Henrhyd Falls - Build Log #003: Rock Cliff Formation
Building the Dramatic Vertical Cliff
Timeline: Continued from base construction through early November 2025
Focus: Creating 18cm of vertical terrain with authentic Welsh geological character
With the base structure complete and thoroughly dried, the challenging work of building the dramatic cliff face began. This phase required transforming the rough foundation layers into a realistic rock formation that would authentically represent Welsh geology while incorporating all the key features: vertical layering, the cave entrance behind the falls, large boulders, and the various edges and slopes.
The Rock Face Sections
The cliff face wasn’t a single uniform surface - it required different approaches for distinct sections, each with its own structural and visual requirements:
The Three Cut-Away Sides
These formed the outer sides or edges of the base for the cliffs. Rather than covering these edges with a facade, I wanted to show them as sculptured rock faces. As I built the cliffs up, the outer skin texture varied between rough, layered, and smooth sections to create natural variation. The sides were also formed at a slight inward angle - partly from natural shrinkage of the cooked paper pulp mixture, but also intentionally for structural stability.
Outer Edges Dropping Into the Valley
The edges forming the sides of the river valley were sloped downward to create the sense of the gorge dropping away. Large boulders were hand-sculpted from the paste mixture and positioned as if they had fallen or resulted from a landslide, adding to the dramatic vertical scale and natural erosion character.
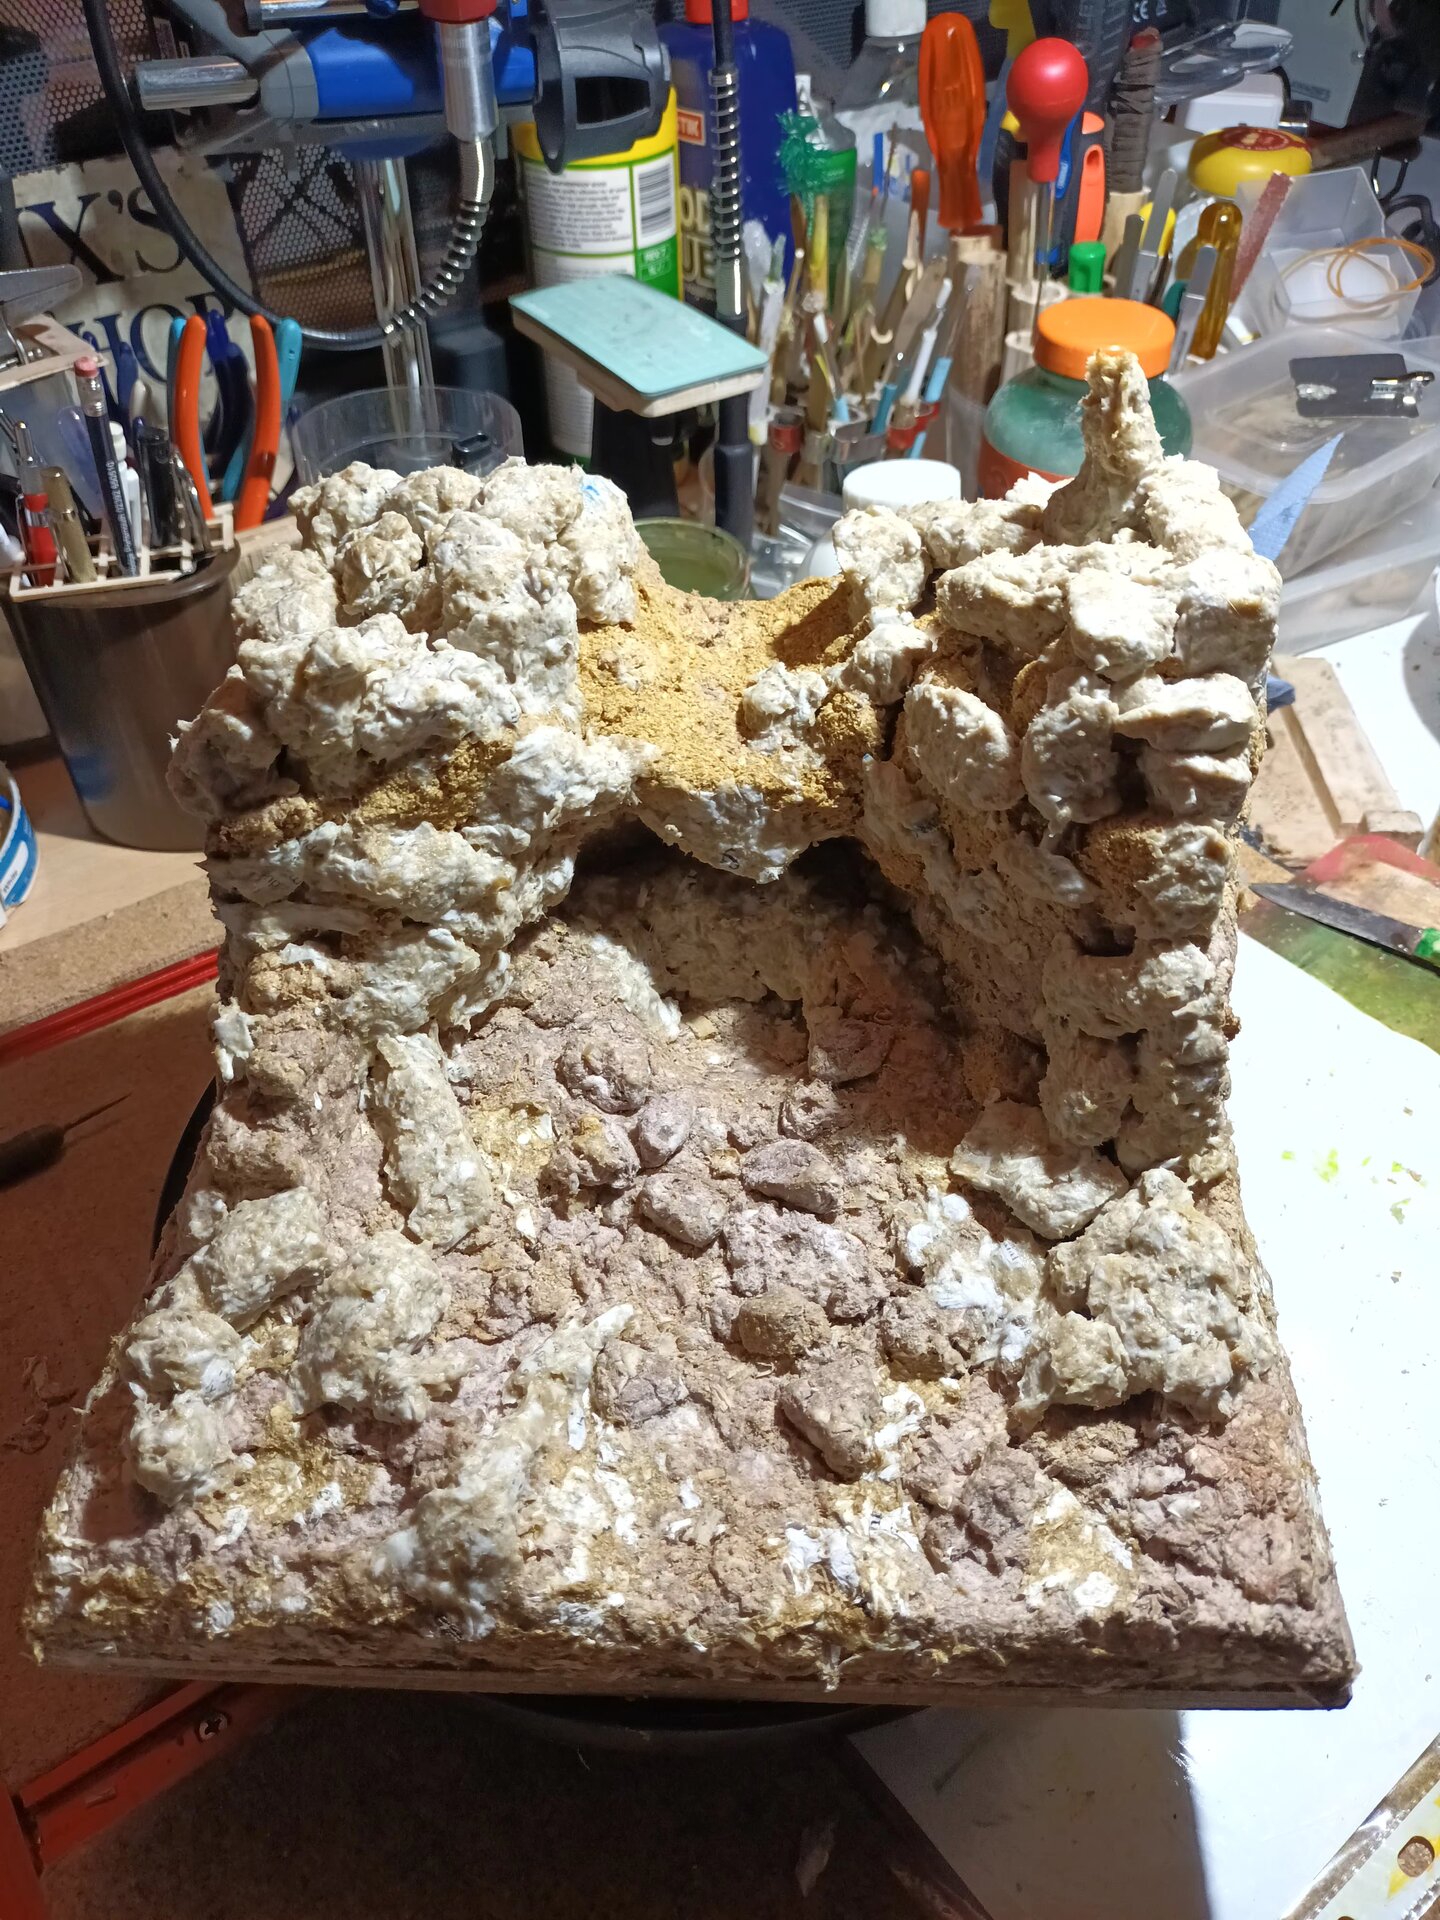 The vertical geological layering and large boulder formations taking shape. The cooked paper pulp mixture proved excellent for capturing the rough, stratified appearance of Welsh sedimentary rock. This close-up shows the intricate texture work that brings authenticity to the cliff face - note the distinct horizontal layers and irregular surface that mimics natural weathering patterns.
The Cave Entrance Canopy
At the base of the waterfall, the paste was carefully formed into a canopy structure to create the entrance to the cave behind the falls - one of Henrhyd Falls’ most distinctive features and the reason it was chosen as a filming location for The Dark Knight Rises. Getting this concave structure right was critical for the diorama’s authenticity.
Vertical Rock Face with Geological Layers
The main rock face beside the waterfall was built up in layers, with vertical sculpting creating the appearance of geological strata. Using various tools, I carved vertical lines and textured surfaces to represent the layered sedimentary rock typical of Welsh formations. This required patience - building up, letting dry, then carving and refining the texture.
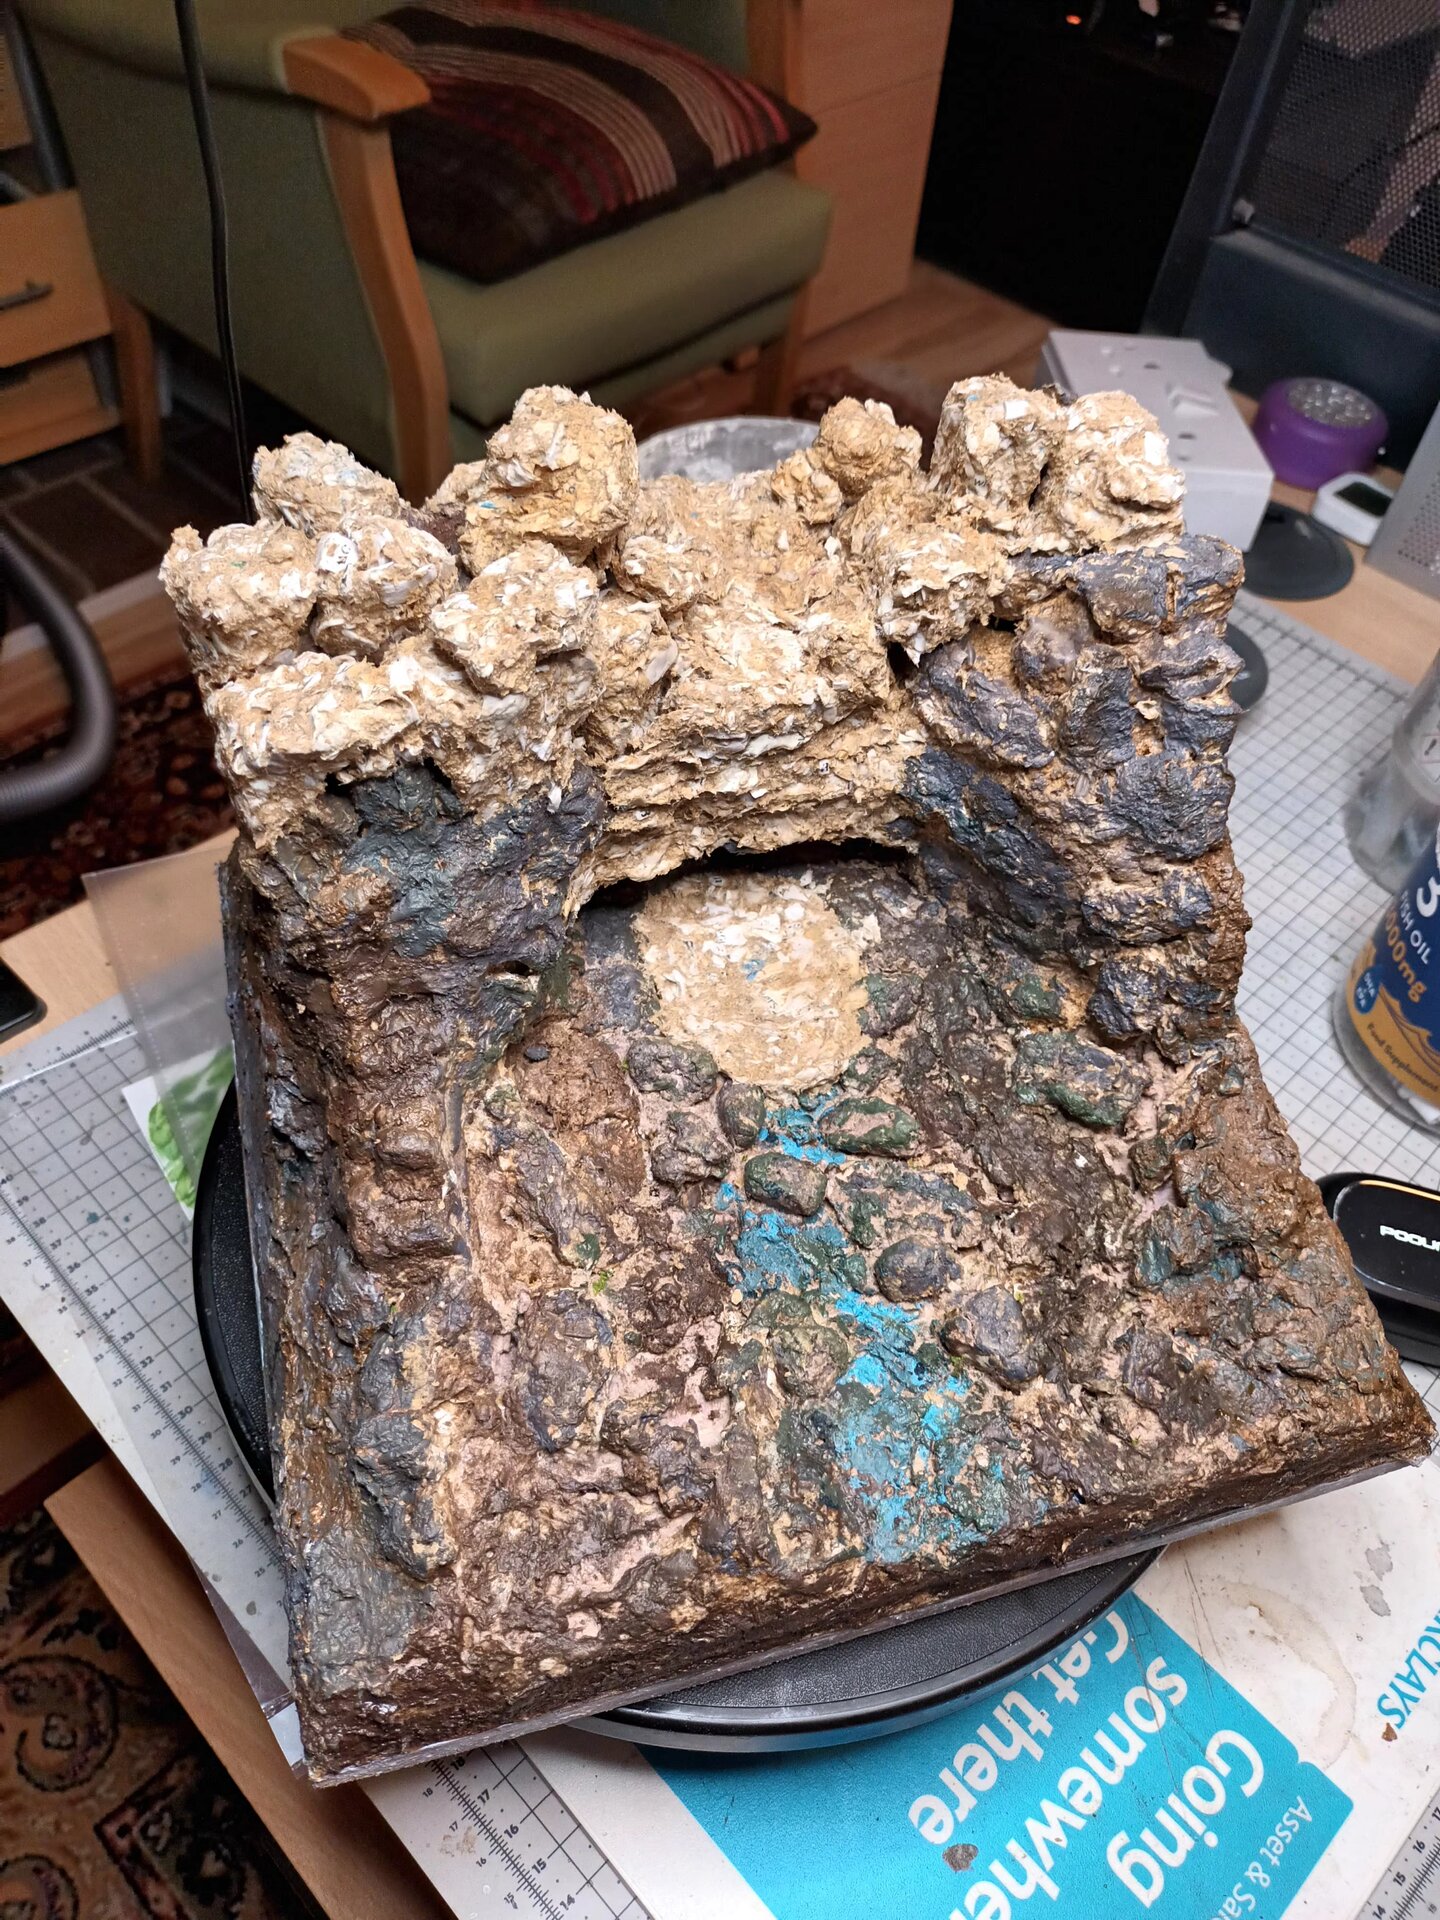 A comprehensive view showing the cliff structure coming together. The vertical stratification is clearly visible, along with the cave entrance formation at the base (center). The large boulder formations at various heights create visual interest and scale variation. This angle best demonstrates how all the different rock face sections work together - from the cut-away sides to the central waterfall channel to the pool area below.
Rocky Outcrops at Cliff Top
At the top of the cliff, I formed the river channel flowing toward the falls, then hand-sculpted large boulders from the paste mixture. These were set to dry separately before being integrated, representing the rocky outcrops where the water cuts through on its way to the dramatic drop.
Pool and River at Base
At the bottom of the falls, a pool was created in the base depression, with a river channel continuing downward. Numerous larger and smaller stones were formed and positioned throughout to create a natural rocky riverbed appearance.
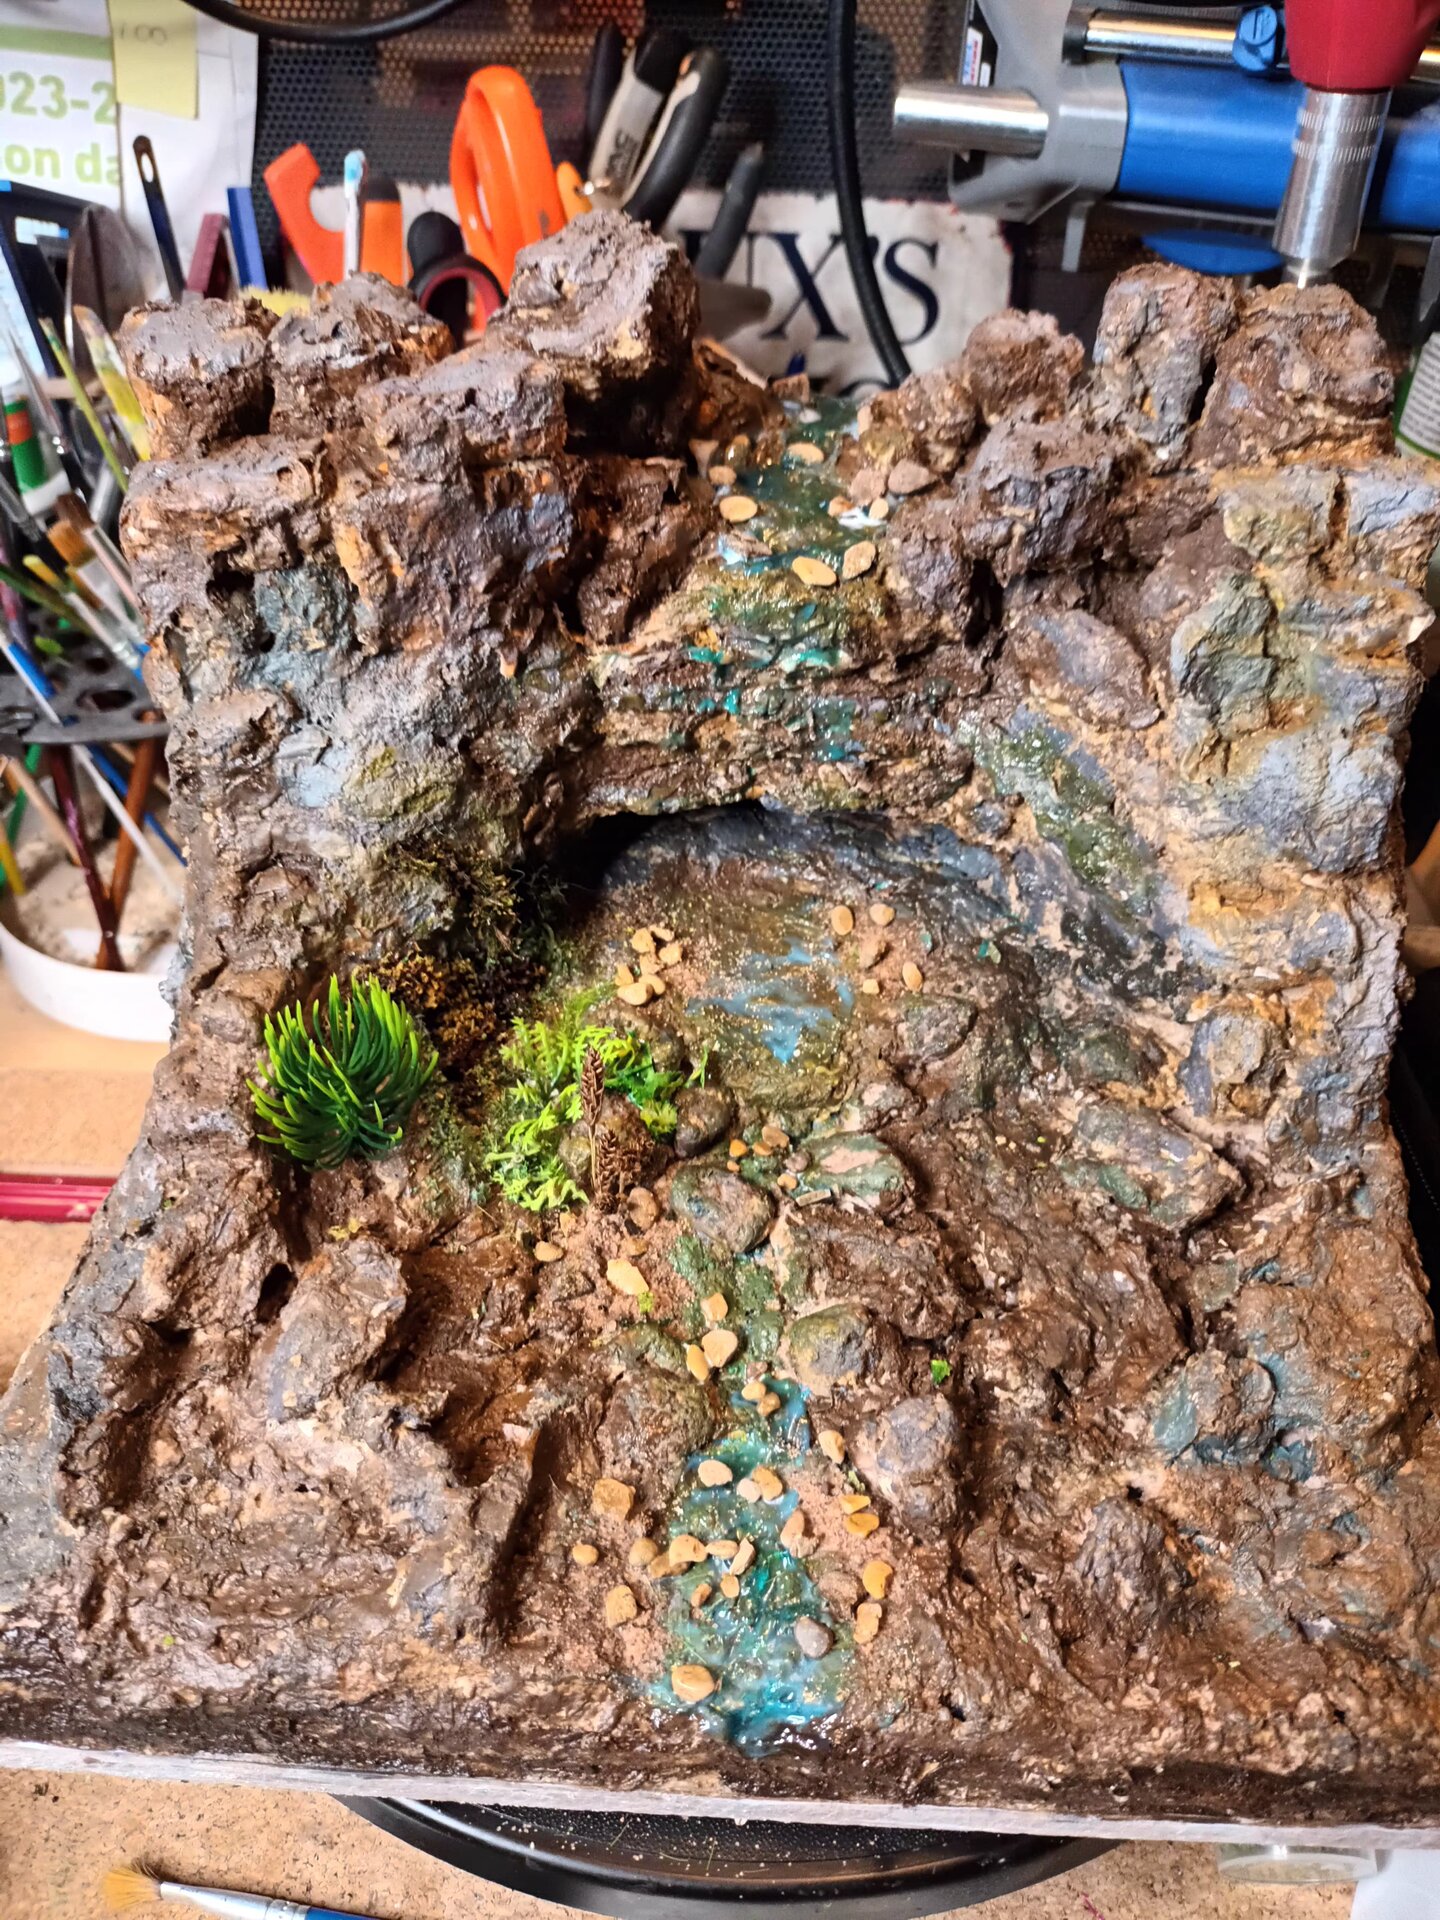 The full dramatic scale revealed - from the cliff top where the river flows in, down the 10cm vertical drop (representing 27 meters), to the pool at the base. This perspective shows how the rock face connects all the vertical elements: the boulders at top, the layered cliff walls, the cave entrance mid-height, and the rocky pool below. The slight inward angle of the sides provides structural stability while maintaining the sense of a natural gorge formation.
Capturing Welsh Geology - Color and Texture
The biggest challenge with the rock formations was achieving authentic Welsh coloring. Reference images showed a wide range of textures and colors, and even photos of the actual Henrhyd Falls didn’t provide a single definitive palette to follow. I had to synthesize from multiple sources.
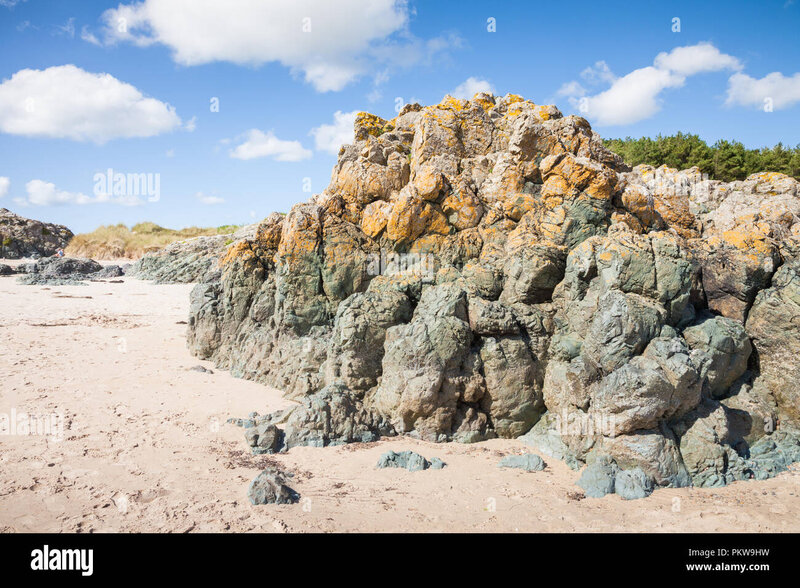
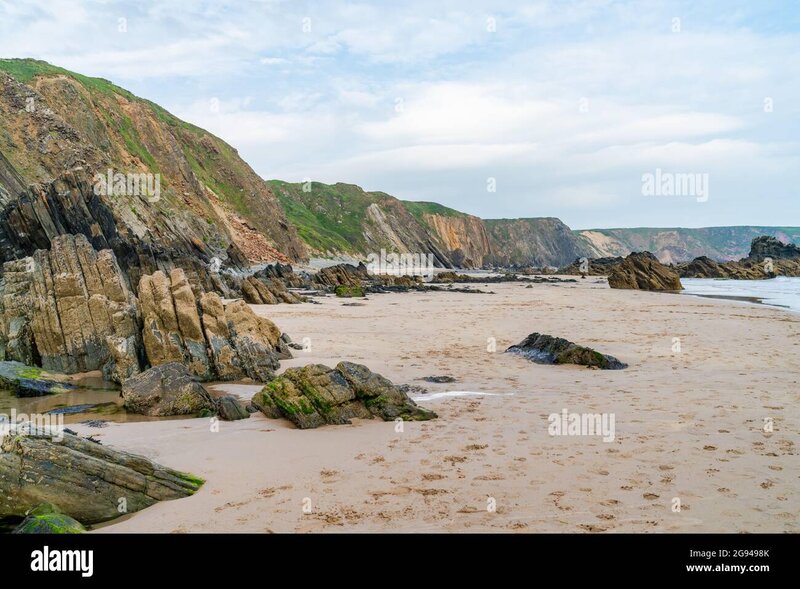
Reference Analysis - Welsh Coastal Rock Formations
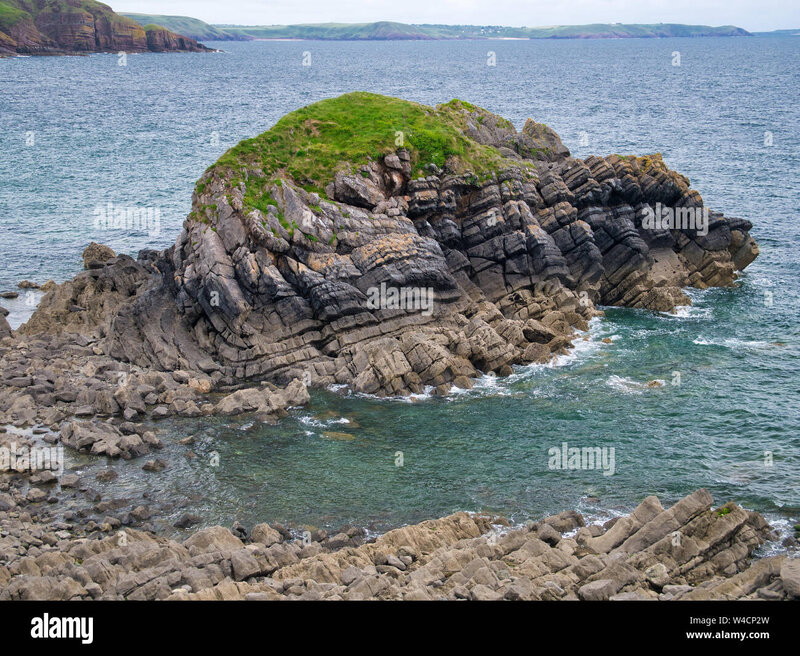 Welsh coastal rock formations showing the authentic color palette: earthy browns, cool greys, mossy greens, and muted tones. The layered, weathered texture visible here informed my approach - note how the rock face combines smooth stratified sections with rough weathered areas, exactly the variation I needed to replicate.
 Another Welsh coastal formation revealing the mottled, blended color approach. The rocks show browns, greys, greens, and subtle blues all working together, with rugged, uneven terrain and distinct crevices. This reference was invaluable for understanding how to layer colors and create textural variations.
 This dramatic Welsh coastal landscape shows the earthy browns and cool greys with vibrant greens - the exact combination I used for the Henrhyd Falls build. Notice how the smooth, layered formations transition to more textured, weathered sections. This taught me to vary my application technique: layered smooth applications in some areas, more expressive textured brushwork in others.
The Painting Process
The painting of the rocks and landscape involved multiple stages and attempts to get right:
Base Layer: I started with darker colors - various shades of brown as the foundation. This created depth and would show through in crevices and recessed areas.
Color Variation: Then I applied lighter browns, greenish tones (for moss and lichen effects), bluish-greys (for cooler stone), and various grey shades to create the varied, weathered look seen in Welsh rock formations. The key was not to paint uniformly - each area needed different color dominance to look natural.
Reference-Driven Refinement: I kept referring back to the Welsh coastal formation images, trying to match the mottled, blended appearance where multiple colors coexist. It took several attempts and color adjustments to reach a satisfactory level that felt authentically Welsh.
Paint Palette Used:
- Browns: Burnt umber, raw sienna, various brown shades for depth
- Greys: Payne’s grey, neutral grey (light to charcoal range)
- Greens: Olive green, moss green for organic weathering
- Blues: Subtle blue-grey tones for cooler stone areas
- Blacks: For deepest shadows and crevices
Techniques and Materials
The Cooked Paper Pulp Mixture
The entire cliff structure was built using the cooked paper pulp mixture refined during base construction:
Recipe:
- Shredded paper (thoroughly soaked)
- Flour (for binding)
- Water
- Vinegar (for preservation)
- PVA glue (for strength)
- General purpose filler (for workability)
Process:
- Mix all ingredients thoroughly
- Cook the mixture to allow flour to bind and paper to mulch properly
- Let cool, divide into fist-sized portions
- Wrap in cling film to keep moist
- Apply in 2cm layers maximum
- Allow thorough drying between layers (oven at 100°C helped)
This mixture proved ideal for rock work - it held texture well, could be sculpted while wet, and when dry was solid enough to carve further detail. The entire cliff structure is quite heavy as a result (no foam core was used), but extremely sturdy.
Texturing Techniques
- Layering: Building up in thin applications created natural stratification
- Sculpting: Hand-shaping boulders and outcrops while paste was workable
- Carving: Once dried, using tools to create vertical lines, crevices, weathering patterns
- Surface Variation: Intentionally varying smoothness - some areas rough, others more refined - for natural appearance
Challenges Overcome
The Color Challenge
The most difficult aspect was color selection. With Welsh rocks showing such varied hues across different formations and lighting conditions, there was no single “correct” answer. The example images provided conflicting information, and the actual Henrhyd Falls photos were taken in different seasons and light conditions.
Solution: I committed to a blended approach, using the coastal formation references as primary guides. The earthy brown base with grey and green overtones proved most authentic. Multiple painting sessions allowed me to adjust and refine until the overall effect captured that Welsh weathered rock character.
Landscape and Scale Adaptation
Creating the various landscape features - boulders, edges, river channels - while fitting everything onto the compact 25×25cm base required constant adjustment. I had to adapt my vision to allow space for vegetation (coming in the next phase) and the river feature, while still maintaining the dramatic vertical scale.
Solution: Careful reference to the initial layout sketch, but remaining flexible. Some boulders were positioned differently than originally planned, and the slopes were adjusted to optimize composition while maintaining structural integrity.
Patience with Drying
The layered construction approach required patience. Each 2cm layer needed hours to dry thoroughly before adding more material. Rushing this process (which I tried once) led to problems with internal moisture that required rework.
Solution: Embrace the slow build. Use oven assistance at 100°C, but accept that proper drying takes time. This resulted in a solid, crack-free structure that could support the waterfall and vegetation work to come.
Materials & Tools Used
Materials
- Shredded paper
- Flour
- Water
- Vinegar
- PVA glue
- General purpose filler
- Acrylic paints: burnt umber, raw sienna, various browns, payne’s grey, neutral grey, olive green, moss green, subtle blues, black
Tools
- Mixing bowl and spoon for paste preparation
- Cling film for storing paste portions
- Various sculpting tools for shaping while wet
- Carving tools for detail work when dry
- Paintbrushes (various sizes for base coat and detail work)
- Sponges for texture application
- Oven for drying assistance
Next Steps
With the rock cliff structure complete and painted, the stage was set for the most challenging element: creating the waterfall itself with realistic water effects. The vertical channel was prepared, the cave entrance formed, the pool at the base ready to receive the cascading water feature.
The rocks provided the dramatic backdrop - now they needed the water that would bring the scene to life.
Time Investment
This Session: [TODO: Hours spent]
Total Project Time So Far: [TODO: Cumulative hours]
Status: Rock cliff formation in progress
Next Log: Waterfall construction and water effects
Estimated Next Update: Early November 2025
Have questions or feedback about this project? I'd love to hear from you.