Base & Landscaping
Layout Planning
With the cottage completed, the positioning and layout of the garden could commence planning. I decided to position the cottage at an angle to the base. This left more room to explore different faces of the garden in more details without having to include the full surrounding of the cottage.
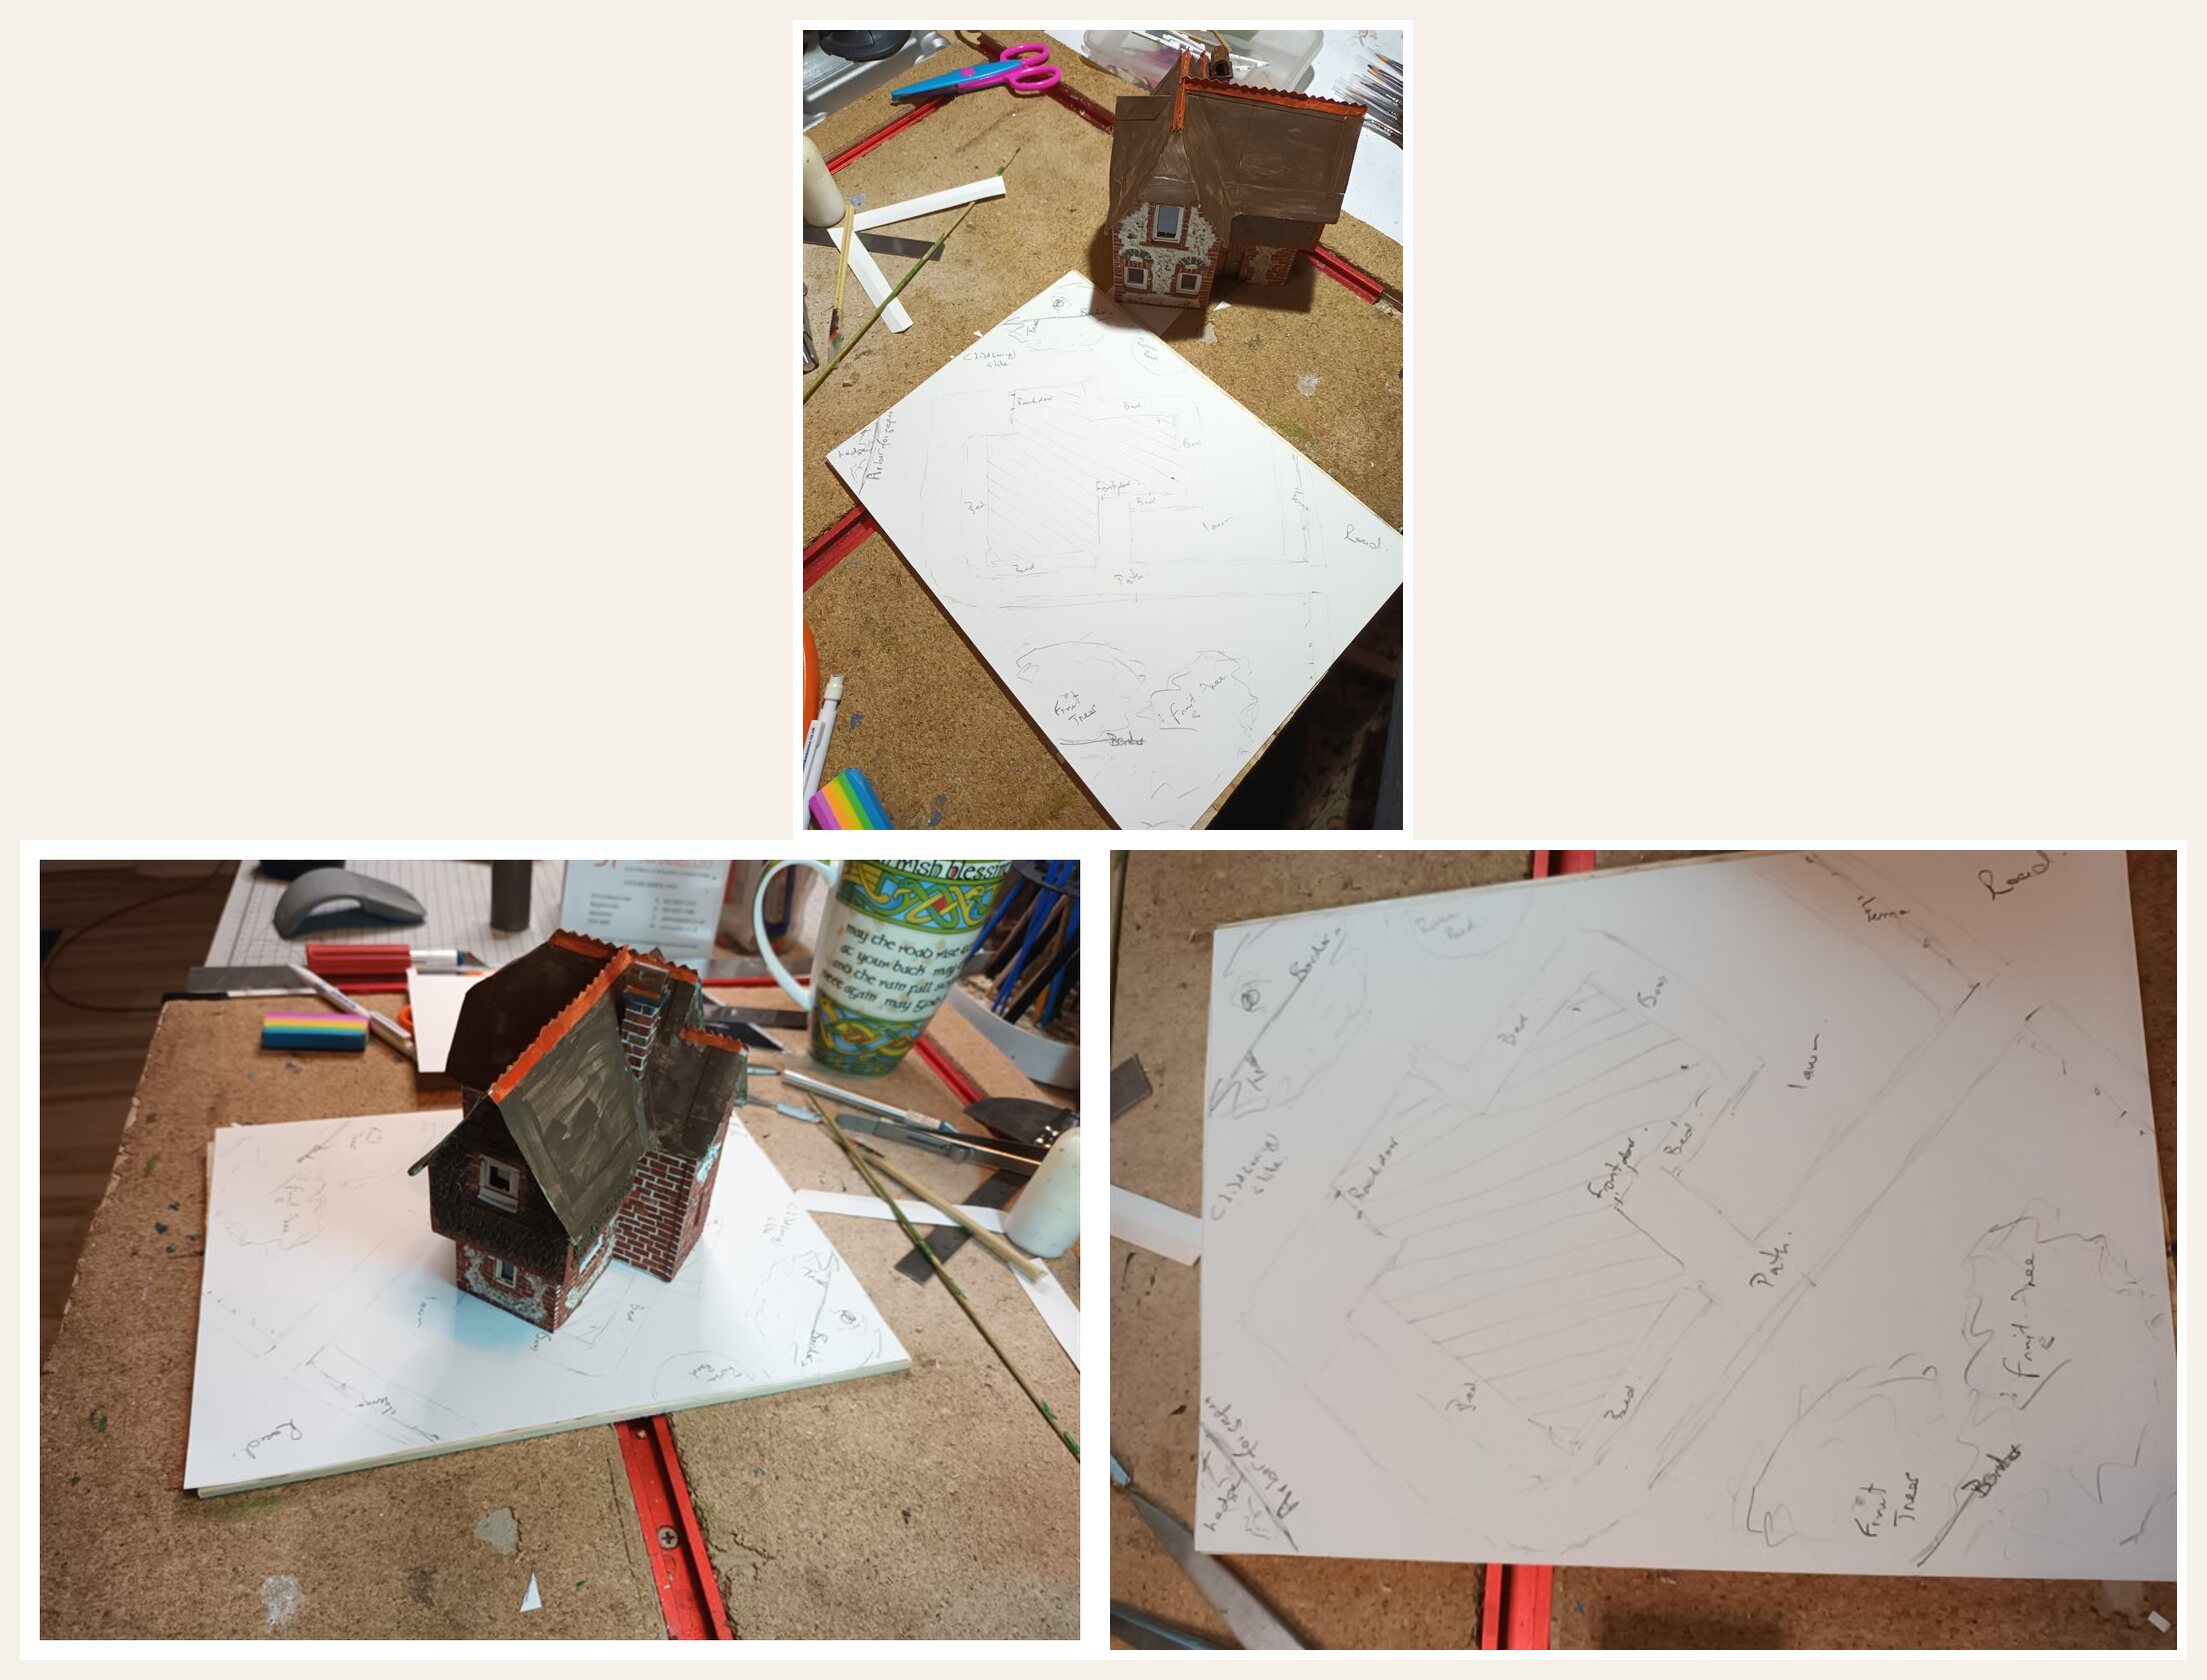
I thought it would add a better perspective of the garden by adding some colour to the plan.

Base Construction
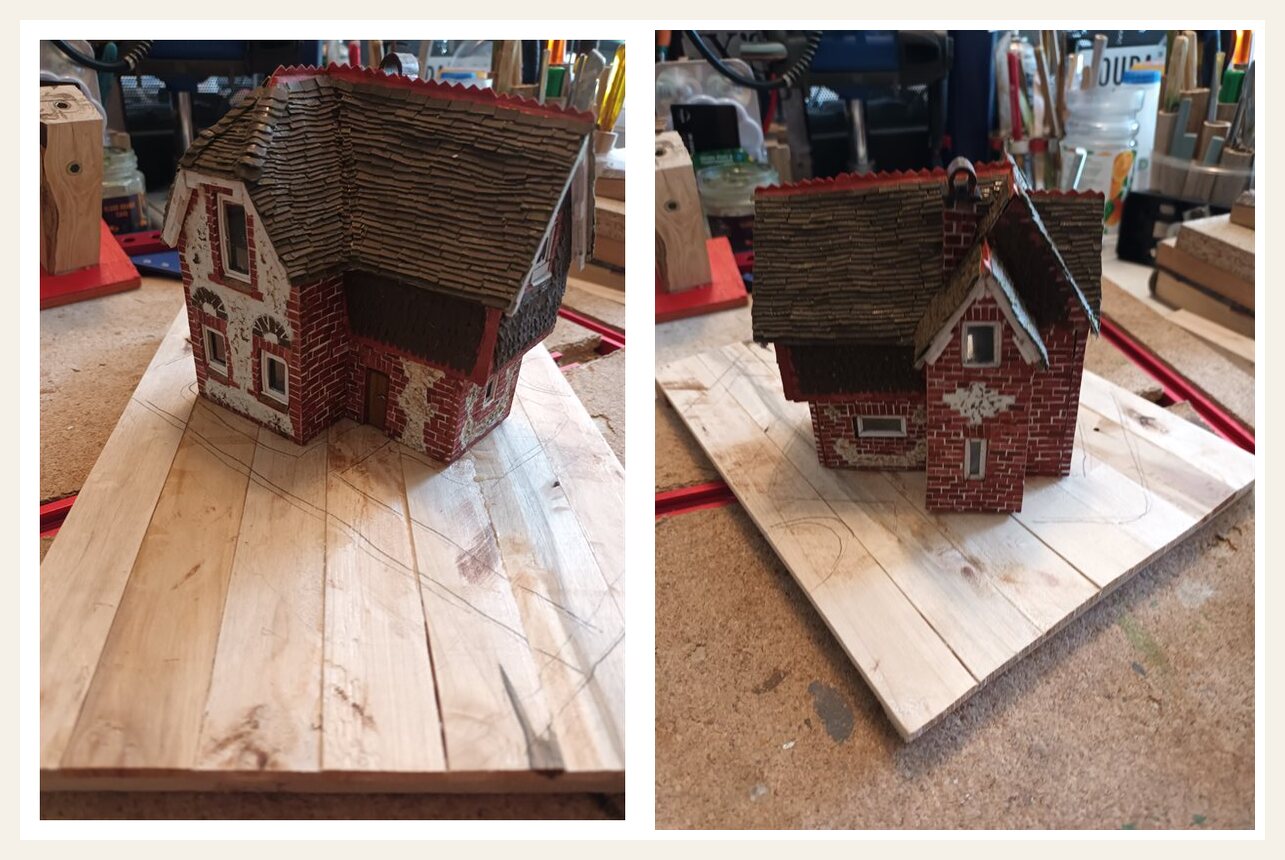
Then the plan is drawn on the base. The base itself is made of planks, cut from the bay leave tree in the garden and laminated together.
Mounting System
The house is fixed to the base by gluing a mounting plate on the base of the cottage hidden from site, and screwing the cottage to the base from beneath. With the cottage screwed on, the landscaping can begin.
Zone Planning
The surroundings around the cottage were divided into different zones:
- Tarmac path and front fence
- Footpath from gate to front door and around to back door
- Front lawn and side lawn
- Plant zones between paths and cottage
- Open garden spaces in front and back
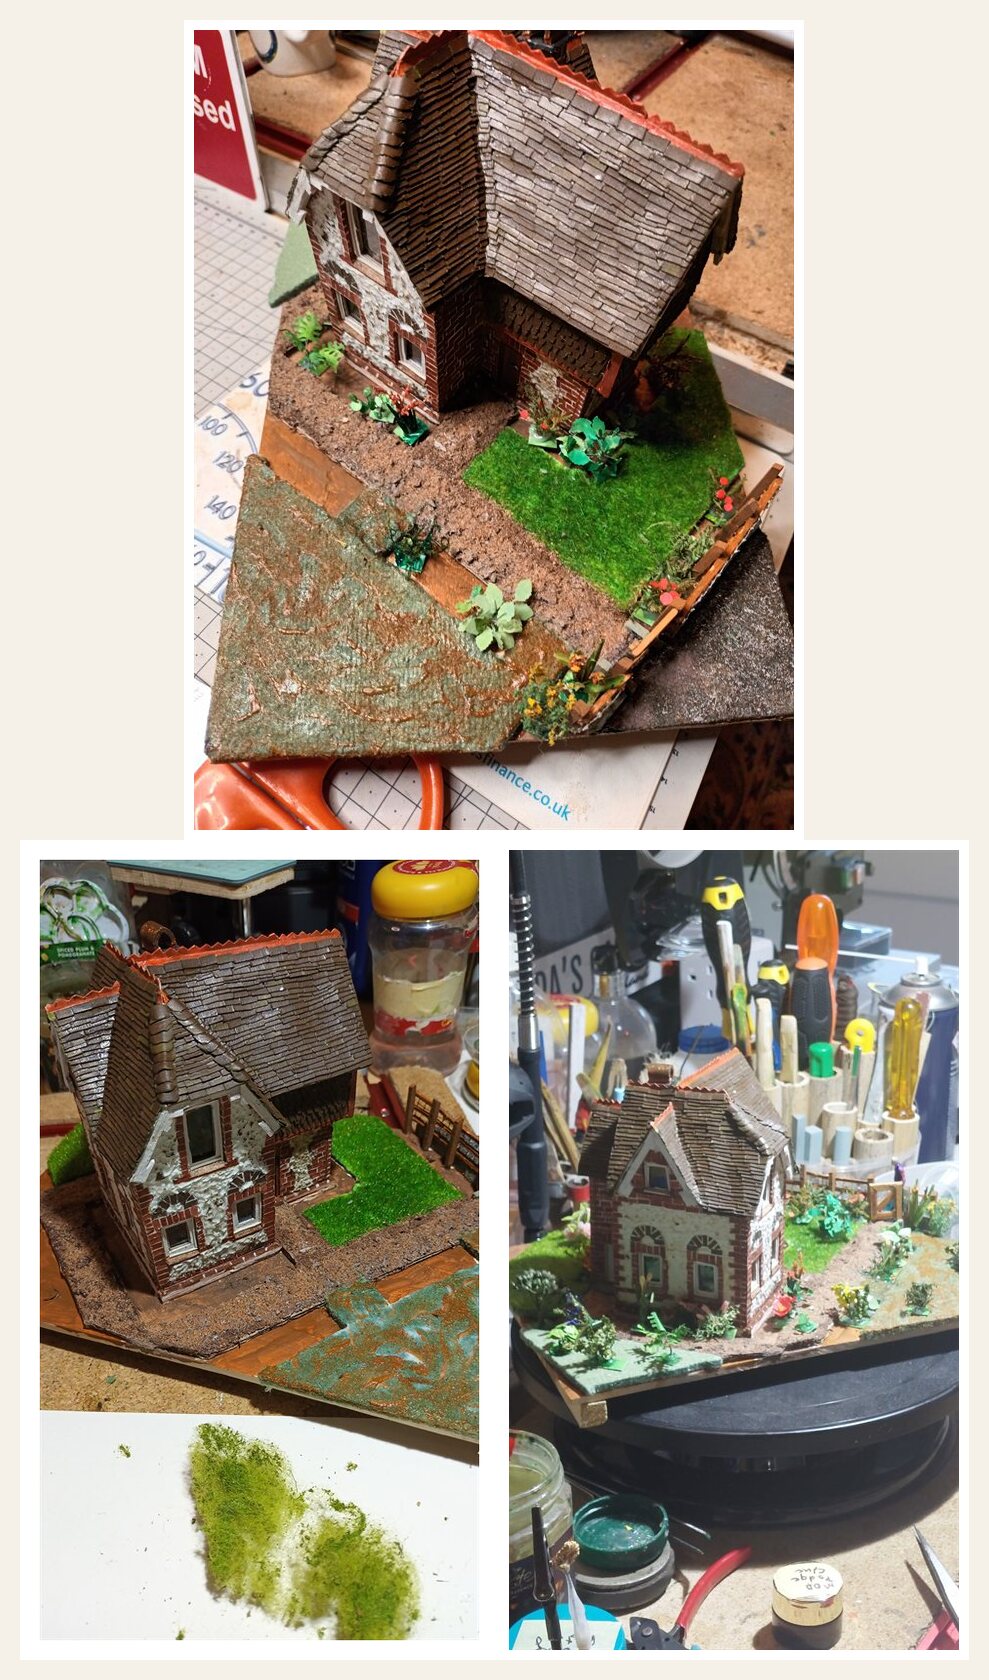
Tarmac Road
The first zone to visualise was the road in front of the house. For the tarmac, pieces of Welsh slate were crushed and then sifted to separate the crushed stone into fine, and medium coarse grains.
Used laminate floor underlay, sealed with Mod Podge glue to serve as the road base. The fine crushed stone was then mixed with Mod Podge and pasted on the road base. Coarser stone was spread on the surface in some areas. The road base was then glued on the model base.
Gravel Paths
The next zone were the paths. Strips of floor underlay were cut for each section of the paths, sealed with Mod Podge. The coarse pieces of crushed slate were mixed with some fine sand and Mod Podge to form a paste. This was then spread thinly on the strips using paint to enhance the colouring of the paths.
Lawn Creation
With the paths positioned, the underlay could again be put into use for the lawns. Cut to size and sealed again, the lawn base were painted and when dried, a static grass applicator could be applied using slightly different colours of static grass, and also slightly different lengths of the material to create the lawns.
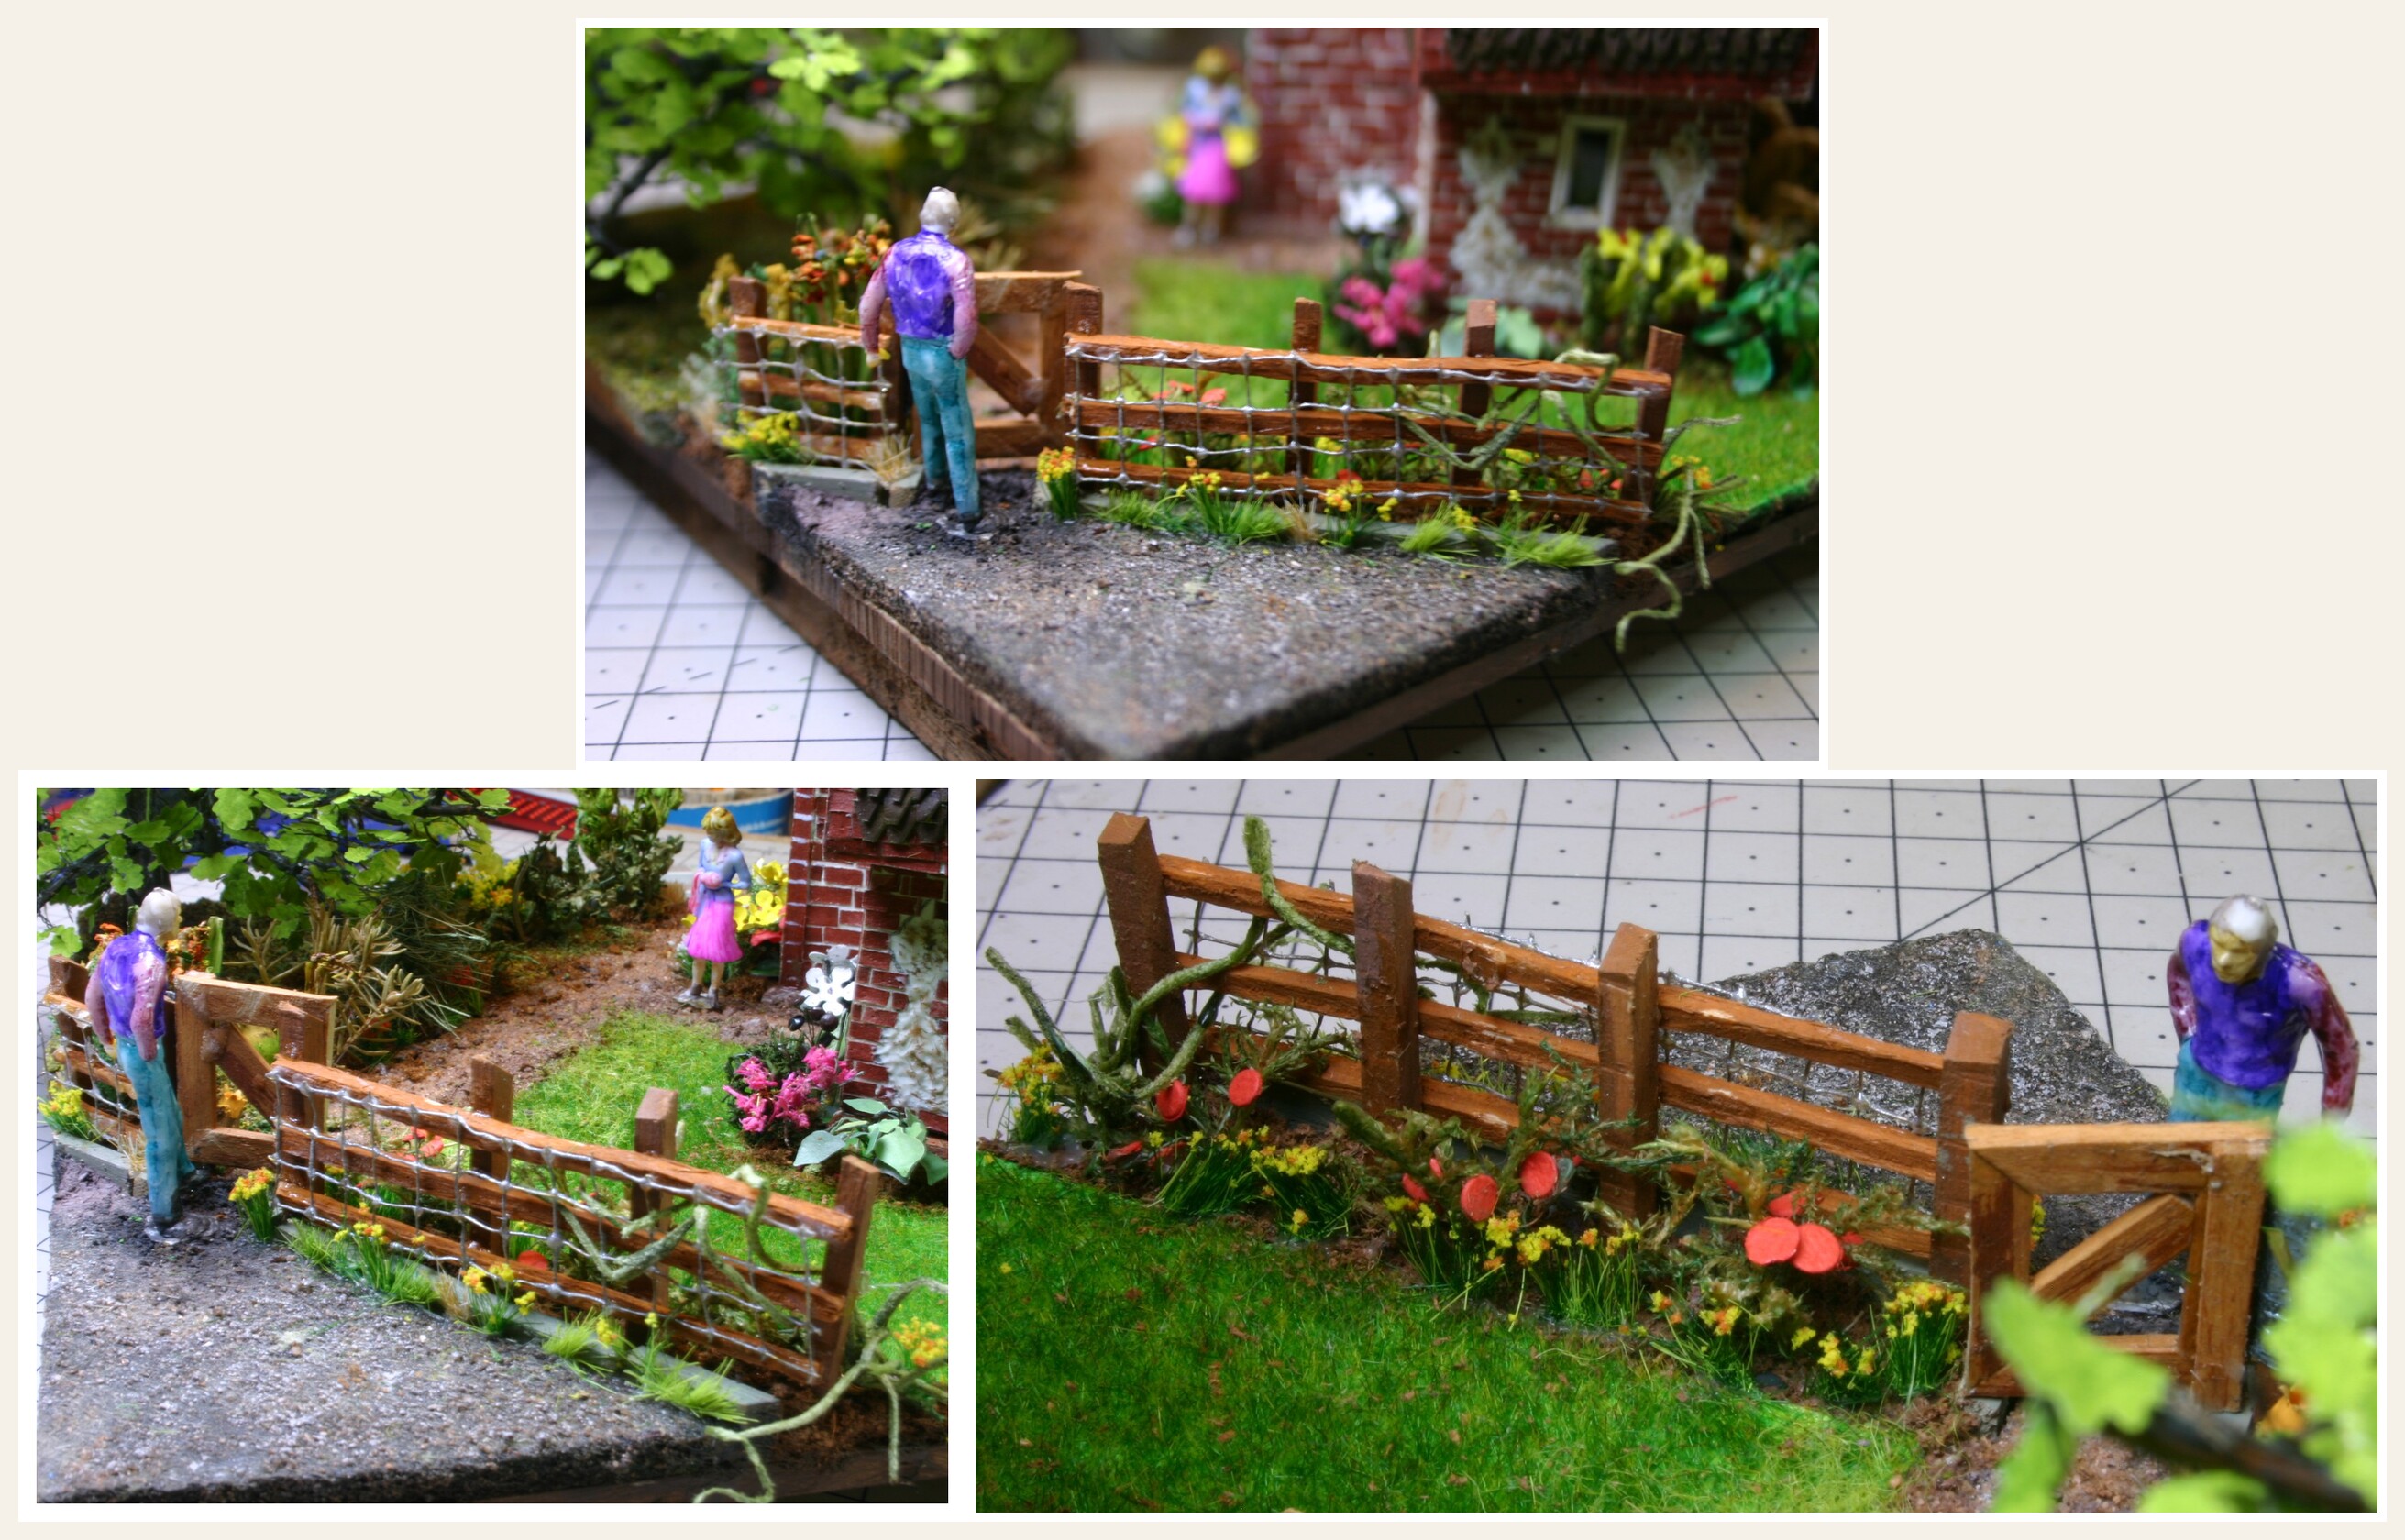
Fence Construction
With the paths glued in the fence could go in. The wood for the fence is mature and dried bamboo, cut with a band saw into about 5mm strips. A hand plane is then used to square some of the strips for the posts, and other of the strips are further planed down for the rails.
The posts of the fence are cut out and the tips bevelled. After determining where the gate will be, holes are drilled in the base and the posts glued in. The rails are then cut to size and fit to the posts on each side of the gate.
The gate was then measured to fit in the gap, and made from the same bamboo source.
Wire Mesh
Finally, I made a jig to have 5 strands of wire running alongside each other approx 3mm apart and then used super glue to fix the vertical wires to form a mesh. This was cut to size and fixed to the fence.
Cement Edging
The cement edge between the road and fence was also made from wood, shaped a bit different and painted greying with tint of green to form the cement edge of the road.
Have questions or feedback about this project? I'd love to hear from you.