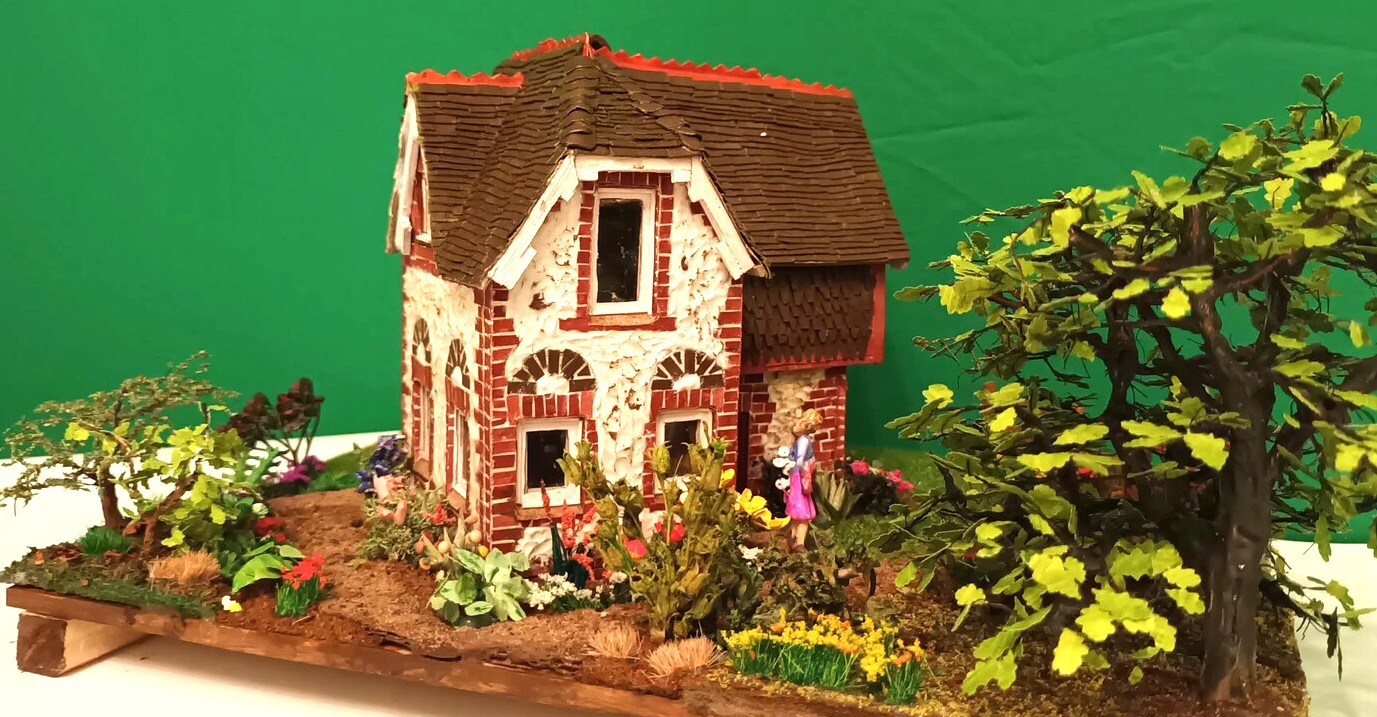
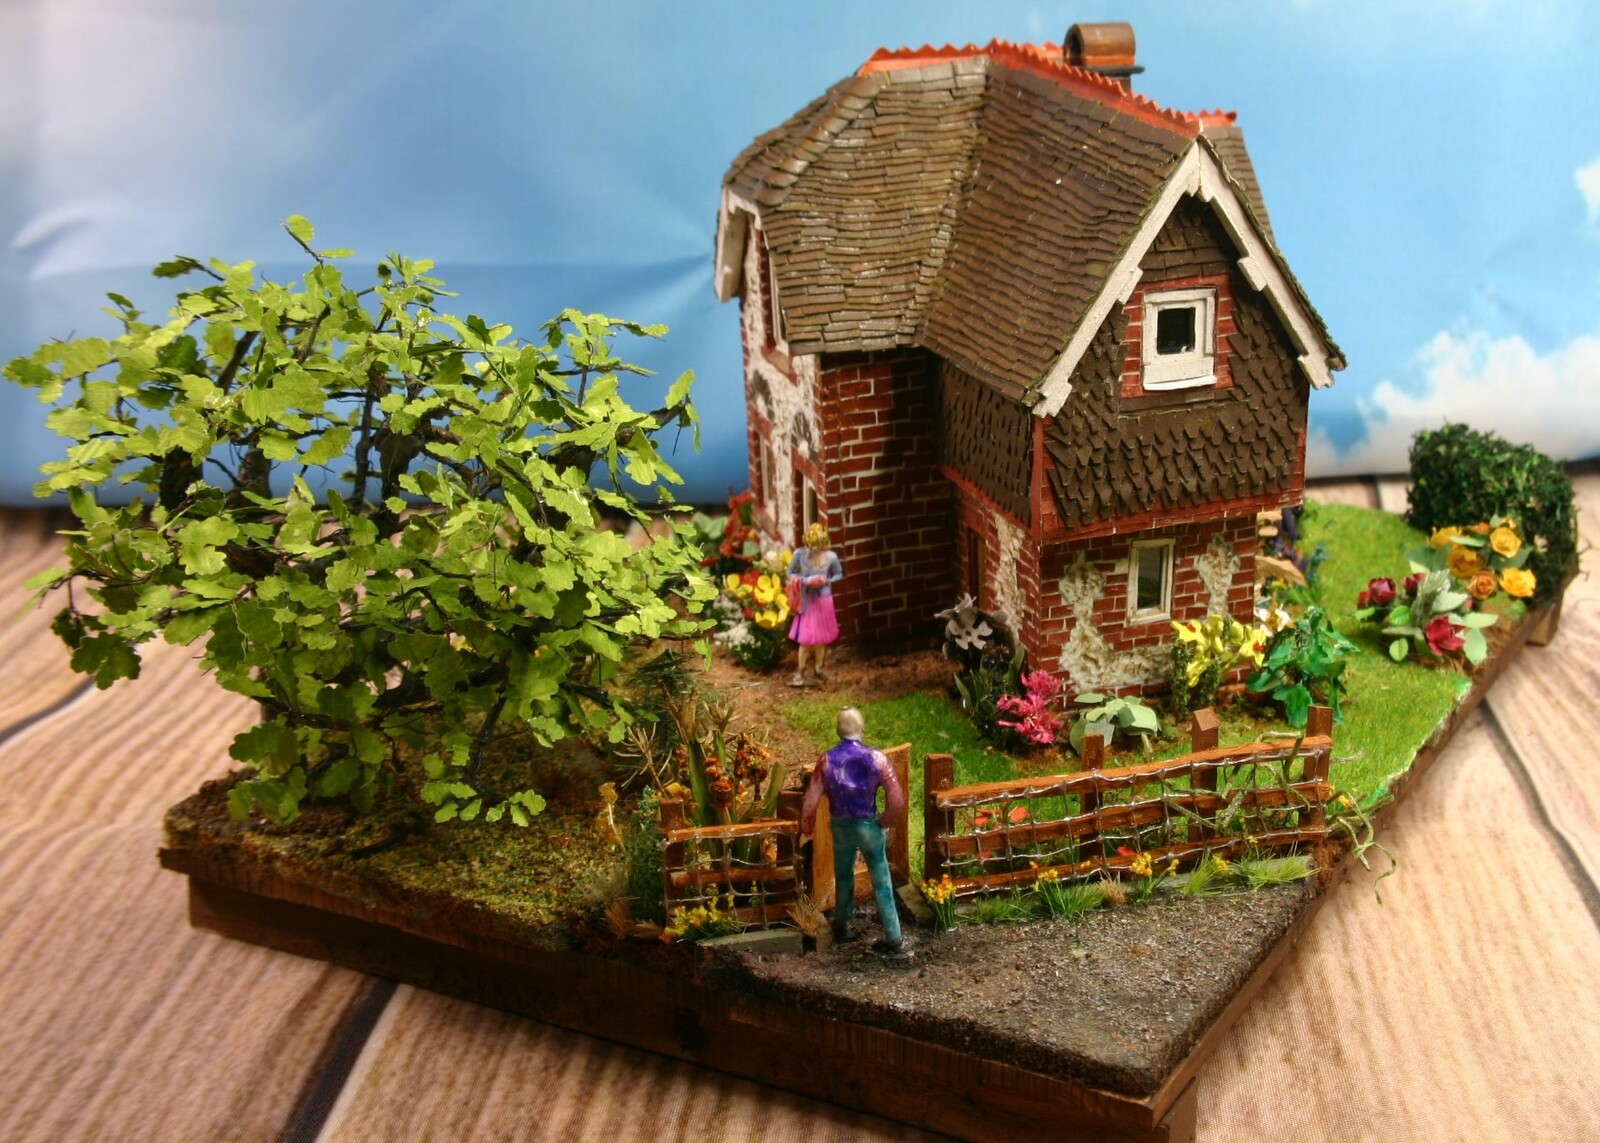
Traditional English Cottage
Creating Traditional English Architecture from a 2D Photograph
Duration: Late June - October 3, 2025 (~3.5 months, 150-200 hours)
Scale: 1:100 (approximately 1cm = 1m)
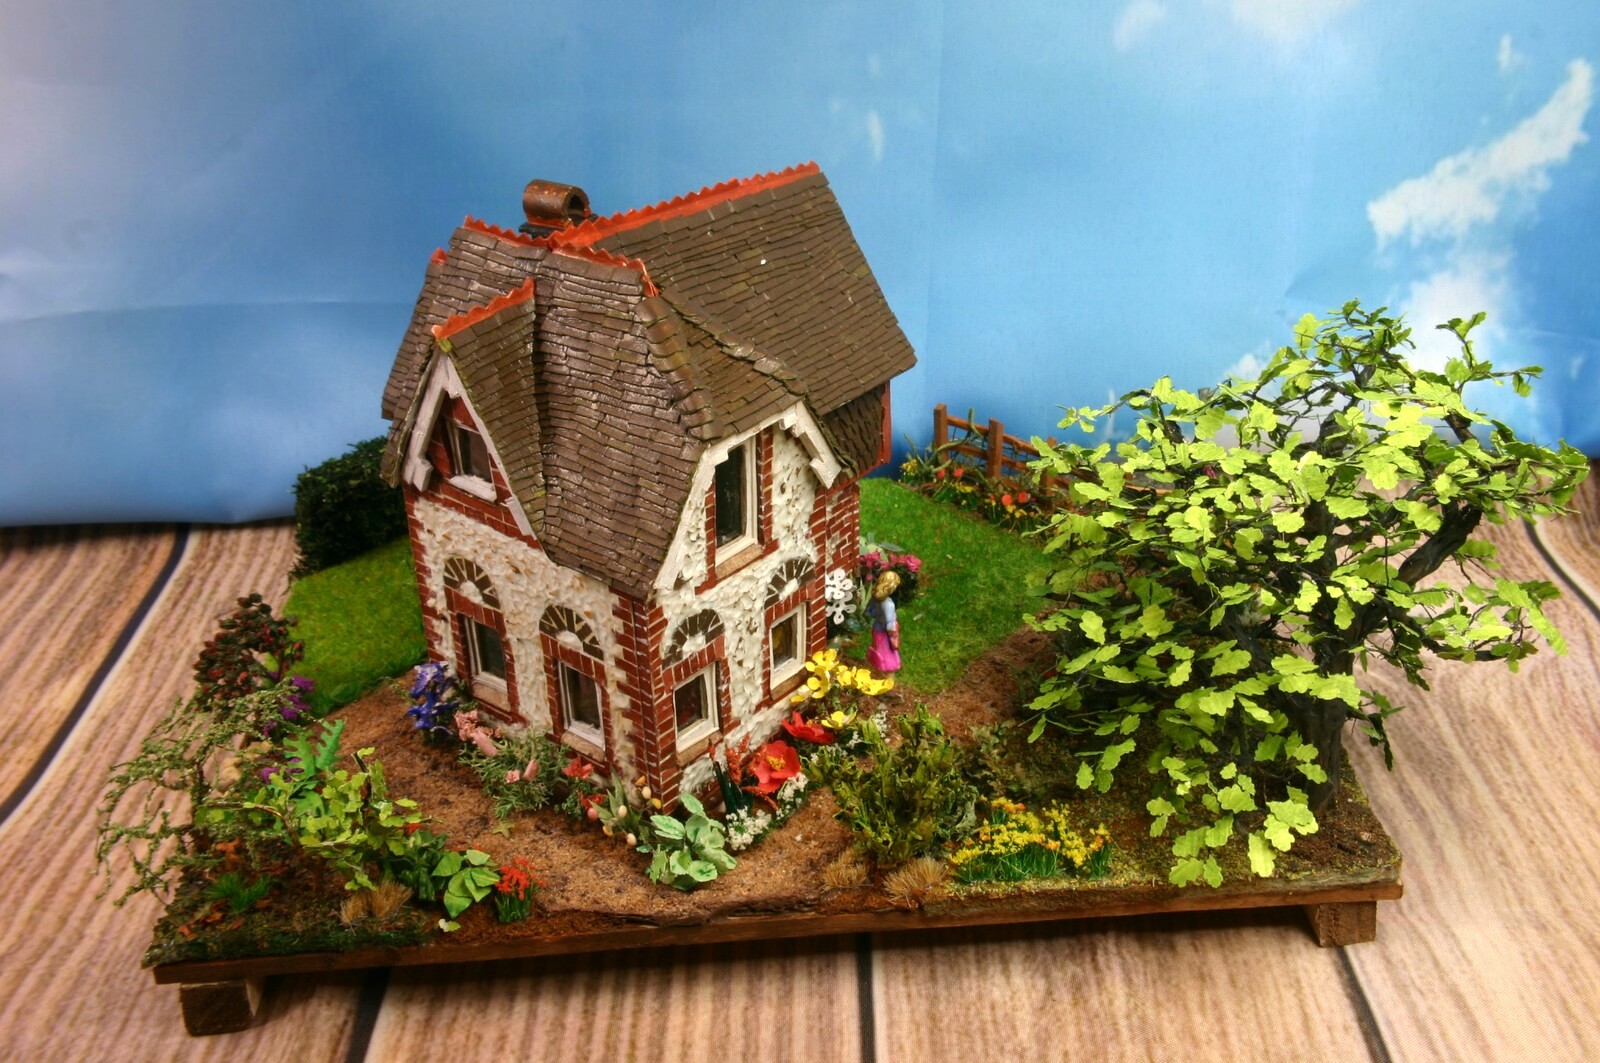
This project has an interesting and odd origination. After completing the caravaning project, thoughts were going around on what next. I did not want to tackle another commission and continued to be fascinated by scratch building. I eventually decided to trawl through all our photos to see if some inspiration would jump out. I came across this photo of a beautiful countryside house and noticed that the photo was taken by my wife when we had a countryside drive in the Meon valley, Hampshire, UK in 2017. The photo was ideal with great features.

Why a Traditional English Cottage
This cottage was an excellent representation of the building style in the region, especially the flintstone which is unique for this area.
Vision for the Finished Piece
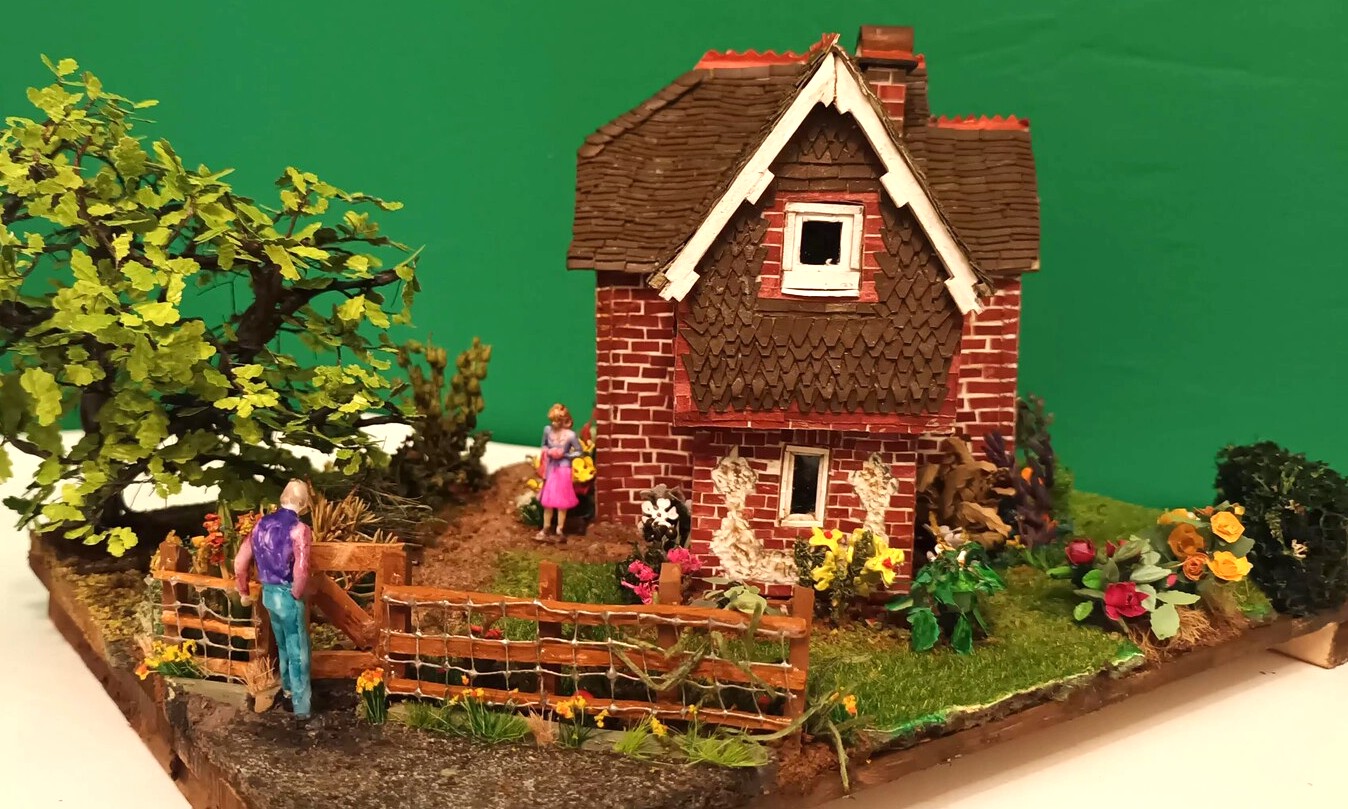
The finished piece would be representative of the house, and setting adjacent to the road. Because no other photos of the back of the house, and the garden are available, artistic freedom will be used to round off the cottage at the back, the garden layout and plants.
The Journey Ahead
A key challenge was to visualise and structure a 3D model from a 2D image. I attempted to scan the 2D house into a Meshy AI to convert it. It came up with some interesting representations of the other side of the house that is not in the photo. Using the views from the different angles that Meshy came up with was very handy. However, I did not manage to go one step further to create full scaled drawings electronically, my skills just did not allow for it.
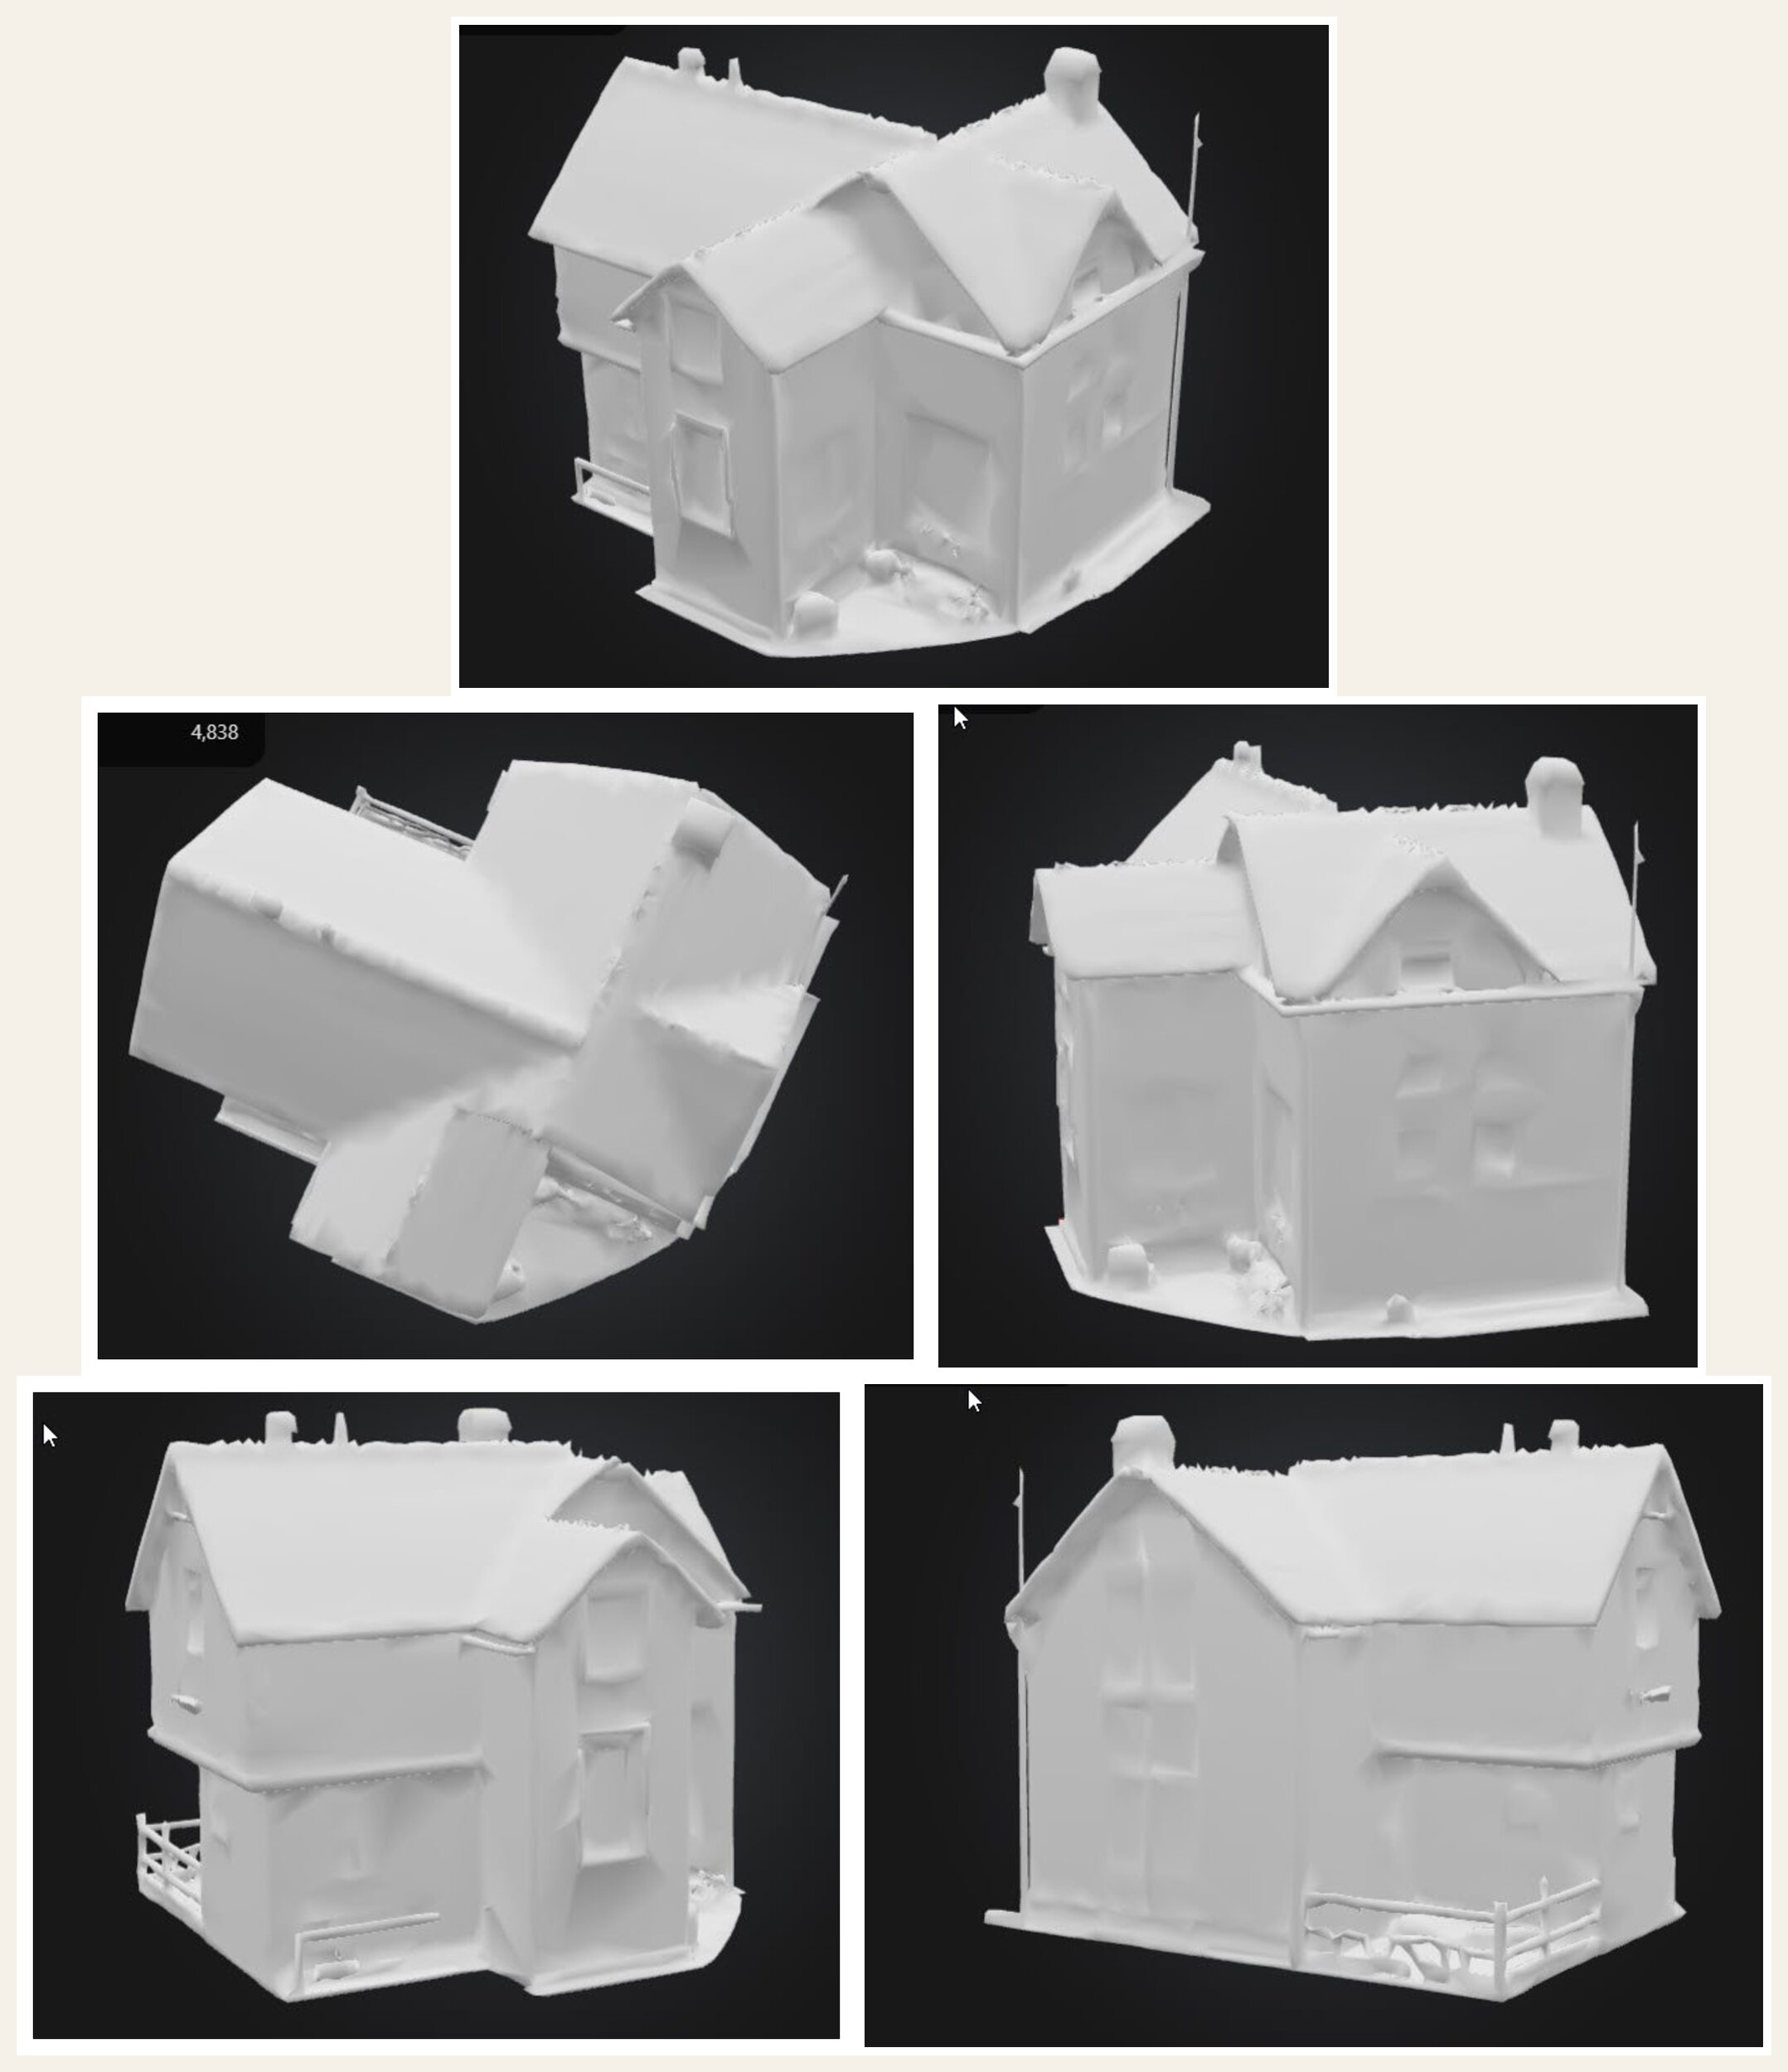
Failing to prepare drawings, I decided to make each wall and facade separately, with reference to the Meshy images, constantly fitting them together to confirm the measurements and design.
Many elements of this particular task ahead would be firsts for me:
- Designing something in 3D from a 2D picture
- The asphalt road
- The fence with wired mesh
- Gravel garden paths
- Brick and flint stone walls
- Tile cladding against the walls
- Multi faceted roof structure
- Ornate gables on the roof and rounded tiled ridges
- Rose bush
- Lawn around the house
- Framed windows
I also wanted to achieve improvements in the accuracy of different types of plants and improve the main tree.
Finally, I wanted to change the angle of the piece on the base and use cutout (not using an entire fenced property).
Chapter 1: Architectural Research and Planning
Architectural Style Selection
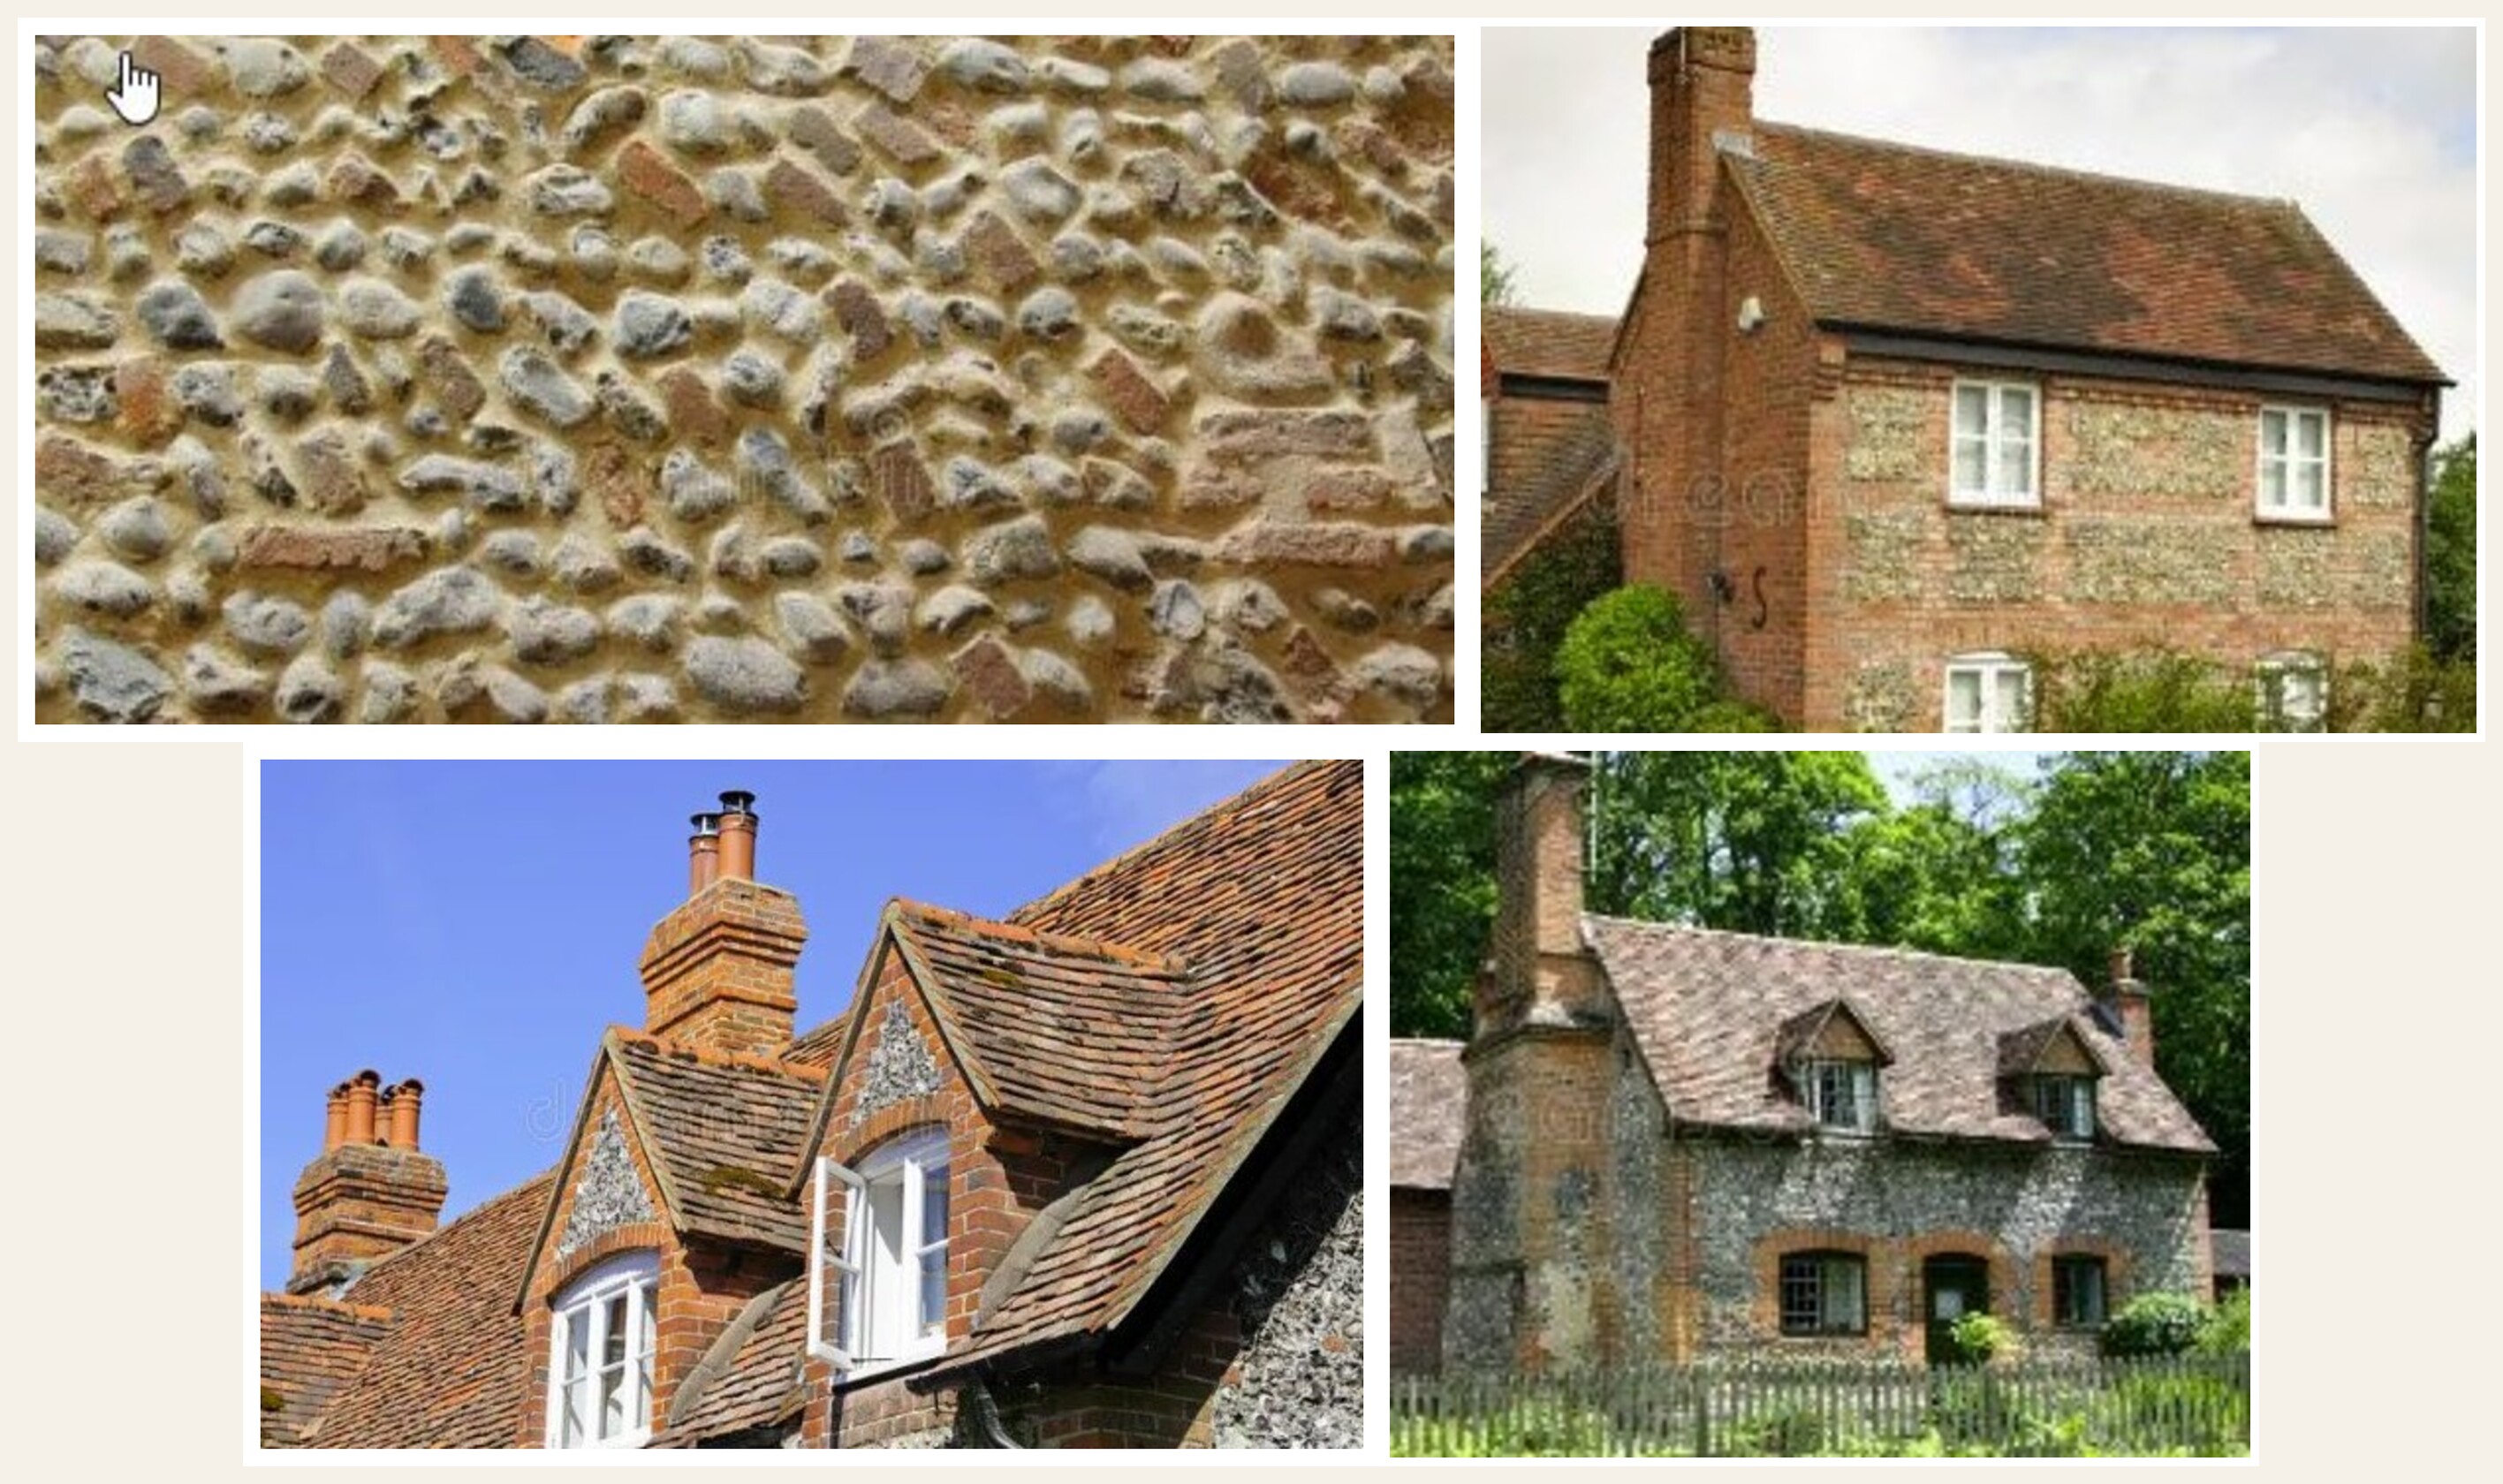
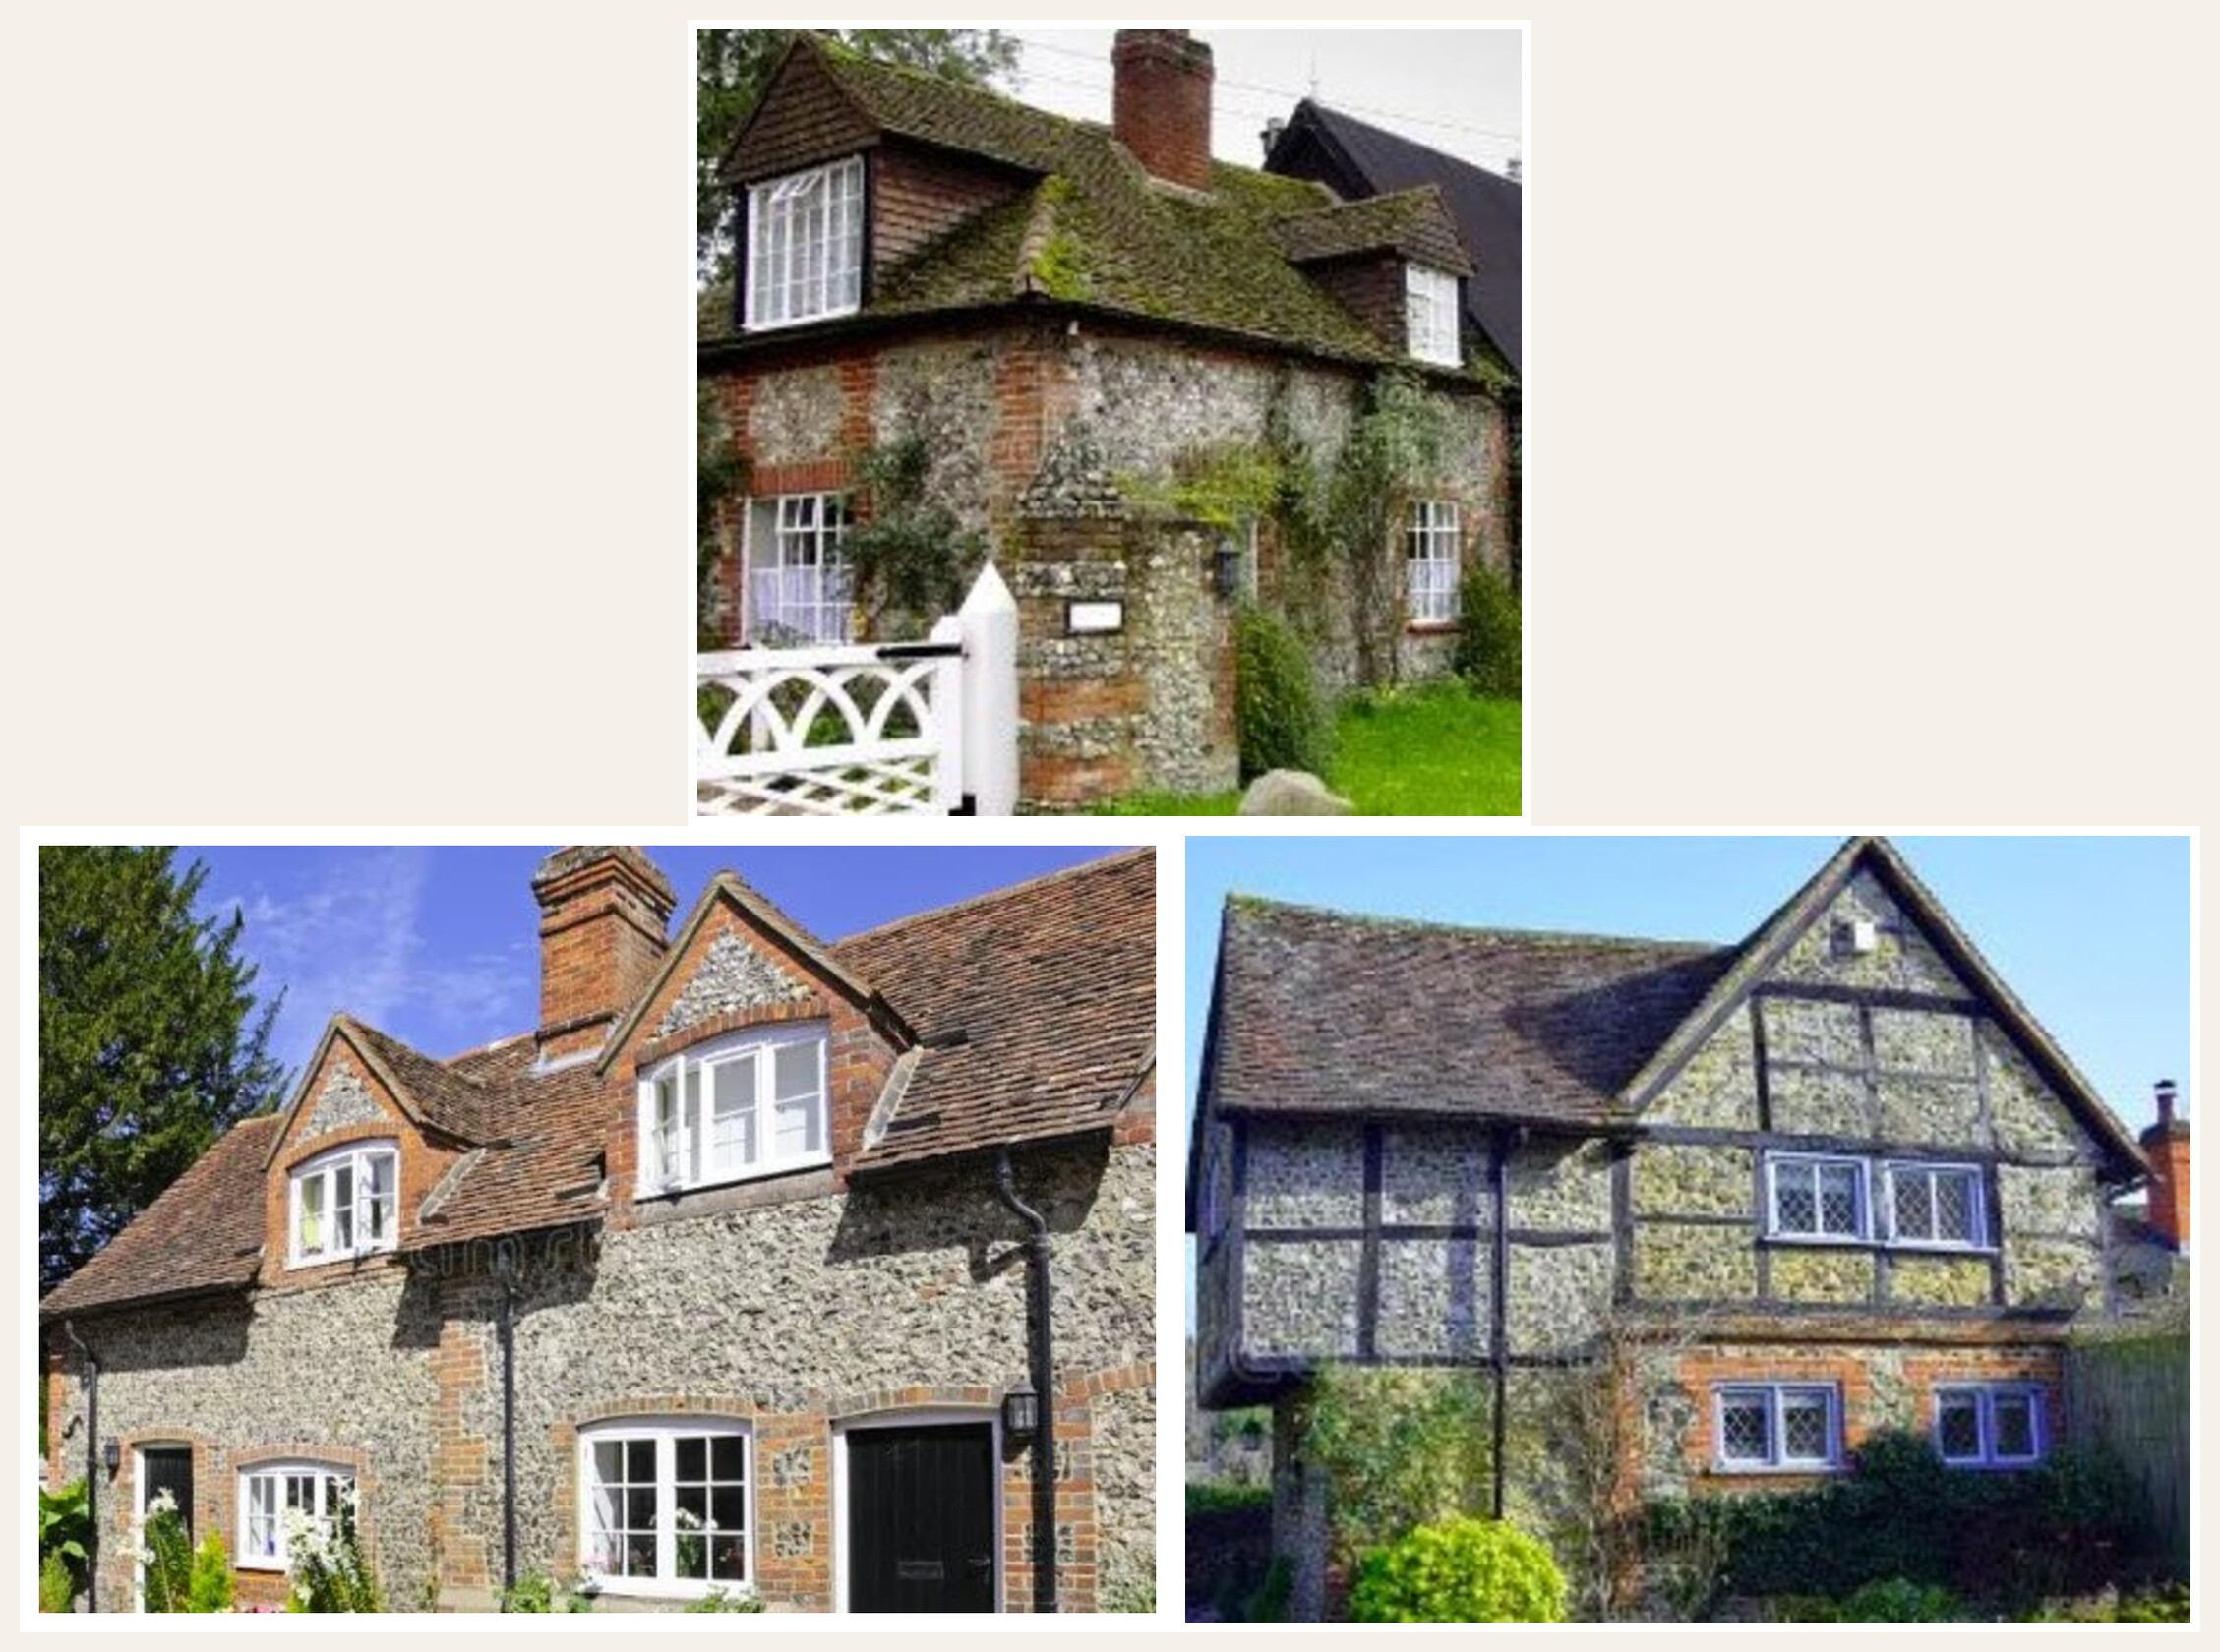
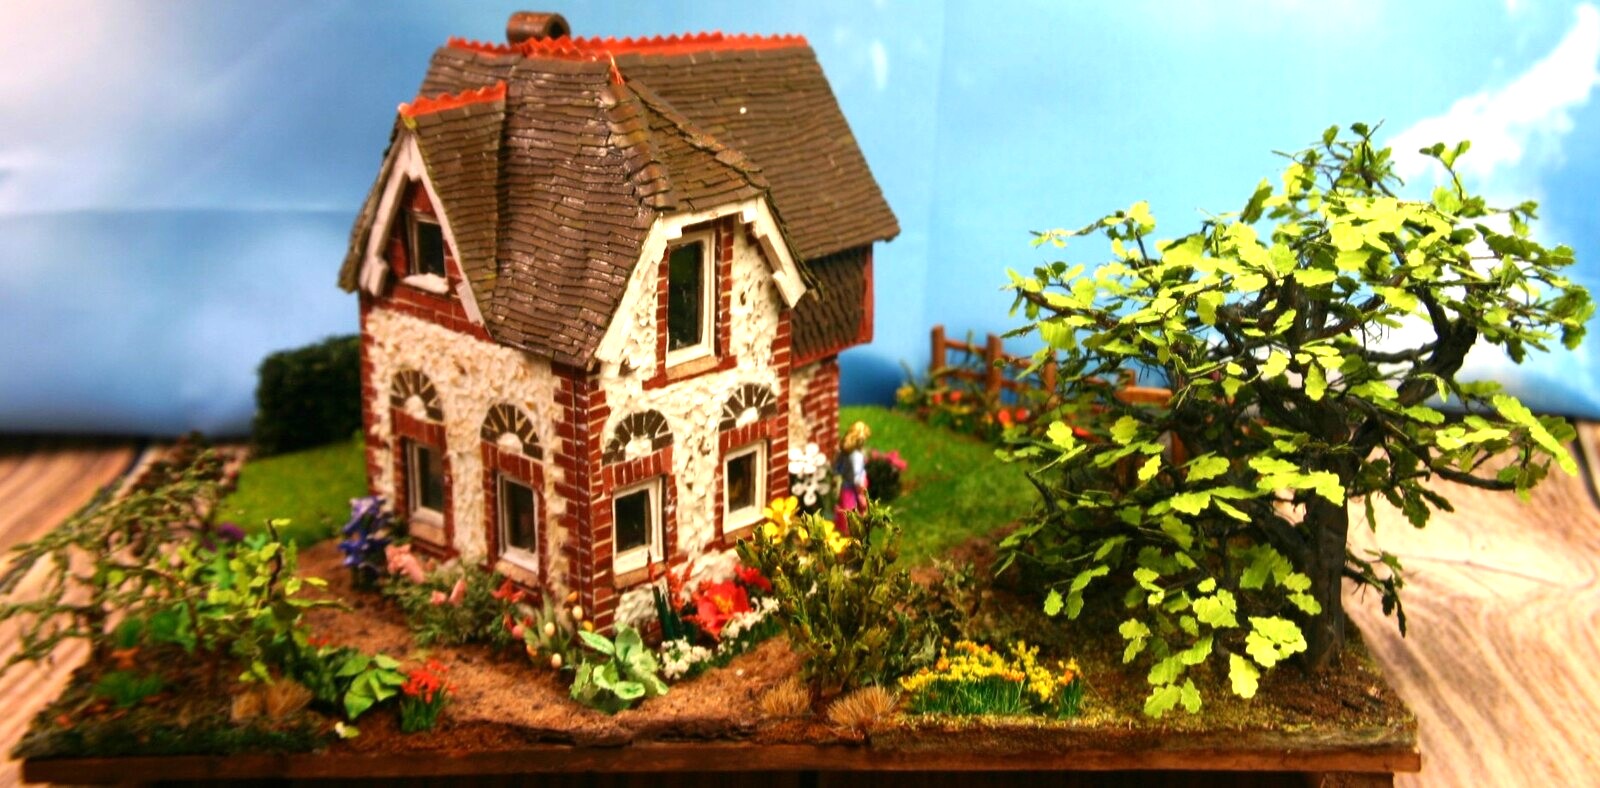
The house design is based on a traditional English cottage, characterized by distinctive architectural features typical of southern English countryside:
- Steeply pitched gable roof
- Brick and flint walls (characteristic of Hampshire, Sussex, and Kent)
- Decorative brickwork around windows and doors
- Cottage garden with flowers and wooden fencing
The use of flint and brick is particularly common in areas where flint is naturally abundant, creating that authentic southern English appearance.
Reference sources:
I did do drive by of many houses as we live in the south of England. These drive by visits were done over time to get a better understanding of the colour and different styles of flint and brick.
Scale Selection
Selecting a scale was largely influenced by the original photo and the remaining of the scale was reduced from it. The actual base is 20cm × 25cm and the house is 13cm long and 12cm high and 10cm. Scale is approx 1:100 with 1cm approx 1m. Looking back, the different parts on the board is more about allowing the size of items to visually fit together, rather than exact scaled items. The figures used in the model are plastic figures and in real terms they may not fit through the doors of the houses, but it is not distracting as such.
Construction Technique Development
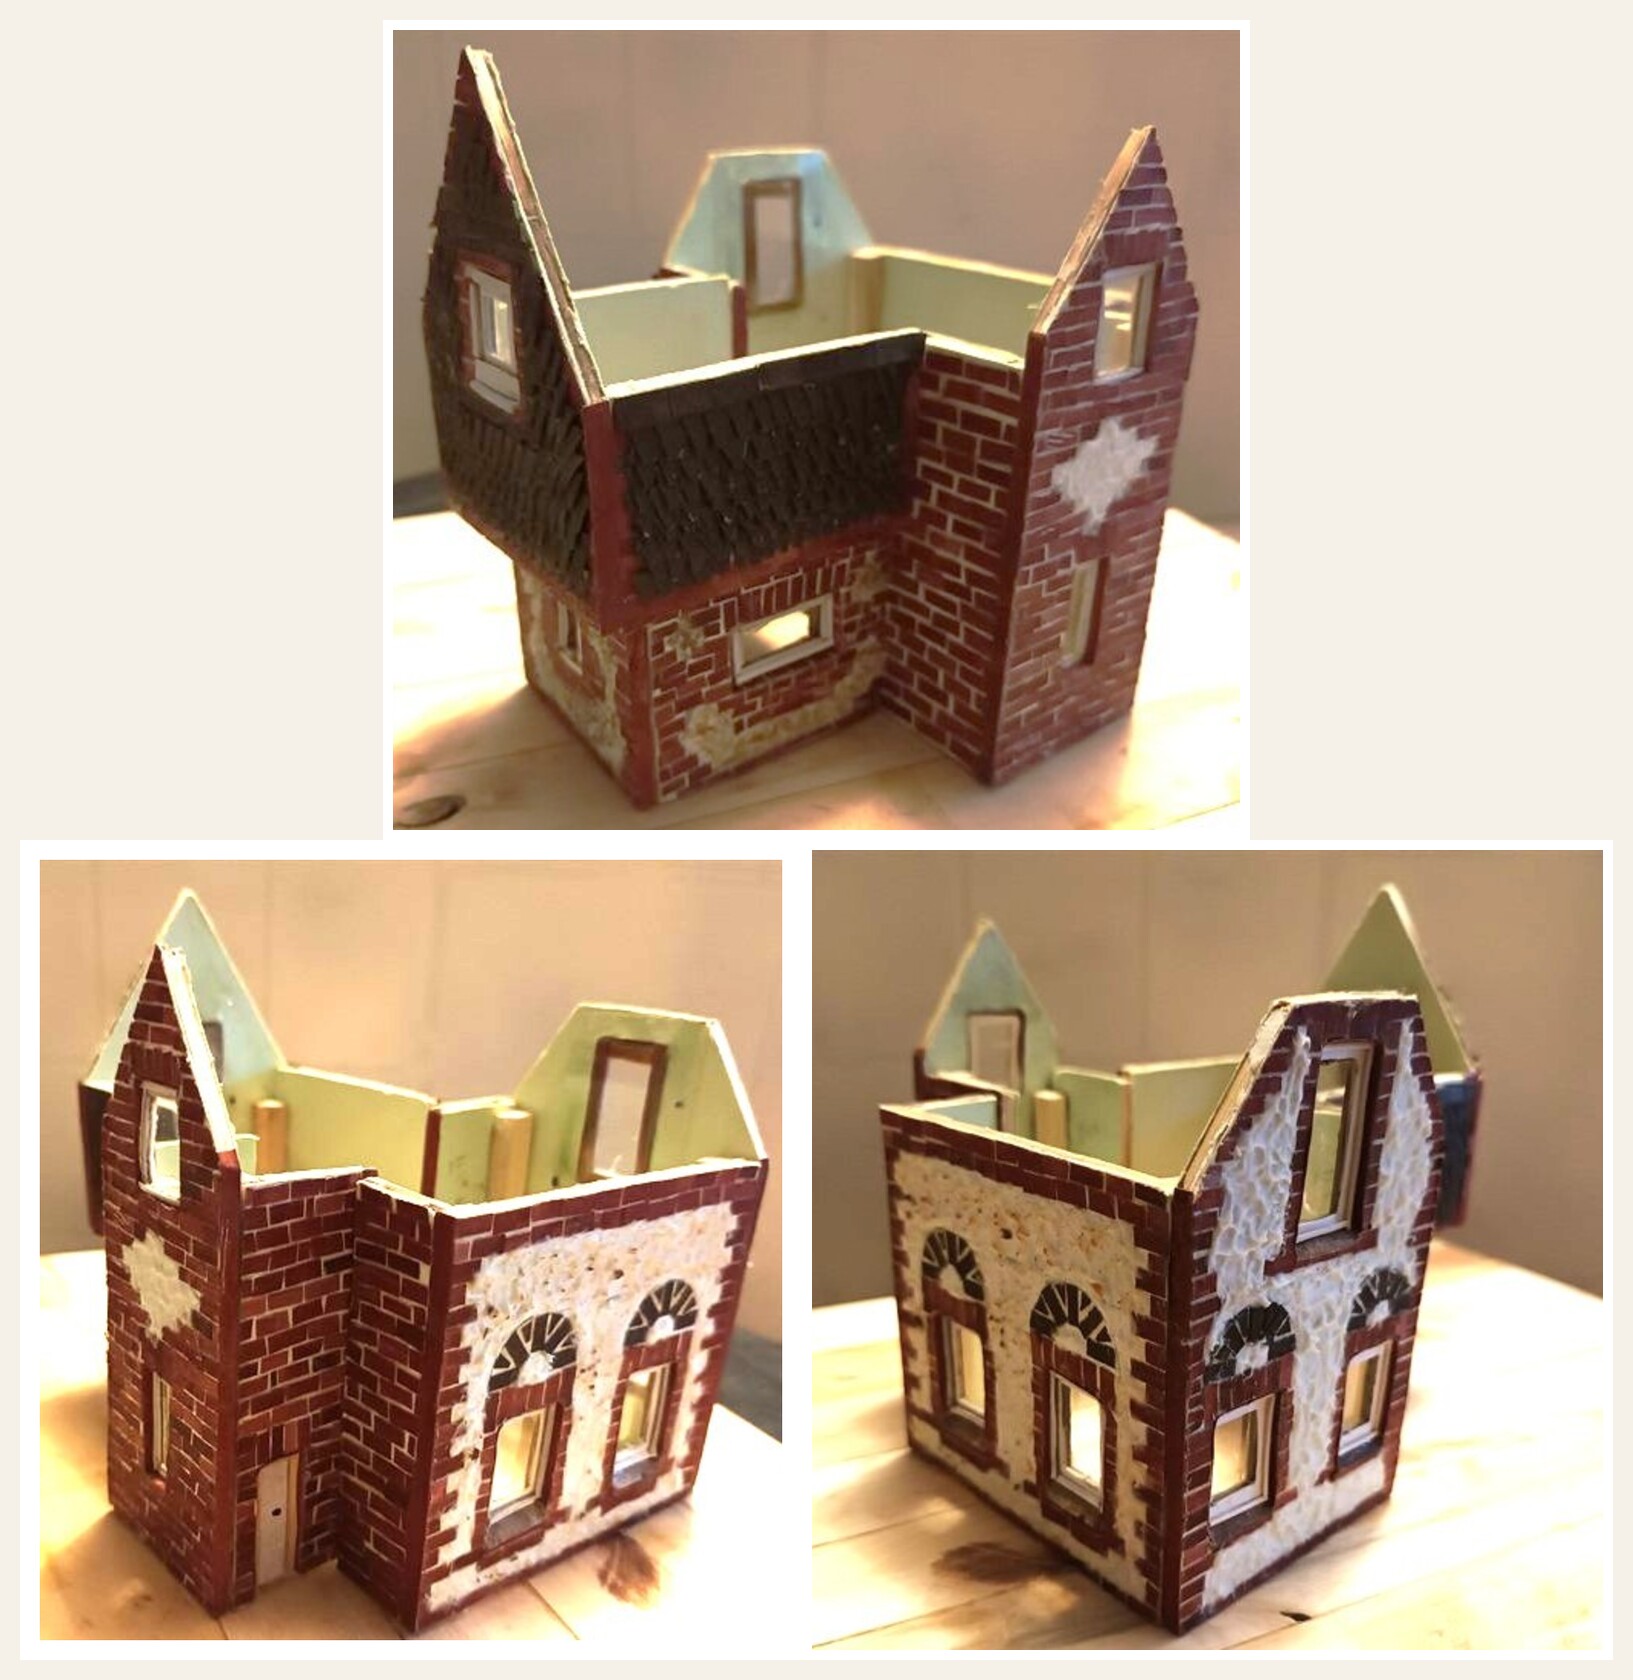
Through research and planning, I developed a construction approach using thin wood slats of approx 2mm on paper as a frame. Paper was glued on both sides and ribs were added to prevent the paper from sagging in the middle. Each wall was measured and formed separately, allowing for the windows and doors. The cottage has 4 sets of outer walls each with different heights and widths. The walls were all painted with white acrylic as a base cover.
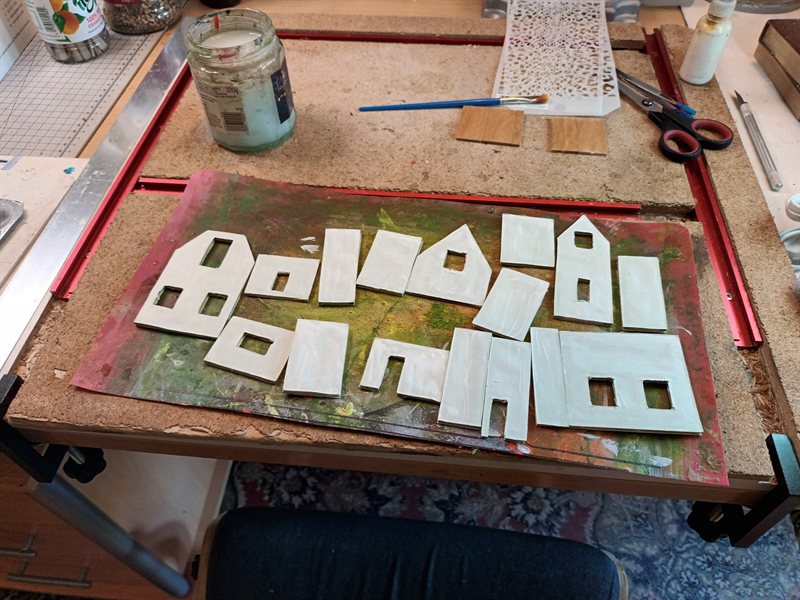
Paper was painted in a red brick allowing for some variations in colour. The paper was cut with a guillotine in strips of approx 2.5mm and then cut in lengths of approx 5mm. The bricks were then glued onto the white wall in decorative patterns around the doors, windows and edges of the walls. Space was left in the middle for the flint stone.
The windows and door frames all had strips of the brown paper glued in.
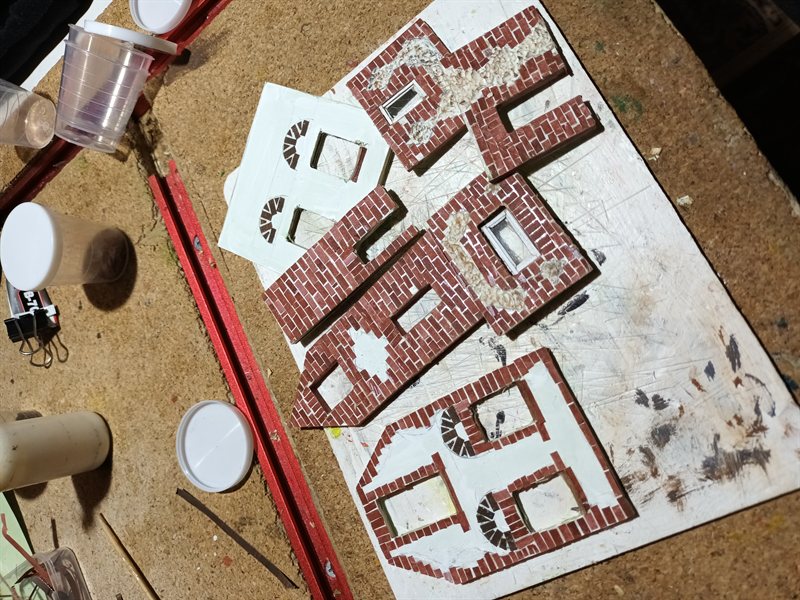
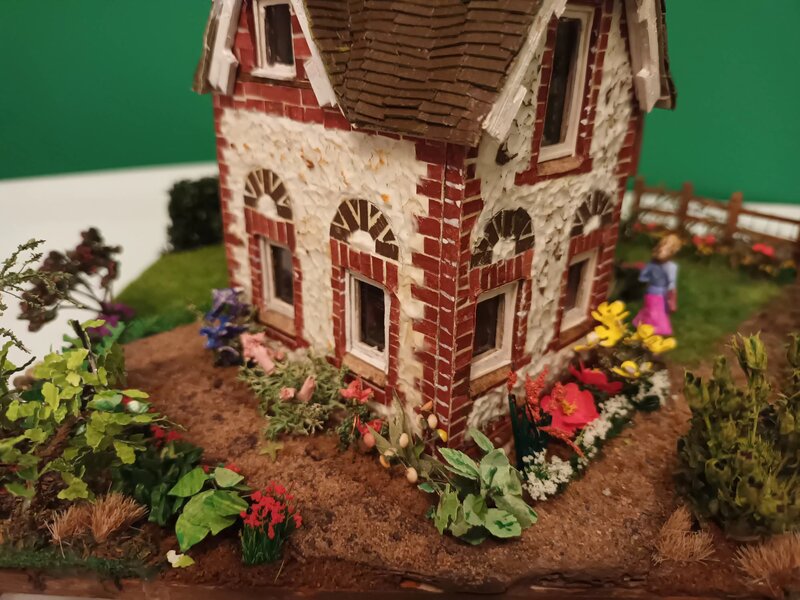
Modelling paste on a small applicator was then used to fill all the white spaces between the bricks and roughened to create the small divots to represent the stones. The modelling paste was lightly dry brushed to weather and age the flint stones.
The walls were then glued together using square 5mm wooden corners to neatly put each sub building together. The windows were all fitted individually with 7 layers: the outer white frame, 1mm white paper strips, inner white frame and pane frames of 0.5mm white paper strips, hard plastic for the glass, thick card stock on the inside to allow for the window to be pushed into the cavity, a backing sheet to allow for the window to be wider than the cavity to provide for the window to be glued in place on the inside of the wall.
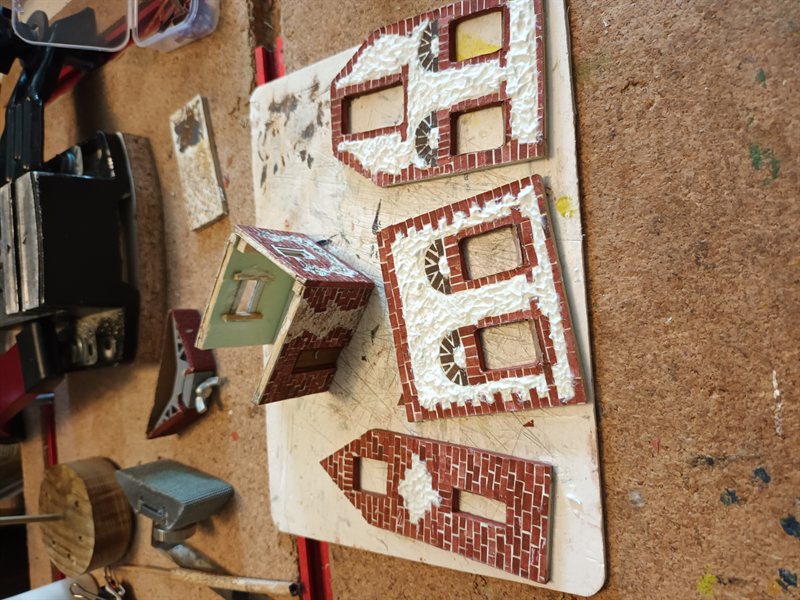
A flat piece of wood was used for the door, painted dark and a small handle from wire fitted. The door was added into the door frame using coloured paper for the door frame.
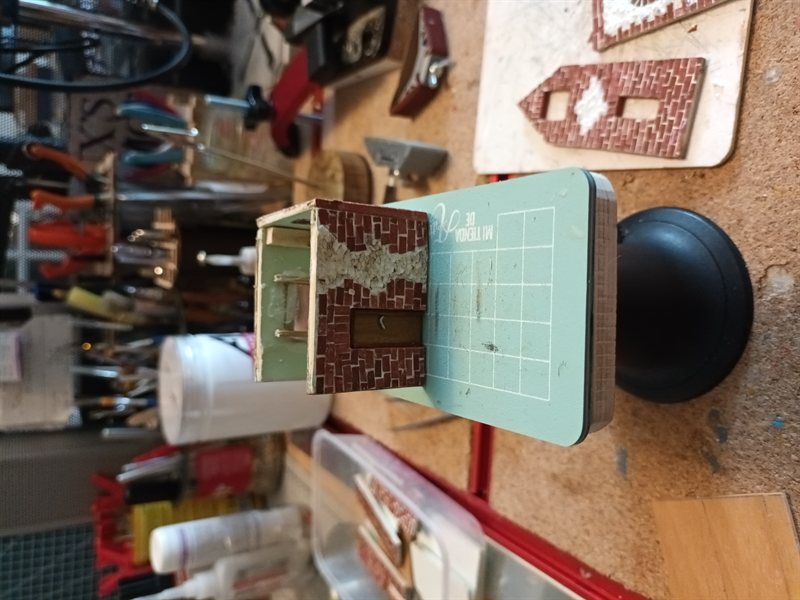
With the small front door section assembled, the assembly of the main building could be started.
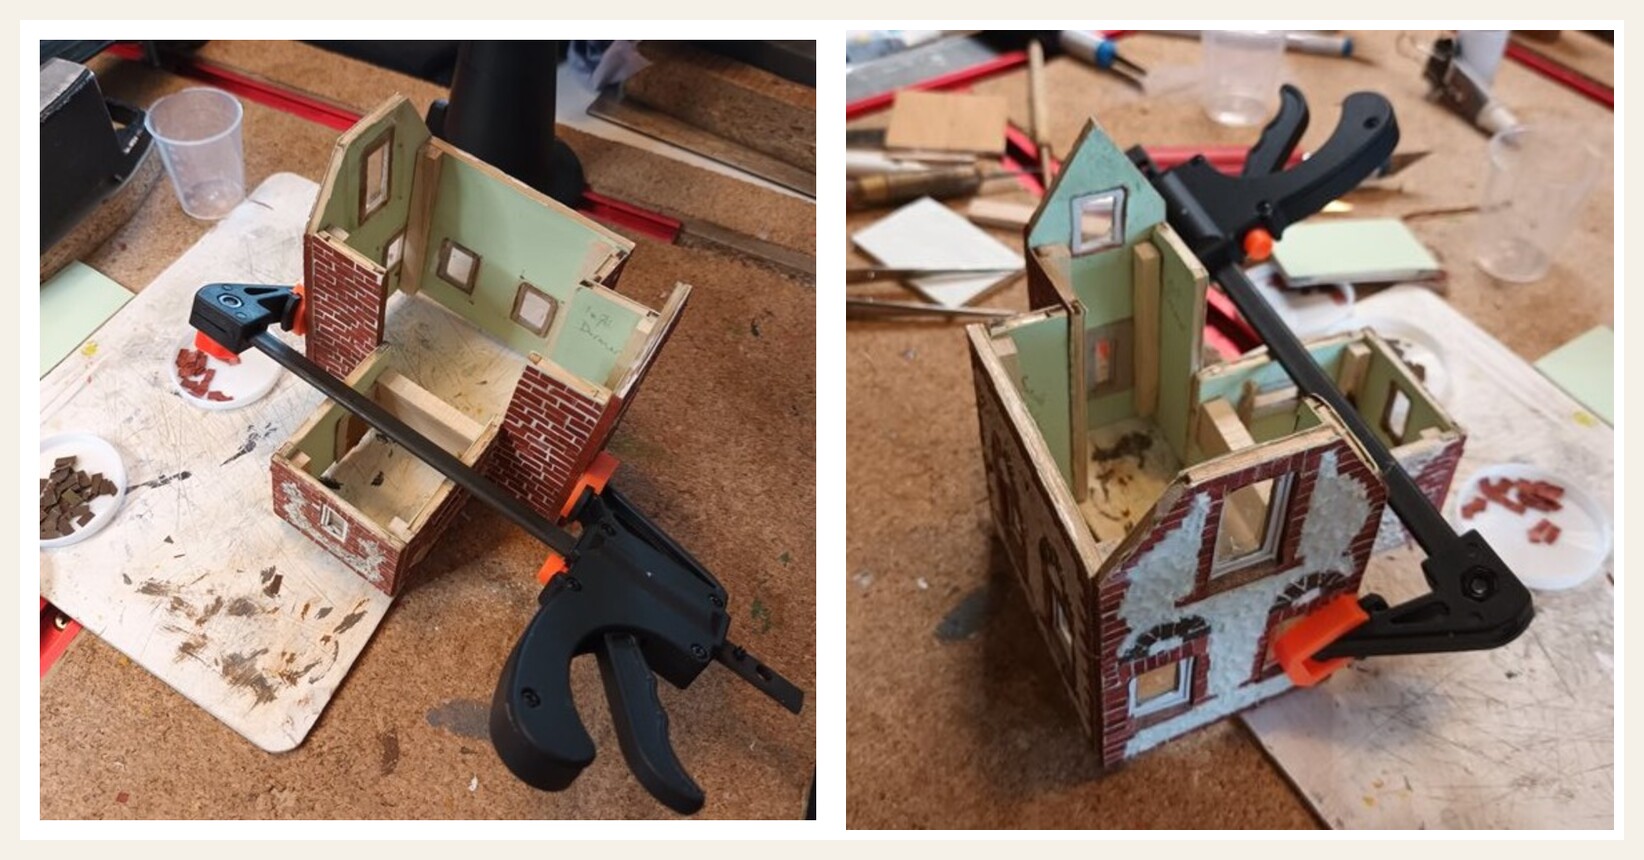
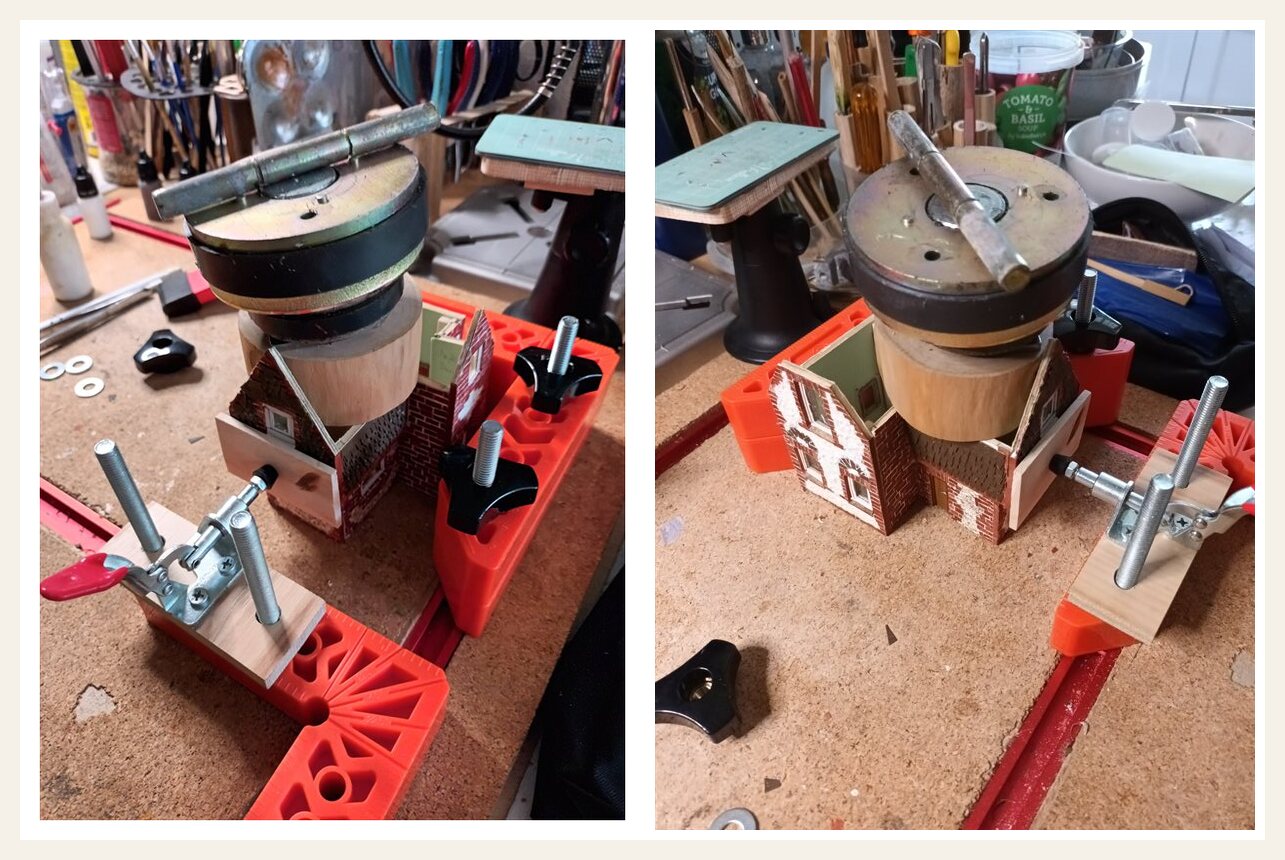
Adding the room above the front door presented a clamping challenge. I had to improvise a series of push and hold clamps, and provide some improvised weights from the top to hold it all together while drying.
On completion of the clamping all the facades of the building were in place and measuring up the roof could start.
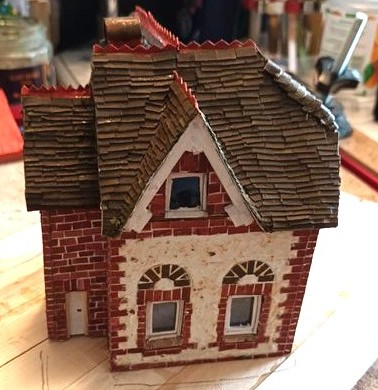
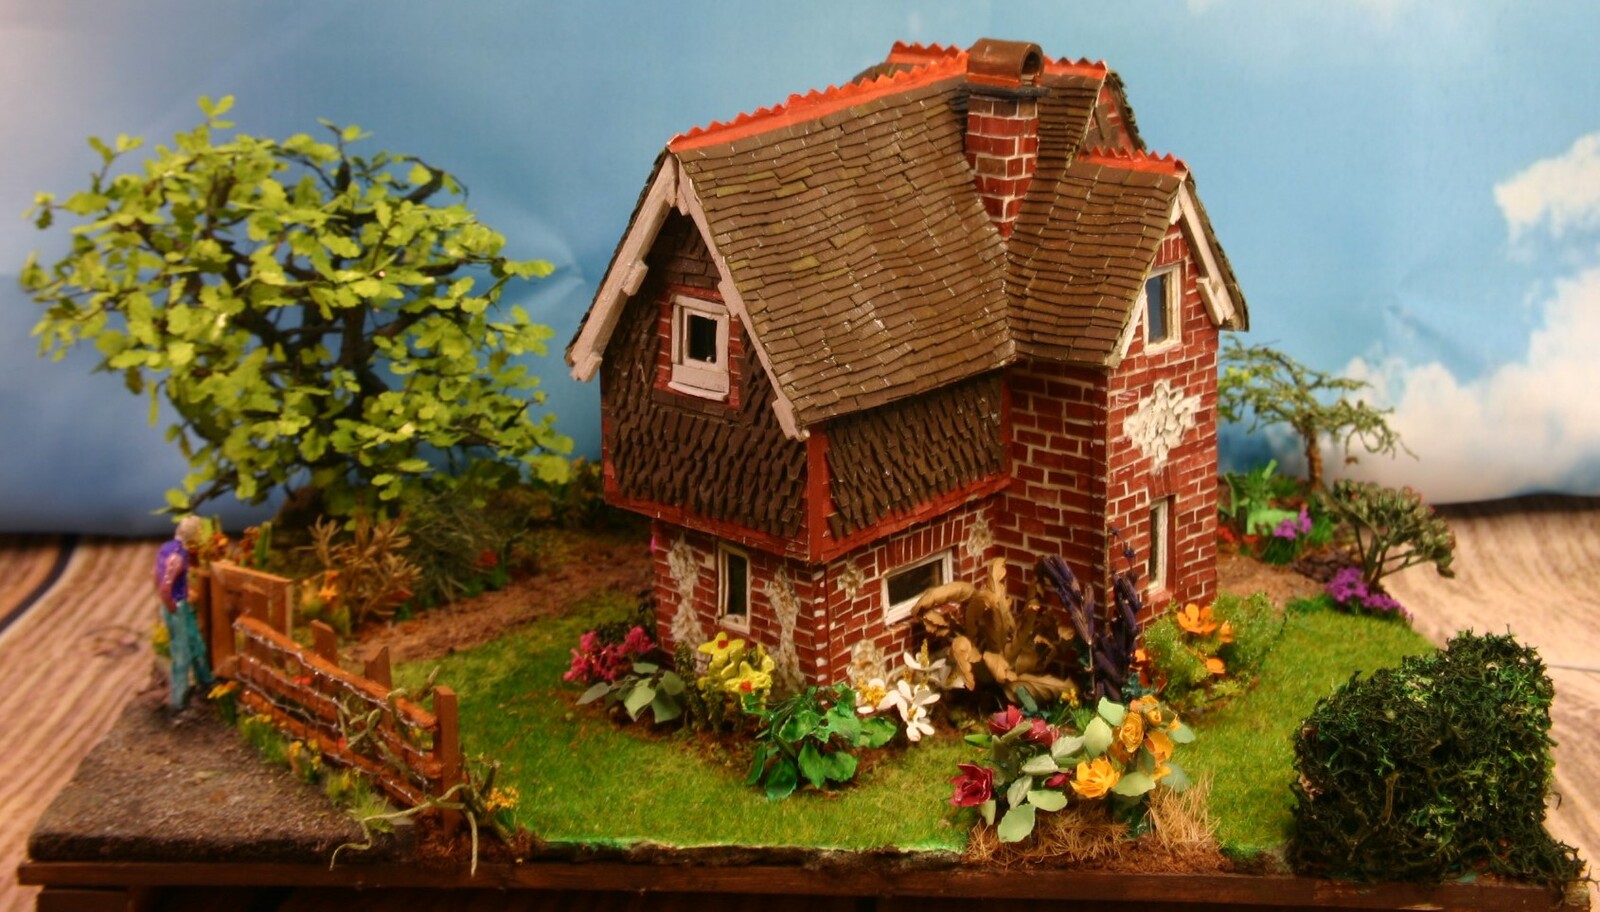
Started off by using sheets of paper to model each facade of the roof. The top ridges were made by gluing half of double folded paper, and using the other side as a V shape to fit over the roof. The ridge was then cut with a zig-zag scissors and painted in red. The entire roof was then painted in dark brown to serve as the base for the roof tiles.
The chimney was constructed separately by covering a square 1cm square balsa wood with bricks, similar to the walls, adding a cap and then a half piece of bamboo on top. As part of fitting the roof, the chimney was glued in against the inner wall and the roof modelled around it.

To make the tiles, heavier paper was pre-painted, then cut into strips of approx 4mm and then lengths of approx 5mm. Each row of tiles were then glued from the bottom up. Soffits were made from wood, painted, and then fitted around the edges of the roof.
This technique provides:
- Structural rigidity from the wood frame
- Better bonding surface for modeling paste
- Reduced risk of cracking or flaking
Following through the cottage build took some time. Each step was an experiment in itself. Material selected, then prepared and coloured which in itself had to dry, then cut and shaped, then glued in and then fitted together. All parts and aspects were designed as the build process moved along, rather than as one grandiose plan and pre-designed parts. Parts have been fitted, and taken apart on many occasions and every major step was preceded with a test run that was put aside later.
It took about 1 month to complete the cottage.
Chapter 2: Base and Foundation Construction
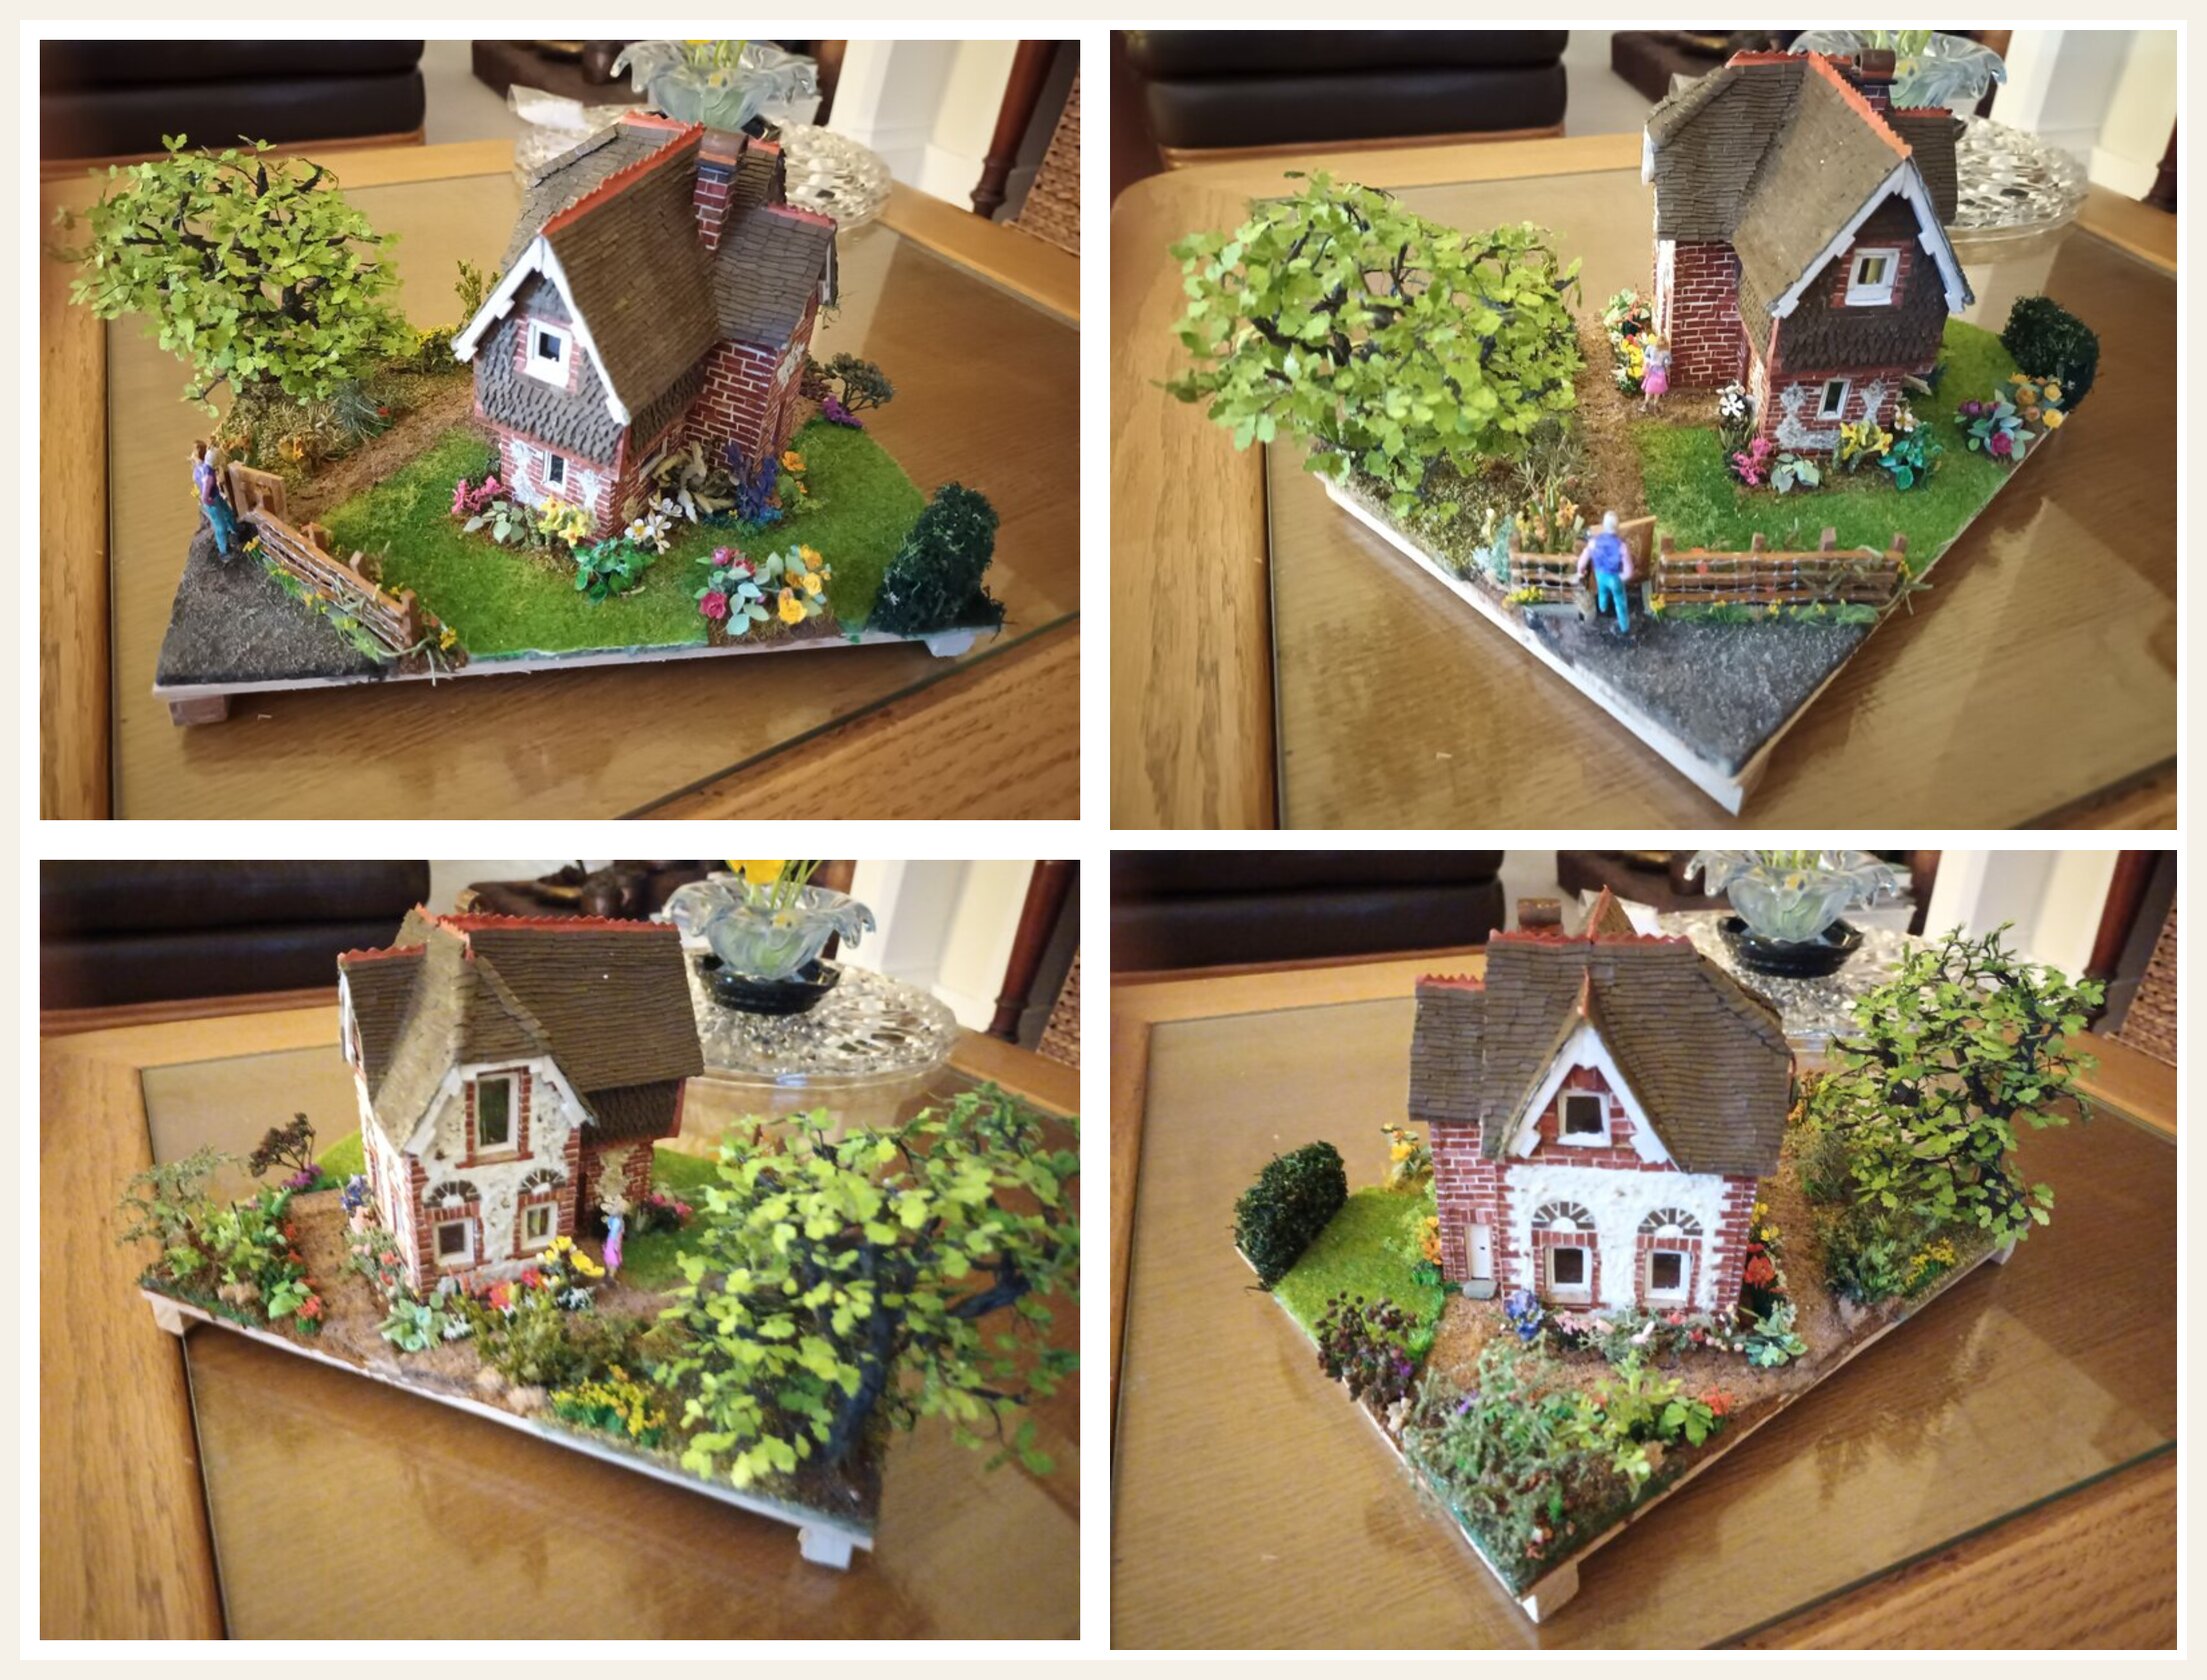
With the cottage completed, the positioning and layout of the garden could commence planning. I decided to position the cottage at an angle to the base. This left more room to explore different faces of the garden in more details without having to include the full surrounding of the cottage.
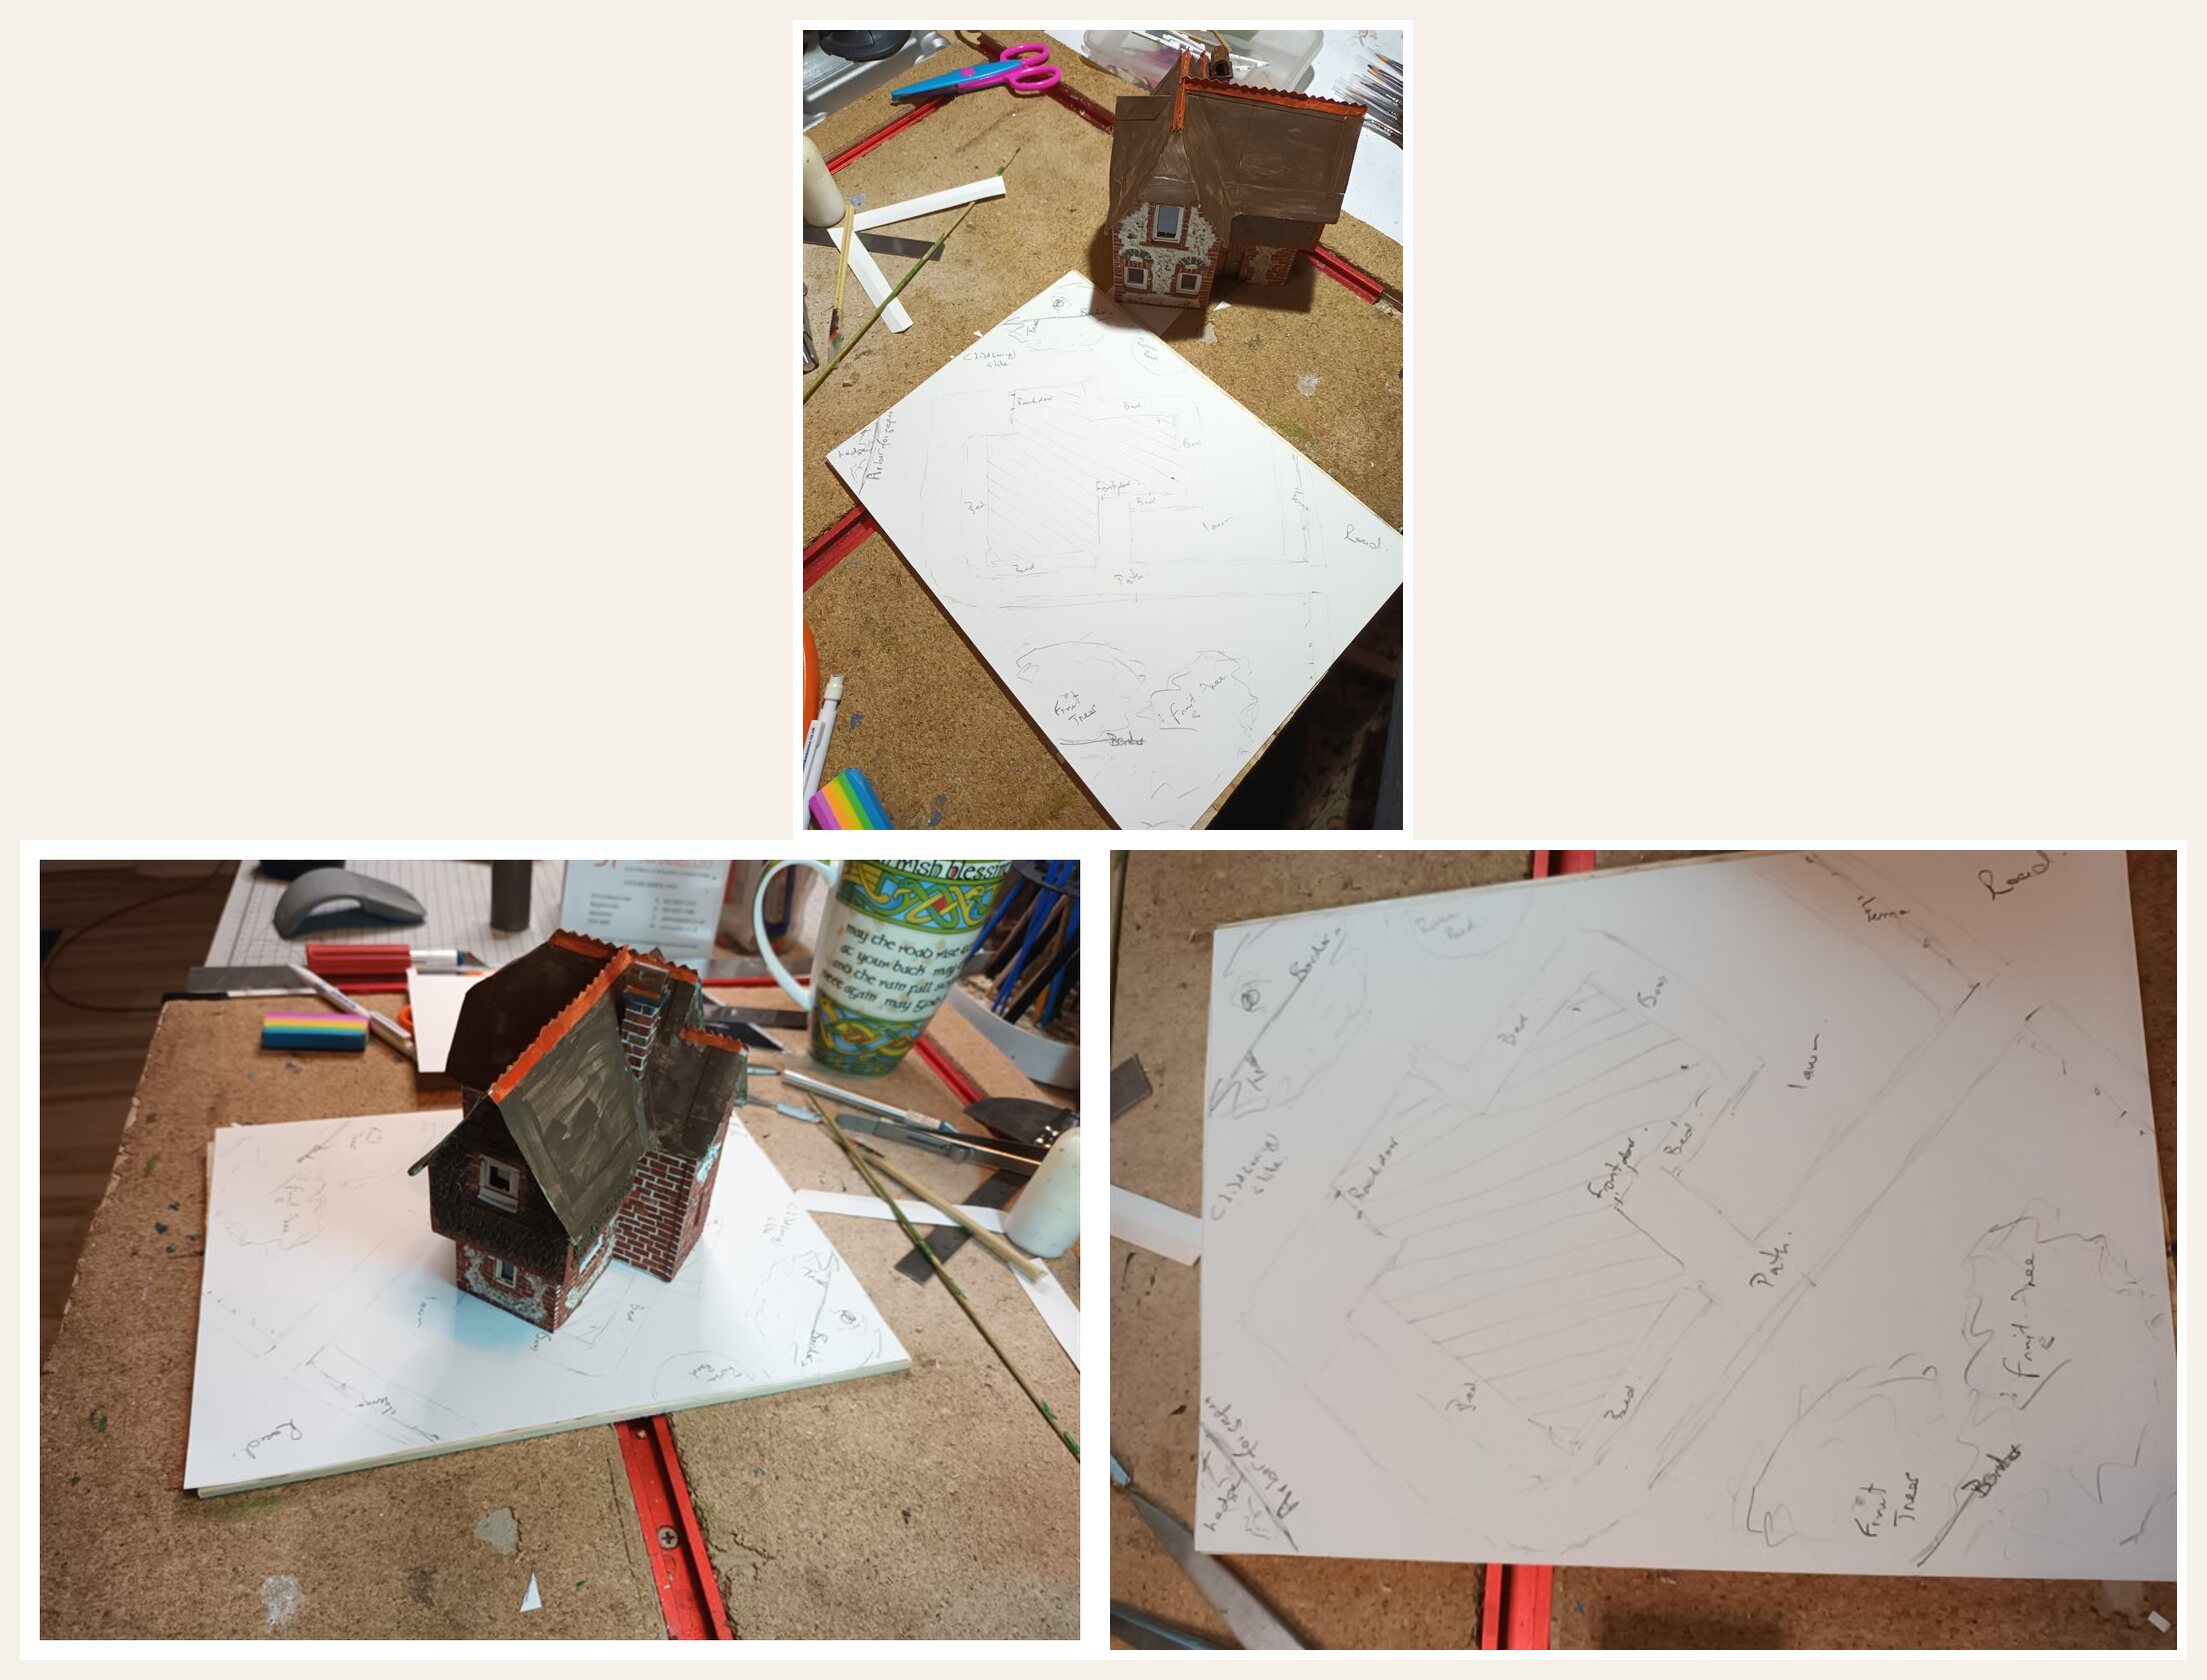
I thought it would add a better perspective of the garden by adding some colour to the plan.

Then the plan is drawn on the base. The base itself is made of planks, cut from the bay leave tree in the garden and laminated together.
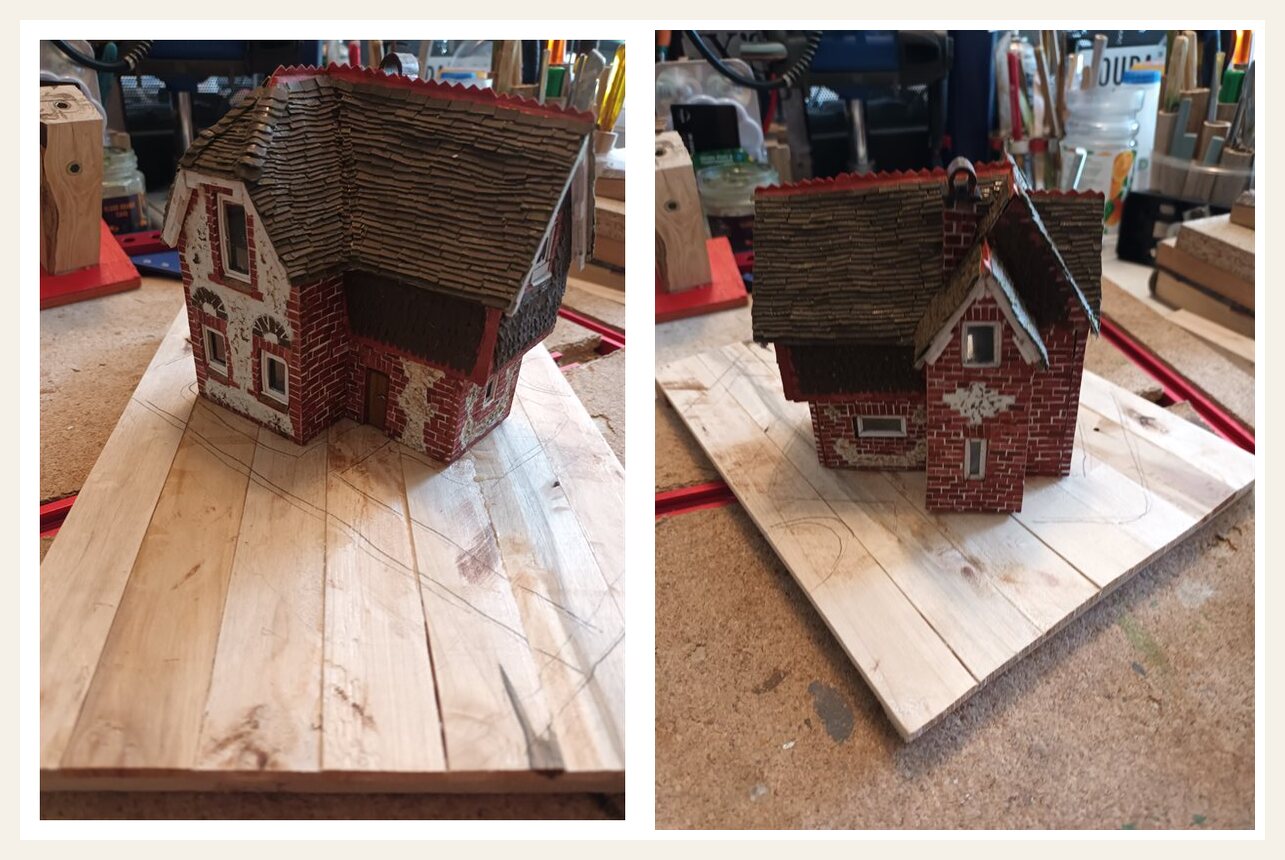
The house is fixed to the base by gluing a mounting plate on the base of the cottage hidden from site, and screwing the cottage to the base from beneath. With the cottage screwed on, the landscaping can begin. The surroundings around the cottage were divided into different zones. Starting with the tarmac path and front fence, then the footpath around from the gate to the front door, and around the cottage to the back door. The next zone was the front lawn and side lawn. Space was left between the path and the cottage, and lawn and the cottage as another zone for plants around the house. Another zone was the open space beyond the path in the front garden, and opposite the back door into the back garden. This was the wider garden areas.
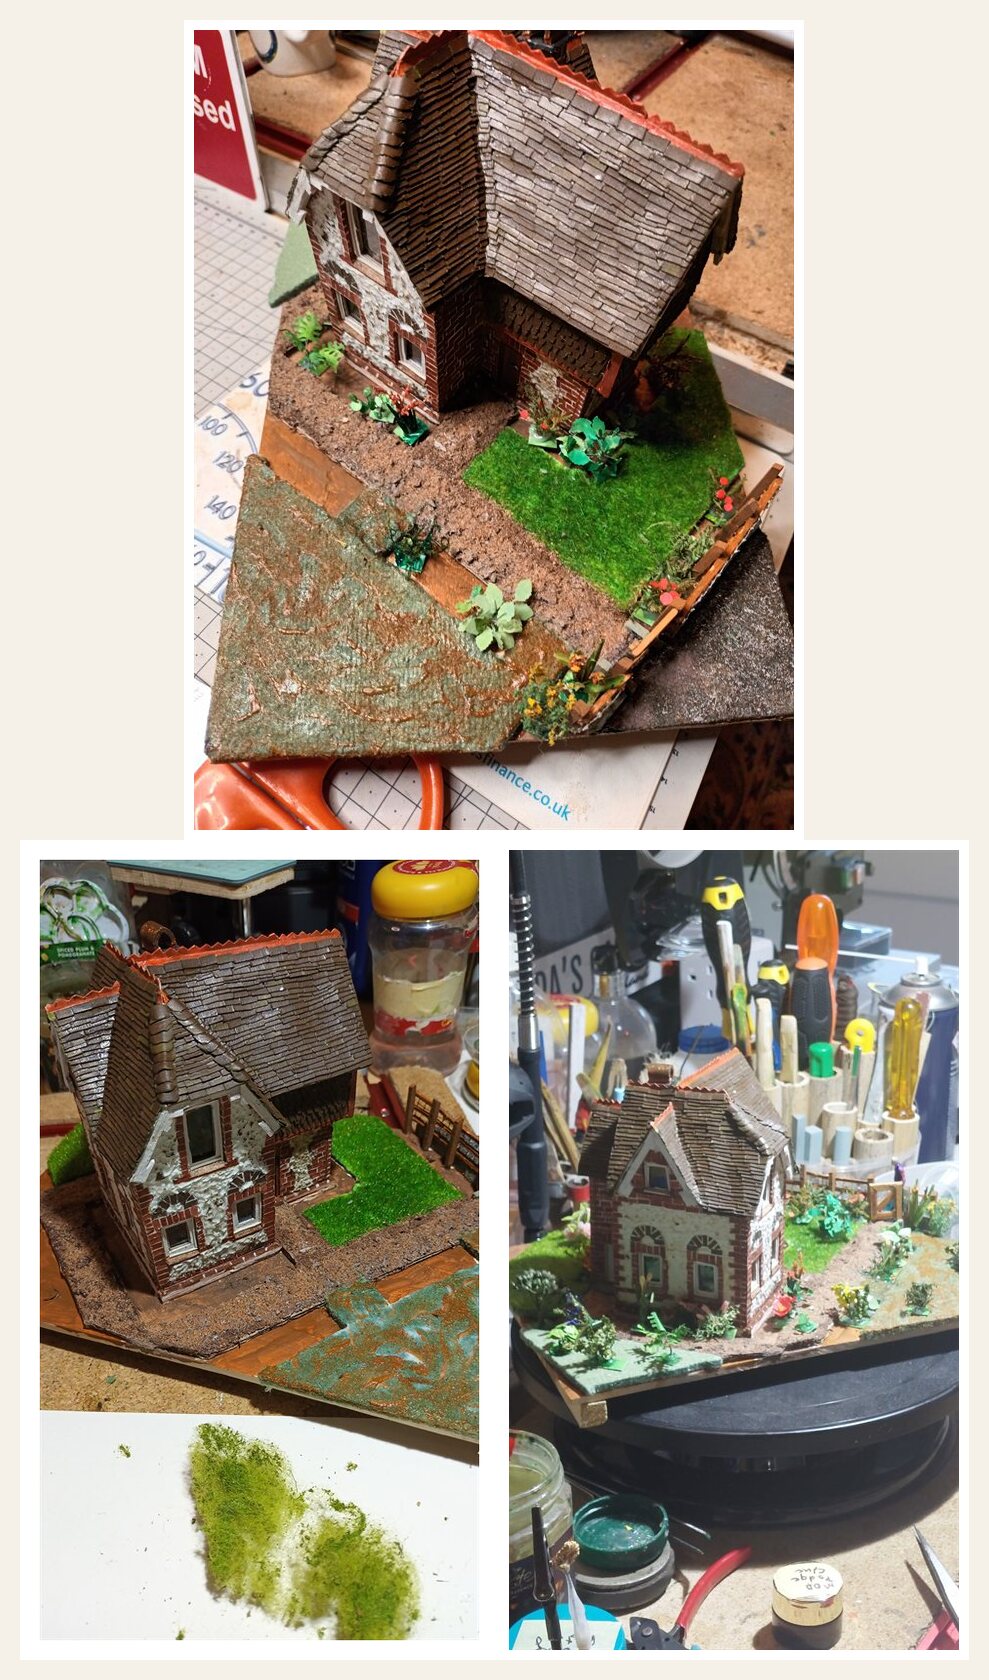
The first zone to visualise was the road in front of the house. For the tarmac, pieces of Welsh slate were crushed and then sifted to separate the crushed stone into fine, and medium coarse grains. Used laminate floor underlay, sealed with Mod Podge glue to serve as the road base. The fine crushed stone was then mixed with Mod Podge and pasted on the road base. Coarser stone was spread on the surface in some areas. The road base was then glued on the model base.
The next zone were the paths. Strips of floor underlay were cut for each section of the paths, sealed with Mod Podge. The coarse pieces of crushed slate were mixed with some fine sand and Mod Podge to form a paste. This was then spread thinly on the strips using paint to enhance the colouring of the paths. These paths can be seen in the images above.
With the paths positioned, the underlay could again be put into use for the lawns. Cut to size and sealed again, the lawn base were painted and when dried, a static grass applicator could be applied using slightly different colours of static grass, and also slightly different lengths of the material to create the lawns.
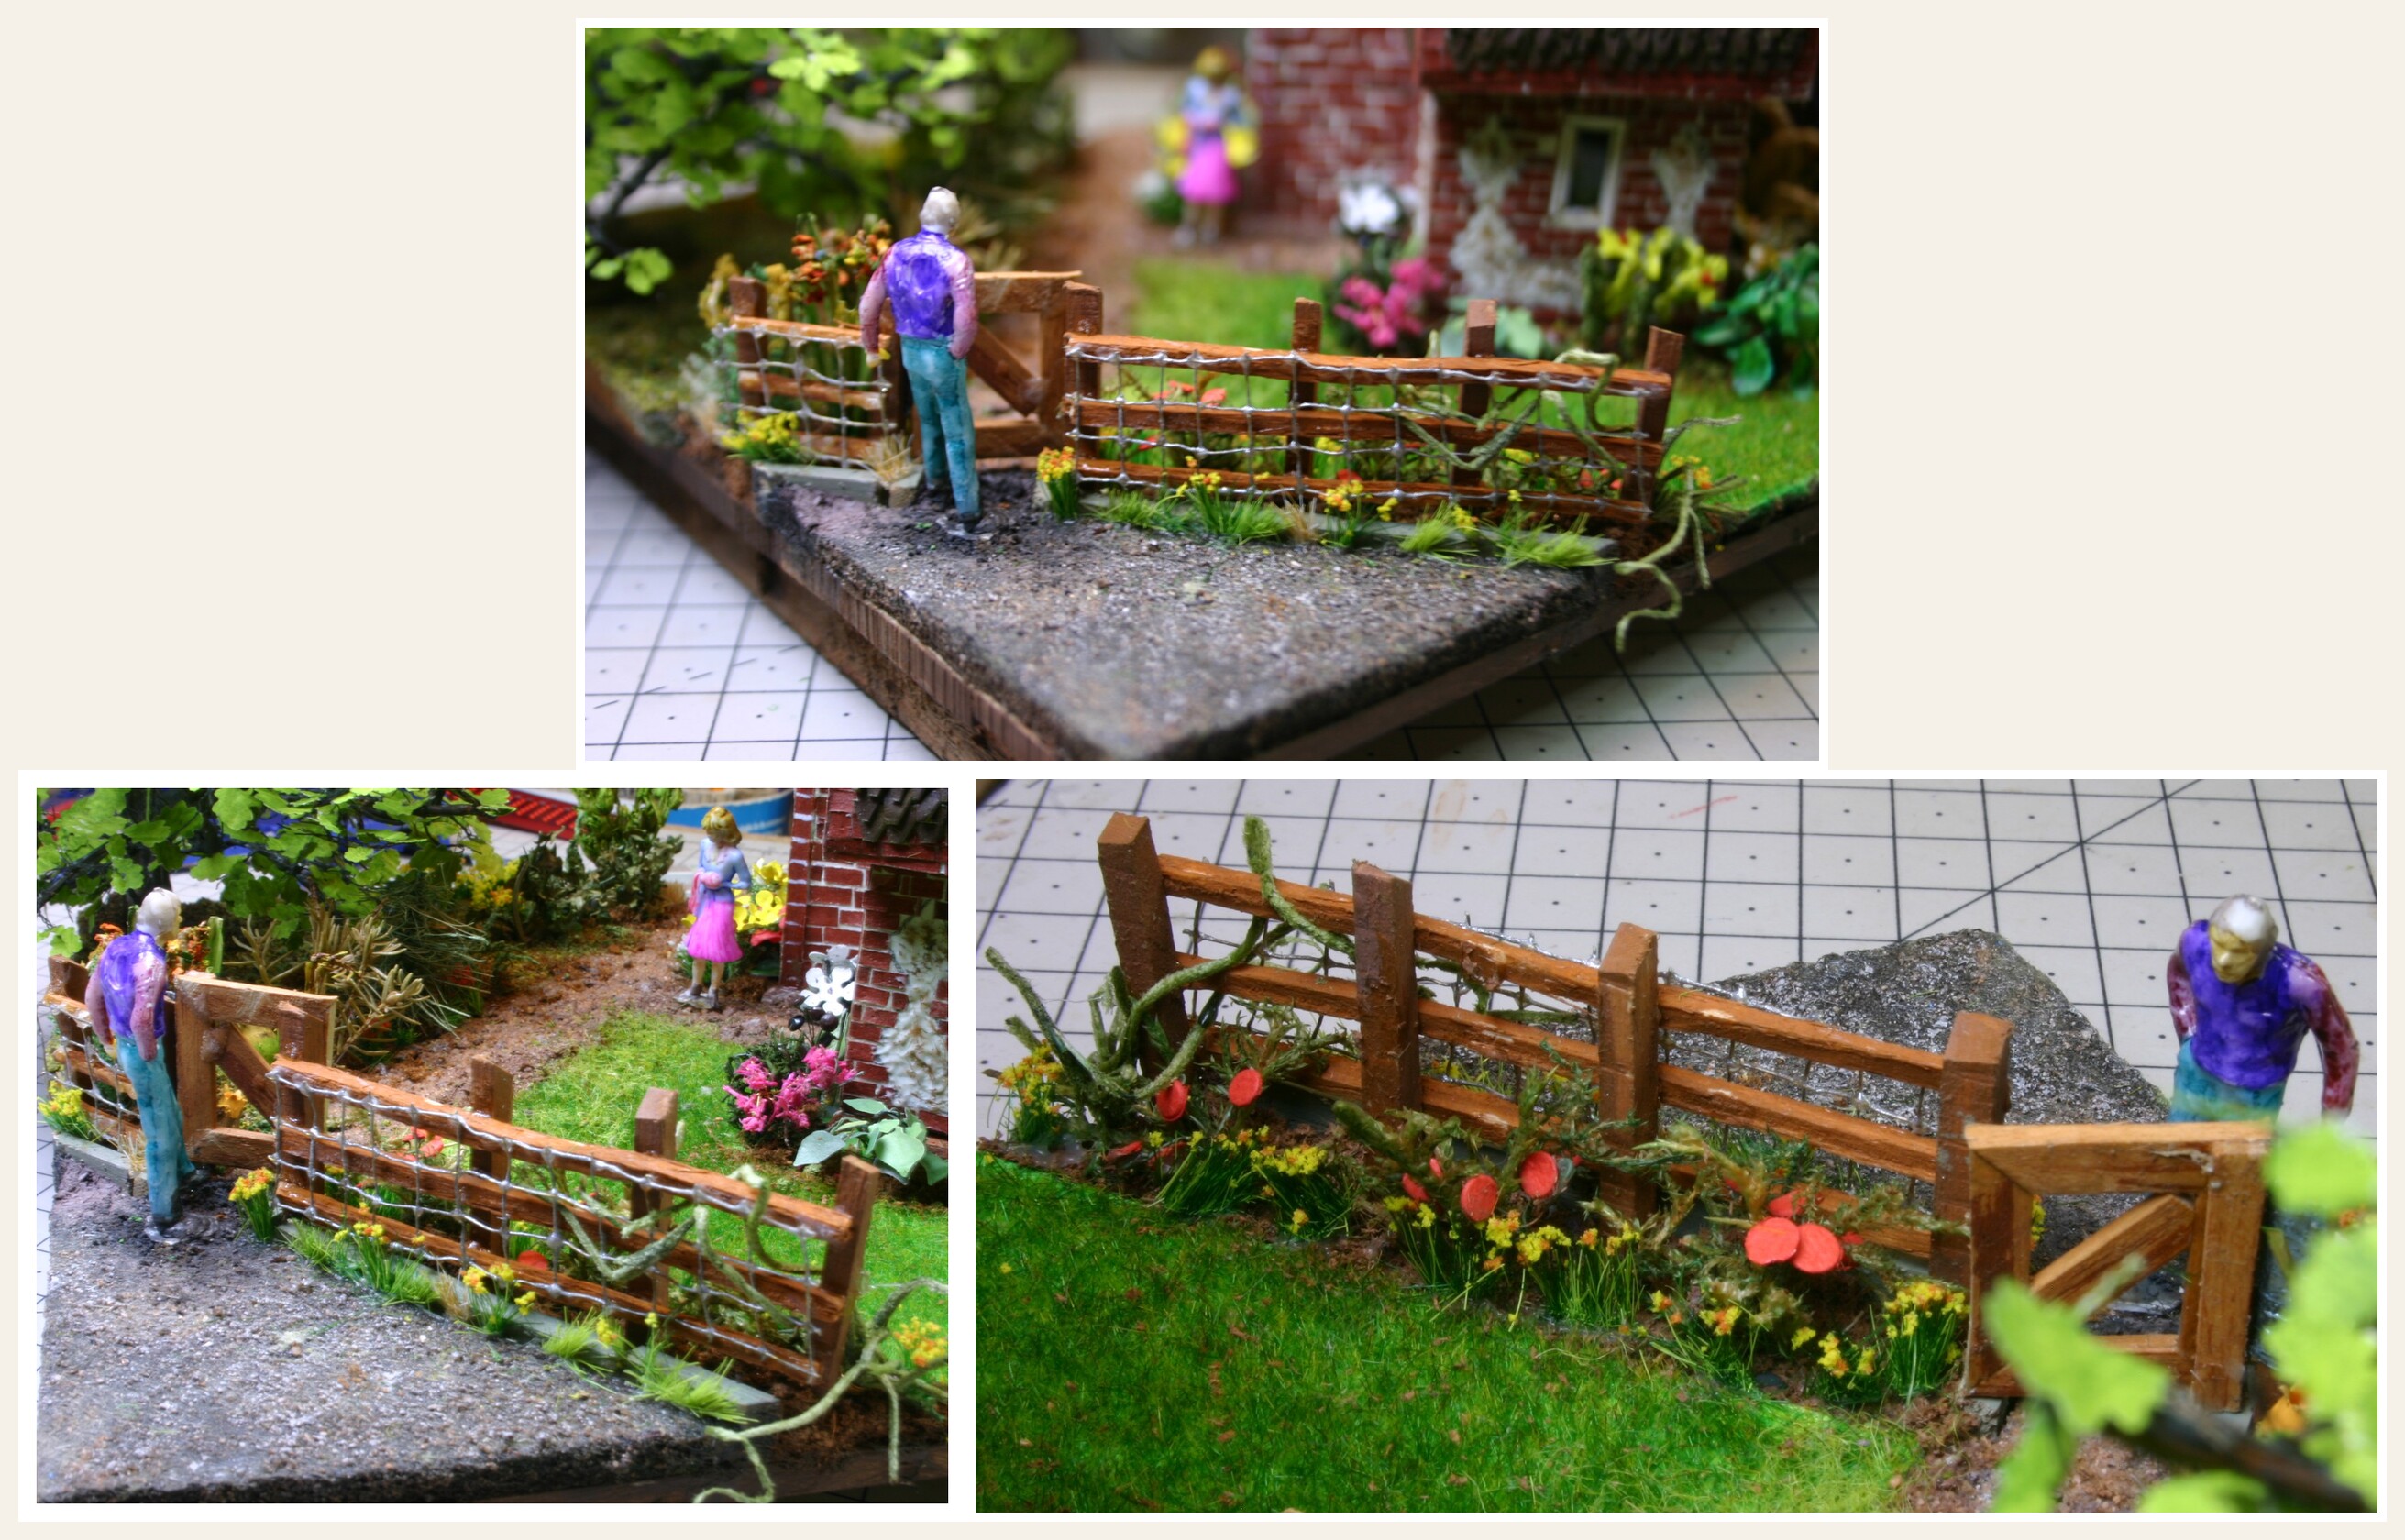
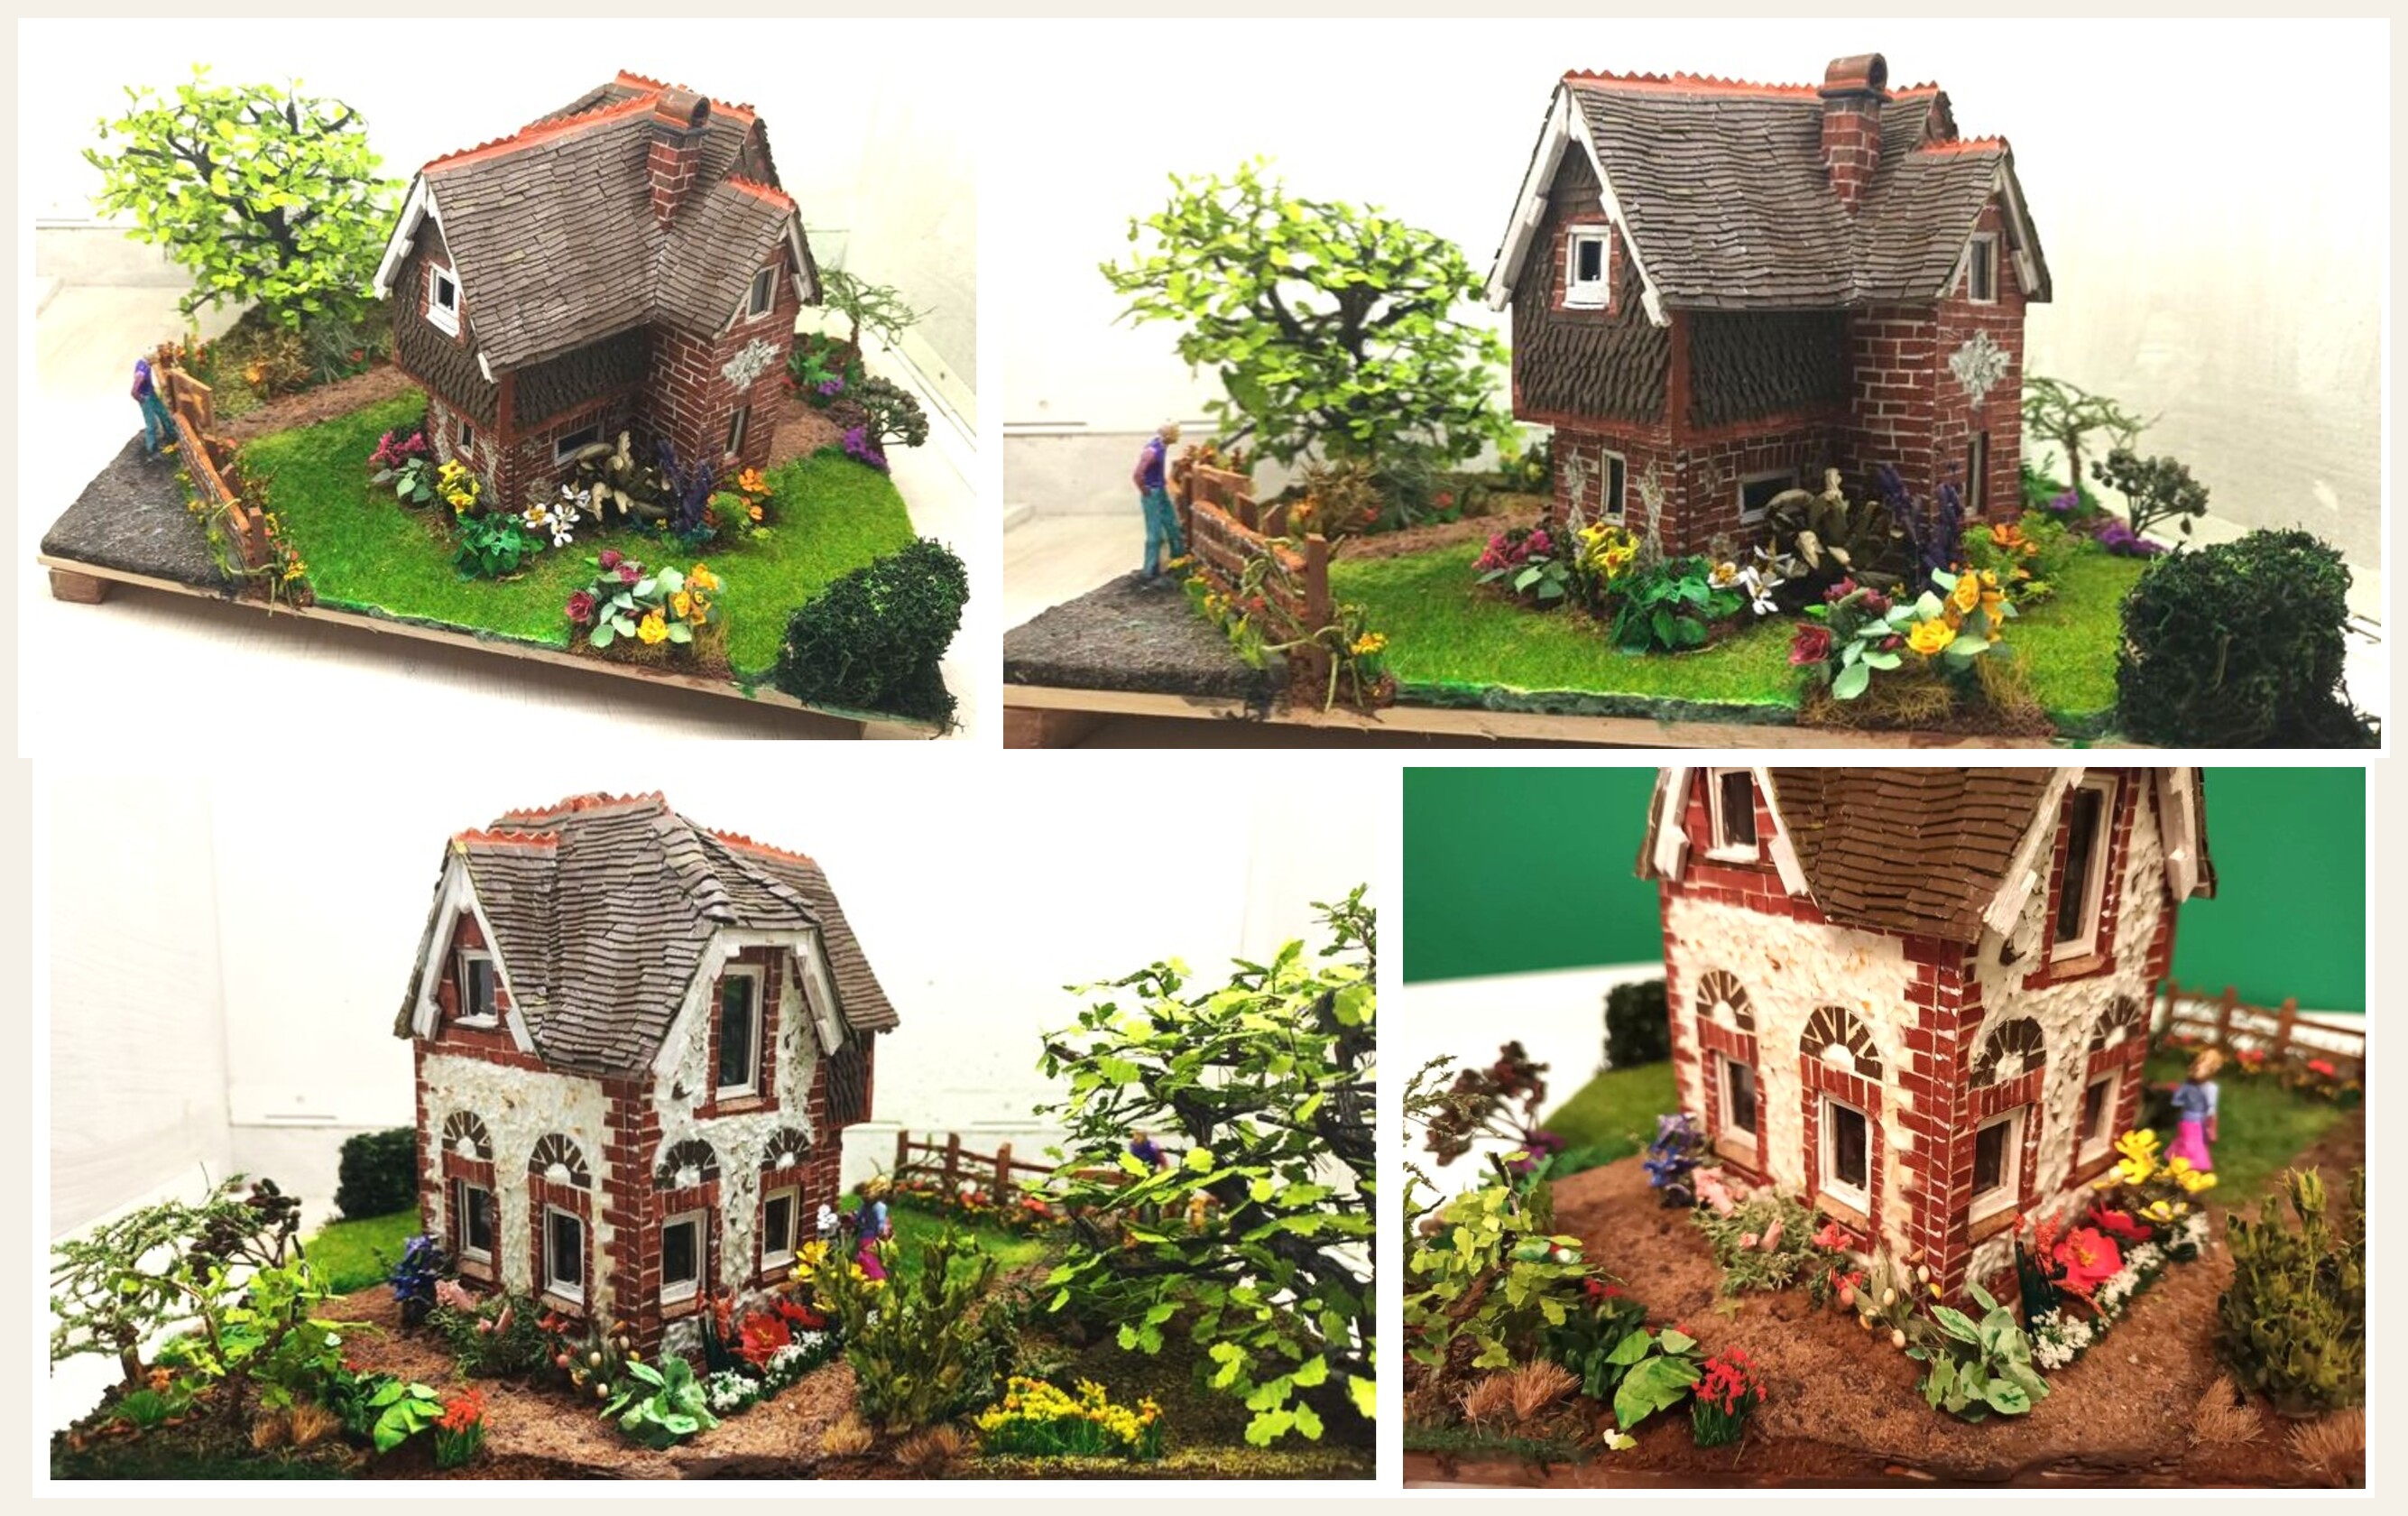
With the paths glued in the fence could go in. The wood for the fence is mature and dried bamboo, cut with a band saw into about 5mm strips. A hand plane is then used to square some of the strips for the posts, and other of the strips are further planed down for the strips. The posts of the fence are cut out and the tips bevelled. After determining where the gate will be, holes are drilled in the base and the posts glued in. The rails are then cut to size and fit to the posts on each side of the gate. The gate was then measured to fit in the gap, and made from the same bamboo source. Finally, I made a jig to have 5 strands of wire running alongside each other approx 3mm apart and then used super glue to fix the vertical wires to form a mesh. This was cut to size and fixed to the fence. The cement edge between the road and fence was also made from wood, shaped a bit different and painted greying with tint of green to form the cement edge of the road.
Chapter 3: Plants and Garden
With a large part of the landscaping now prepared, and visualised, I turned my attention to finish the preparation of the plants. Each plant was individually created, positioned, and matched with the surrounding plants and available space to get a sense of the plants to make, the quantities needed to fill the space and the colour schemes.
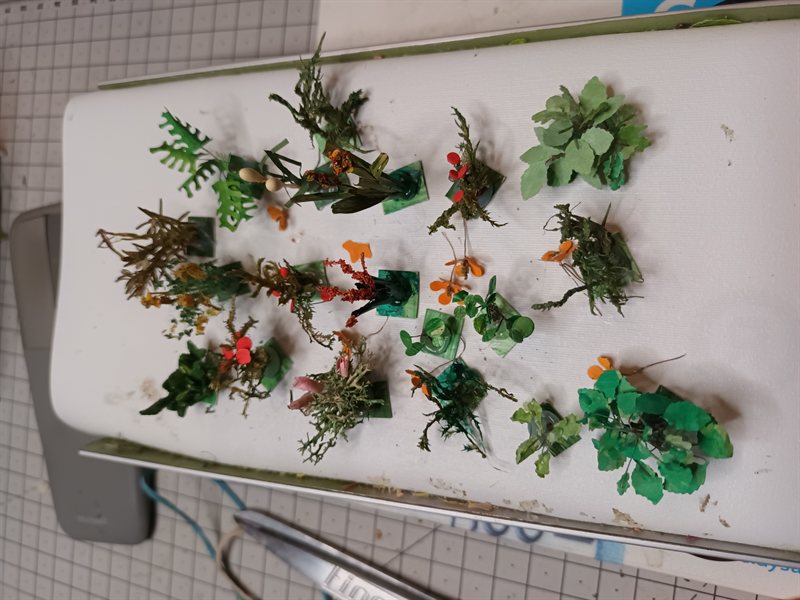
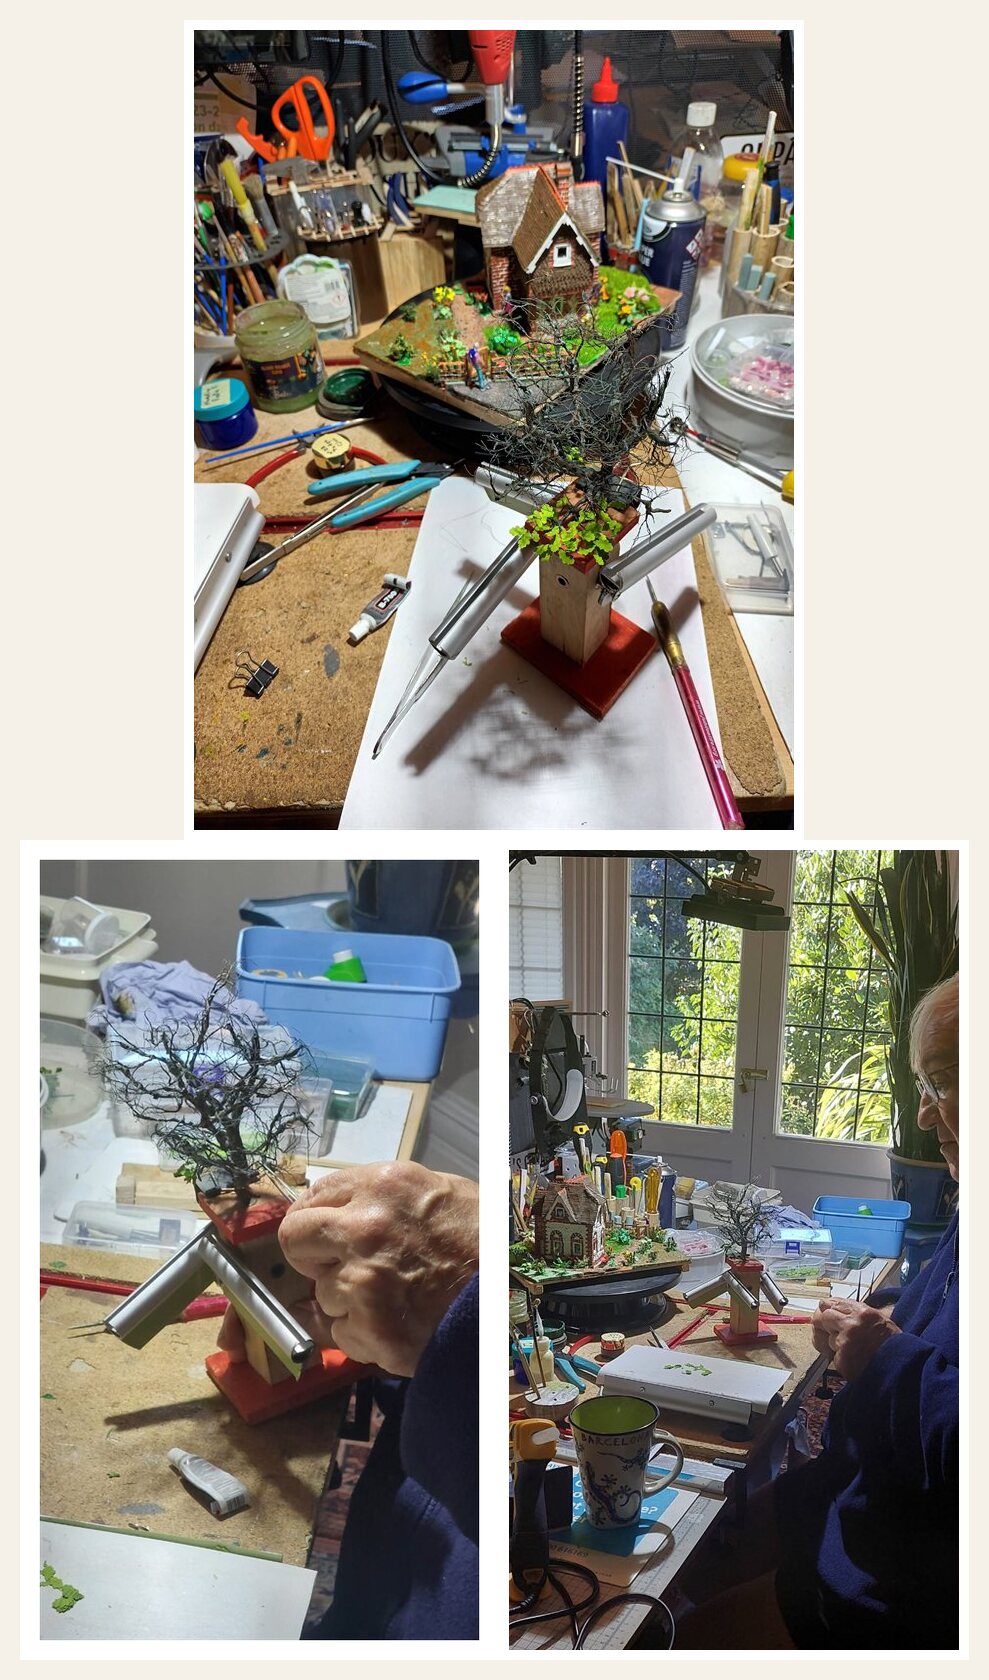
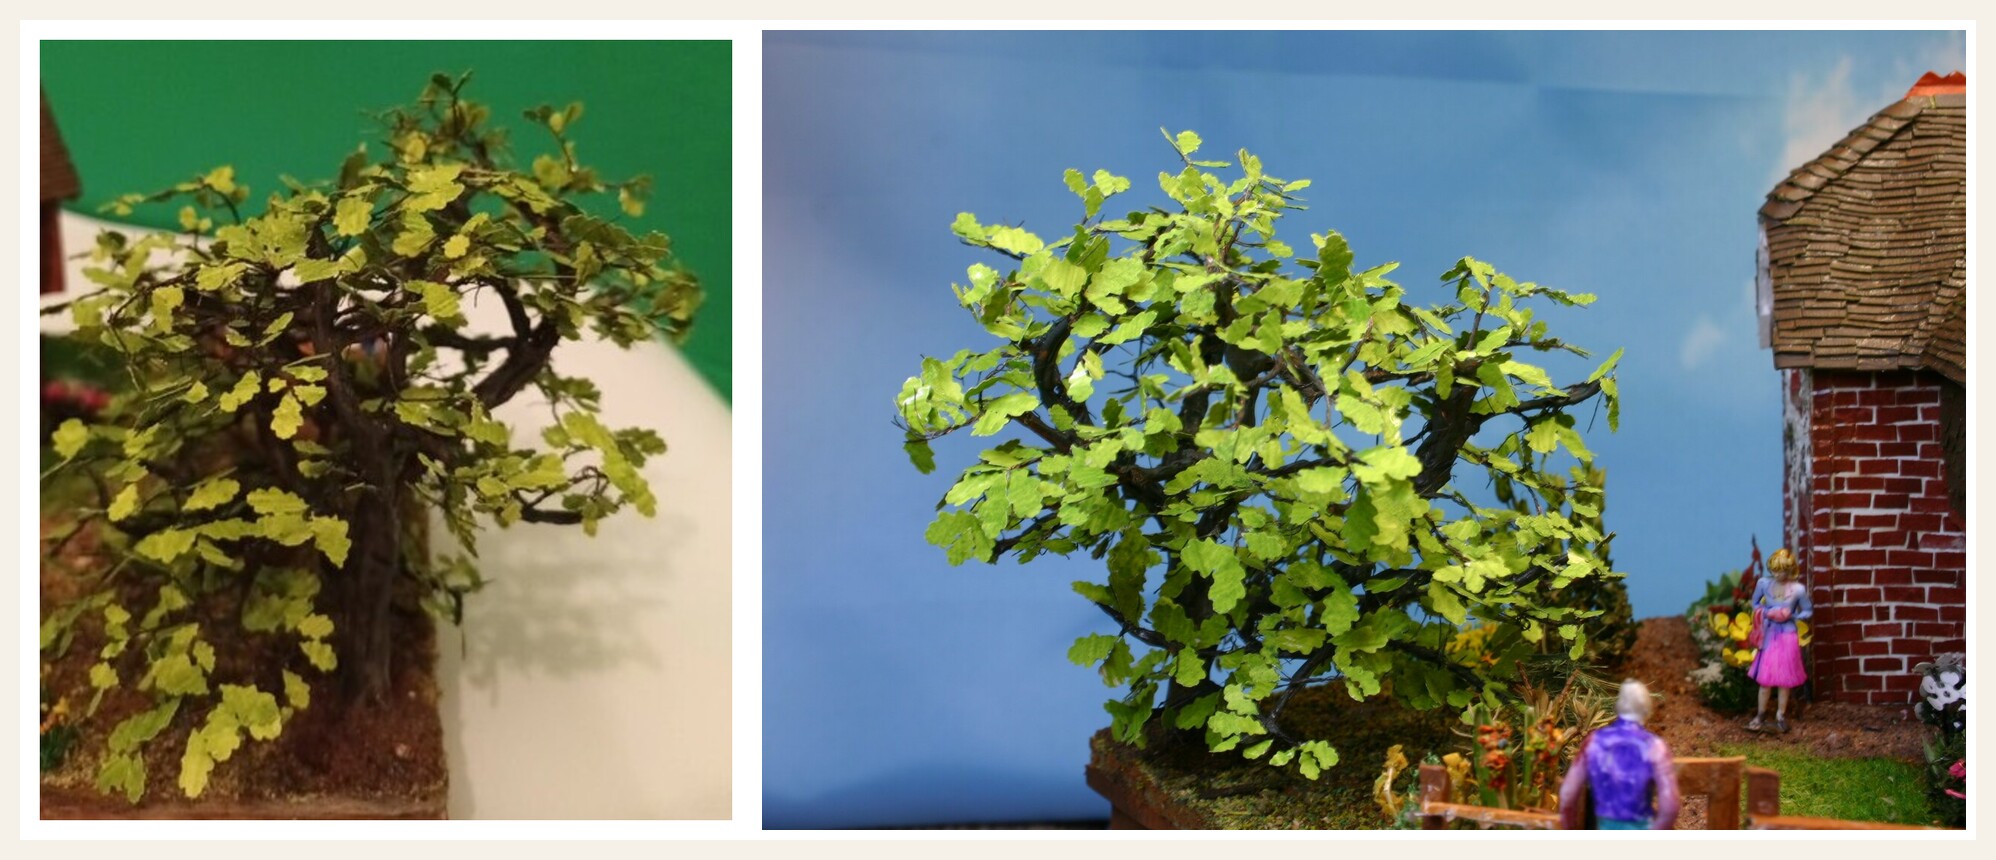
The main tree was created by twisting copper wire. The main branches were formed from thicker copper wire, further thickened and tapered with hot glue. The thinner branches were individually twisted and then fixed to the main branches using the hot glue gun. The tree was then spray painted with dark brown and pointed on a jig that will allow me to add the leaves. Paper, first painted with a light green, was cut with a leaf stencil, ultimately about 3 sheets of A4 paper was used. For about two weeks the leaves were painstakingly glued to the tips of the wire, working from the bottom upwards.
The plants and flowers were then finished off and installed around the house. Each flower is made using different techniques.
Following is a celebration of the plants around the house:
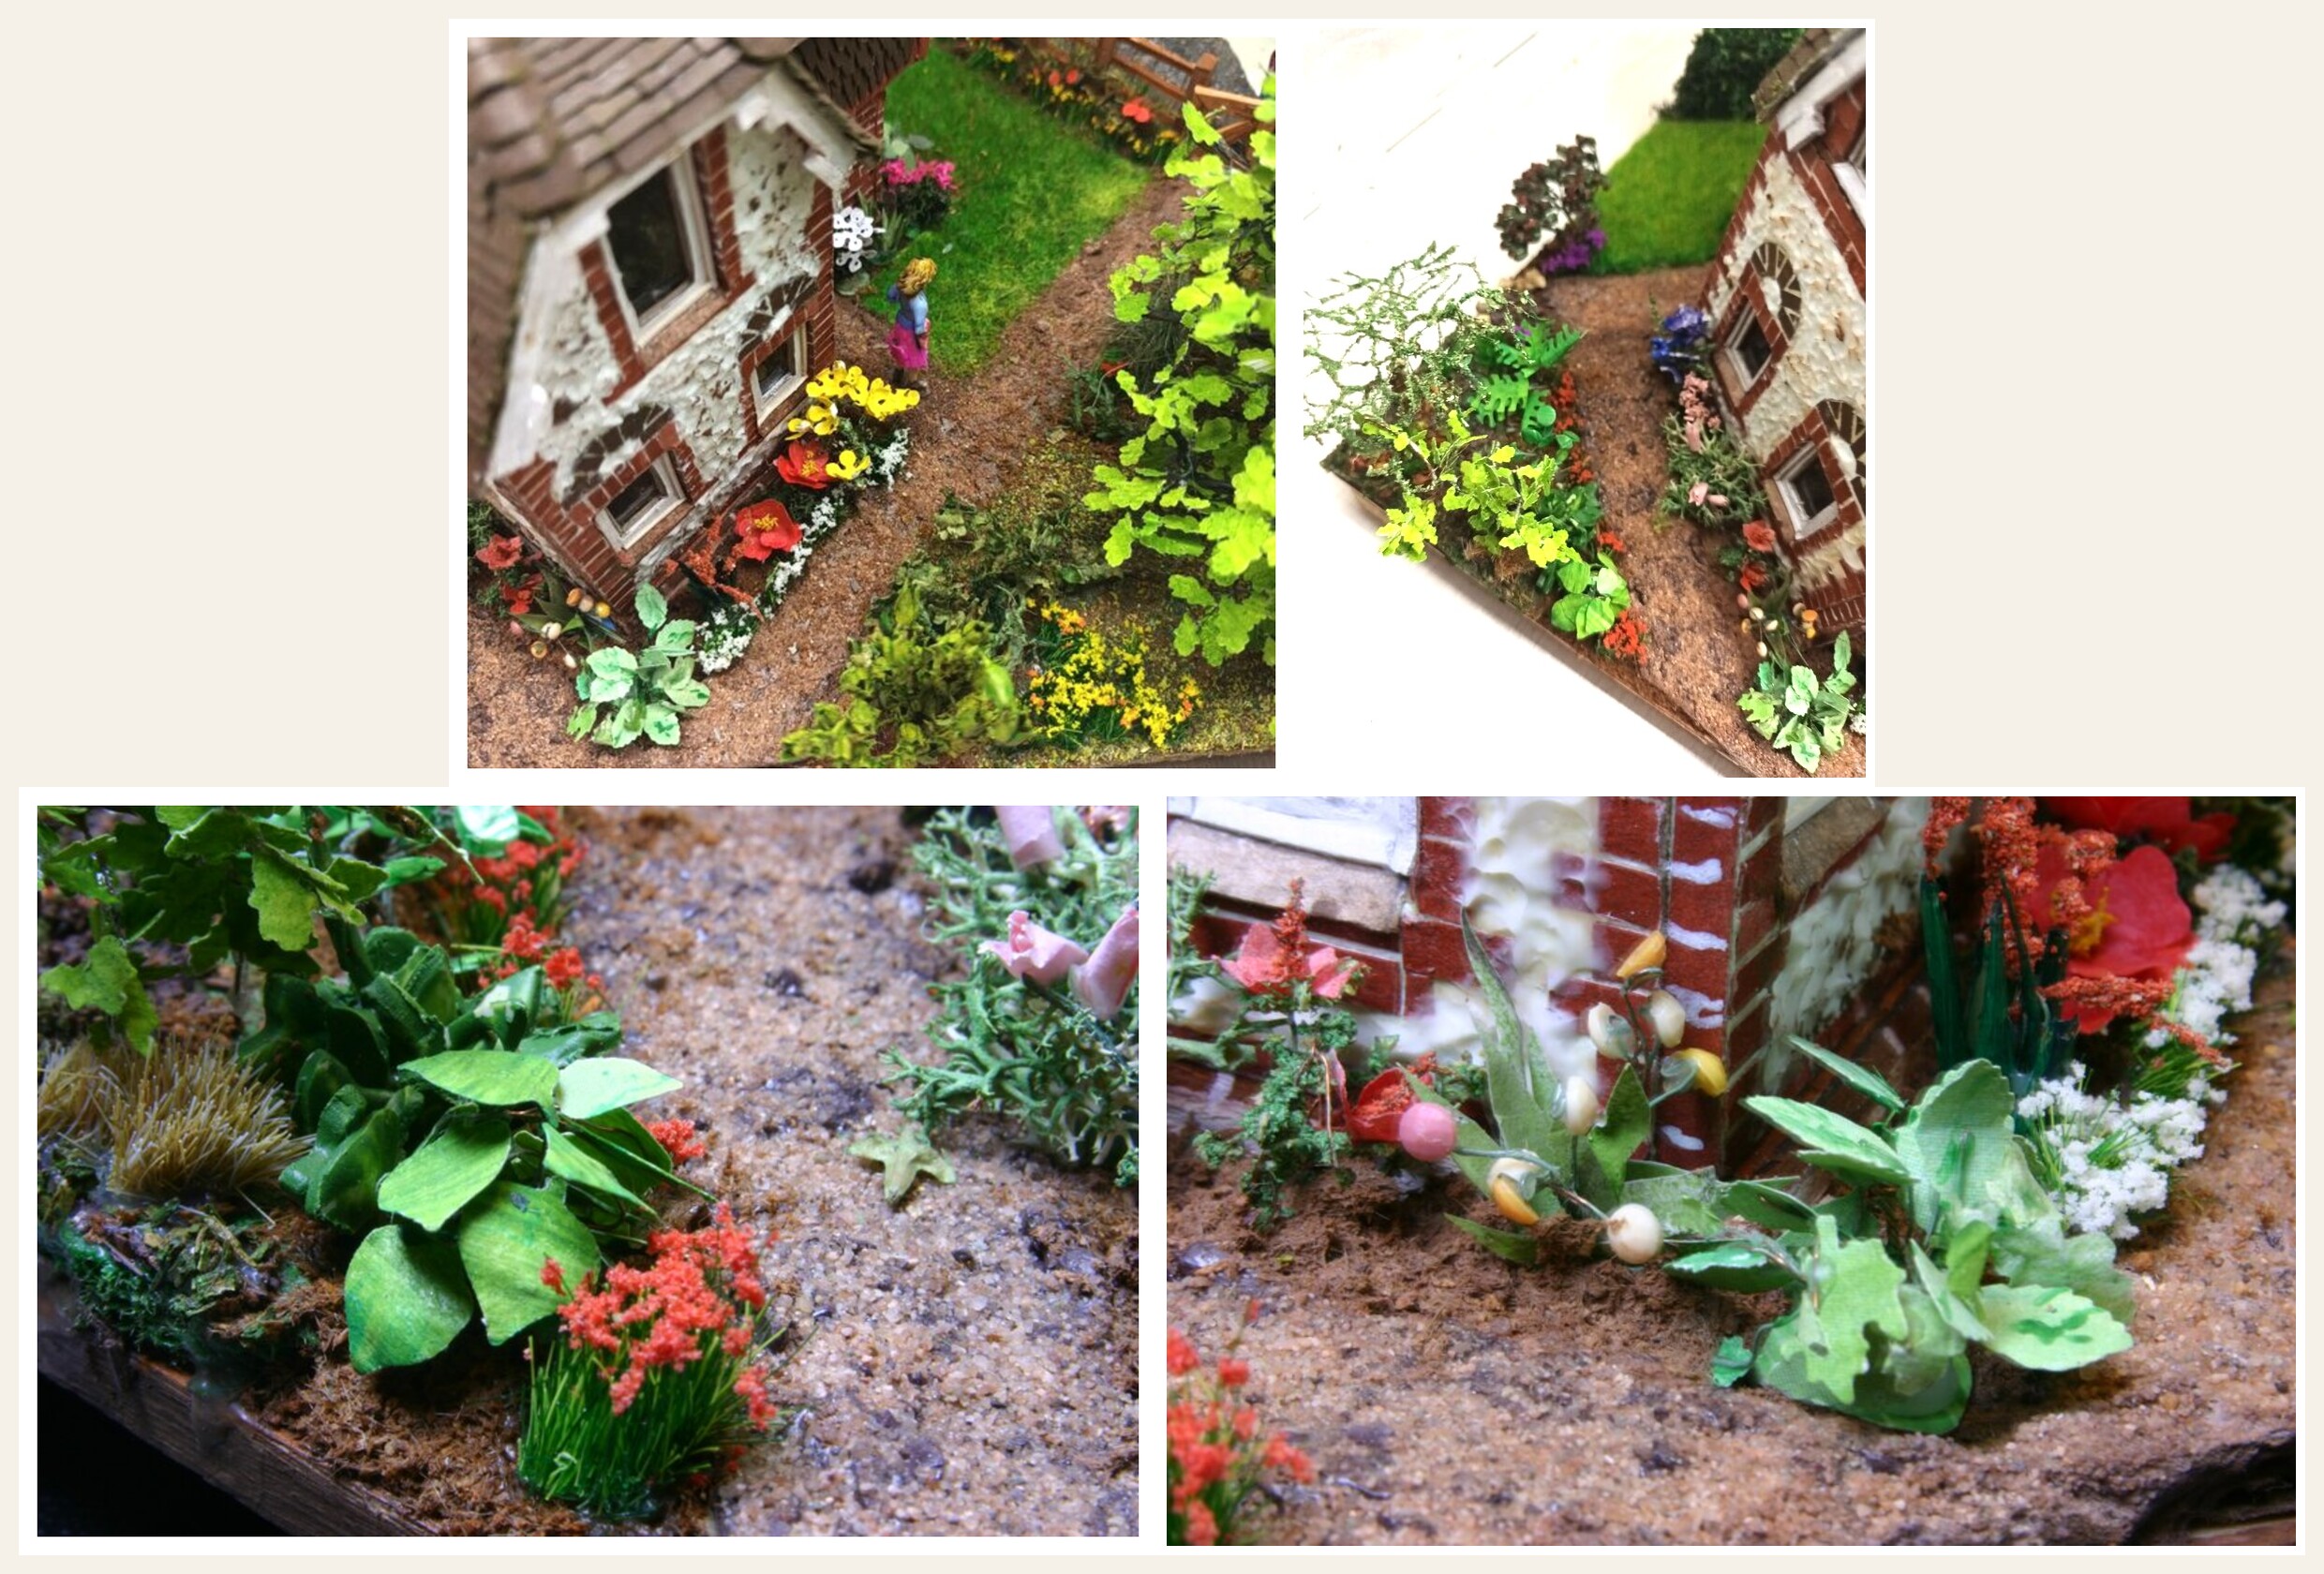
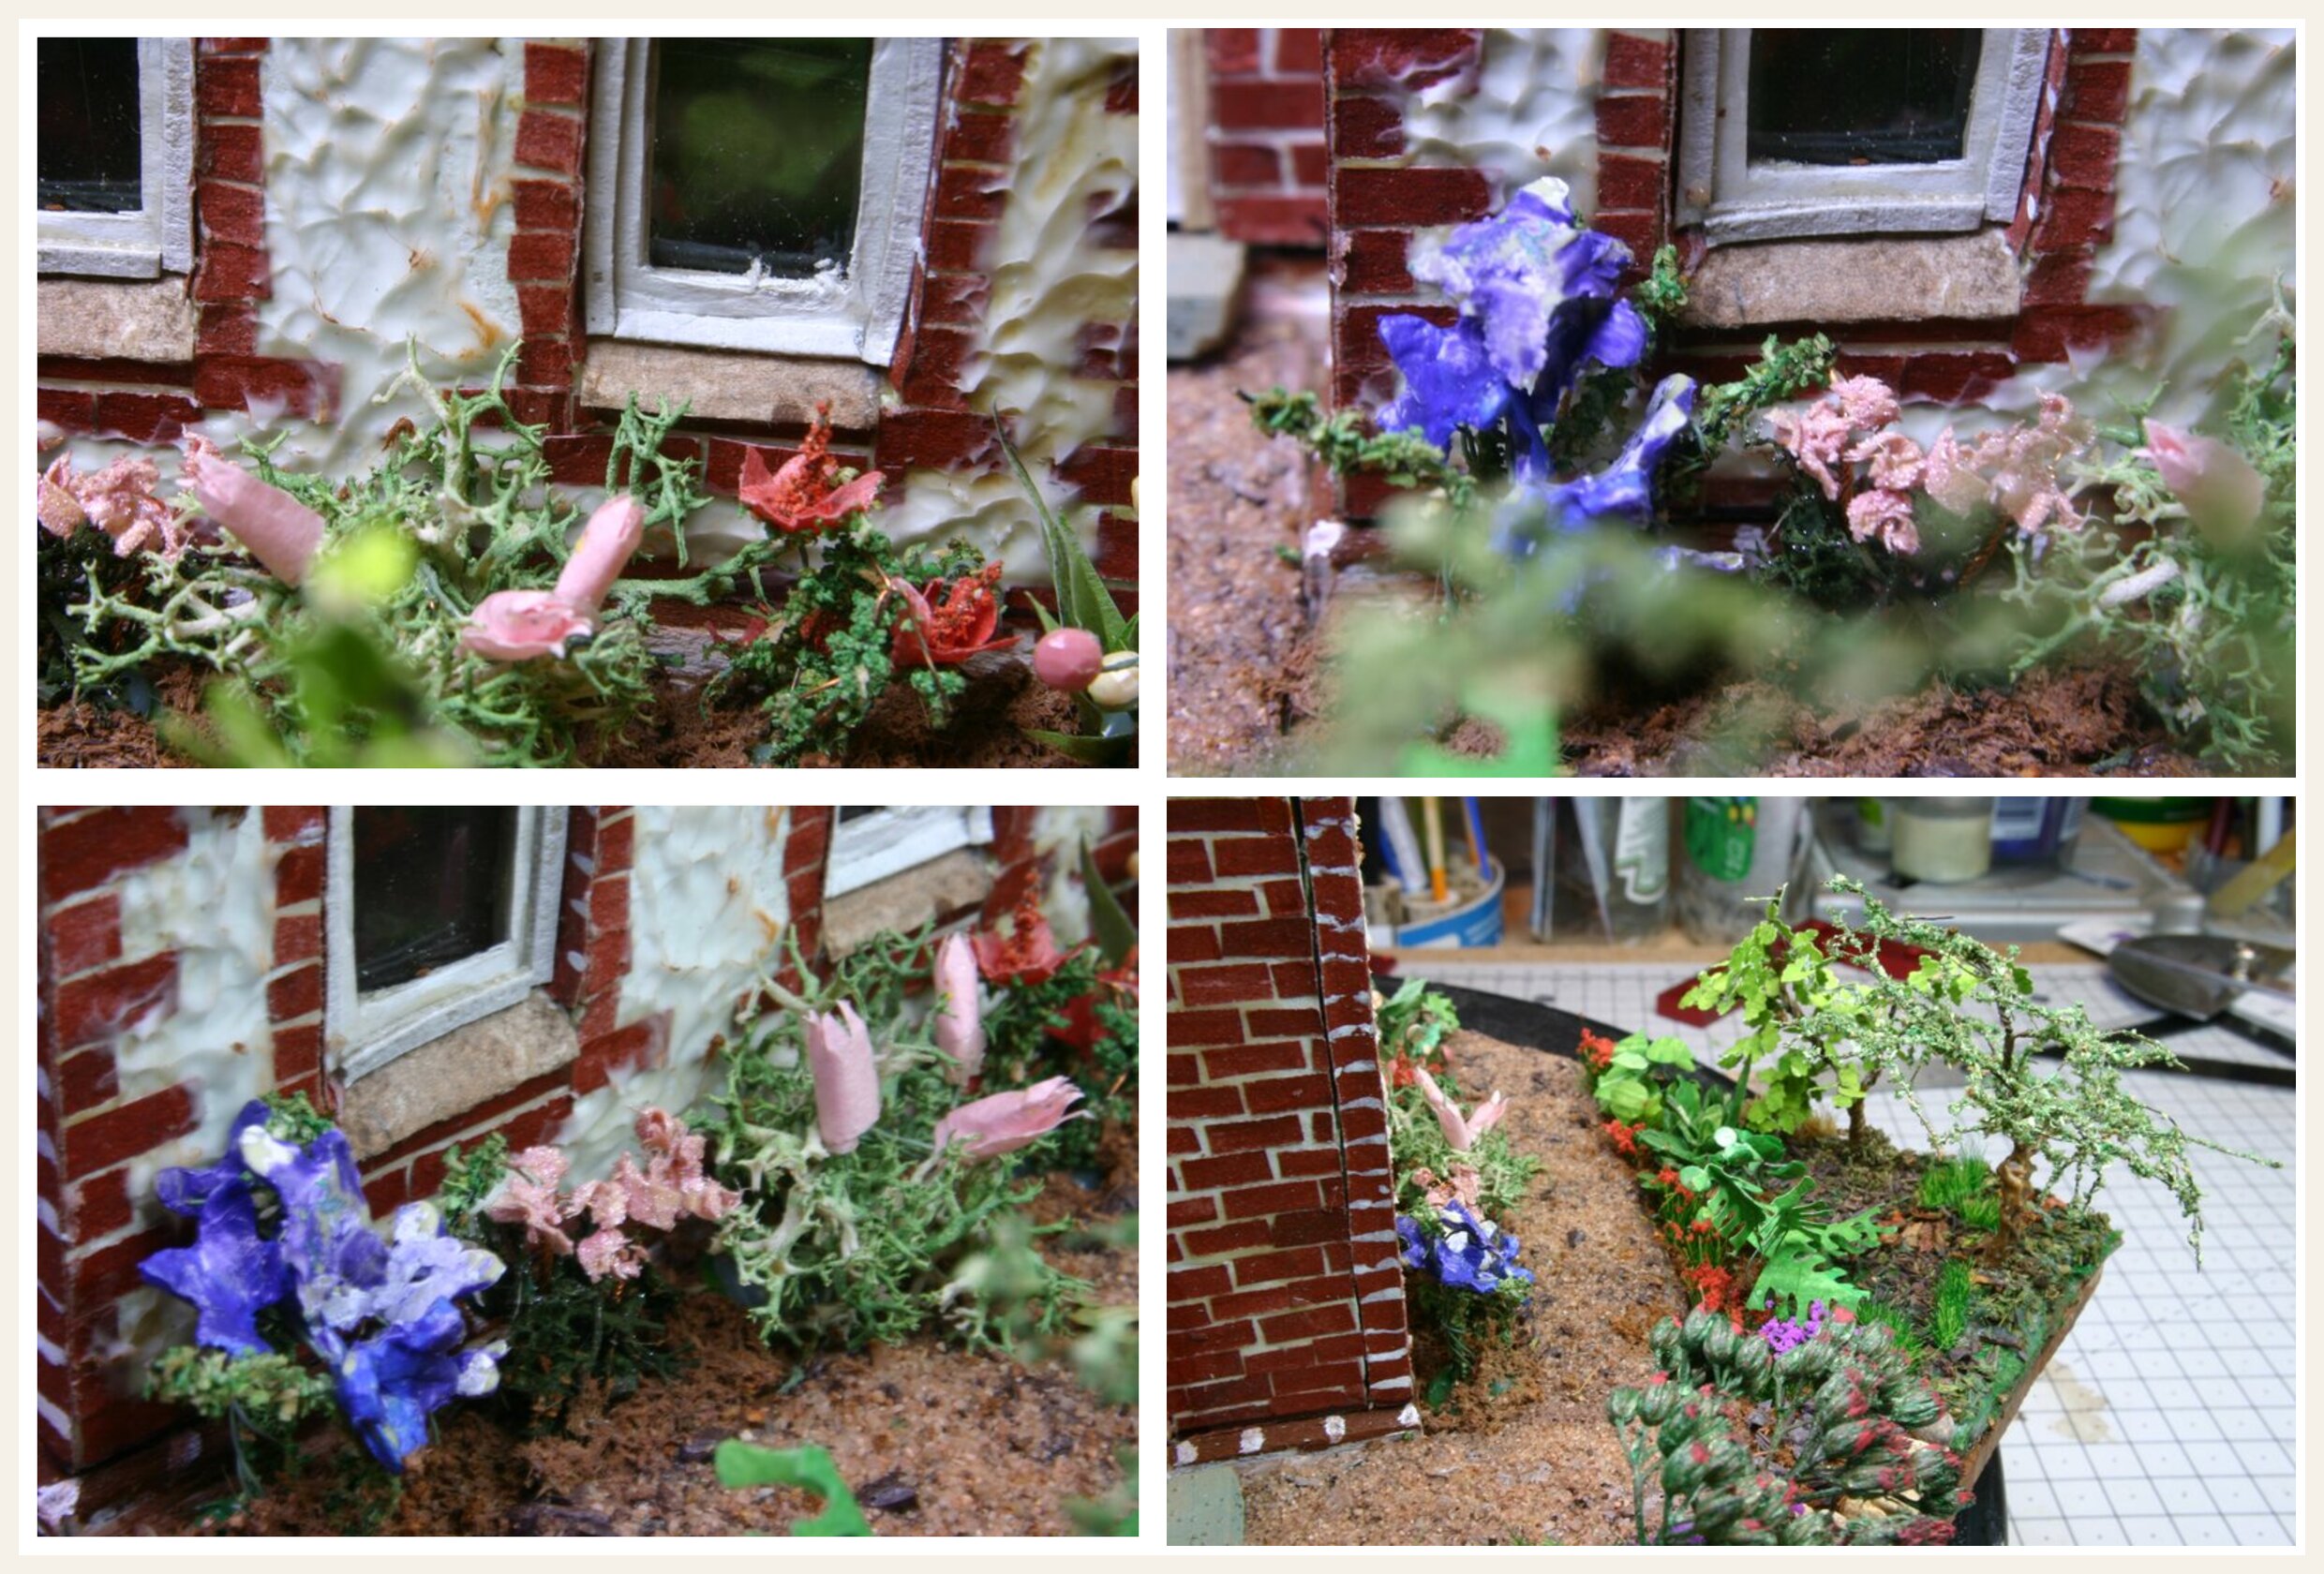
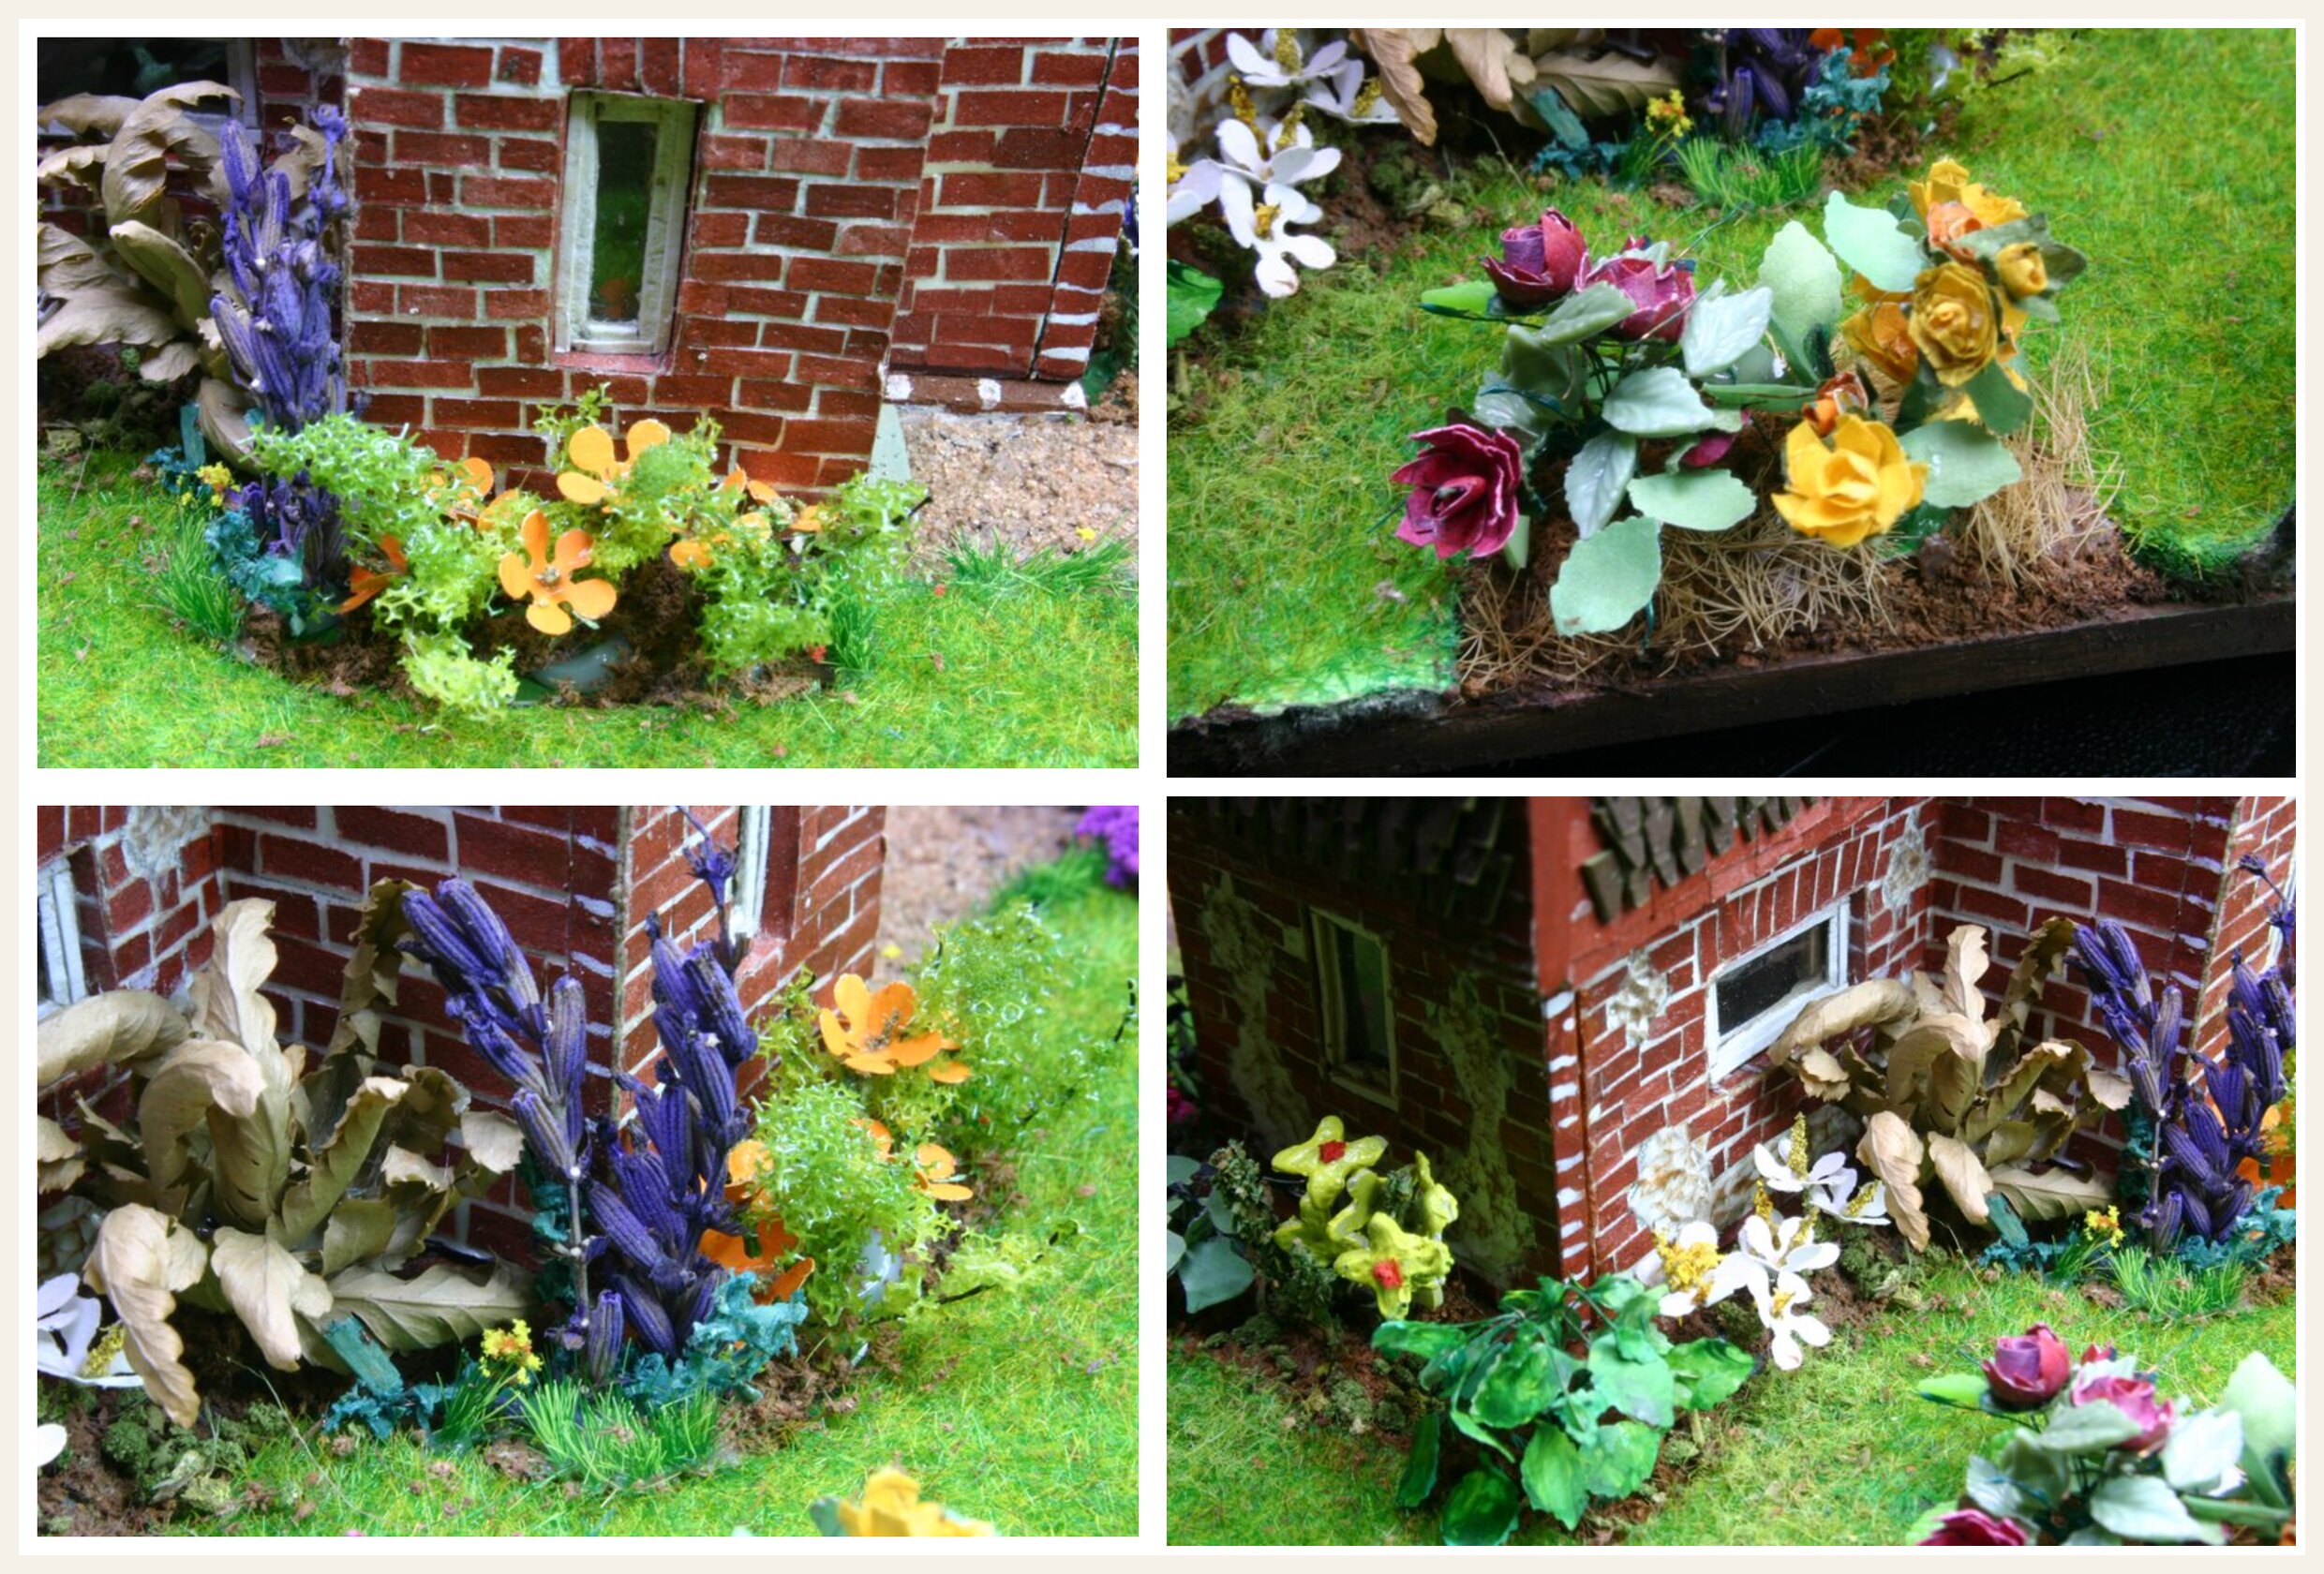
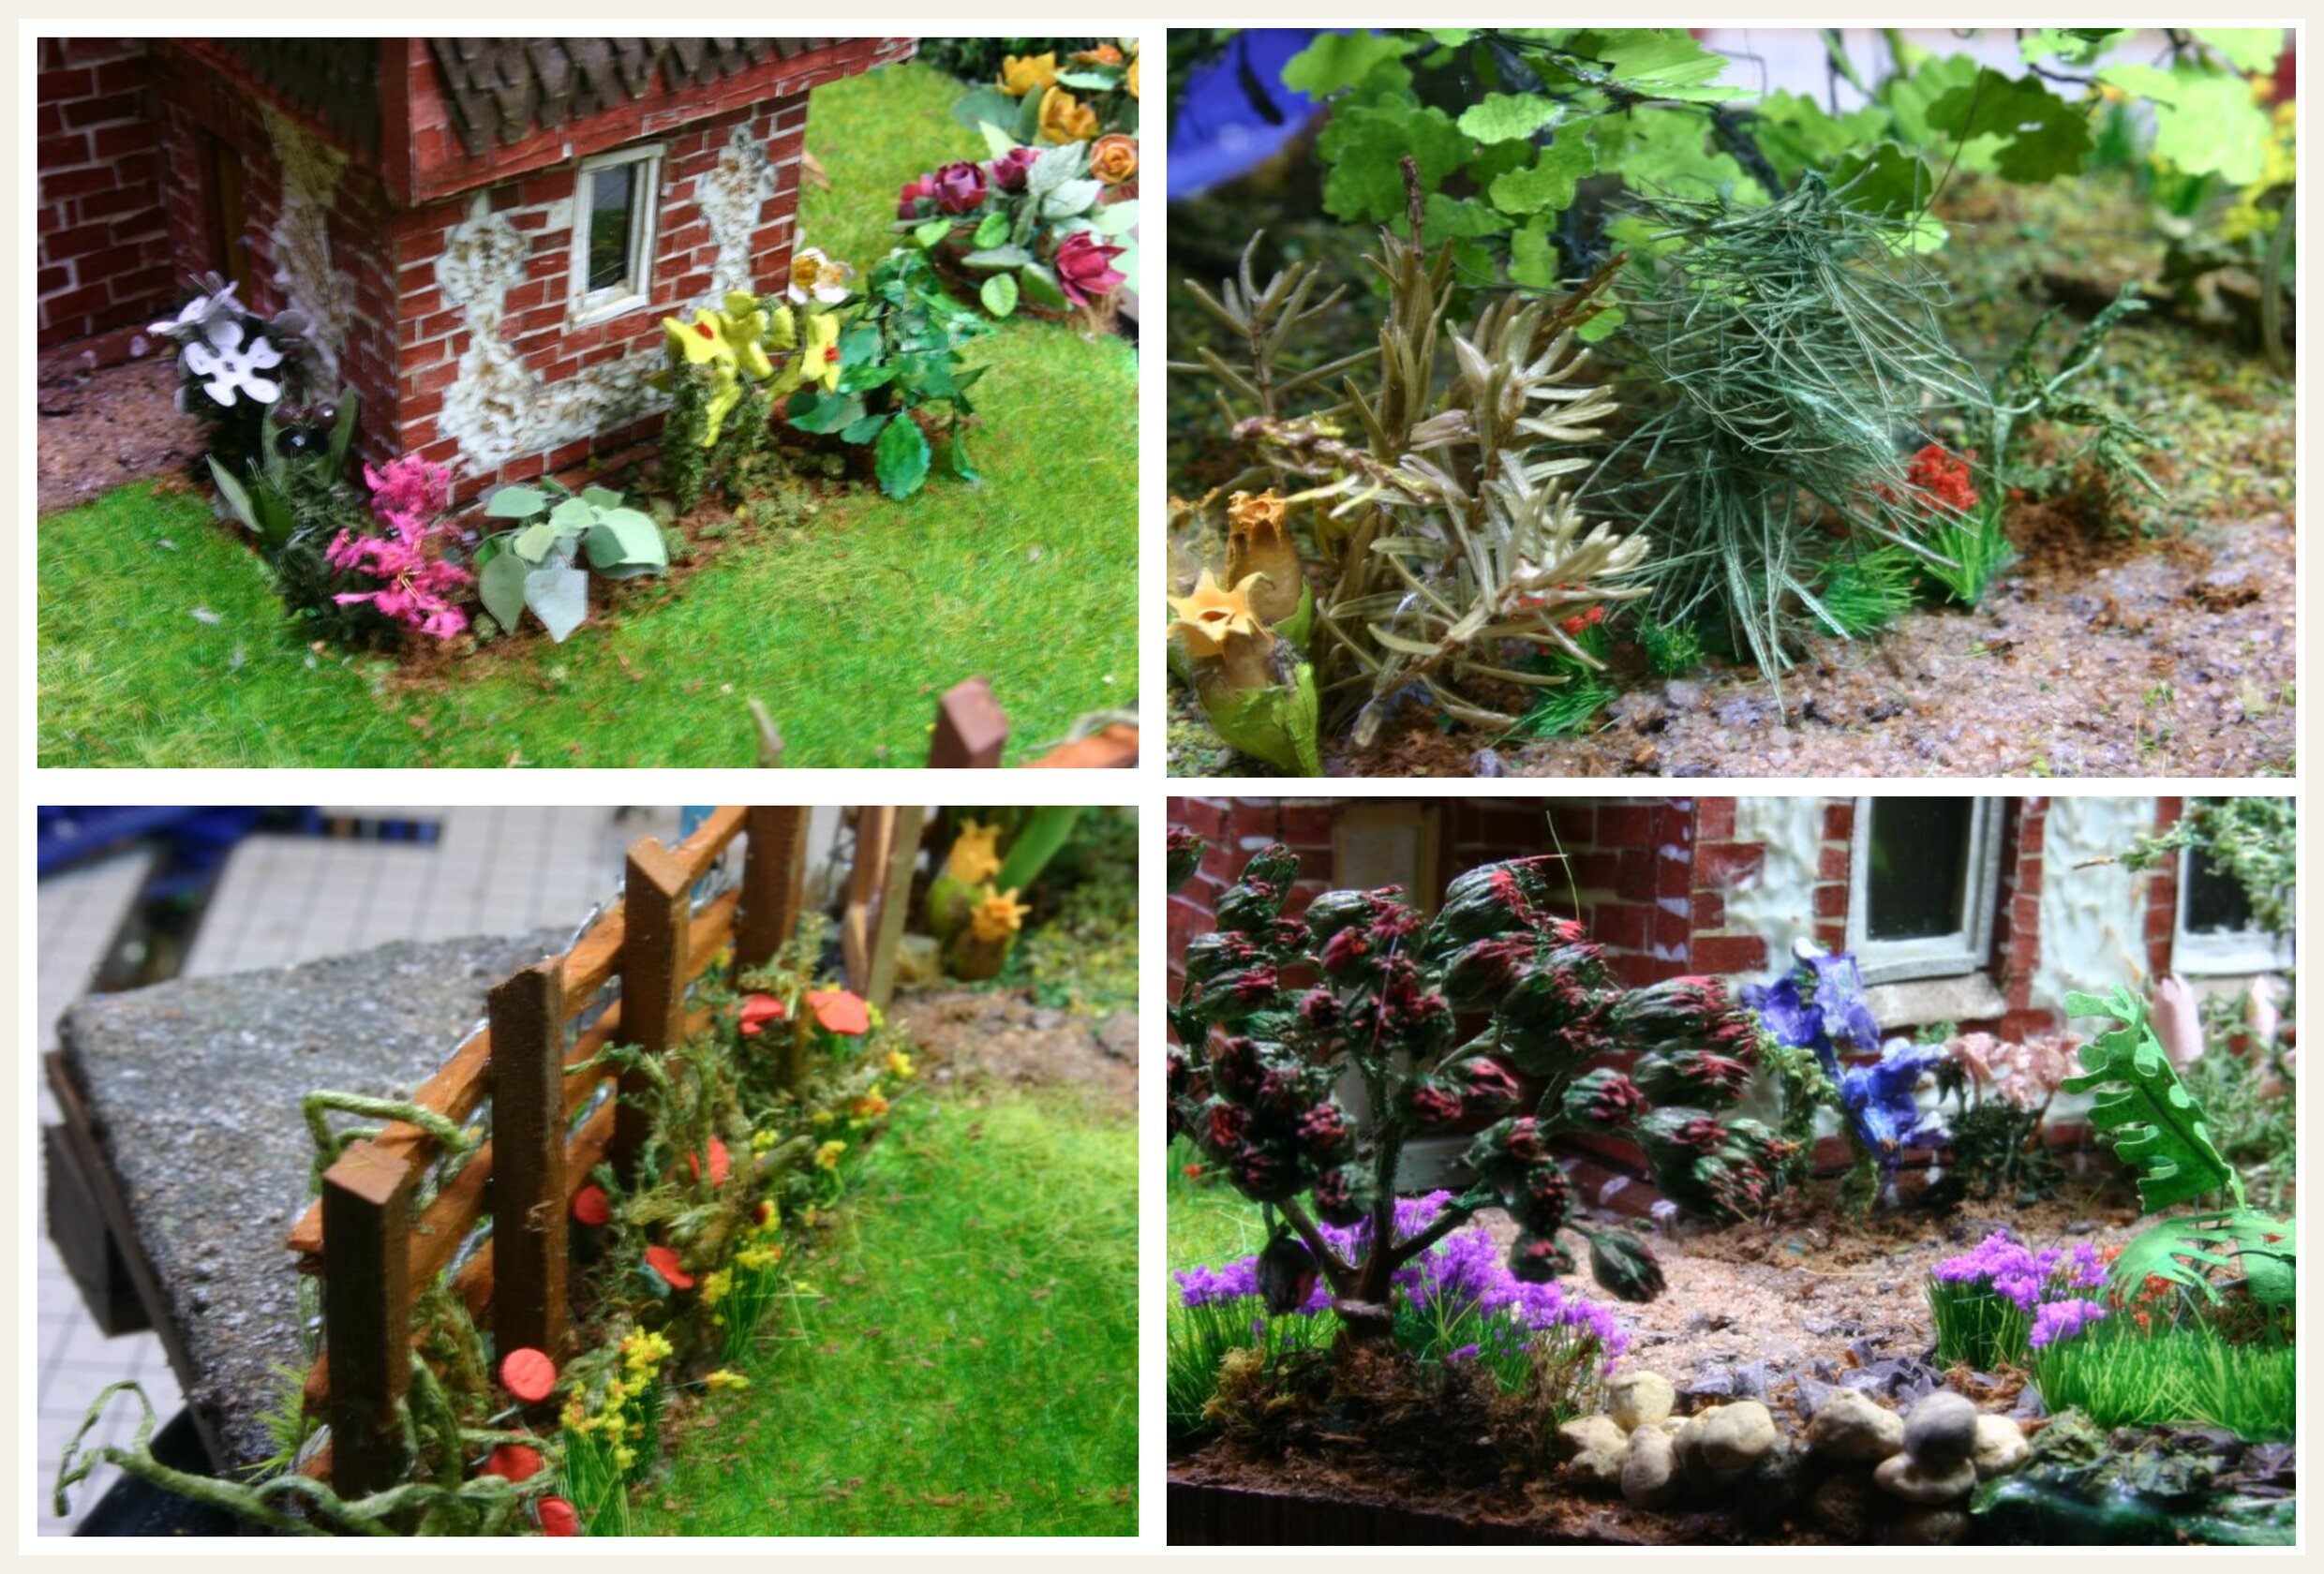
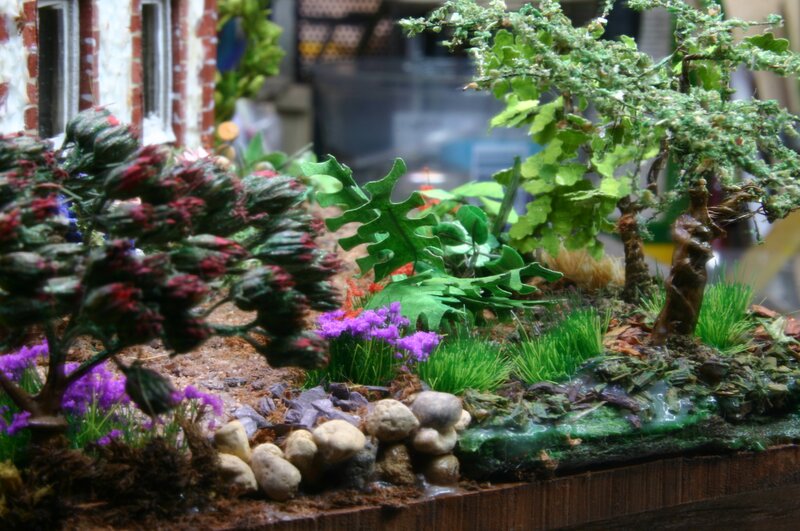
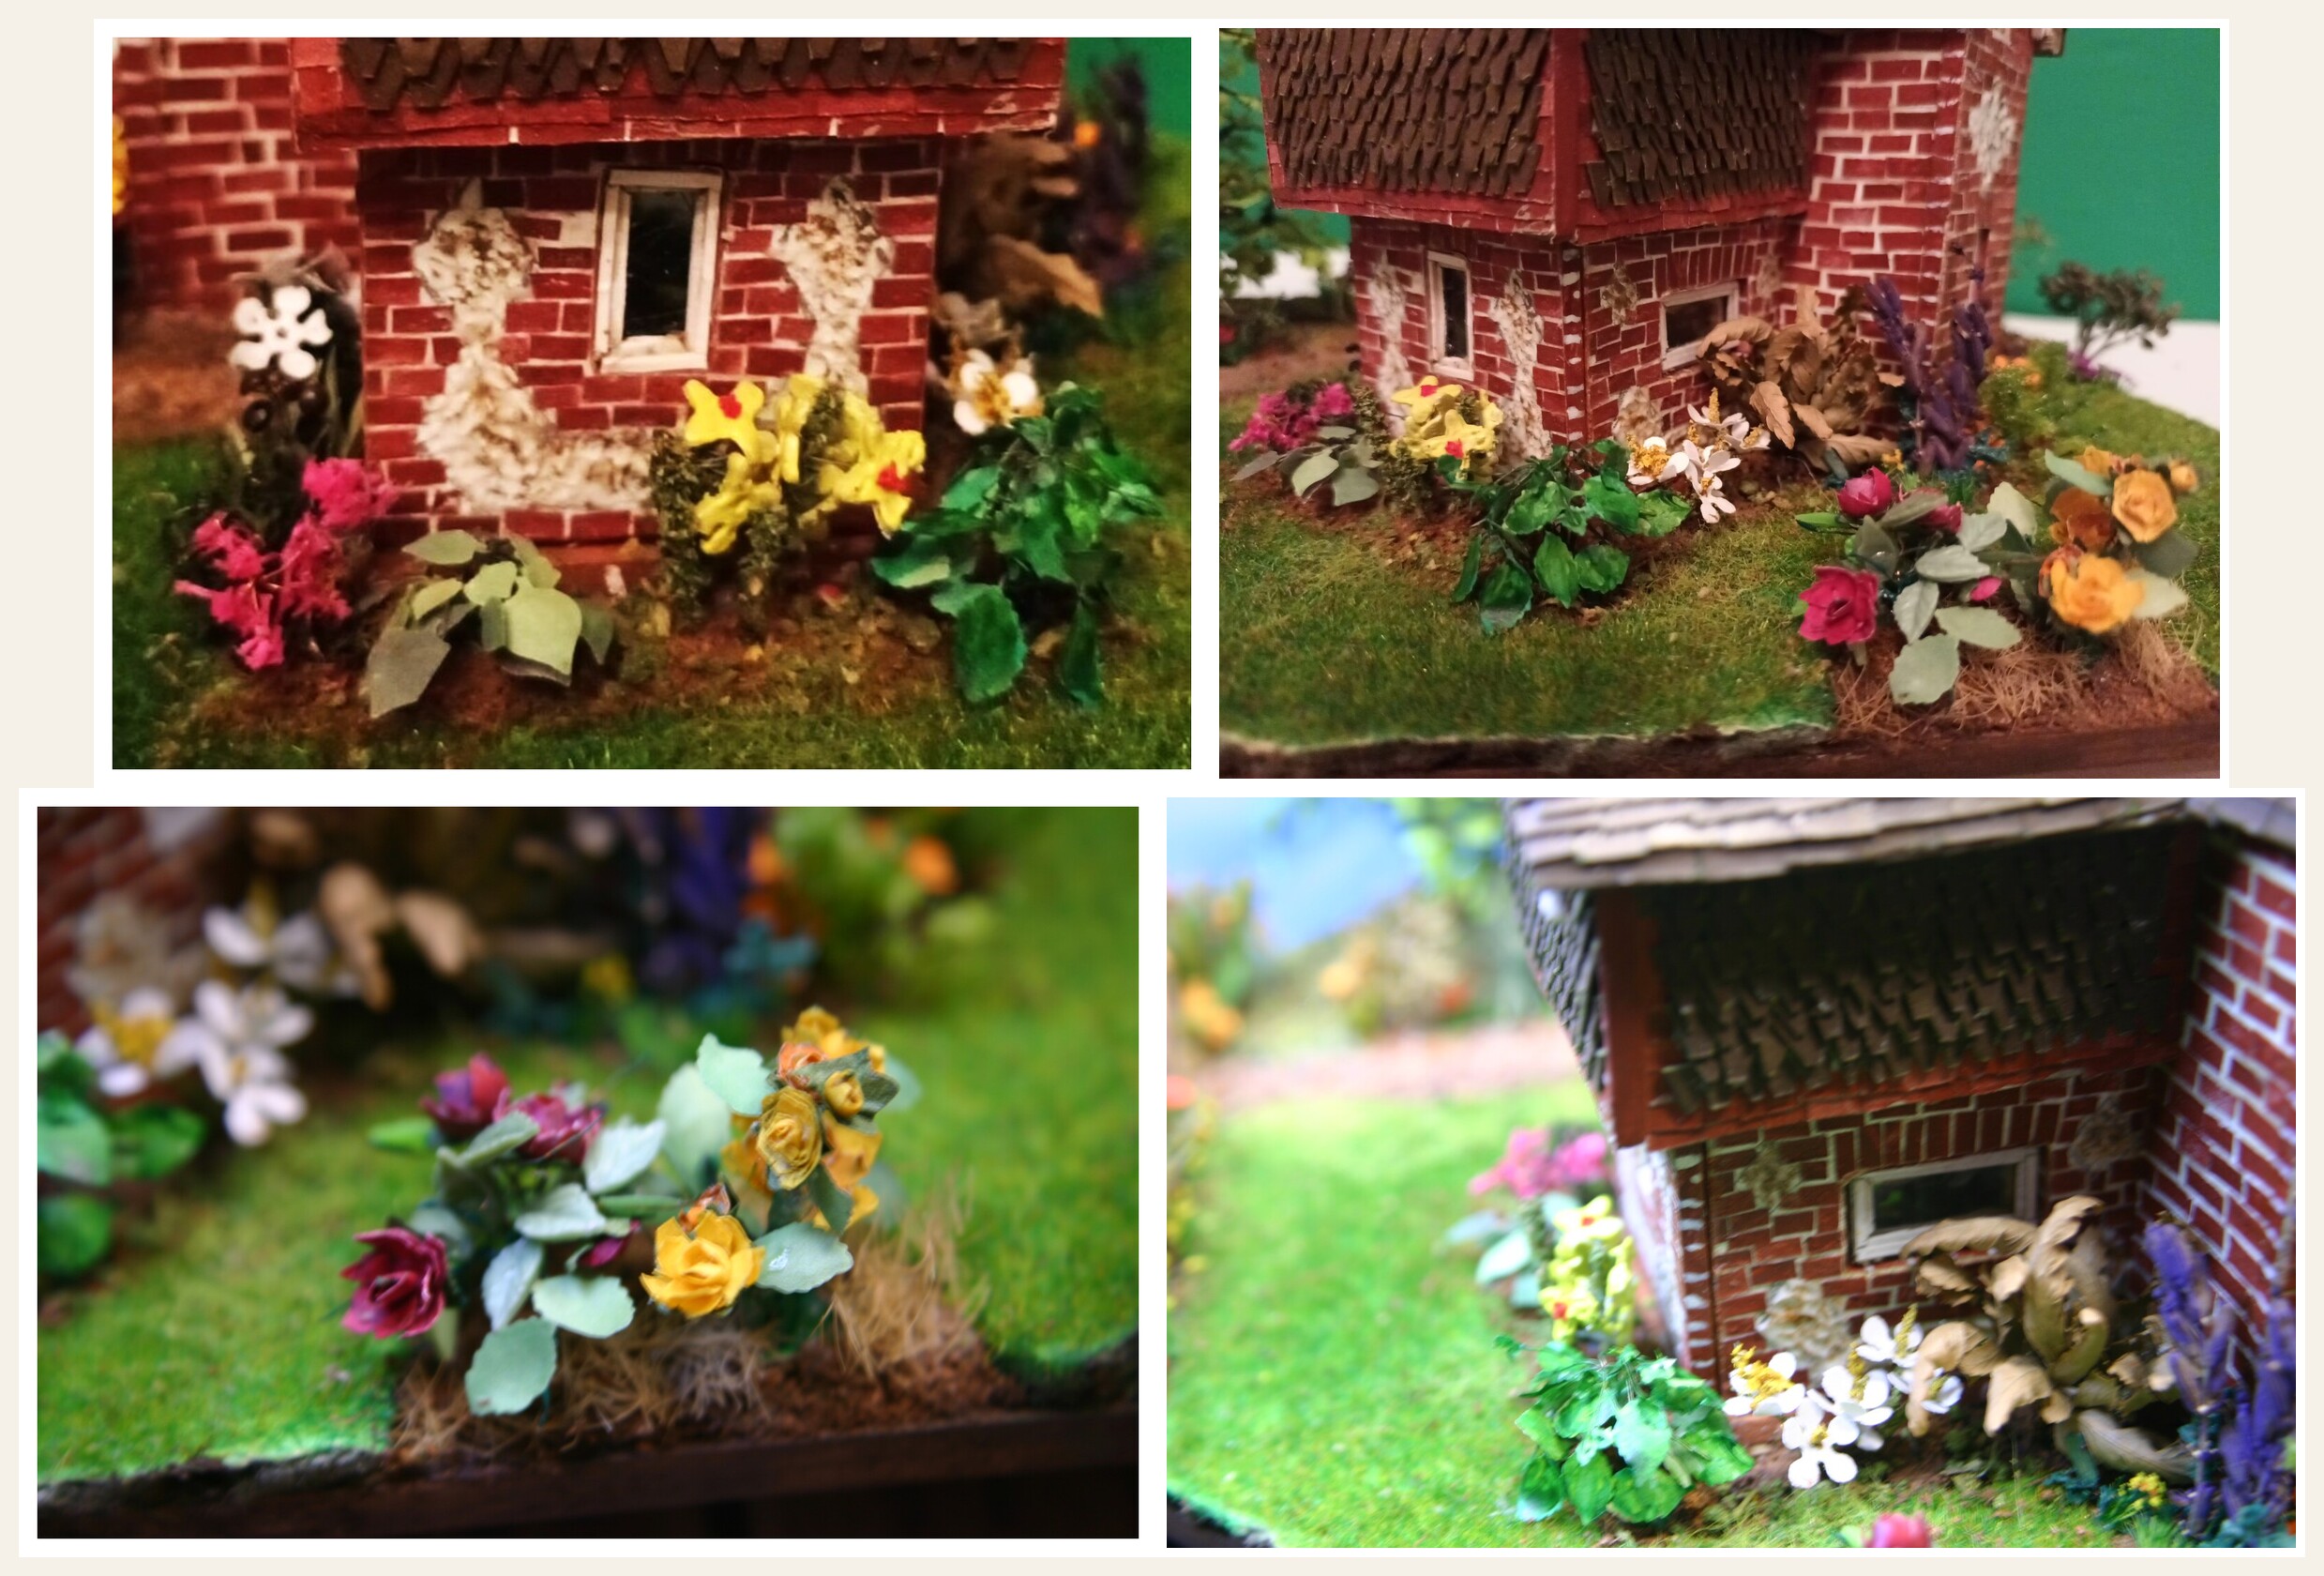
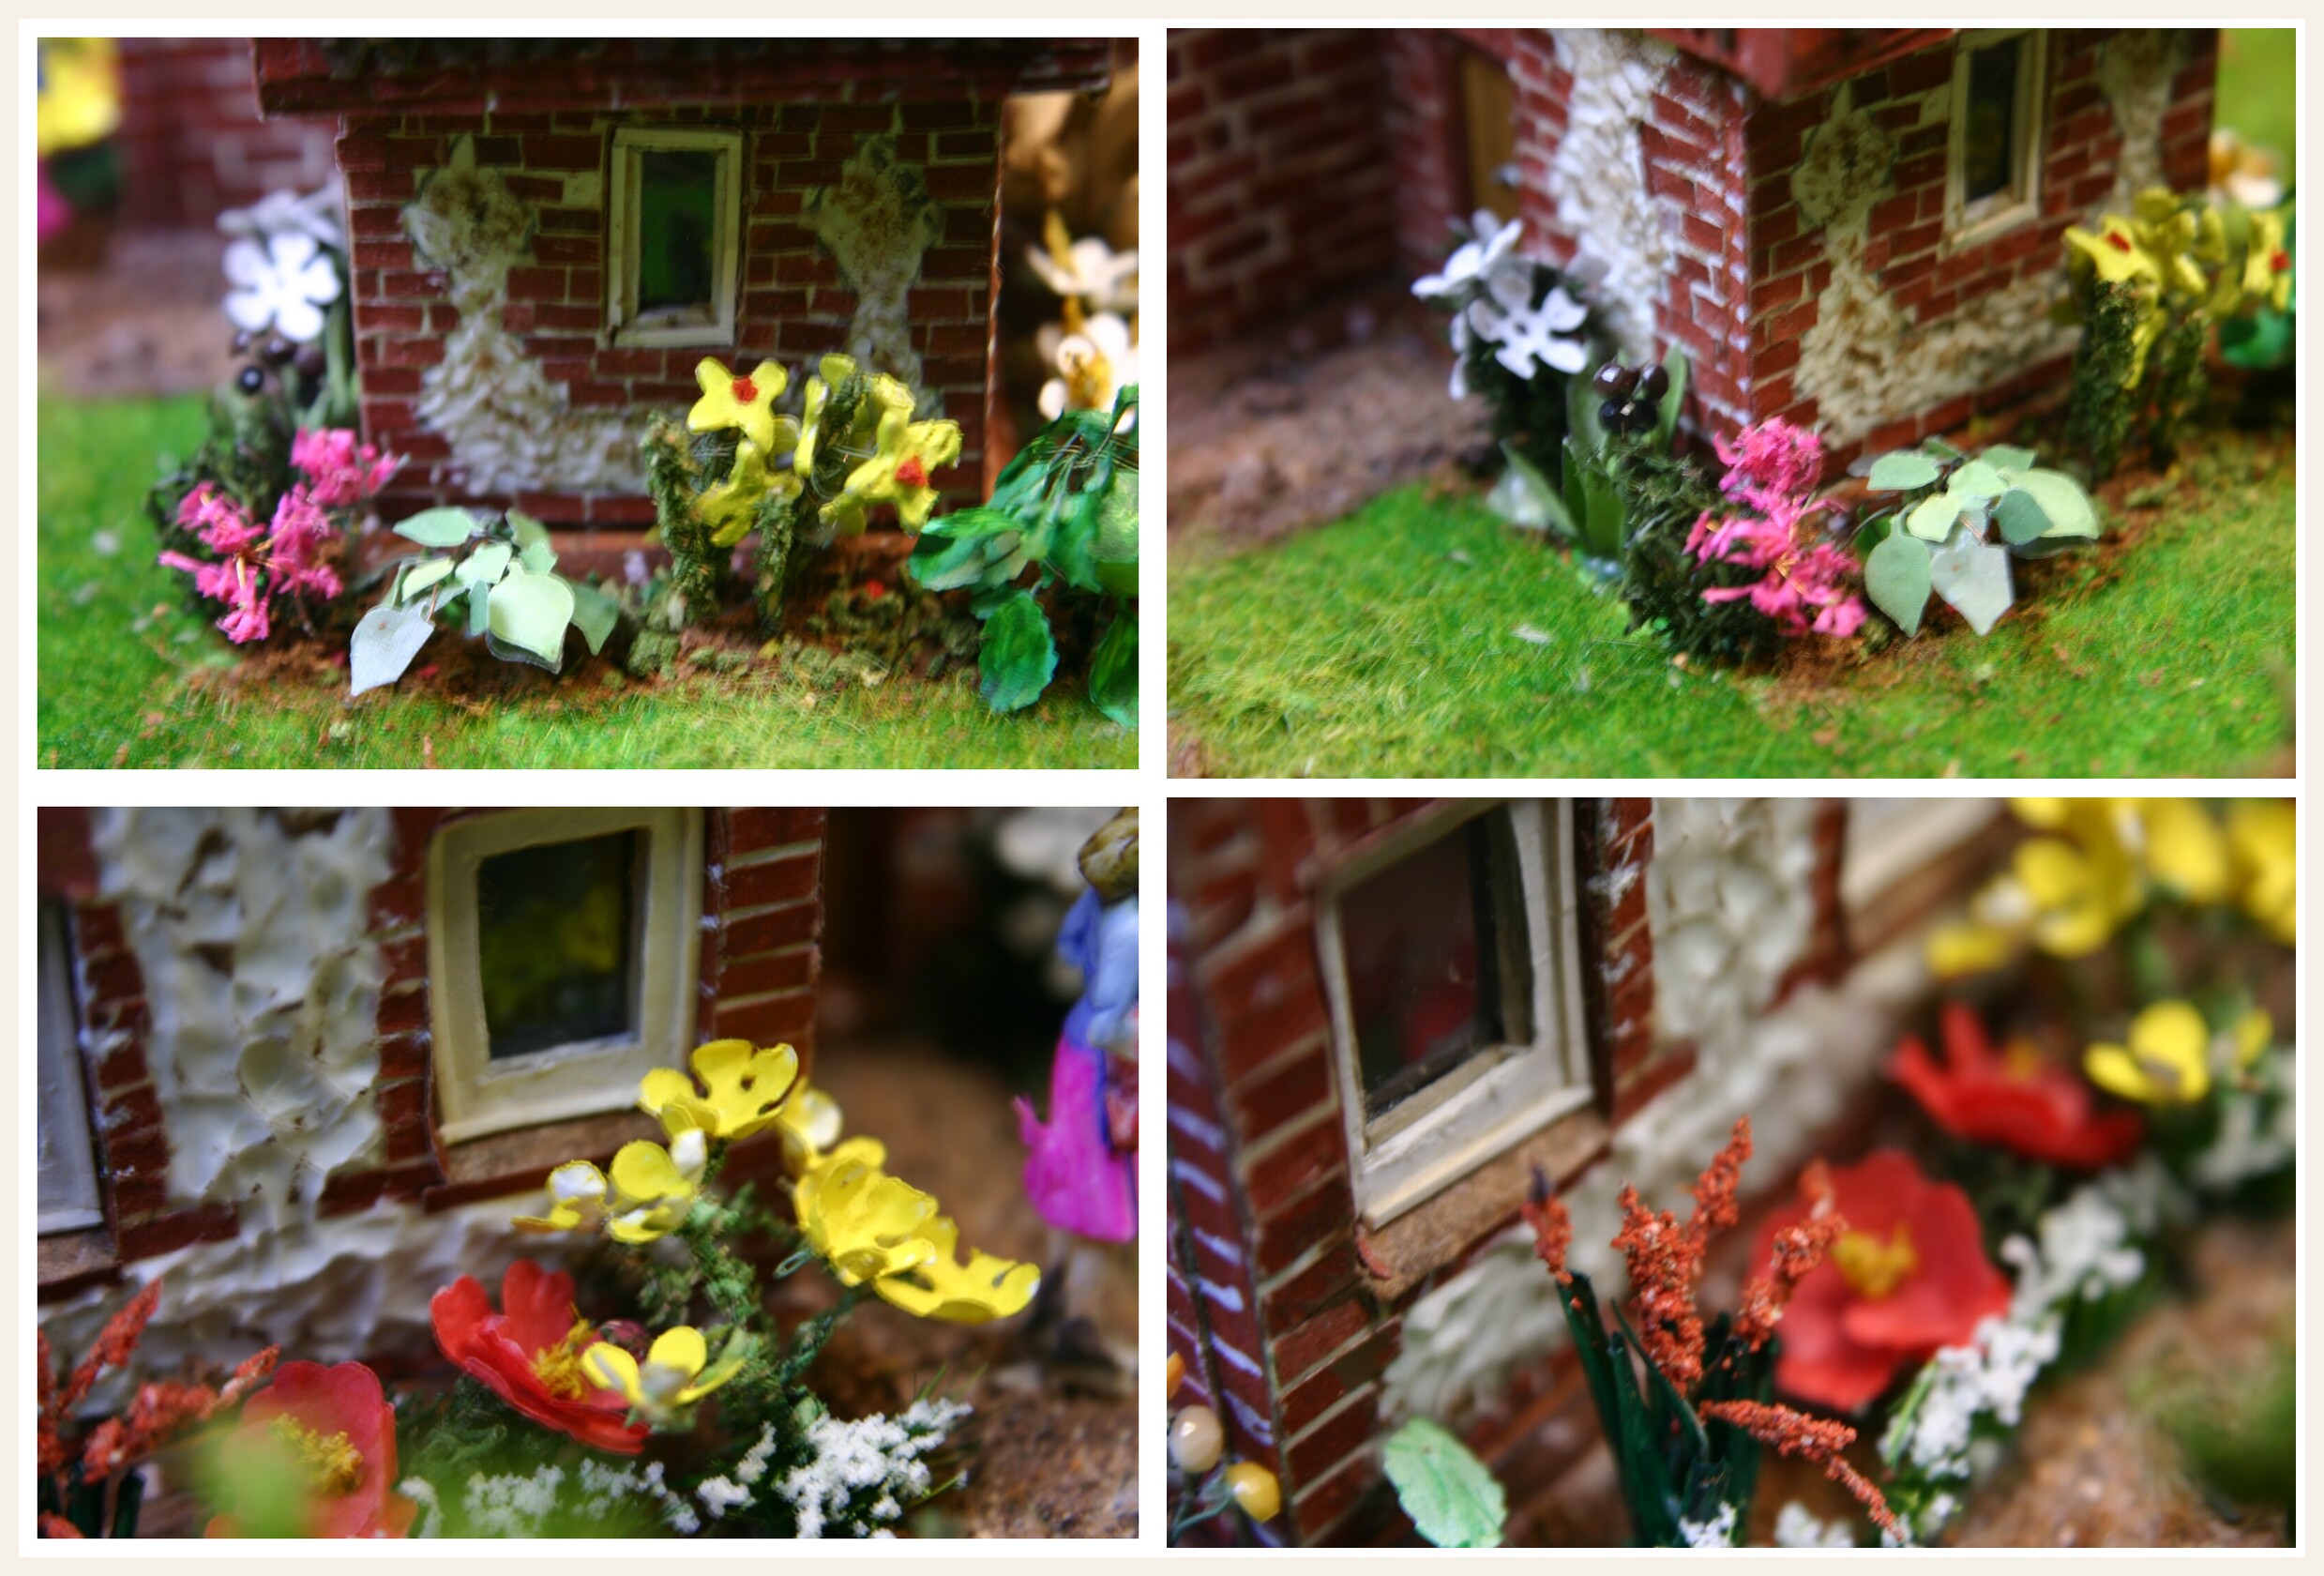
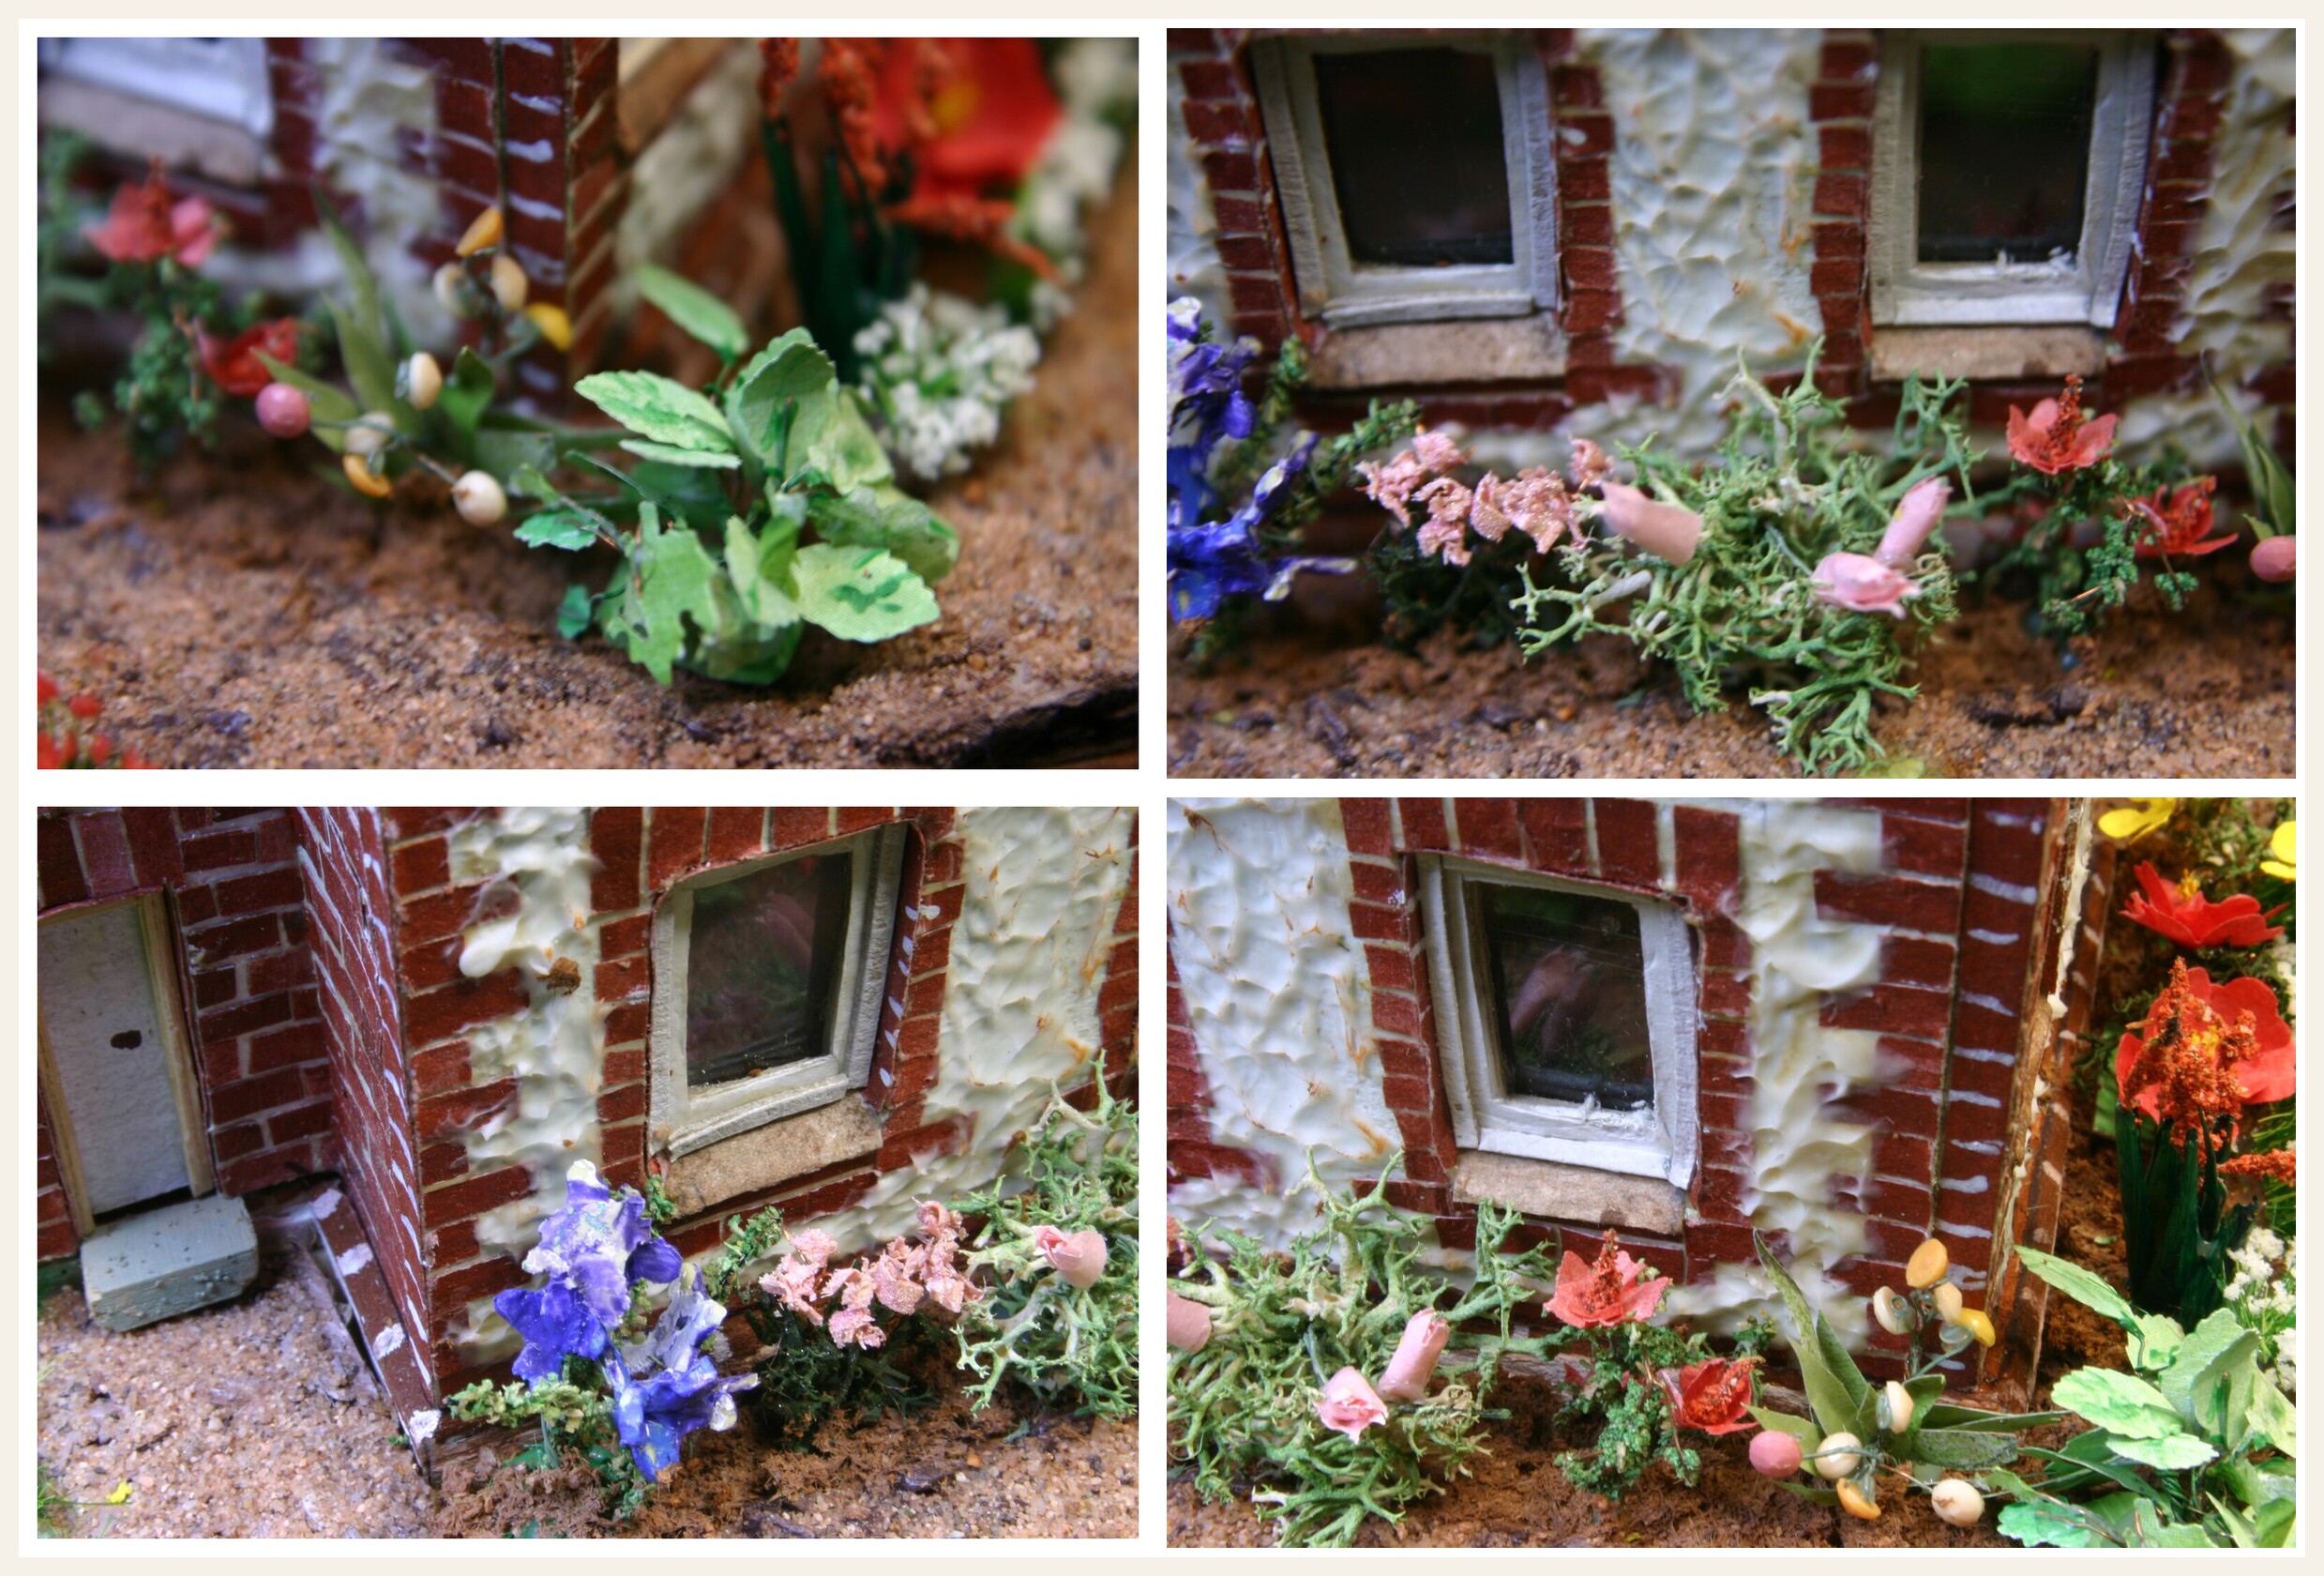
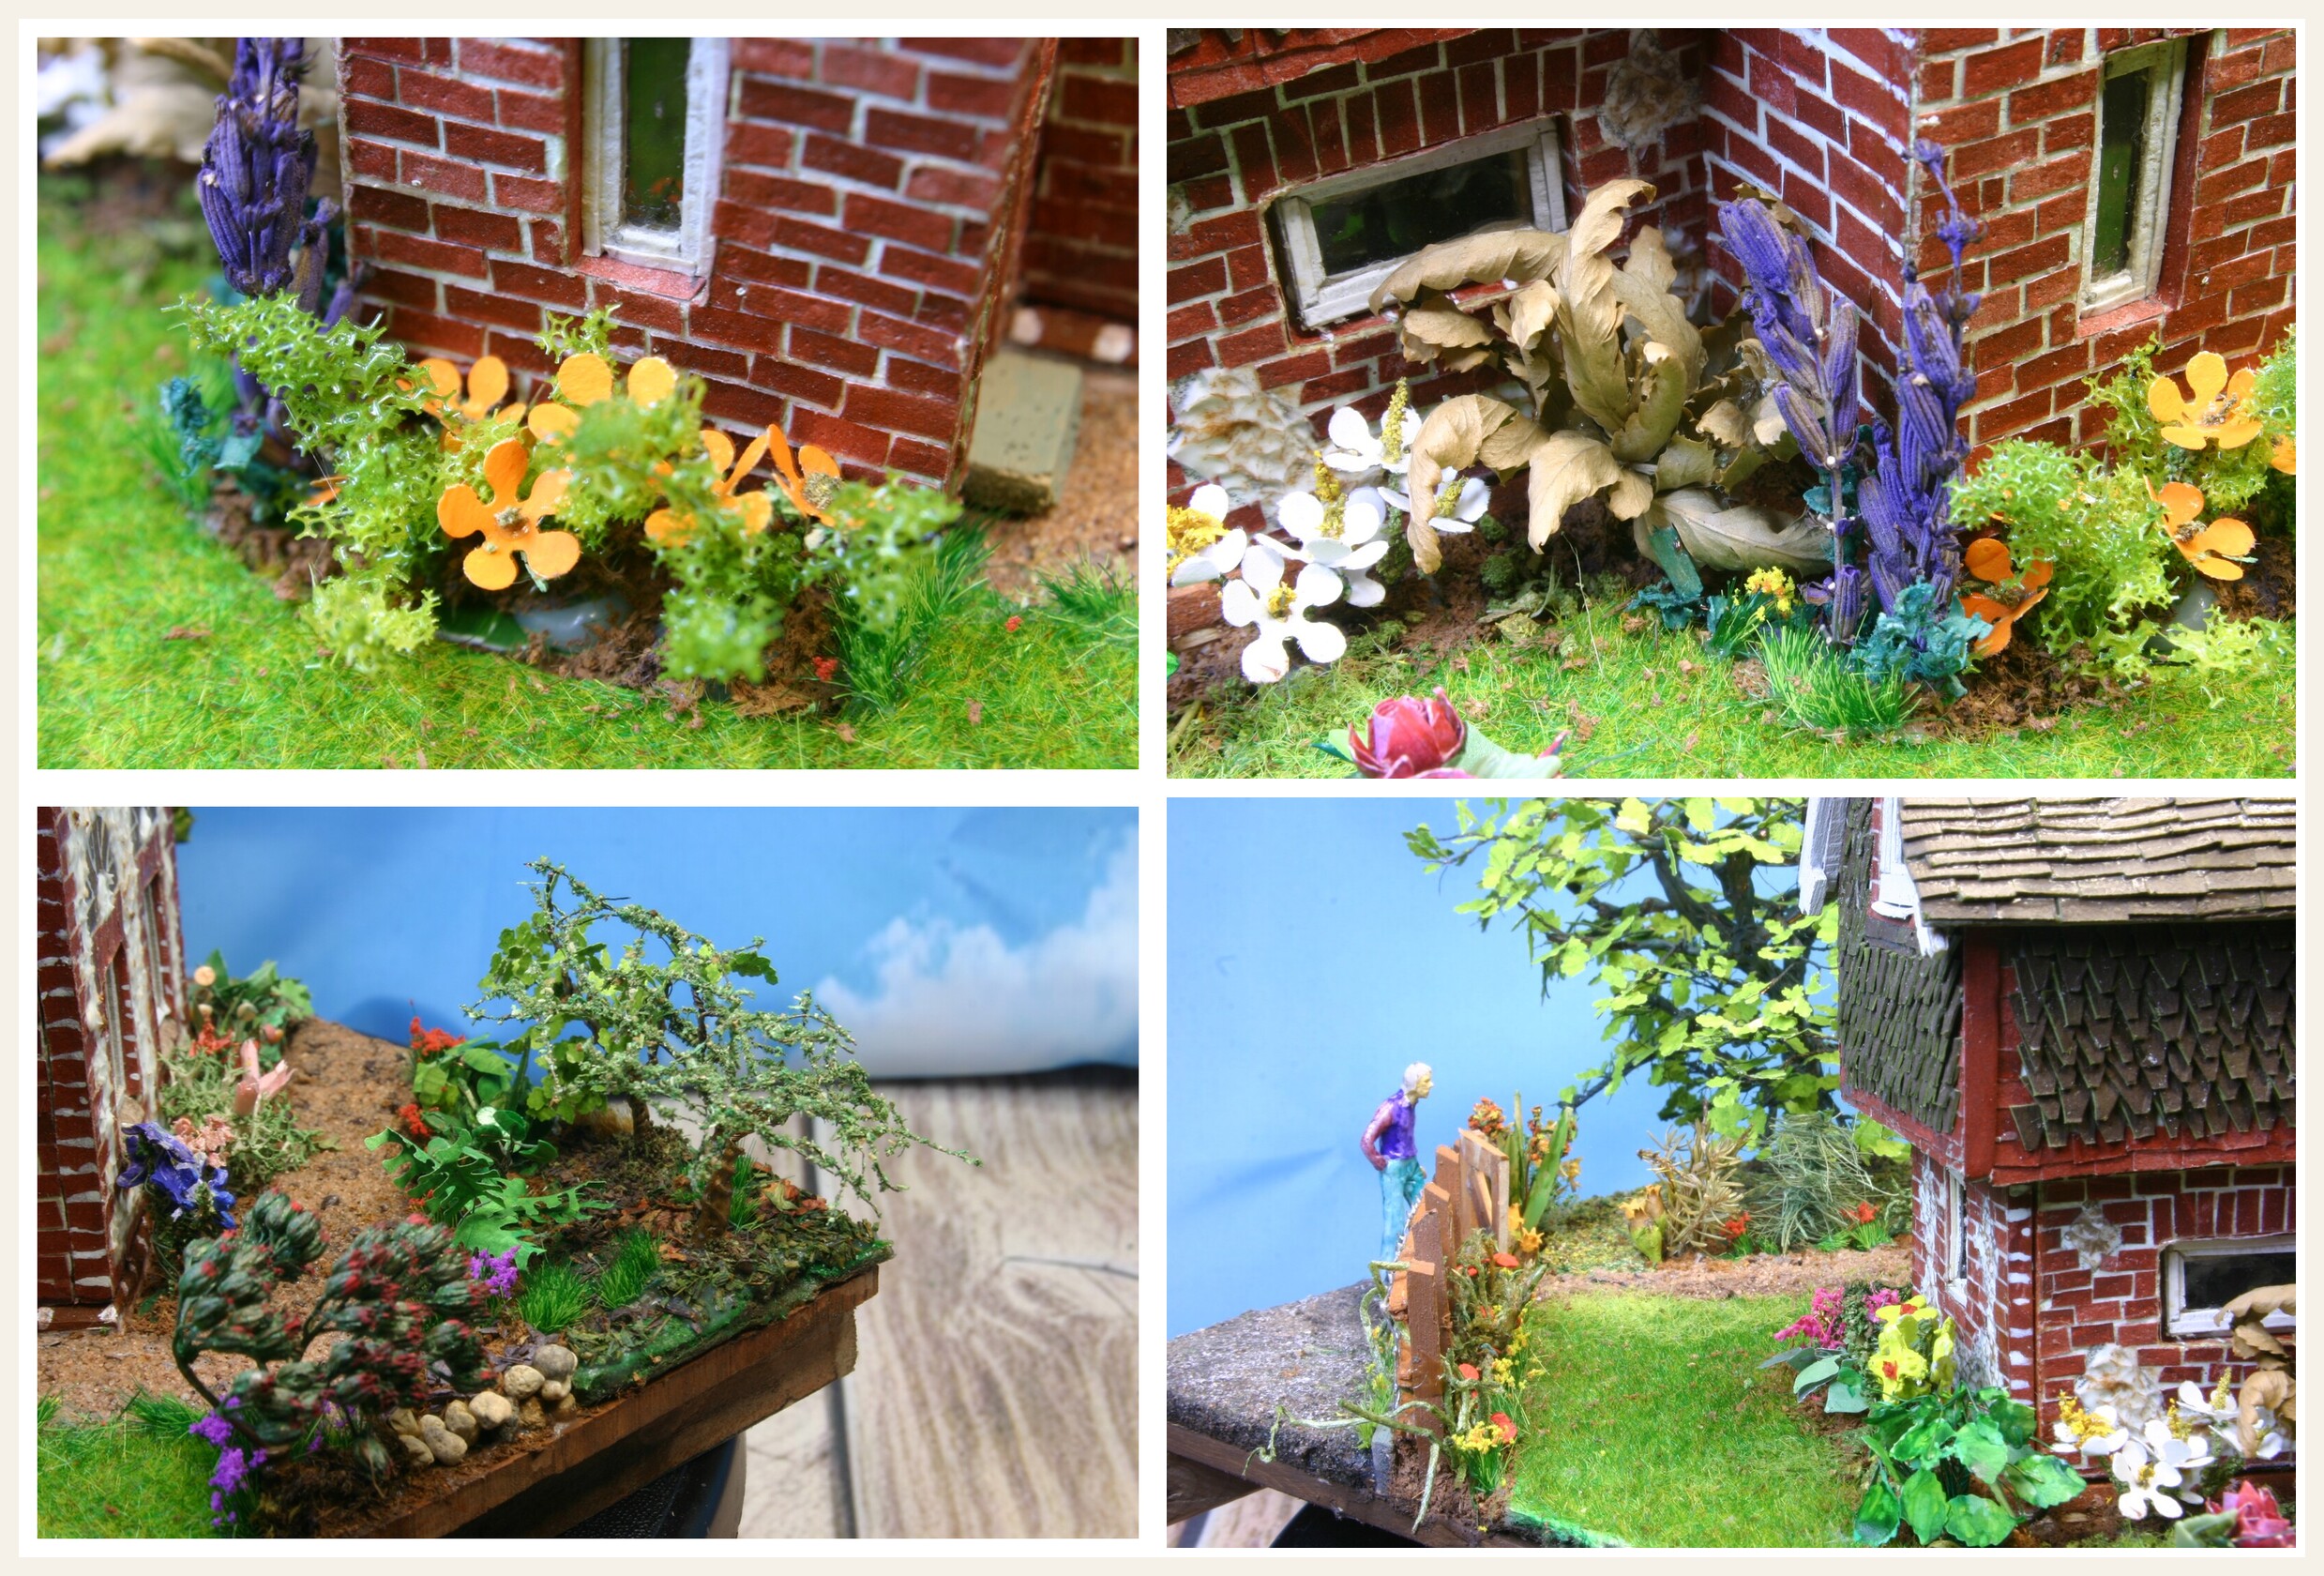
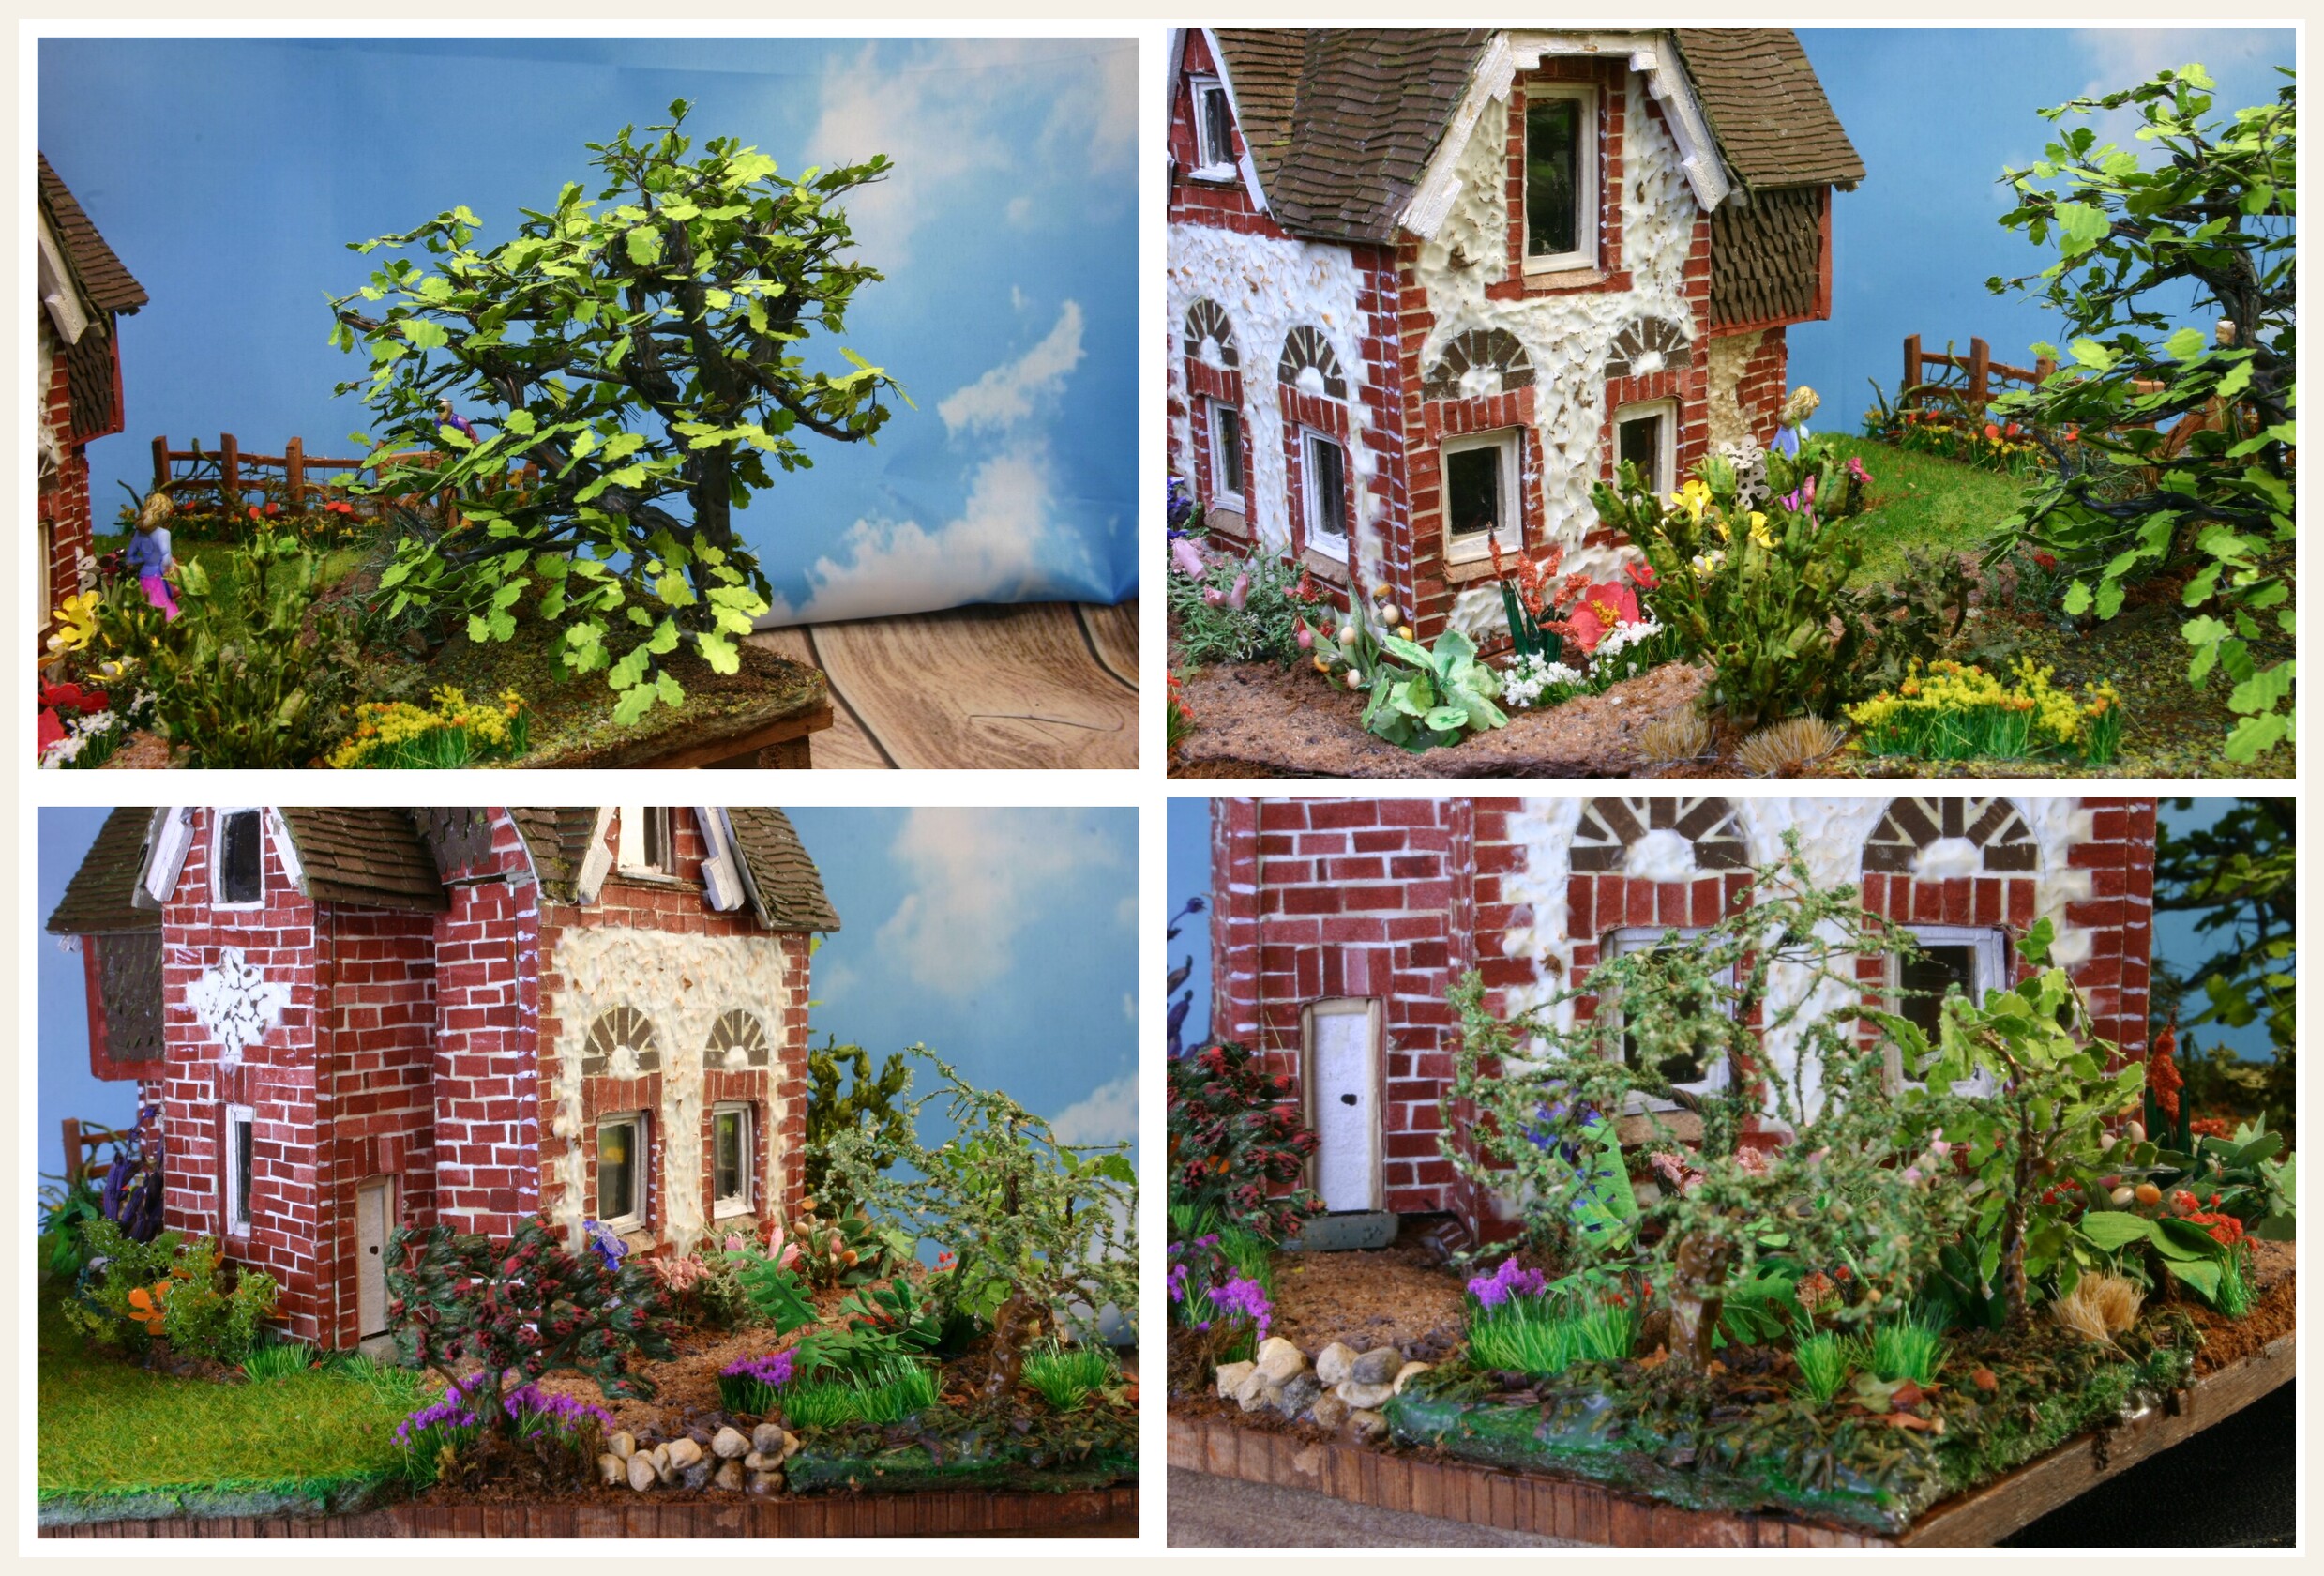
And this is different perspectives on the placing of the plants:
Challenges and Solutions
3D from 2D Challenge: Building the cottage in 3D from a 2D picture without plans was the most challenging aspect. Used Meshy AI to visualize different angles, then made each wall and facade separately, constantly fitting them together to confirm measurements and design.
Clamping Complex Structures: Adding the room above the front door presented significant clamping challenges. Had to improvise a series of push and hold clamps with weights from the top to hold everything together while drying.
Material Preparation: Each step was an experiment. Material selected, then prepared and coloured (which had to dry), then cut and shaped, then glued and fitted. All parts were designed as the build process moved along rather than as one grandiose plan.
Test and Retry Approach: Parts have been fitted and taken apart on many occasions. Every major step was preceded with a test run that was put aside later.
Skills Developed
New Construction Techniques:
- Wood frame construction with paper cladding (2mm wood slats with paper on both sides)
- Modelling paste texturing for flint stone with divots and weathering
- Paper strip brick work (2.5mm × 5mm strips in decorative patterns)
- Multi-layer window fabrication (7 distinct layers)
- Multi-faceted roof structure with paper tiles
- Ridge tiles using zig-zag scissors technique
New Materials Introduced:
- Modelling paste for flint stone texture
- Micro plastic plants (grasses and sidewalk flowers)
- Stencils to cut flowers and leaves
- Plastic figures
- Laminate floor underlay for base surfaces
- Crushed Welsh slate for tarmac and paths
- Static grass applicator for realistic lawns
- Bamboo cutting and shaping for fence construction
Landscape Techniques:
- Crushed slate tarmac (fine and coarse grains mixed with Mod Podge)
- Gravel paths (crushed slate with sand and Mod Podge paste)
- Static grass lawn application (varying colours and lengths)
- Wire mesh fence construction using custom jig (5 strands, 3mm apart)
- Zone-based landscaping approach
Plant Creation:
- Copper wire tree construction with twisted branches
- Hot glue tapering for natural branch appearance
- Stencil-cut leaves (3 sheets of A4, painstakingly applied over two weeks)
- Individual plant creation matched to surrounding plants and available space
Tool Making:
- Making more jigs and support tools for working with miniatures
- Micro cutting board
- Jig to hold wiring to provide free hand use
- Wire mesh jig for fence construction
Personal Reflections
The quality of the cottage and plants have improved significantly from the start. Many newly discovered or refined techniques were used including the static grass applicator, improved wiring, and in many cases parts were first tested and then built, which gave more confidence.
Bamboo is actually a fantastic material to work with - cutting strips from bamboo and forming it for specific uses opened up new possibilities.
What I Learned: Patience, persistence, try and retry, increased colour appreciation.
What I Would Do Differently: Tree leaves are too large; sidewalk colour and surface not completely right; would add lighting in the house.
Comparison to Previous Projects: This project is definitely an improvement in quality and detail from previous projects.
Completion Details
- Completion Date: 3 October 2025
- Total Duration: Late June - October 2025 (~3.5 months)
- Estimated Hours: 150-200 hours
- Scale: 1:100
- Dimensions: 20cm × 25cm
Materials and Techniques Summary
Materials Used
Base Materials:
- Wood from garden (bay leave tree planks, laminated)
- Laminate floor underlay
- Welsh slate (crushed and sifted)
- Fine sand (sifted)
Structural Materials:
- Bamboo (mature and dried)
- Balsa wood
- Wood slats (approx 2mm)
- Paper of different weights
Construction Materials:
- Copper wire (different grades)
- Hard plastic for windows
- Card stock
- Modelling paste
Paint and Finishing:
- White acrylic paint (base coat)
- Red brick paint
- Brown paint
- Dark brown paint
- Light green paint
- Various weathering colours
Plant Materials:
- Twigs and seed heads
- Dried leaves and plant parts
- Static grass (various colours and lengths)
- Grass pods
- Small plastic flowers
- Sawdust
Adhesives and Sealers:
- Hot glue gun
- Wood glue
- CA glue (super glue)
- Mod Podge
Techniques Employed
- Wood frame construction with paper cladding
- Modelling paste texturing for flint stones
- Stencil work for cutting flowers and leaves
- Paper strips for brick patterns (2.5mm × 5mm)
- Roof tiles from painted paper strips
- Ridge tiles with zig-zag scissors
- Multi-layer window fabrication (7 layers)
- Wire mesh fence construction with jig
- Static grass application
- Copper wire tree construction with twisted branches
- Hot glue tapering for natural branch appearance
- Dry brushing for weathering and aging
- Zoning approach for landscaping
- Test-and-refine methodology
- Jig-assisted construction
Tools Required
Cutting Tools:
- Band saw
- Guillotine
- Scissors (including zig-zag)
- Leaf stencils
- Micro cutting board
Hand Tools:
- Hand plane
- Small applicator
- Drill
- Files and bevelling tools
Painting Tools:
- Spray paint
- Brushes (various sizes)
- Dry brushing tools
Assembly Tools:
- Hot glue gun
- Clamps (improvised push and hold clamps)
- Weights (improvised)
- Wire jigs
- Mounting jigs for tree work
Specialty Tools:
- Static grass applicator
- Wire twisting jigs
Related Build Logs:
Gallery


Have questions or feedback about this project? I'd love to hear from you.