Cottage Construction
Construction Technique Development
Through research and planning, I developed a construction approach using thin wood slats of approx 2mm on paper as a frame. Paper was glued on both sides and ribs were added to prevent the paper from sagging in the middle.
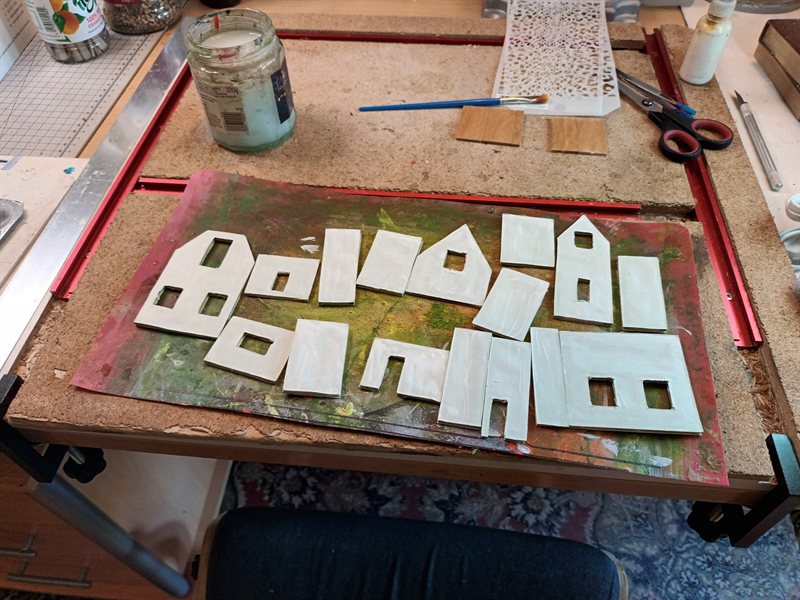
Each wall was measured and formed separately, allowing for the windows and doors. The cottage has 4 sets of outer walls each with different heights and widths. The walls were all painted with white acrylic as a base cover.
Brick Application
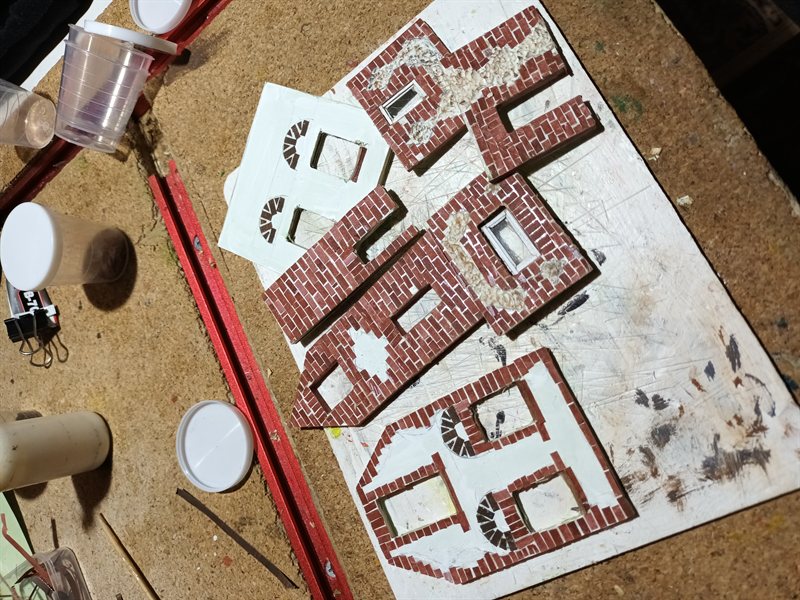
Paper was painted in a red brick allowing for some variations in colour. The paper was cut with a guillotine in strips of approx 2.5mm and then cut in lengths of approx 5mm. The bricks were then glued onto the white wall in decorative patterns around the doors, windows and edges of the walls. Space was left in the middle for the flint stone.
The windows and door frames all had strips of the brown paper glued in.
Flint Stone Texture
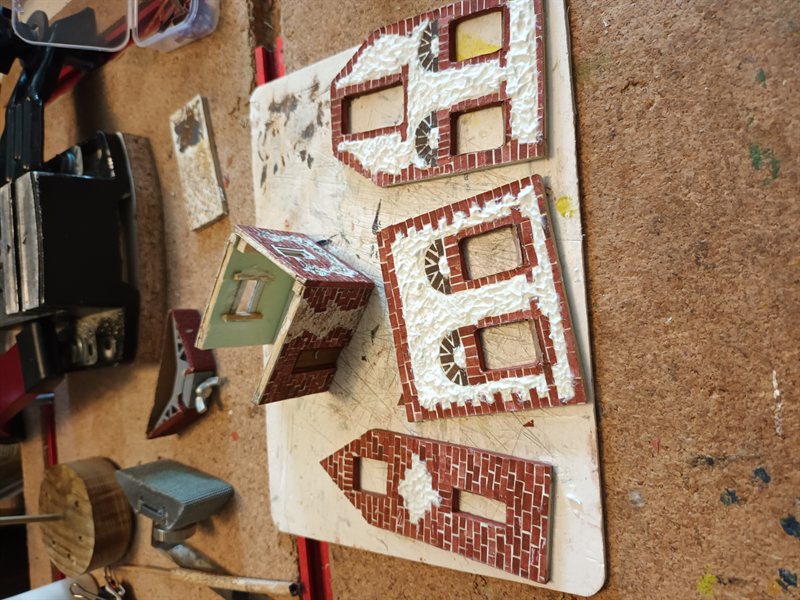
Modelling paste on a small applicator was then used to fill all the white spaces between the bricks and roughened to create the small divots to represent the stones. The modelling paste was lightly dry brushed to weather and age the flint stones.
Window Fabrication
The walls were then glued together using square 5mm wooden corners to neatly put each sub building together. The windows were all fitted individually with 7 layers:
- Outer white frame
- 1mm white paper strips
- Inner white frame and pane frames of 0.5mm white paper strips
- Hard plastic for the glass
- Thick card stock on the inside to allow for the window to be pushed into the cavity
- A backing sheet to allow for the window to be wider than the cavity
- Final assembly glued in place on the inside of the wall
Door Construction
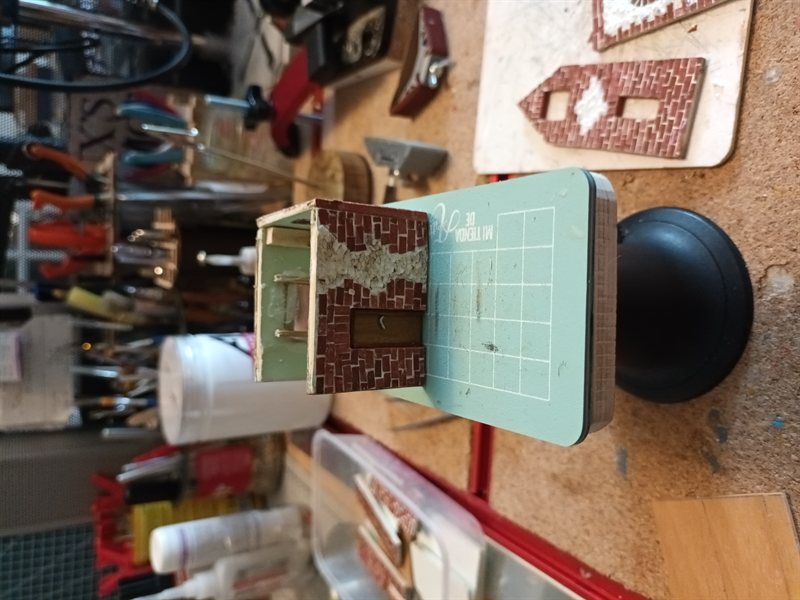
A flat piece of wood was used for the door, painted dark and a small handle from wire fitted. The door was added into the door frame using coloured paper for the door frame.
Main Assembly
With the small front door section assembled, the assembly of the main building could be started.
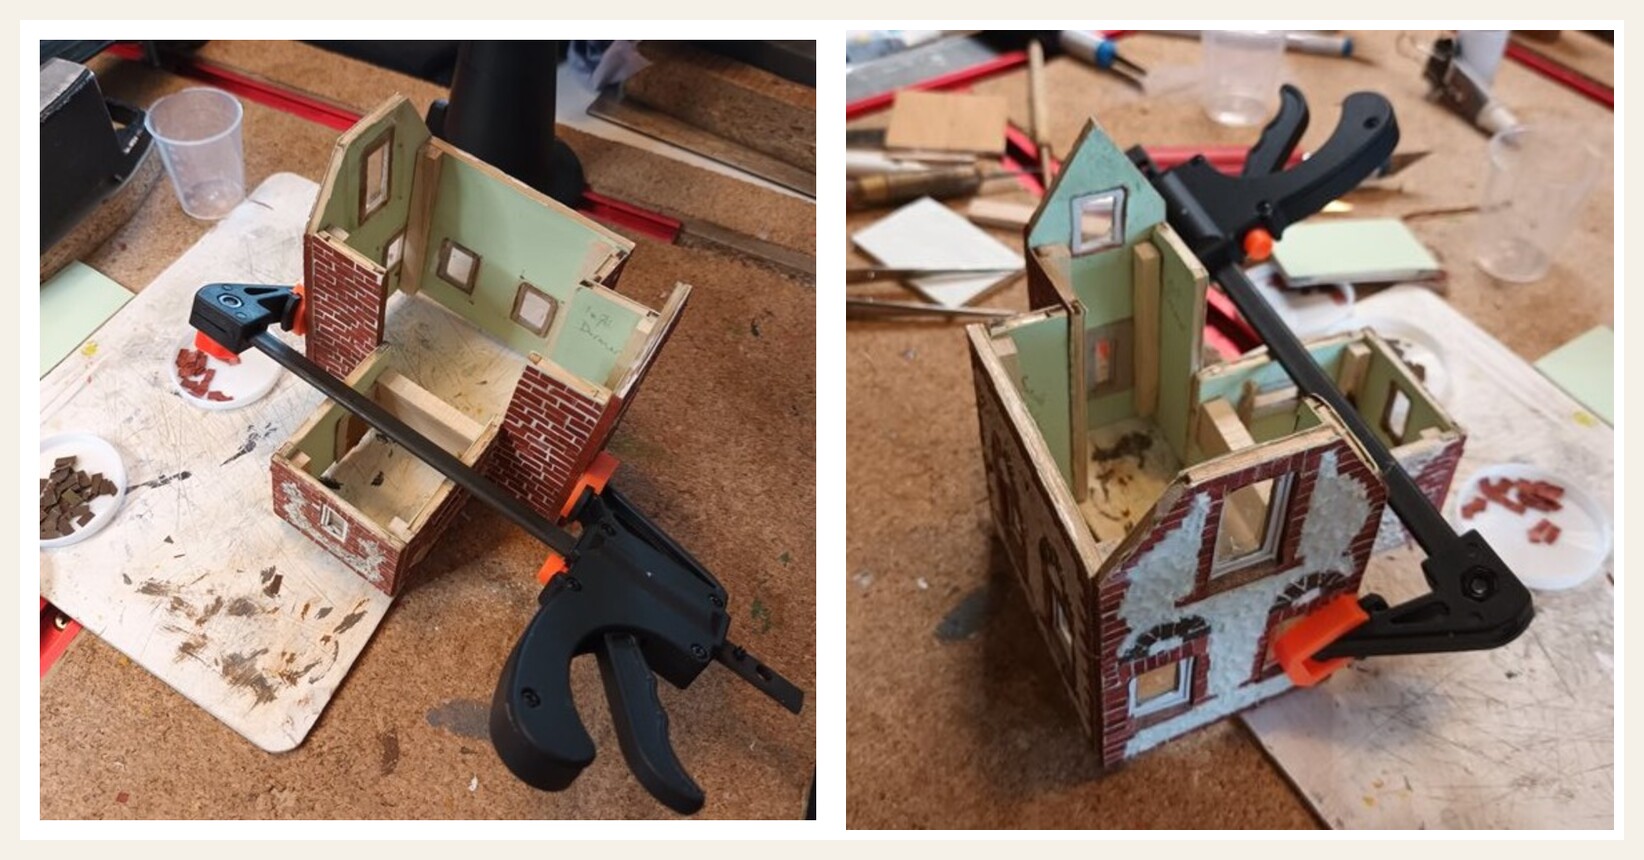
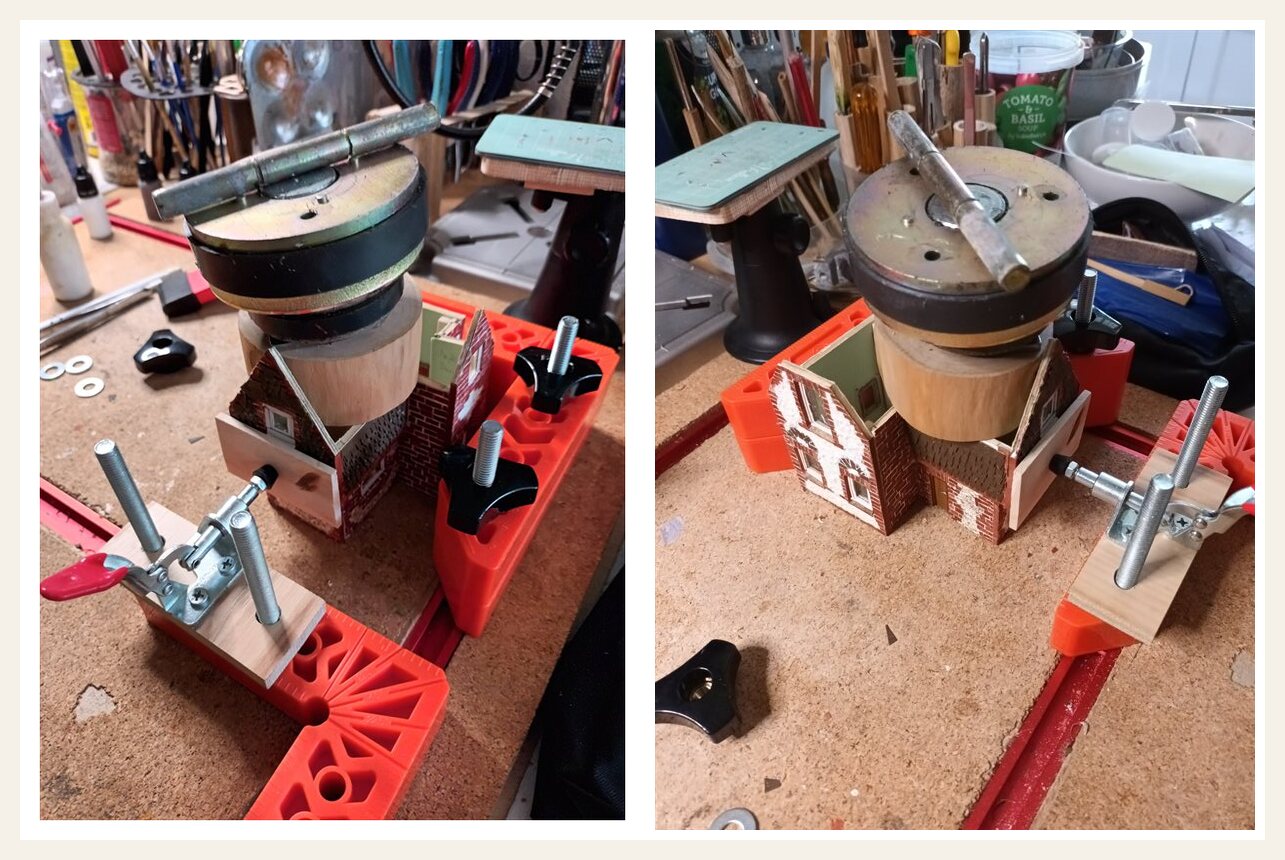
The Clamping Challenge
Adding the room above the front door presented a clamping challenge. I had to improvise a series of push and hold clamps, and provide some improvised weights from the top to hold it all together while drying.
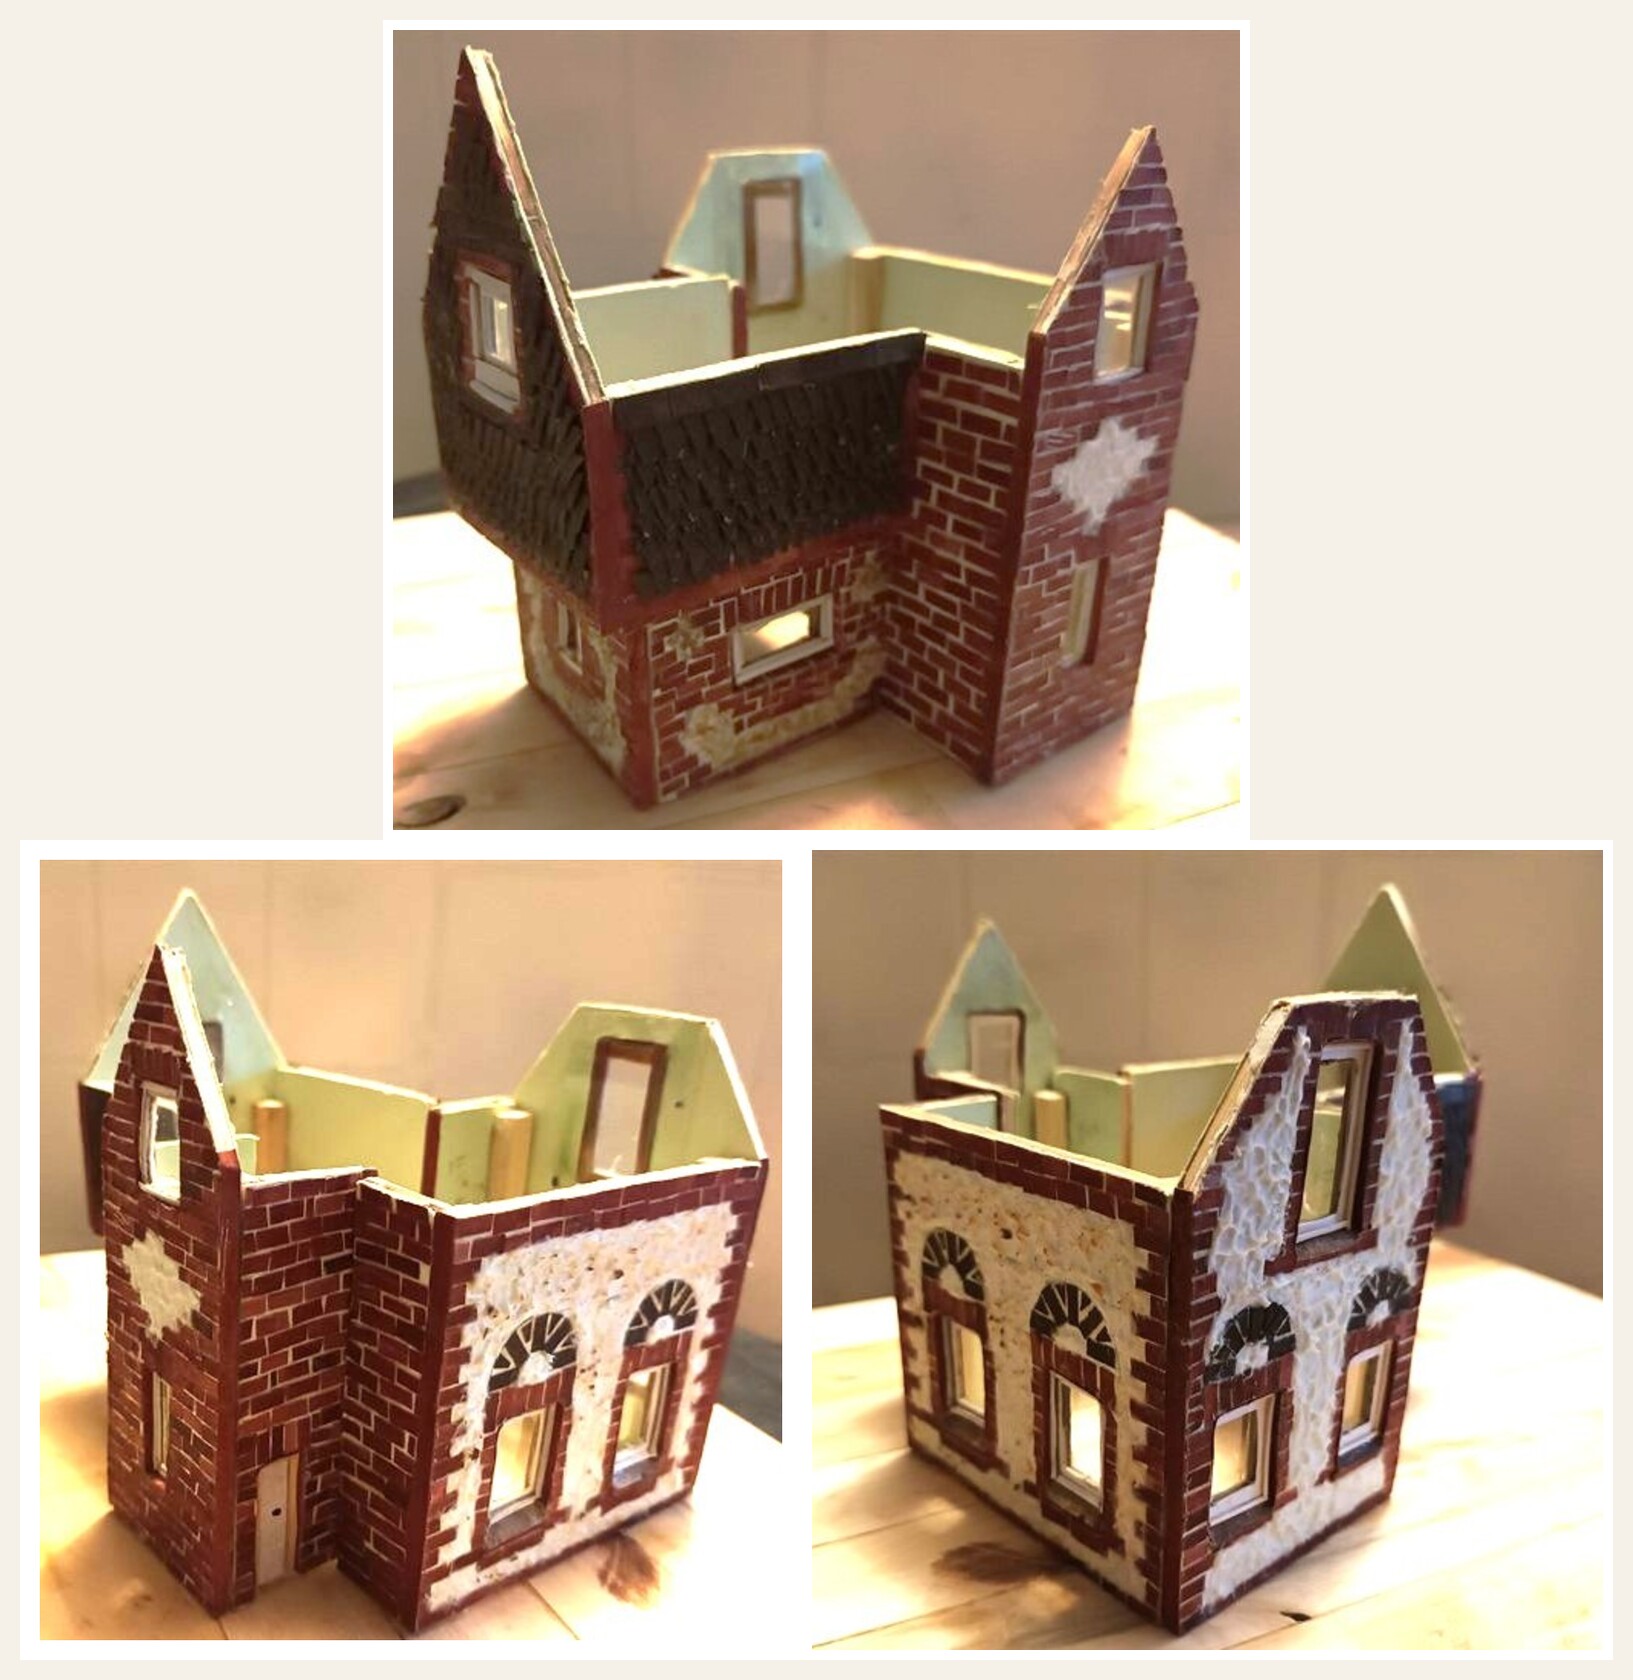
Roof Planning
On completion of the clamping all the facades of the building were in place and measuring up the roof could start.
Roof Construction
Started off by using sheets of paper to model each facade of the roof. The top ridges were made by gluing half of double folded paper, and using the other side as a V shape to fit over the roof. The ridge was then cut with a zig-zag scissors and painted in red. The entire roof was then painted in dark brown to serve as the base for the roof tiles.
The chimney was constructed separately by covering a square 1cm square balsa wood with bricks, similar to the walls, adding a cap and then a half piece of bamboo on top. As part of fitting the roof, the chimney was glued in against the inner wall and the roof modelled around it.

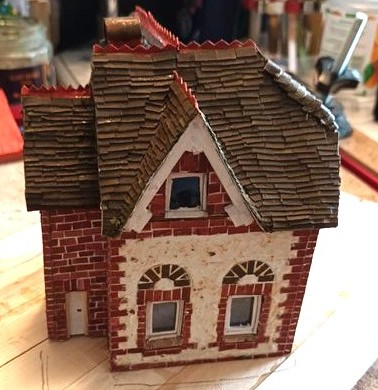
Roof Tiles
To make the tiles, heavier paper was pre-painted, then cut into strips of approx 4mm and then lengths of approx 5mm. Each row of tiles were then glued from the bottom up. Soffits were made from wood, painted, and then fitted around the edges of the roof.
Build Process Reflections
Following through the cottage build took some time. Each step was an experiment in itself. Material selected, then prepared and coloured which in itself had to dry, then cut and shaped, then glued in and then fitted together.
All parts and aspects were designed as the build process moved along, rather than as one grandiose plan and pre-designed parts. Parts have been fitted, and taken apart on many occasions and every major step was preceded with a test run that was put aside later.
It took about 1 month to complete the cottage.
Have questions or feedback about this project? I'd love to hear from you.