Scenery and Layout - Building a Welsh Riverside
Build Log 005: Creating the Welsh Riverside Scenery
Date: March 5 - March 28, 2025
Phase: Scenery Construction
Time Spent: ~20 hours
Status: Completed
The Challenge: Wales in Miniature
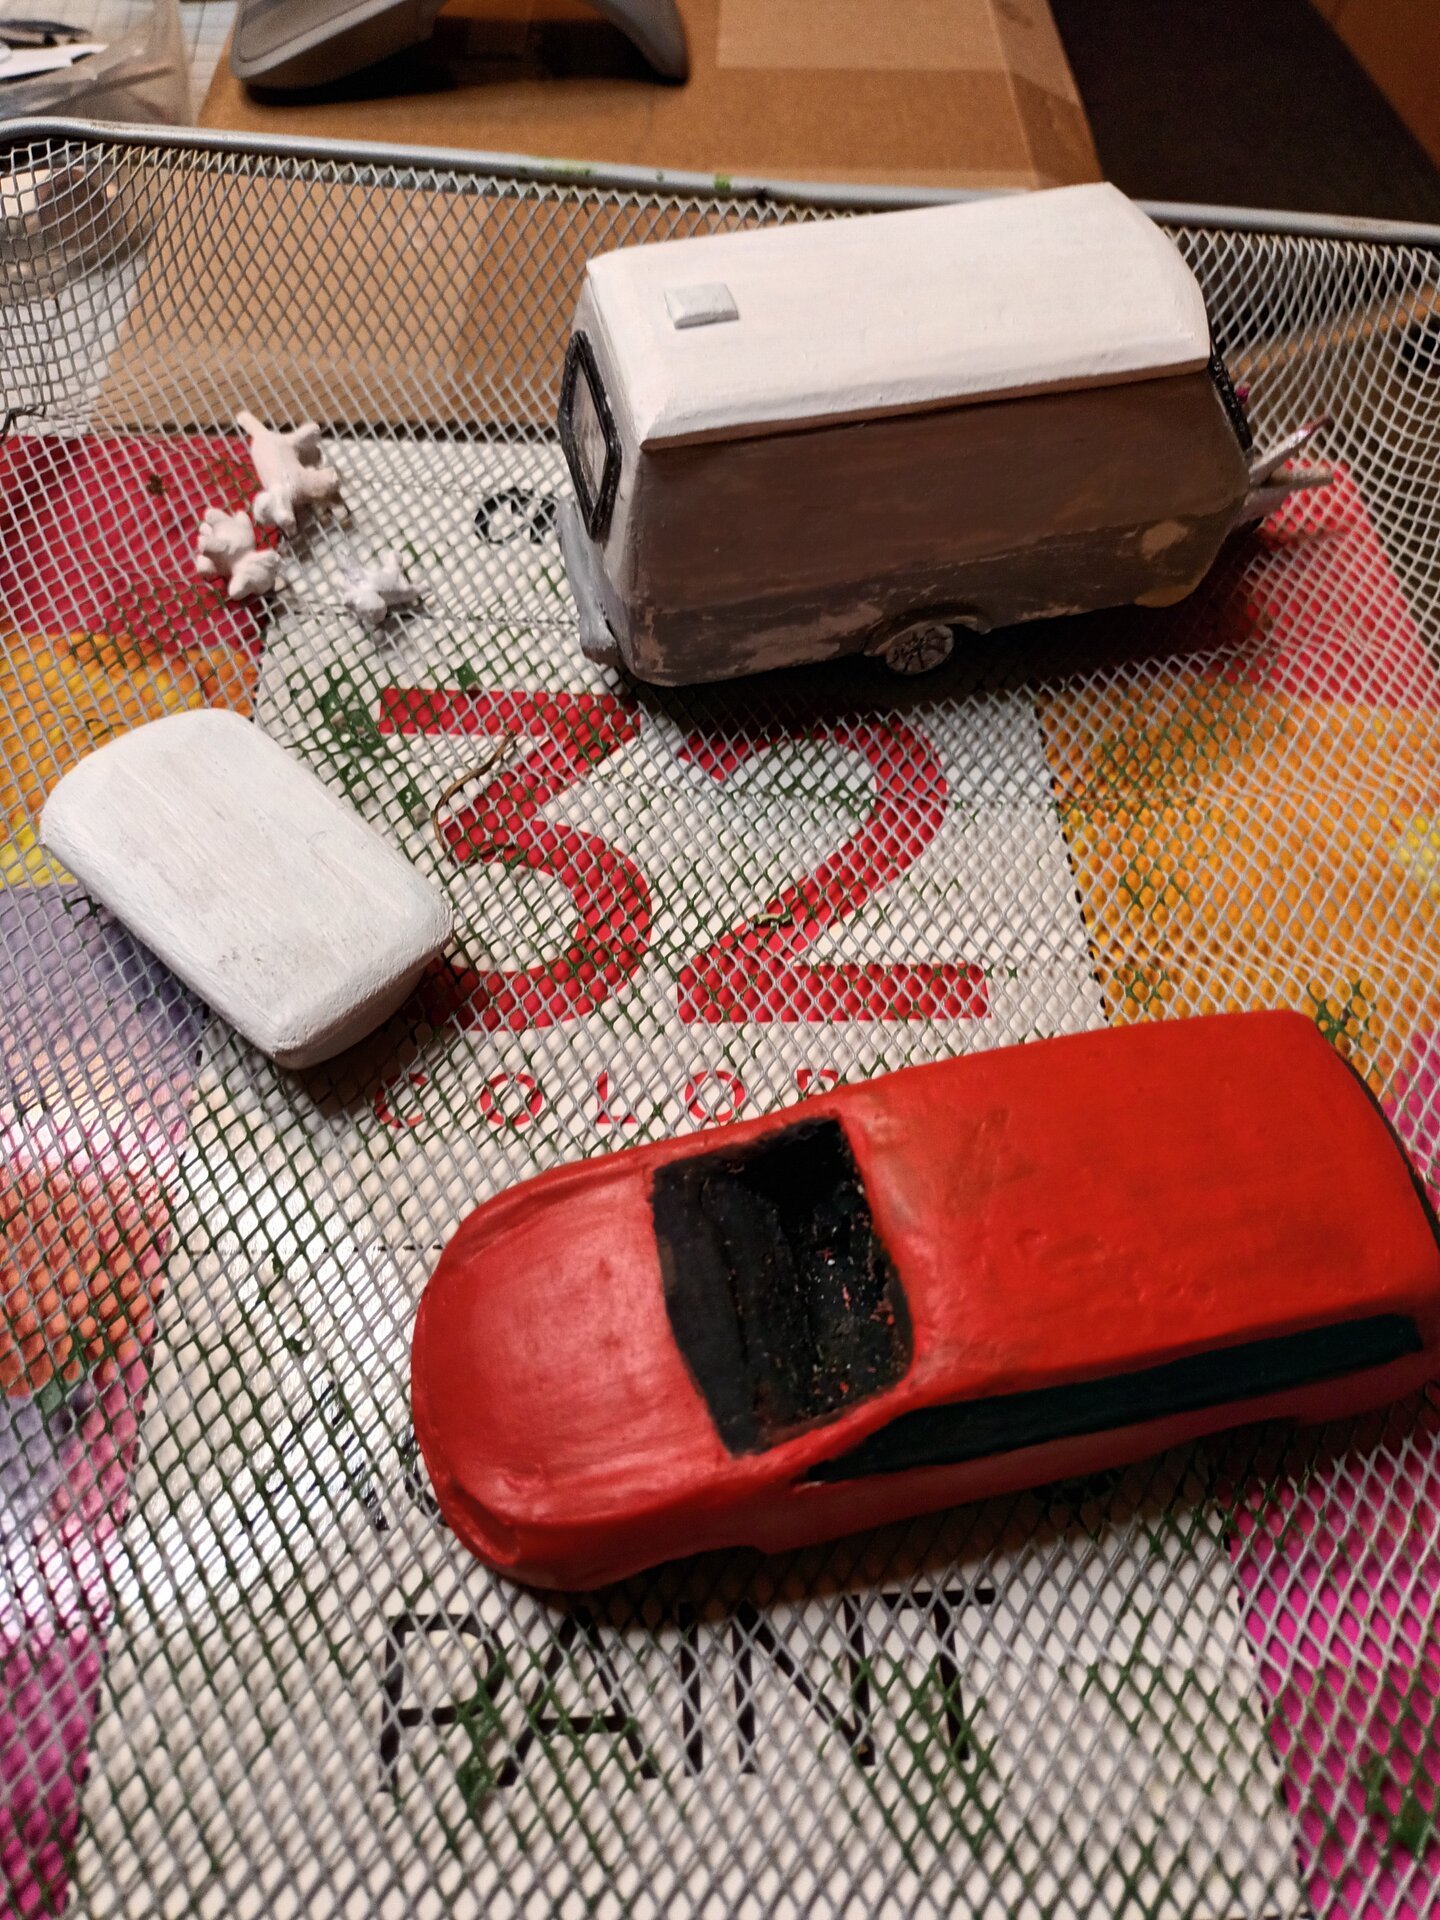
With all the main components complete (caravan, car, figures, and Tilly), I faced the challenge of creating a convincing Welsh riverside setting within tight space constraints.
The Brief:
- Riverside setting in Wales
- Native Welsh plants and trees
- Natural, not manicured
- Rocky riverbank
- Sense of depth despite small footprint
- Maximum display size: ~350mm x 250mm
The Problem: How do you suggest “Welsh countryside” without building an entire landscape? The scene needed to feel expansive while fitting on a small base.
Space Management and Layout Strategy
Constraints:
- Base size: ~350mm x 250mm maximum
- Must accommodate caravan (70mm long)
- Must accommodate car (90mm long)
- Need space for figures
- Need to suggest river
- Need trees without crowding
- Must remain stable and transportable
Layout Strategy:
- Caravan Positioning:
- Slightly off-center (more natural)
- Angled (not parallel to base edge)
- Door facing toward viewer (showing detail)
- Creates compositional interest
- Car Placement:
- Towing position behind caravan
- Suggests “just arrived” or “about to depart”
- Hitch connection visible
- River Location:
- Along one edge (allows suggestion without building entire river)
- Diagonal flow (more interesting than straight)
- Banks at different levels (topographic interest)
- Tree Placement:
- Background and sides (creates depth)
- Varying heights (perspective)
- Not blocking main subjects
- Suggests continuation beyond base edges
- Figure Positioning:
- Near vehicles (logical placement)
- Interacting with space
- Tilly exploring (dog behavior)
- Creating story moment
Key Principle: The base shows a “moment in time” within a larger landscape. Viewers’ imagination fills in what continues beyond the edges.
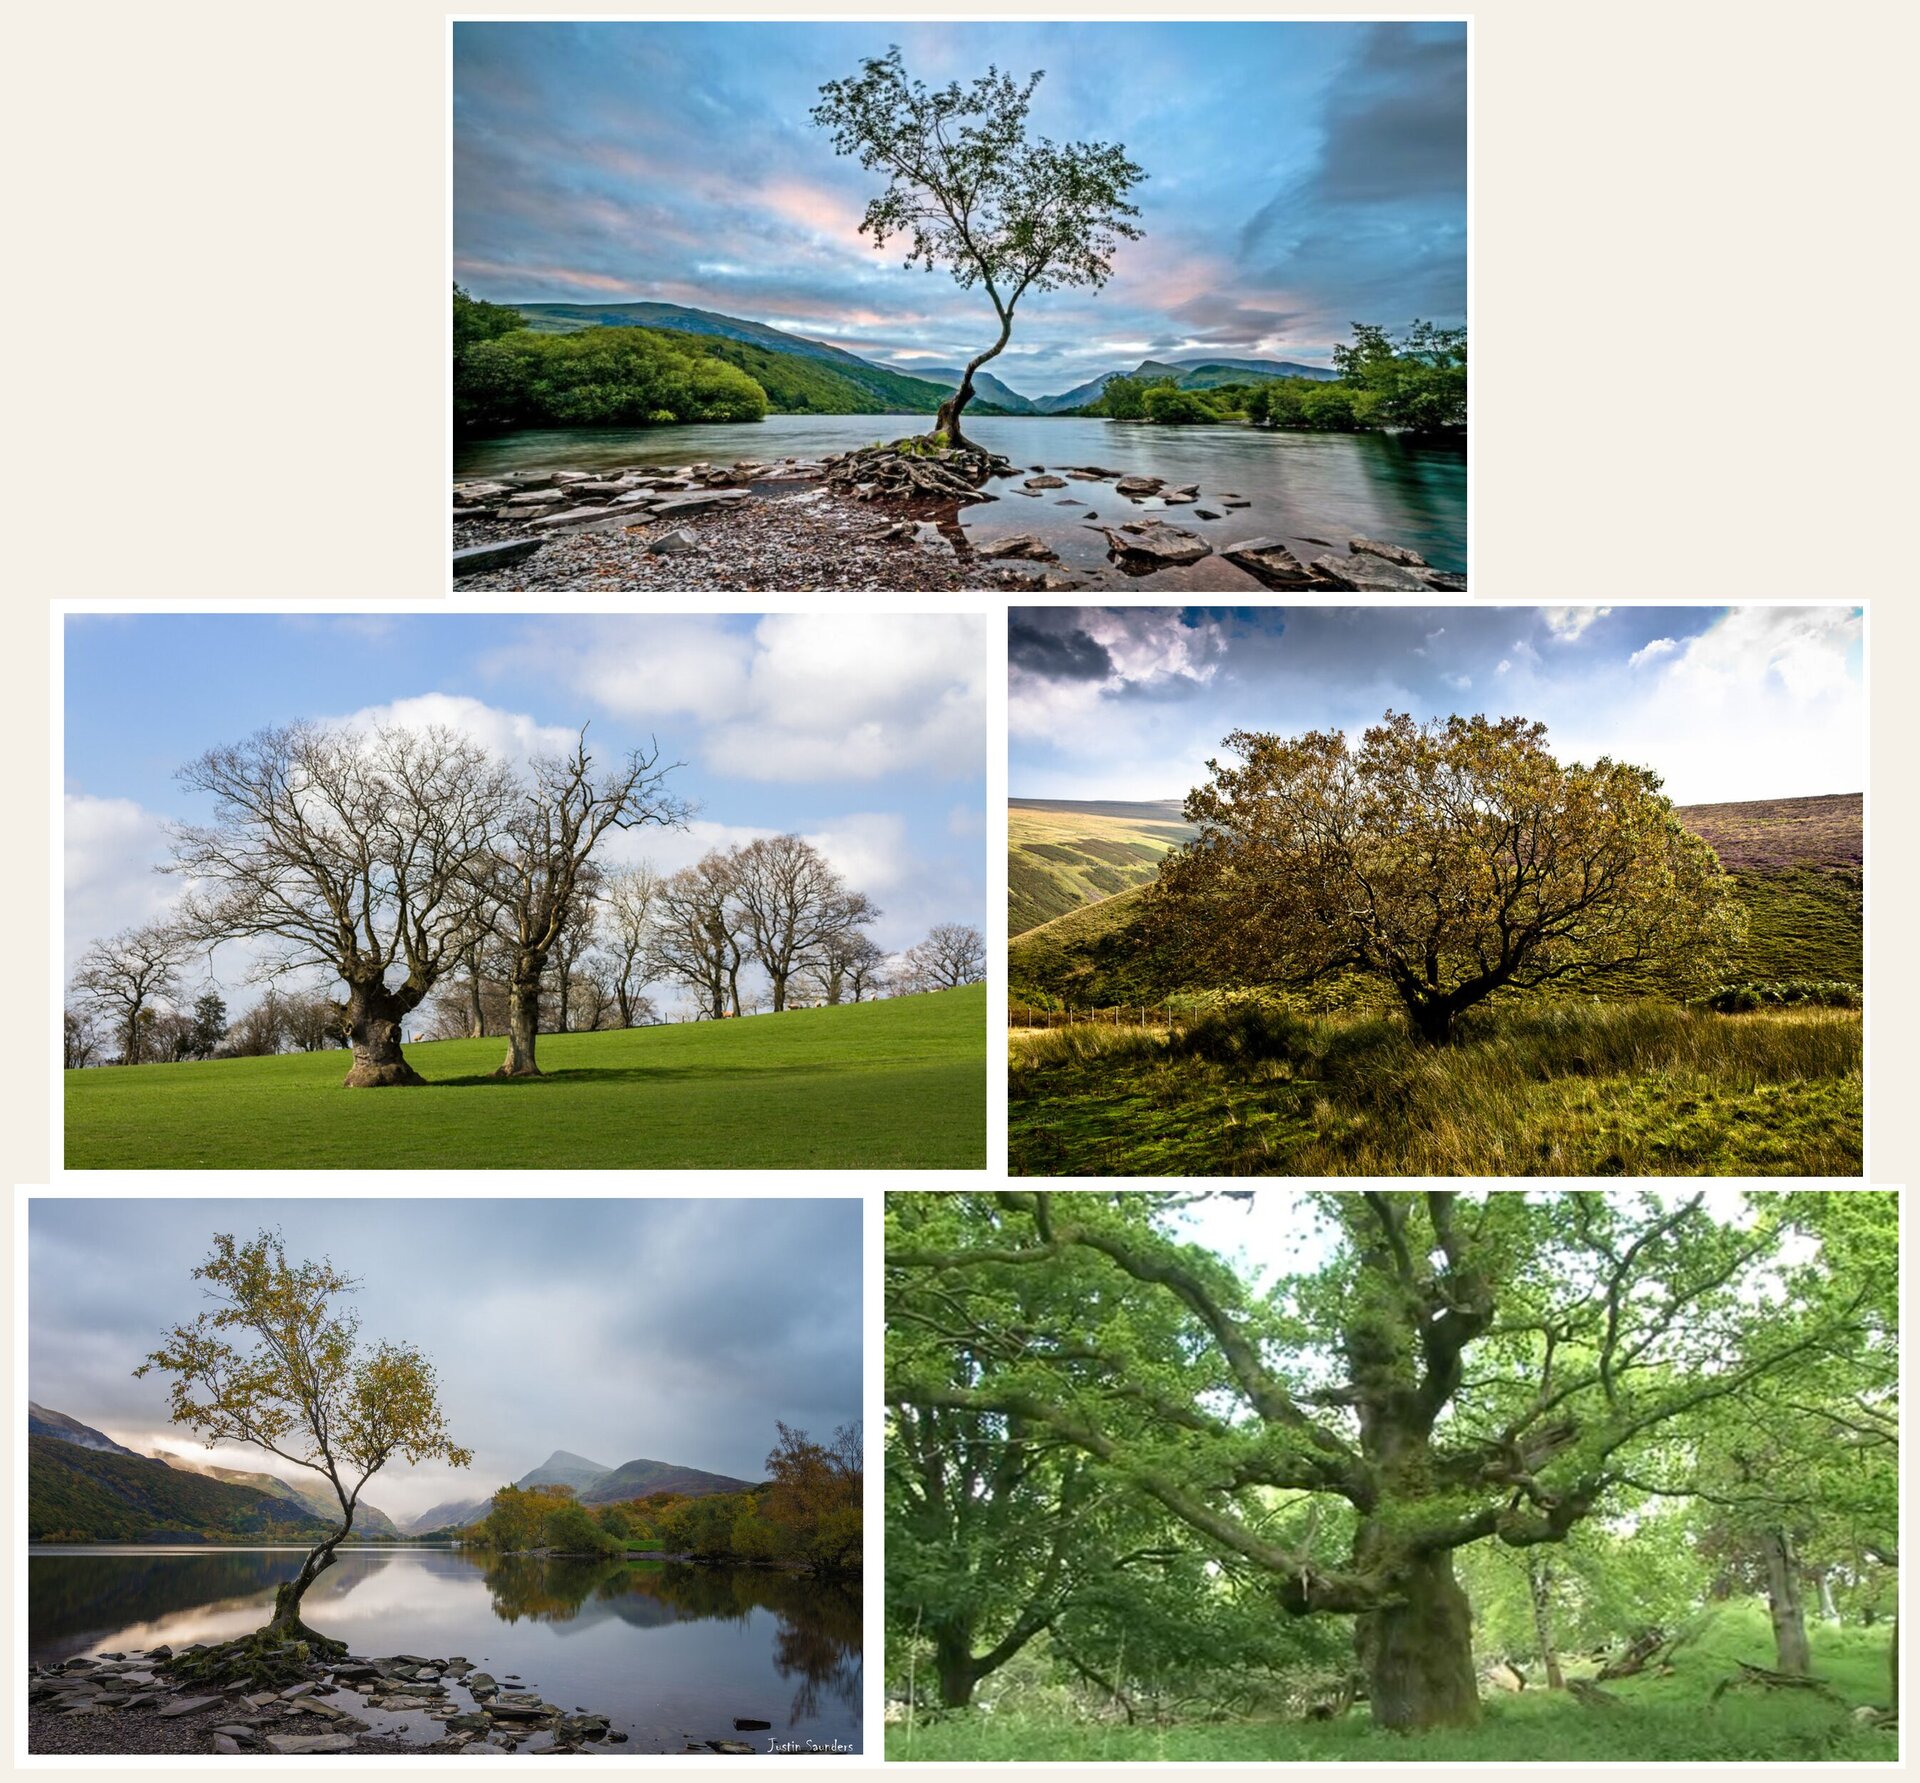
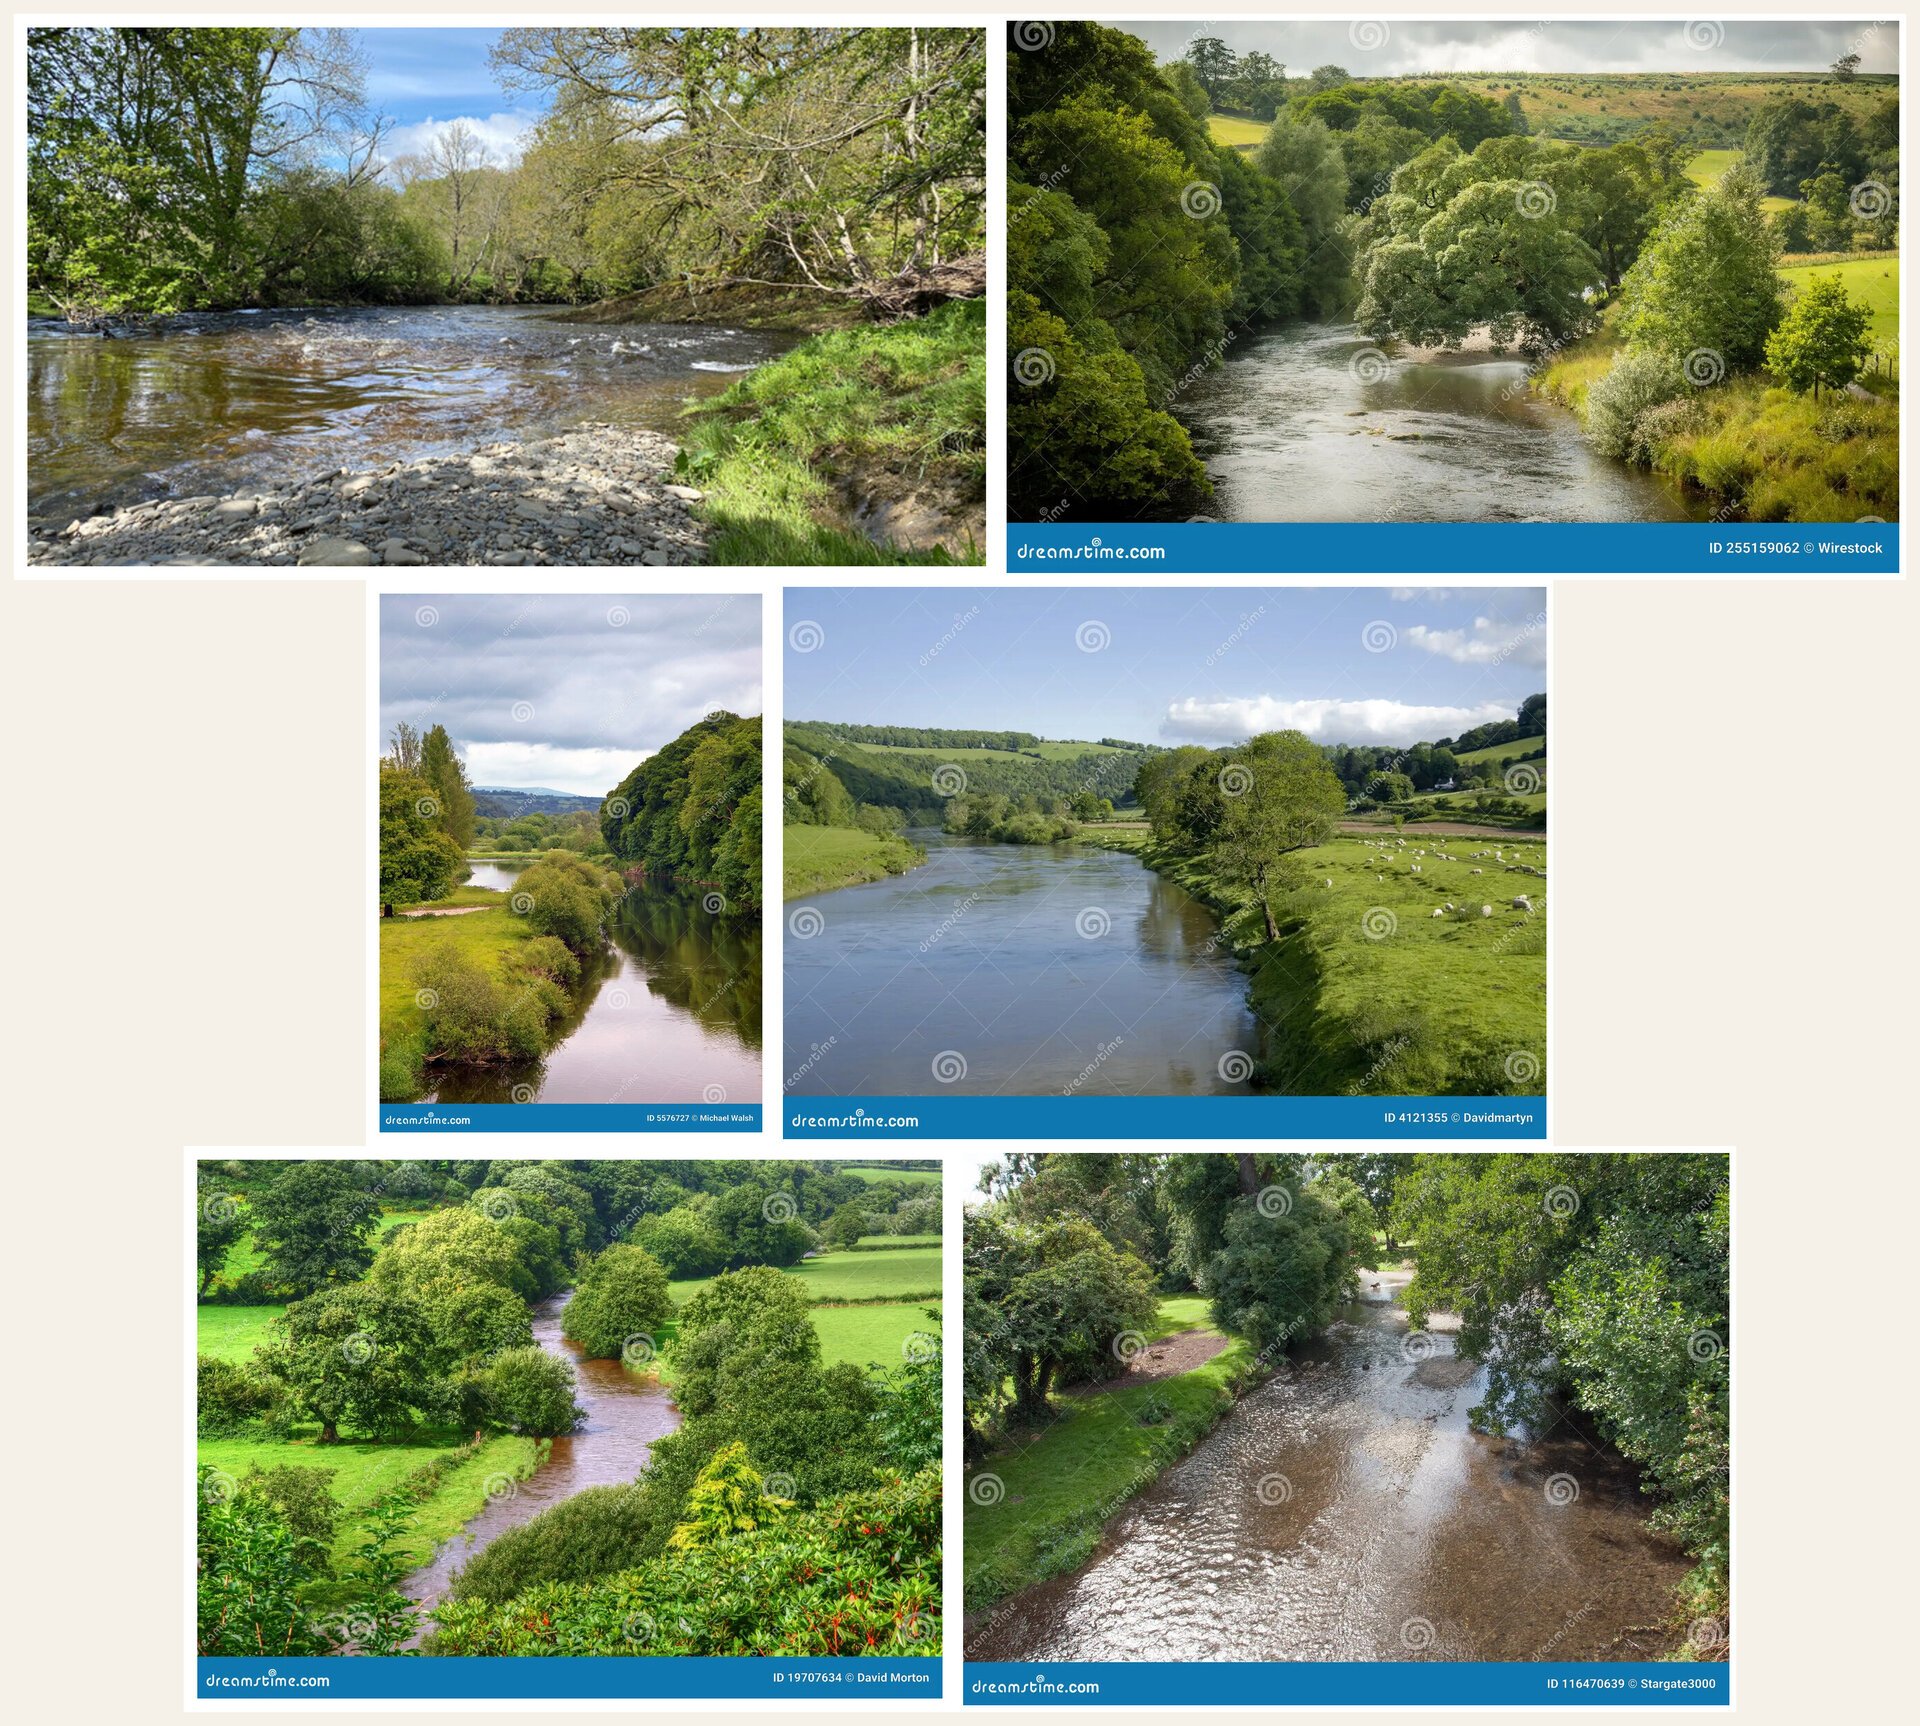
Research: Welsh Riverside Flora
To make the scene authentically Welsh, I researched typical riverside vegetation in Wales:
Trees Common to Welsh Riversides:
- Oak (Quercus robur) - iconic British tree
- Willow (Salix) - characteristic riverside trees
- Alder (Alnus glutinosa) - water-loving, common near streams
- Ash (Fraxinus excelsior) - common in Welsh valleys
- Birch (Betula) - lighter foliage, adds variety
Understory Plants:
- Ferns - abundant in damp Welsh climate
- Nettles and dock - realistic for riversides (though not pretty)
- Wild grasses - mixed heights and textures
- Moss - rocks and tree bases
- Wild flowers - foxglove, meadowsweet, primrose
What to Avoid:
- Palm trees (obviously not Welsh)
- Tropical plants
- Overly manicured appearance
- Mediterranean vegetation
- Desert plants
The key was creating the “feel” of Wales: lush, green, slightly wild, varied textures.
Base Construction
Base Structure:
- Foundation:
- MDF board (~350mm x 250mm x 9mm)
- Sealed with PVA (prevents warping)
- Strong enough to handle weight
- Transportable size
- Topography:
- Built up with foam board layers
- Created gentle slopes
- Carved river valley
- Added rocky outcrops
- Textured with filler/plaster mix
- Riverbank:
- Two levels (high bank, water level)
- Rocky edge (small stones embedded)
- Natural irregularity
- Water area carved lower than surroundings
- Texture Layer:
- PVA and sand mix for general ground
- Rougher texture near river (rocky)
- Smoother areas for grass (campsite area)
- Varied finish suggests different terrain types
Tree Construction: Trial and Error
Tree Construction Process:
- Wire Armature:
- Twisted wire for trunk and main branches
- Multiple strands twisted (creates realistic bark texture)
- Branches divide naturally (Y-junctions, not T-junctions)
- Taper as branches get smaller
- Overall tree shape before adding foliage
- Trunk Texture:
- Painted with dark brown/black
- Dry brushed with lighter browns
- Highlighted bark texture created by twisted wire
- Different colors for different tree species
- Some green tint on north side (moss effect)
-
Foliage Material Testing:
Attempt 1: Commercial foliage (foam clusters)
- ✅ Looked okay
- ❌ Too uniform in texture
- ❌ Limited color variety
- ❌ Expensive
Attempt 2: Natural materials (dried herbs/moss)
- ✅ Interesting texture
- ❌ Deteriorated over time
- ❌ Color faded
- ❌ Too fragile
Attempt 3: DIY foliage (stretched fiber + flock)
- ✅ Controllable texture
- ✅ Can create varied densities
- ✅ Mix multiple colors
- ✅ Cost effective
- ✅ This was the winner
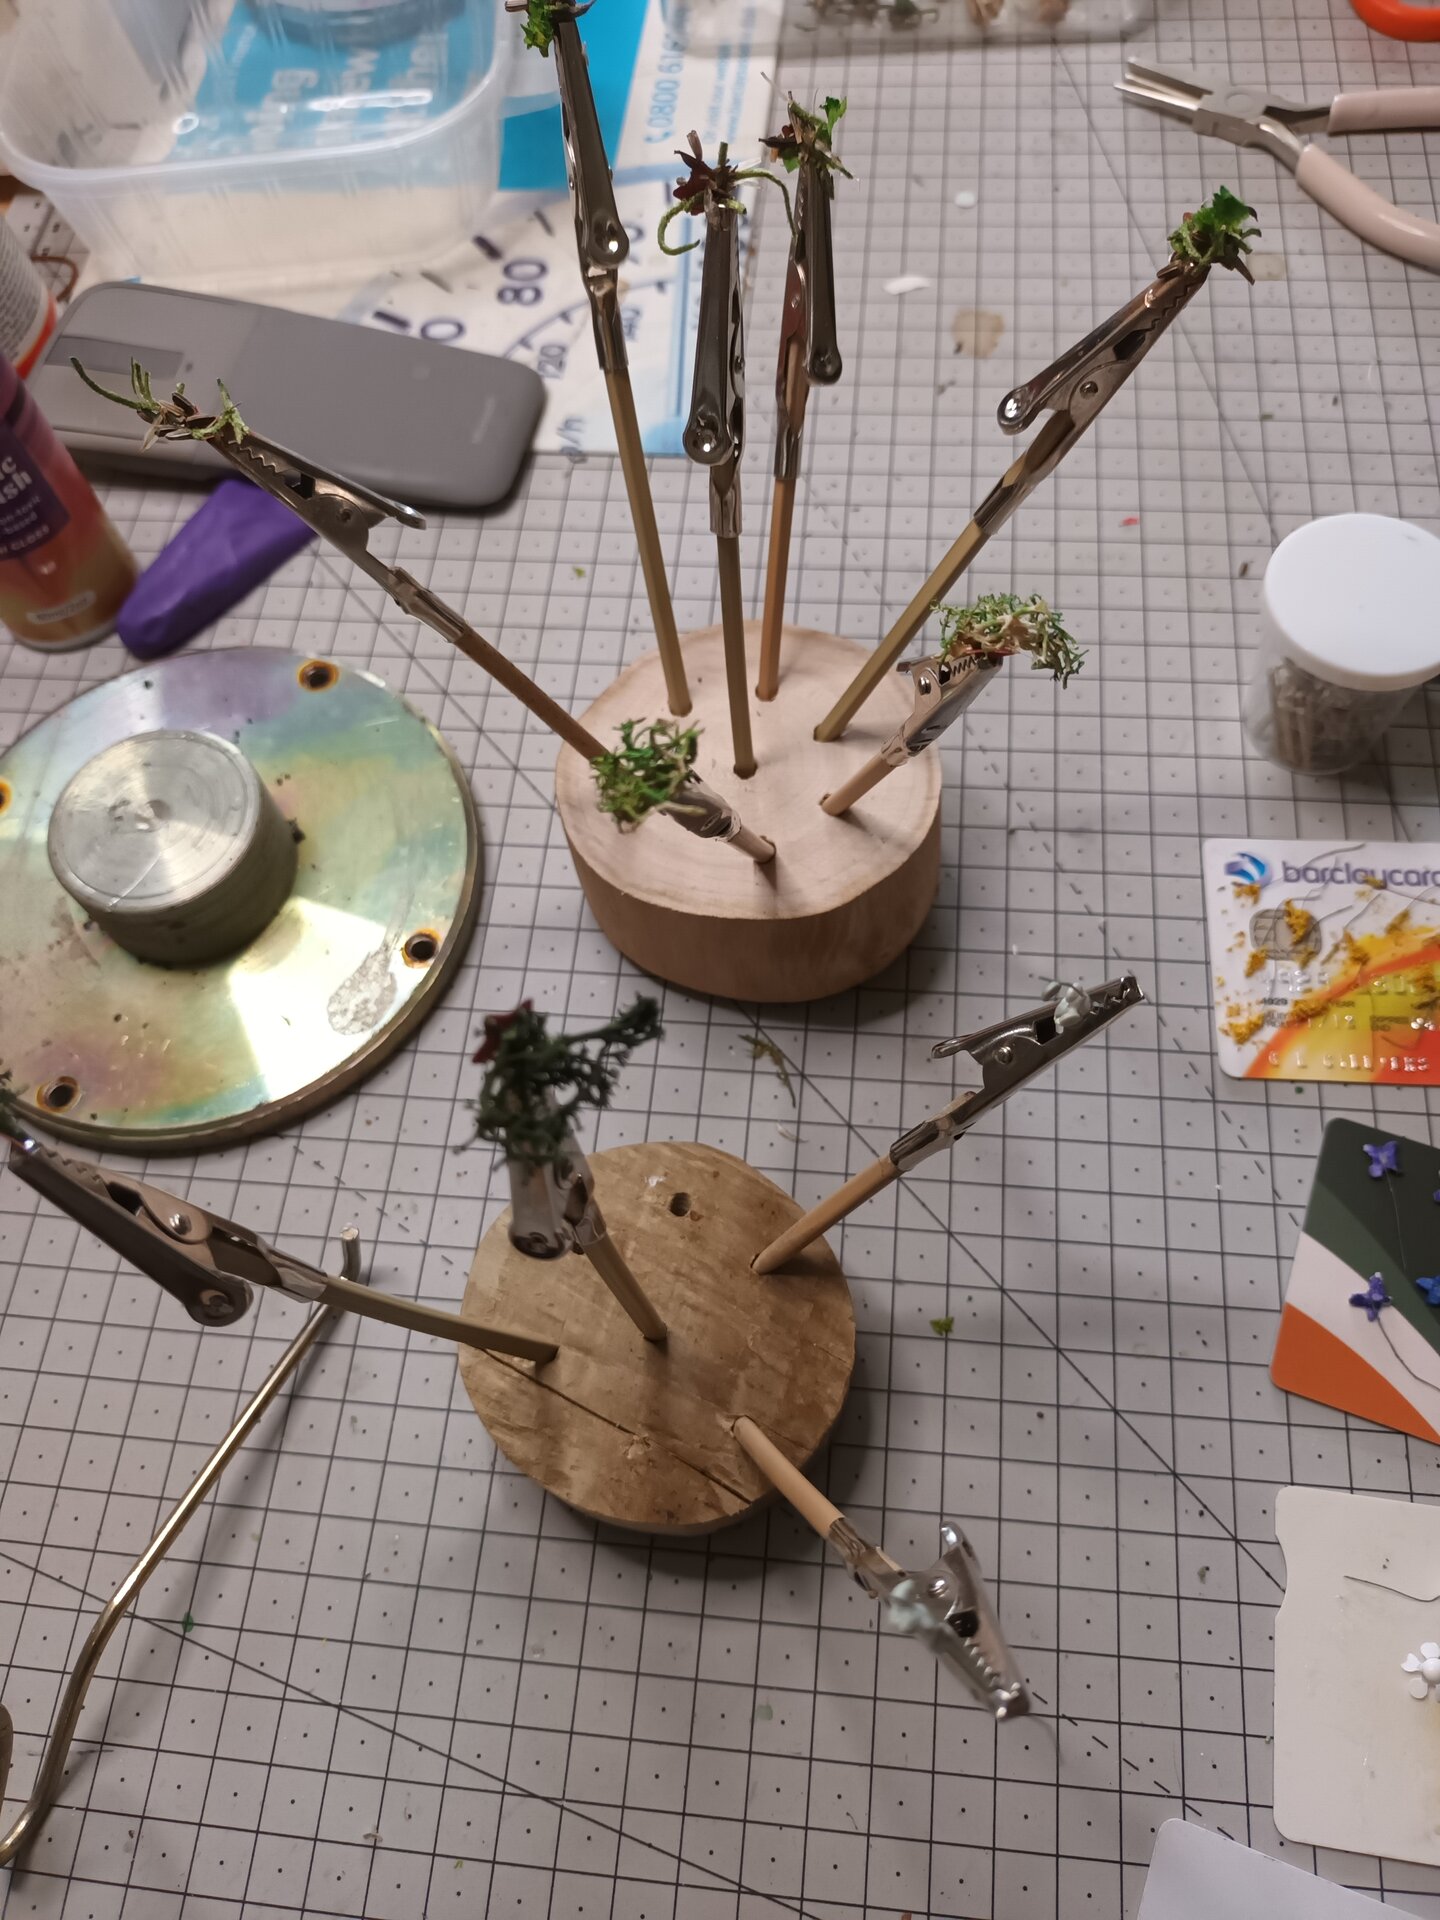
- Foliage Application:
- Pull apart polyester fiber fill (creates web-like structure)
- Stretch over wire branches
- Spray with diluted PVA (holds shape)
- Apply different colored ground foam/flock
- Multiple colors (dark green, light green, yellow-green, brown)
- Layer different textures (depth)
- Less dense at edges (natural, not solid blobs)
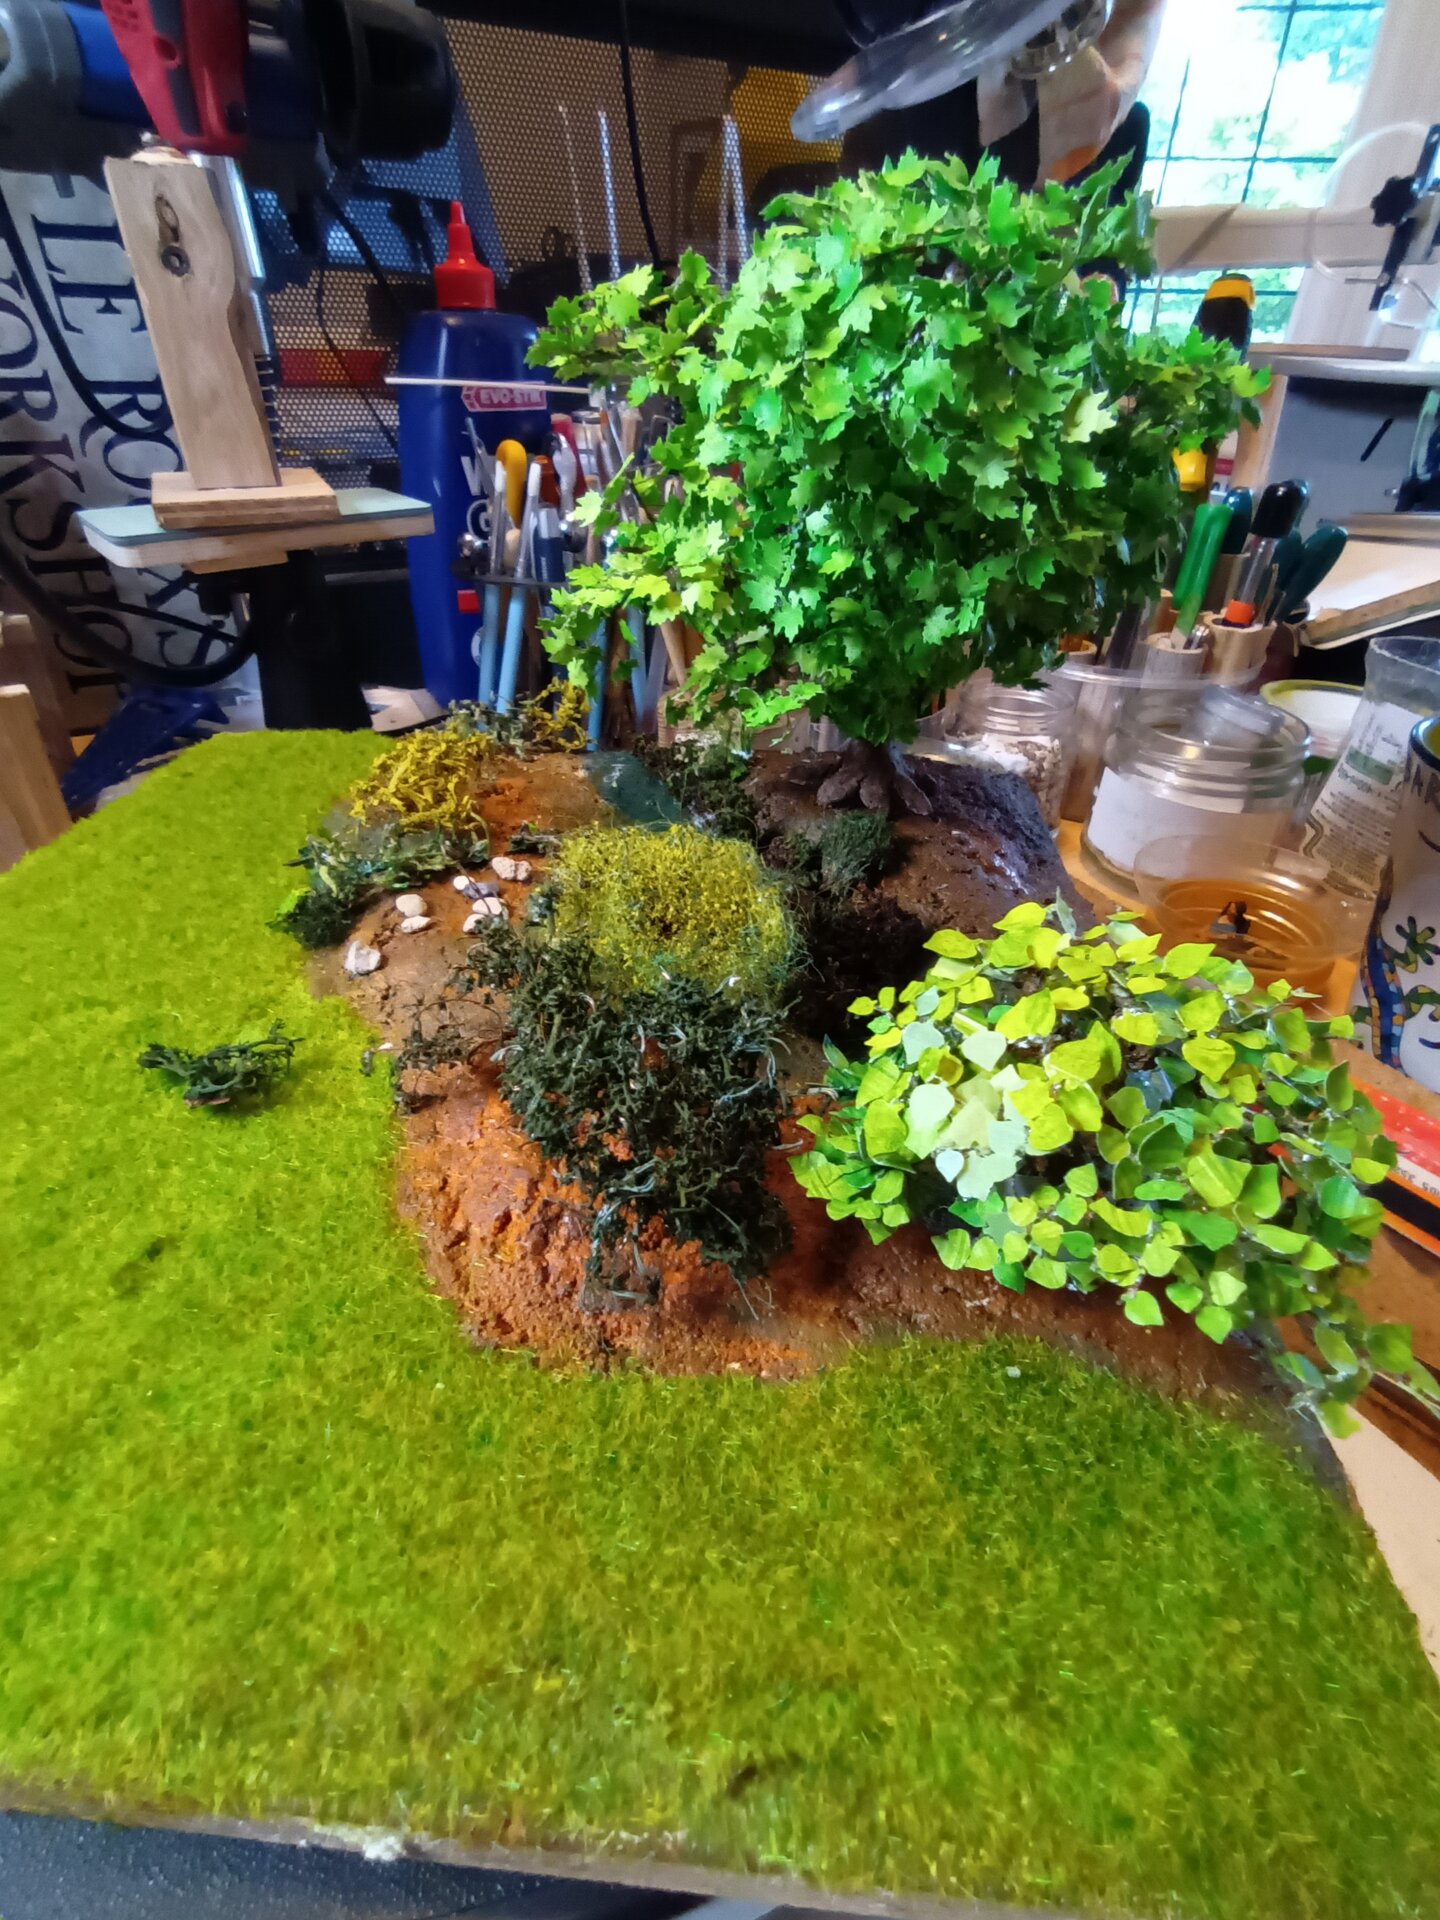
Tree Types Created:
- 3 background trees (taller, establishing scale and depth)
- 2 mid-ground trees (frame composition)
- 1 foreground tree (detail, shows off technique)
Total trees: 6 (enough to suggest woodland without crowding)
Custom Tool Development
During scenery construction, I made several custom tools:
Static Grass Applicator:
- Purpose: Stand grass fibers upright (realistic grass effect)
- Construction: Modified tea strainer + 9V battery + wire
- Theory: Static charge makes fibers stand up
- Reality: It worked! (somewhat unpredictably)
- Cost: ~£2 vs. £40+ for commercial version
Foliage Applicator (Tweezer-Sifter Hybrid):
- Purpose: Apply fine flock precisely
- Construction: Fine mesh + tweezers + small reservoir
- Allows controlled sprinkle of flock onto glue
- Better control than fingers or shakers
Tree Bark Texture Tool:
- Purpose: Create bark patterns in putty trunks
- Construction: Wire brush head wrapped with coarse thread
- Roll along wet putty = bark texture
- (Mostly used twisted wire trunks, but tool available)
Lesson: Sometimes making a simple tool takes 20 minutes and saves hours of frustration. Don’t be afraid to make custom solutions.
Rocky Riverbank Construction

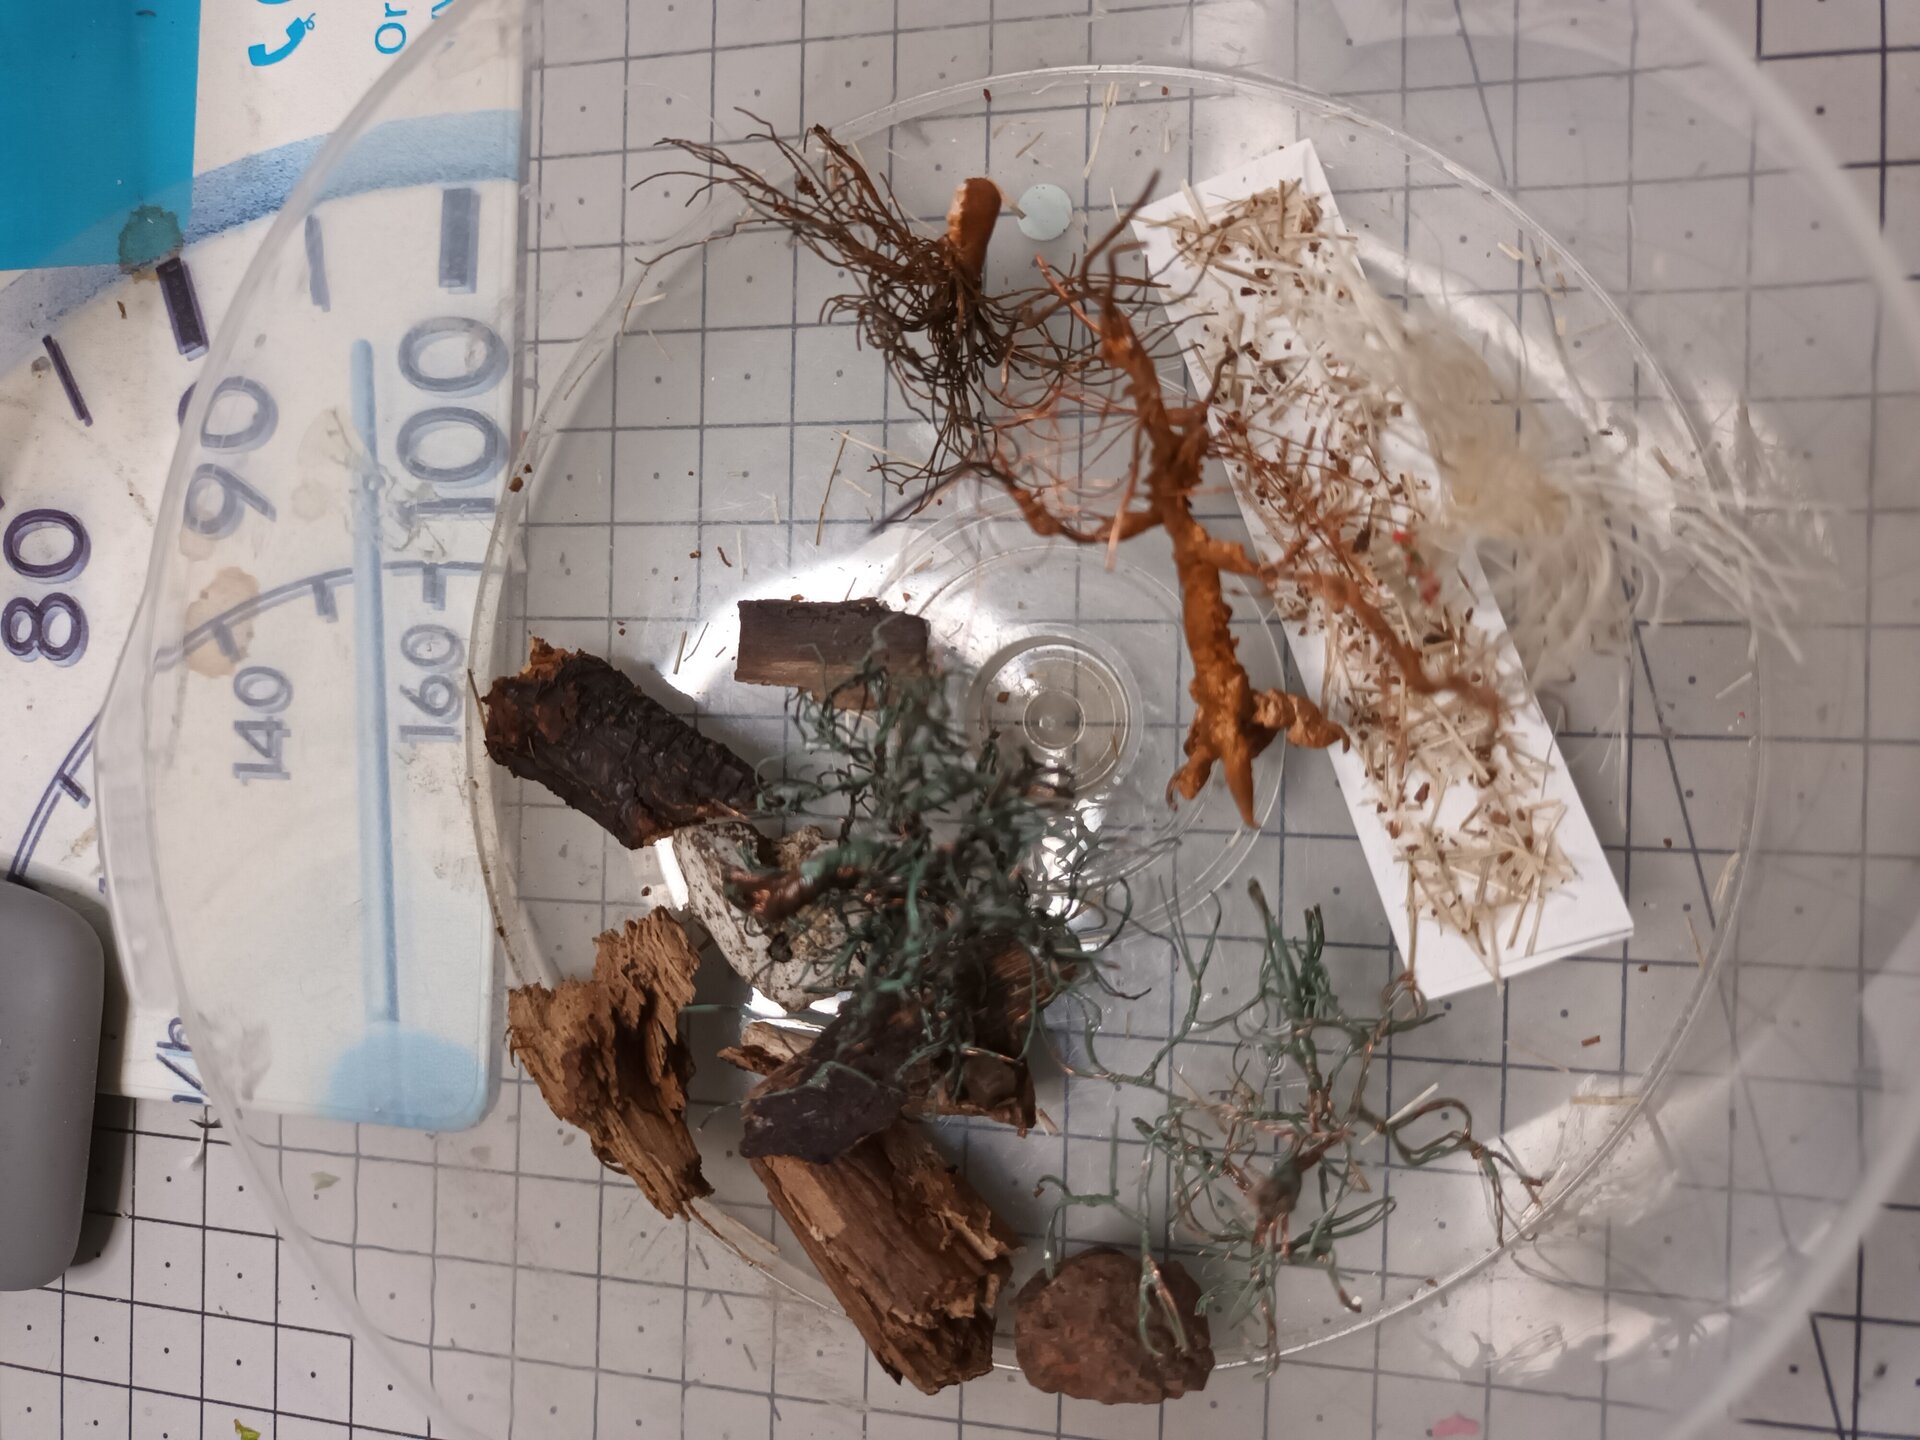
Rock Materials:
- Real small stones (appropriate scale)
- Broken cork bark (looks like larger boulders)
- Carved foam (lightweight, large rocks)
- Plaster/filler (embedding and texture)
Rock Placement Strategy:
- Larger rocks near water (realistic erosion pattern)
- Smaller stones higher up bank
- Random placement (nature isn’t regular)
- Some partially buried (realistic, not just sitting on surface)
- Varied colors (not all same stone type)
Rock Painting:
- Base coat: grey/brown mix
- Wash: diluted black (settles in cracks)
- Dry brush: light grey (highlights)
- Dry brush: green/brown (moss/lichen on some)
- Some orange/rust (iron in Welsh stone)
- Variation: Not all rocks same color
Result: Rocks read as Welsh stone - grey, weathered, varied, some with moss. Not pretty decorative stones, but realistic riverside rocks.
Vegetation: Layers of Texture
Vegetation Application Strategy:
Layer 1 - Base Texture:
- Fine sand/ballast
- Earth colors (brown, dark green)
- PVA adhesive
- Covers exposed base
Layer 2 - Coarse Ground Cover:
- Scatter materials (multiple colors)
- Varied shades of green
- Some brown (dead vegetation, dirt patches)
- Creates base for grass
Layer 3 - Static Grass:
- Multiple grass colors and lengths
- Applied in patches (not uniform lawn)
- Denser in some areas (campsite clearing)
- Sparser in others (rocky areas, under trees)
- Varied heights (2mm, 4mm, 6mm)
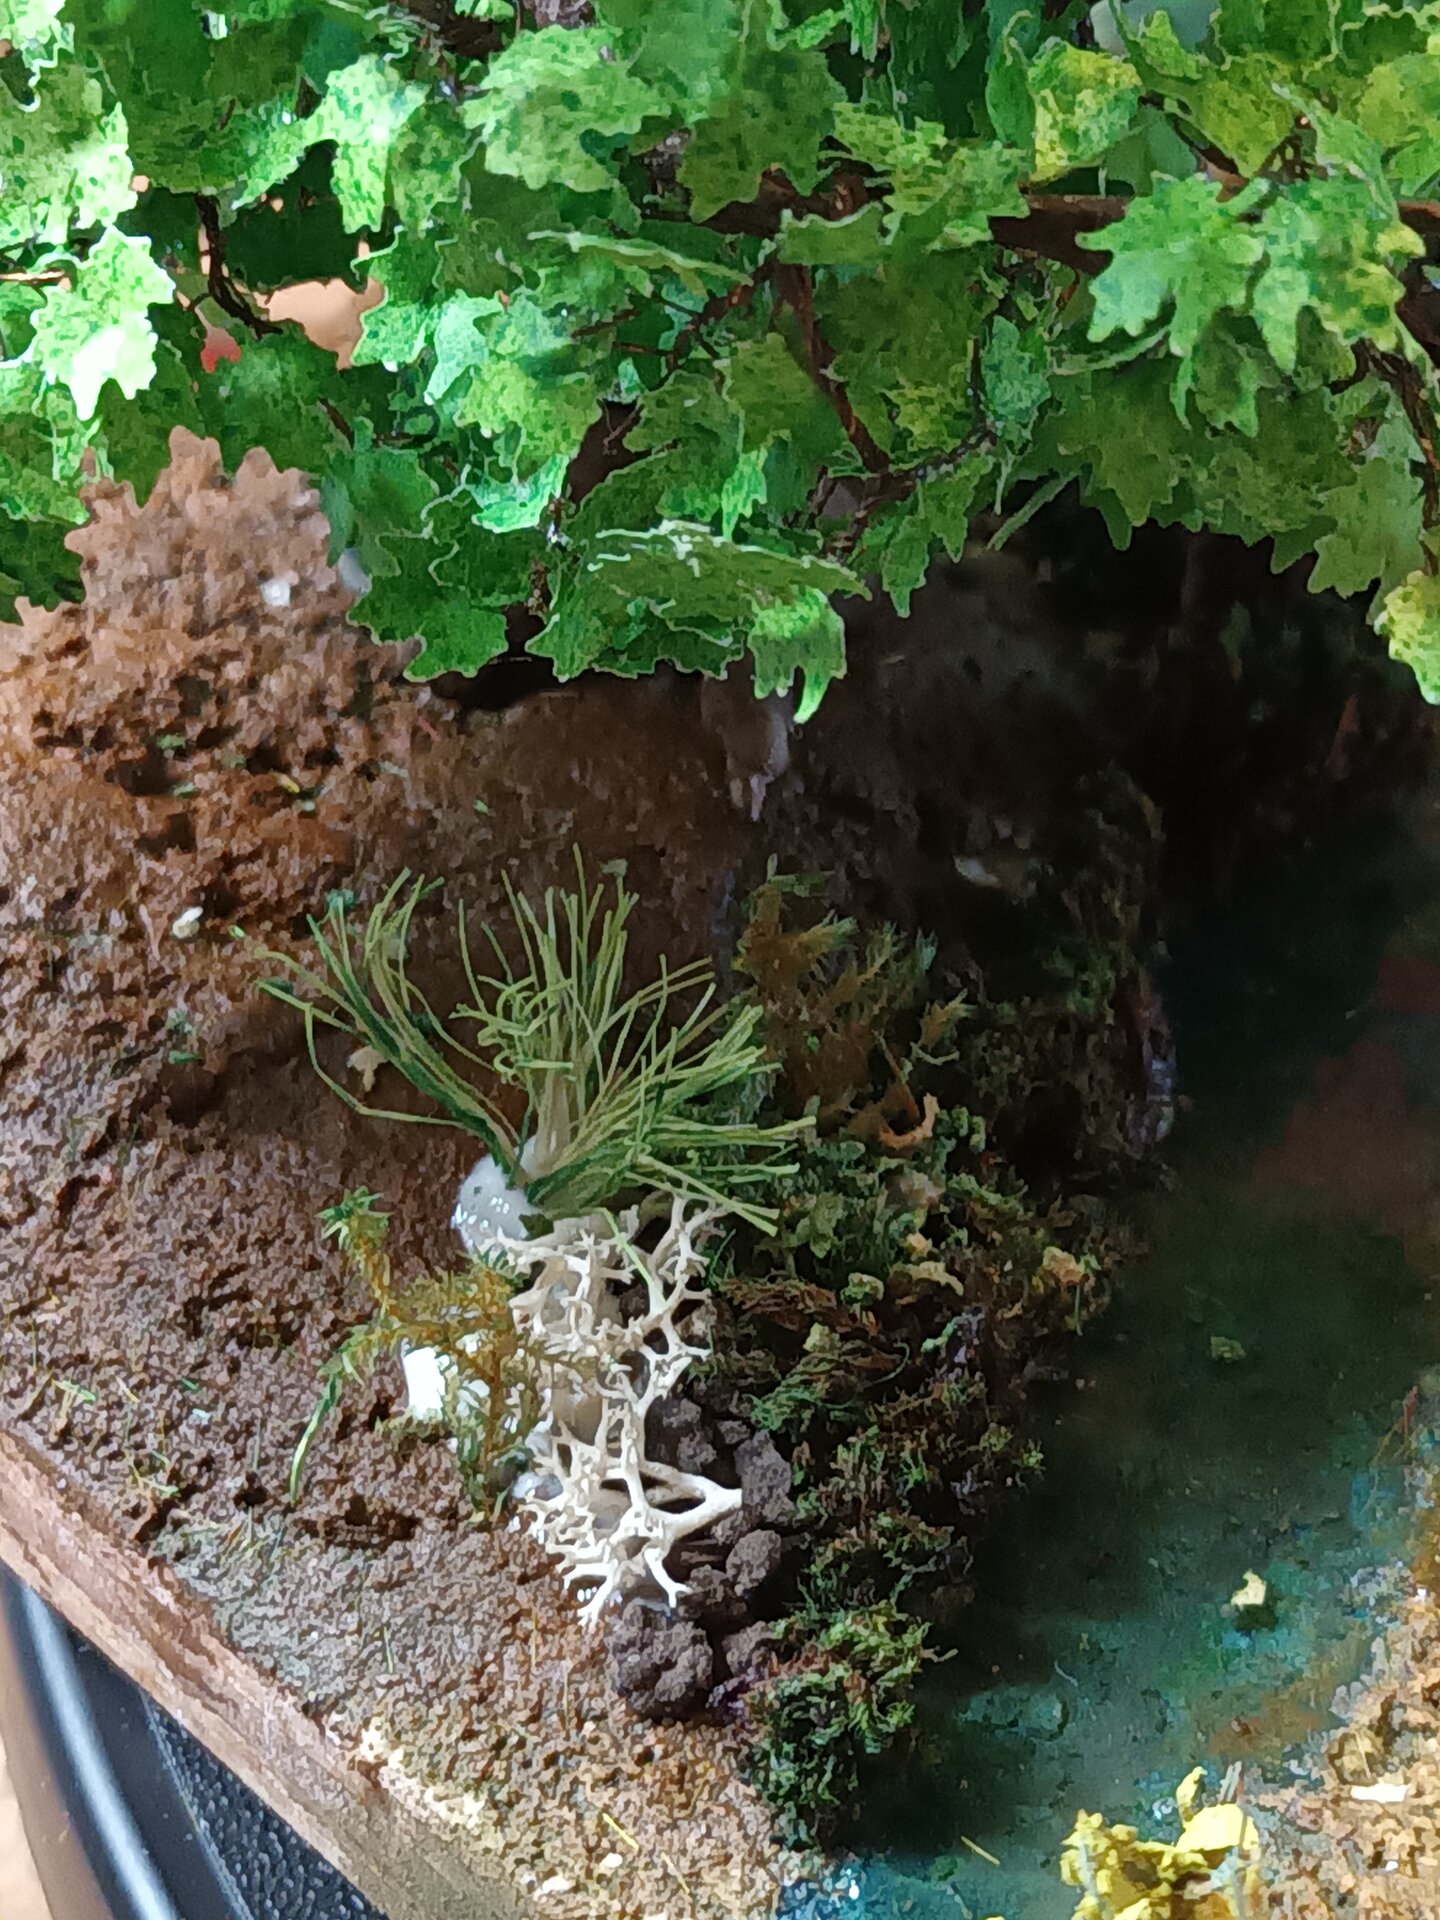
Layer 4 - Accent Plants:
- Fern fronds (made from painted fabric leaves)
- Taller grass tufts
- Wild flower clusters (small dried flowers painted)
- Patches of color (not just green)
Layer 5 - Final Details:
- Individual grass blades (tall, at edges)
- Fallen leaves (punched paper, painted)
- Small debris (tiny twigs, bark bits)
- Final flock and texture
Key Principle: Nature has layers of texture at different scales. Replicating this in miniature creates convincing landscape depth.
The Composition Coming Together
Compositional Considerations:
Visual Flow:
- Viewer’s eye enters scene through foreground
- Travels to main subjects (car, caravan, figures)
- Explores details (Tilly, trees, river)
- Suggests continuation beyond edges
Depth Cues:
- Objects overlap (foreground over background)
- Size variation (larger near, smaller far)
- Detail gradation (more detail near, less detail far)
- Color shift (slightly hazier in background)
Balance:
- Not centered (more interesting)
- Weight distributed (not all on one side)
- Vertical elements (trees) balance horizontal elements (car/caravan)
- Negative space (allows breathing room)
Story Elements:
- Caravan and car suggest travel/arrival
- Figures near vehicles (setup/pack-up moment)
- Tilly exploring (dog behavior, adds life)
- Riverside setting (peaceful, vacation feel)
What Makes it Work:
- Clear focal point (vehicles and figures)
- Supporting elements don’t distract
- Sense of place (Welsh riverside)
- Tells a story (family trip moment)
Problem Solving: Limited Space
Challenges Encountered:
- Trees Too Tall:
- First trees overwhelmed scene
- Solution: Made shorter trees, saved tall ones for background
- Varied heights create depth without dominating
- River Too Wide:
- Initial river took too much space
- Solution: Narrowed river, made it diagonal (suggests flow continues)
- Implied water more effective than showing entire river
- Too Much Vegetation:
- First attempt looked cluttered
- Solution: Removed some vegetation, left space for eye to rest
- Less is more - strategic placement beats blanket coverage
- Figures Got Lost:
- Figures disappeared among scenery
- Solution: Cleared immediate area around figures, created “campsite clearing”
- Natural but provides focus area
- Base Edge Treatment:
- Hard edges looked artificial
- Solution: Brought vegetation and texture to edges, broke up hard line
- Scene feels continuous beyond base
Skills Developed
New Skills:
- Miniature tree construction from wire
- DIY foliage creation (fiber + flock)
- Static grass application
- Multi-layer vegetation techniques
- Composition planning with fixed elements
- Working within strict space constraints
- Custom tool making for specific tasks
Improved Skills:
- Color variation in natural elements
- Texture layering for depth
- Creating impression of larger space in limited area
- Strategic detail placement
Research Skills:
- Plant identification and regional flora
- Reference gathering for natural landscapes
- Understanding landscape composition
Important Lesson: Scenery is about suggestion and layers. You’re creating the impression of a landscape, not recreating every blade of grass. Strategic detail work beats trying to cover everything.
Materials Used
Base Structure:
- MDF board (foundation)
- Foam board (topography)
- Plaster/filler (texture)
- PVA glue (adhesive and sealant)
Trees:
- Wire (multiple gauges for armatures)
- Polyester fiber fill (foliage base)
- Ground foam/flock (multiple colors)
- Paint (trunk colors)
Rocks:
- Natural small stones
- Cork bark
- Carved foam
- Various paints
Vegetation:
- Static grass (2mm, 4mm, 6mm in multiple colors)
- Scatter materials (ground texture)
- Sand/ballast (base texture)
- Dried plant materials (modified)
- Punched paper (leaves)
Custom Tools:
- Static grass applicator (DIY)
- Foliage applicator (DIY)
- Various adapted household items
Time Investment: ~20 hours (including research, testing, and multiple layout iterations)
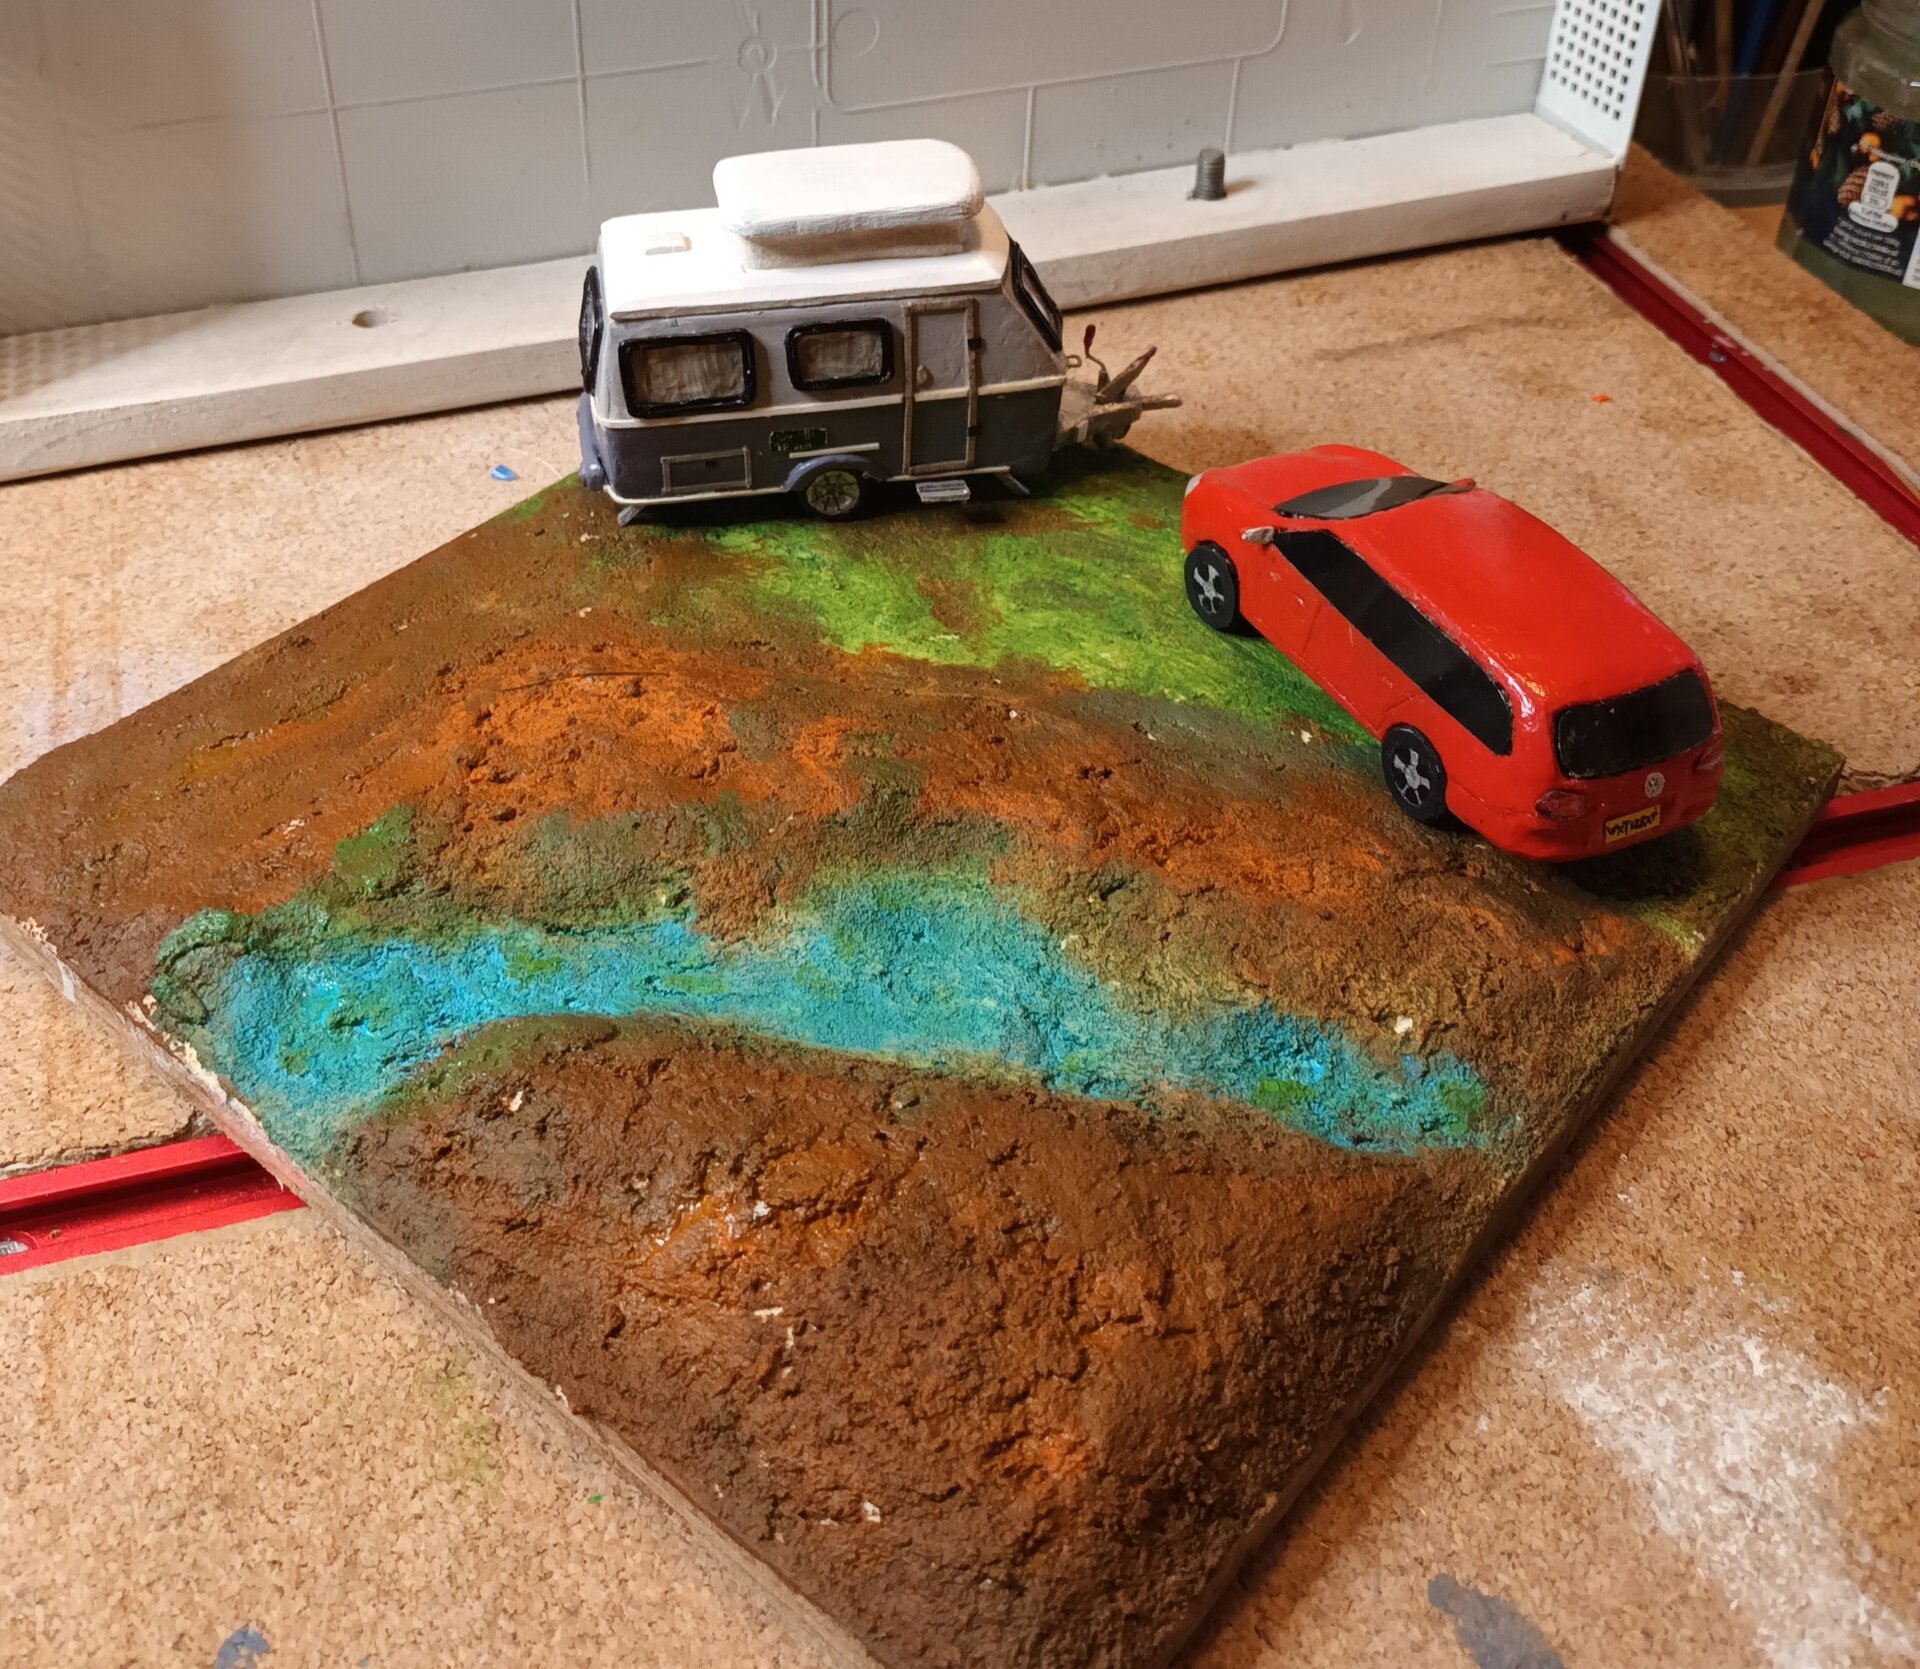
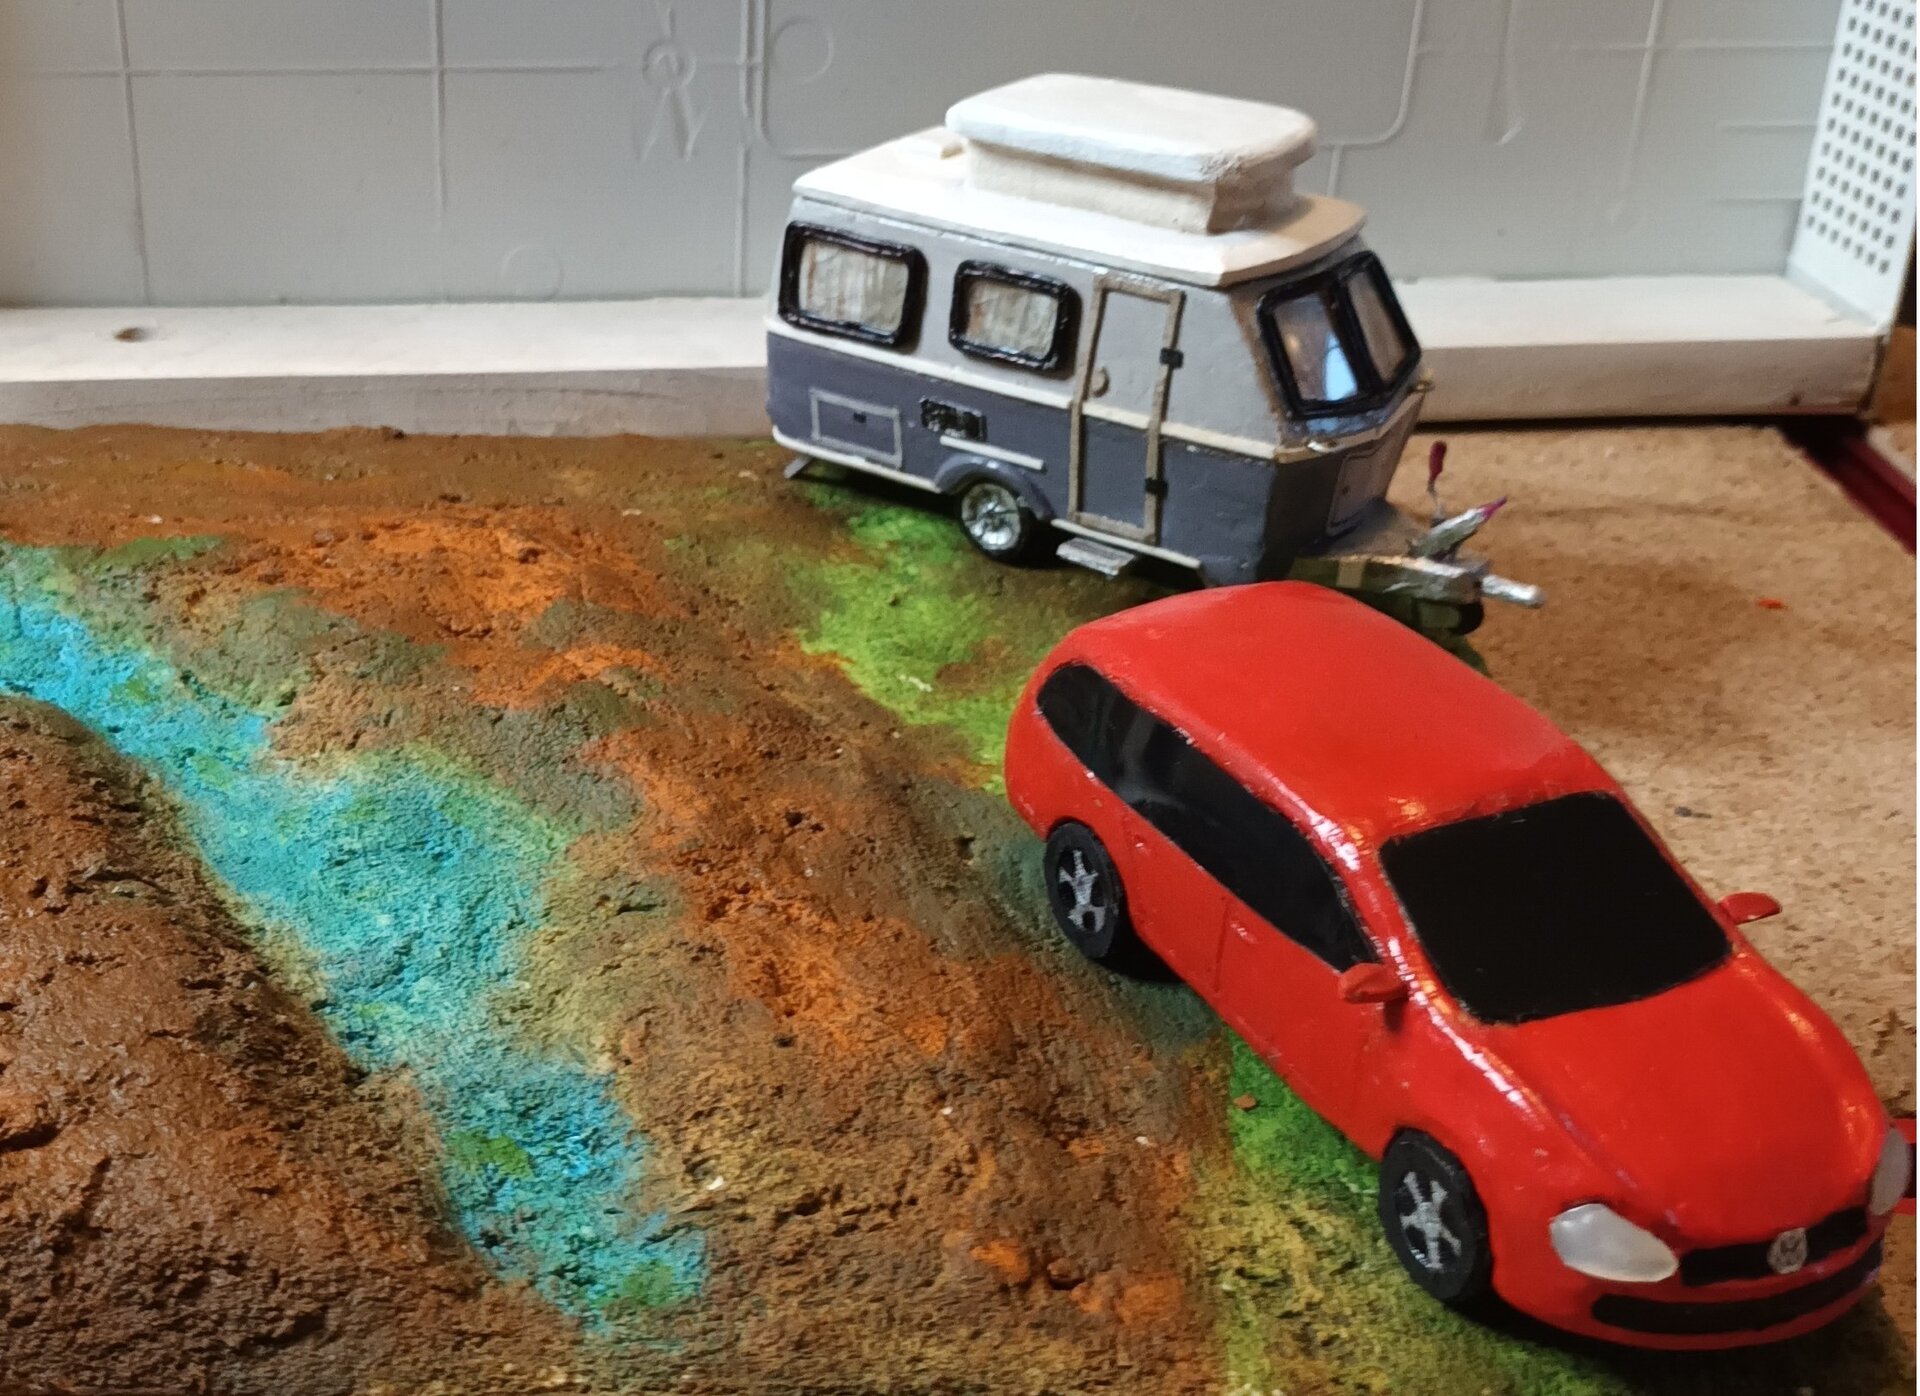
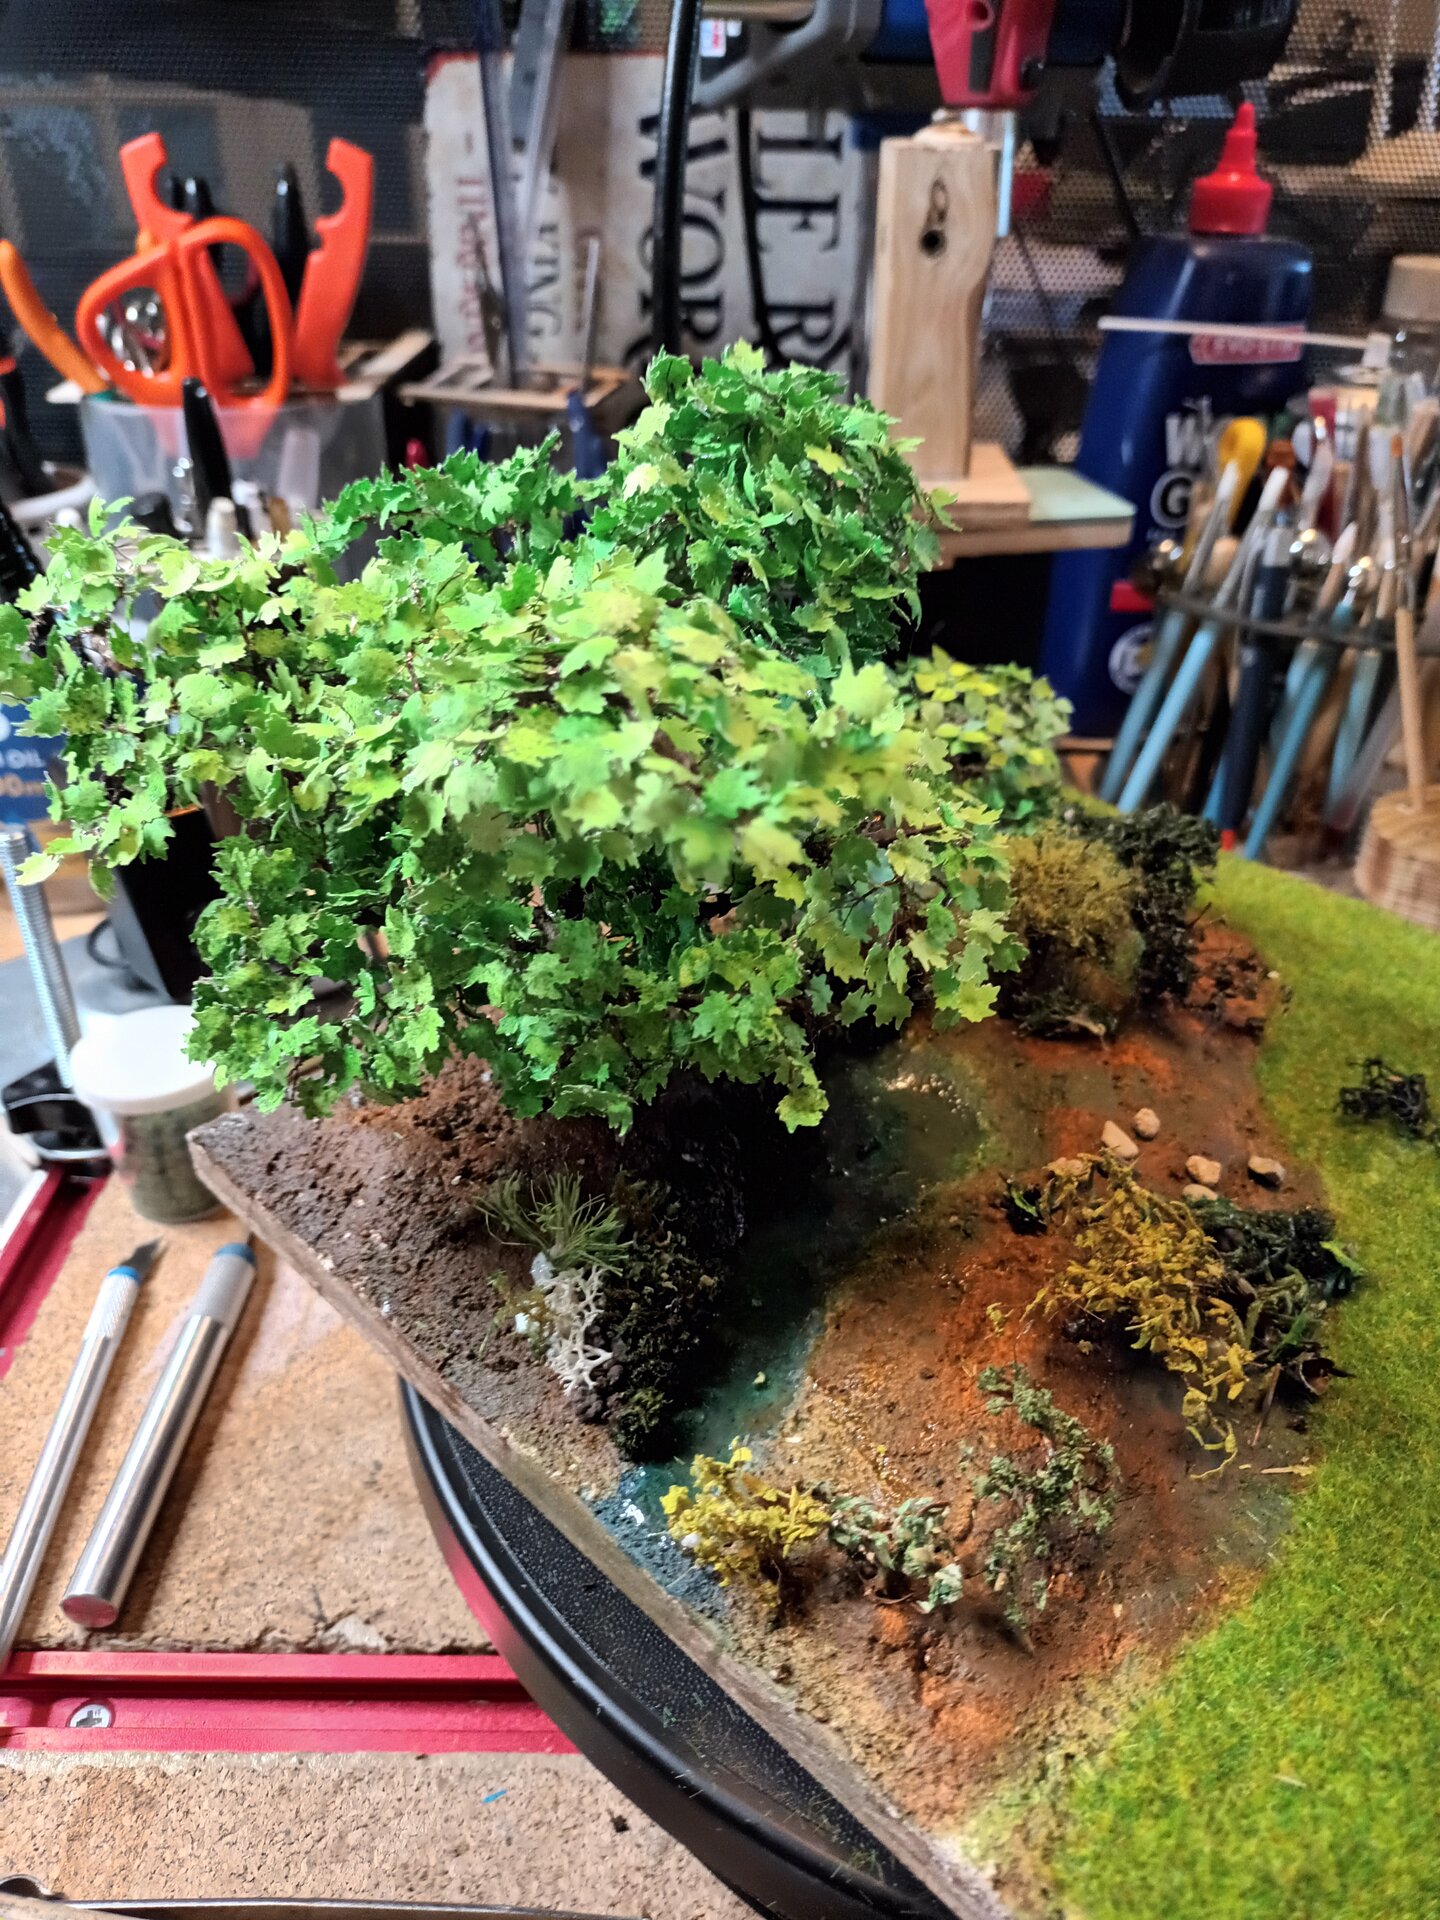
The Scene Taking Shape
With the scenery largely complete, the diorama transformed from “components on a base” to “a place.” The caravan and car now sit in a Welsh riverside setting that feels authentic and lived-in.
What’s Working:
- Trees create depth and frame the scene
- Rocky riverbank suggests flowing water nearby
- Layered vegetation provides texture and realism
- Composition draws eye to main subjects
- Space feels larger than actual base size
- Authentically Welsh feel (green, lush, slightly wild)
What Remains:
- Ground cover completion (static grass areas)
- River water effects (resin water)
- Final integration of all elements
- Last details and weathering
Two major elements remained: completing the grass work to create the campsite feel, and adding the river water to bring the scene to life.
Reflections
What Worked:
- DIY foliage technique (cost-effective, controllable)
- Layered vegetation approach (creates depth)
- Research into Welsh flora (authentic feel)
- Custom tools (solved specific problems)
- Strategic space management (fits despite constraints)
What Was Challenging:
- Working within tight space constraints
- Balancing detail with viewing distance
- Preventing scene from looking cluttered
- Creating depth in limited area
- Time management (20 hours flew by)
What I’d Do Differently:
- Make test trees before final trees (learned as I went)
- Plan vegetation placement more carefully (removed some initially placed)
- Take more in-process photos (focused on building, forgot to document)
Key Insight: Scenery is as much about what you leave out as what you include. The space between elements matters as much as the elements themselves.
Next Steps
With the landscape and vegetation largely complete, two major tasks remained:
- Ground cover completion - finishing the static grass application, creating the campsite clearing, final vegetation details
- River effects - creating flowing water with resin, painting the river bed, achieving realistic water appearance
These final elements would transform the setting from “background” to “environment.”
Coming in Build Log 006: Static Grass and River Effects - Creating realistic grass coverage and water using resin techniques.
Materials Cost This Phase: ~£35
Time Spent: 20 hours
Trees Built: 6
Custom Tools Made: 3
Research Hours: ~4 hours (Welsh flora and riverside landscapes)
Space Management: Successfully fit extensive scenery in 350mm x 250mm
Previous: 004 - Figures and Tilly
Next: 006 - Static Grass and River Effects
Have questions or feedback about this project? I'd love to hear from you.