Date: March 30 - April 18, 2025 Phase: Ground Cover and Water Effects Time Spent: ~16 hours Status: Completed
Two Critical Elements: Grass and Water
With the scenery structure complete, two elements remained that would transform the diorama from “interesting” to “immersive”:
Static Grass - Creating convincing grass coverage that looked natural, not like astroturf
River Water - Making water that actually looked wet, reflective, and flowing
Both techniques were new to me. Both required research, testing, and accepting that first attempts might fail.
Static grass application in progress - creating natural variationPreparing the river bed for water effects
The Campsite Research Trip
Before tackling the grass work, I did something unusual: I visited actual caravan campsites in Wales.
What I Was Looking For:
How grass actually grows around caravans
Wear patterns (where people walk)
Natural vs. maintained areas
Color variations in grass
Texture differences between areas
Observations:
Real Welsh campsite - studying grass patterns around caravansNotice the worn paths, varied grass lengths, and bare patchesGrass grows differently in shade vs. sun, near vehicles vs. away</figcacaption>
</figure>
</div>
**Key Findings:**
- **Immediate area around caravan:** Shorter grass (mown or worn down)
- **Vehicle tracks:** Visible flattened paths, some bare earth
- **High traffic areas:** (near door, around car) grass shorter and sparser
- **Away from activity:** Taller, lusher grass
- **Under trees:** Patchier, more moss and bare ground
- **Color variation:** Multiple shades of green, some yellow/brown patches
- **Not uniform:** Nature doesn't do perfect lawns
This research trip was invaluable. I stopped thinking "add grass" and started thinking "where would grass grow and how would it look in this scenario?"
---
### Static Grass: Theory and Practice
**What is Static Grass?**
Static grass is tiny fibers (usually nylon or rayon) that can be made to stand upright using static electricity, creating realistic-looking grass at miniature scales.
**Available Lengths:**
- 2mm - very short grass, lawn-like
- 4mm - medium grass, typical field
- 6mm - tall grass, wild areas
- 12mm+ - very tall grass, wheat fields, meadows
**Colors Available:**
- Light green (spring grass)
- Dark green (lush summer grass)
- Yellow-green (dried grass)
- Brown (dead grass, autumn)
- Multiple shades in between
**The Static Grass Applicator:**
DIY static grass applicator - tea strainer + 9V battery + wire = grass magic
**How It Works:**
1. PVA glue applied to area where grass will go
2. Static grass fibers placed in applicator (metal tea strainer)
3. 9V battery creates electric charge
4. Fibers fall through mesh onto glue
5. Static charge makes fibers stand upright
6. Fibers stick to glue in standing position
7. Allow to dry (30-60 minutes)
8. Excess fibers brushed away and recycled
**The Reality:**
- Works... mostly
- Some fibers stand up perfectly (yay!)
- Some fibers lay flat (less yay)
- Coverage is uneven (actually good - nature is uneven)
- Requires multiple applications to build up
- Wind from breathing can blow fibers before they stick (annoying)
---
### Static Grass Application Strategy
**Planning the Grass Layout:**
Marking out different grass zones before applicationFirst areas of static grass applied - the ground comes alive
**Zone 1: Immediate Caravan Area (2mm grass)**
- Short grass (regularly mown at campsites)
- Dark green (healthy, maintained)
- Dense coverage (established pitch)
- Some worn patches near door/steps
**Zone 2: Around Car (2-4mm mixed)**
- Slightly longer (less foot traffic than caravan area)
- Mixed colors (some yellowing from vehicle weight)
- Tire track areas = compressed/bare
- Mix of 2mm and 4mm for variation
**Zone 3: Away from Vehicles (4-6mm grass)**
- Longer grass (natural growth)
- Multiple colors mixed (realistic variation)
- Denser in some areas, sparser in others
- Tallest grass near edges (suggests continuation)
**Zone 4: Under Trees (2-4mm, sparse)**
- Patchy coverage (less light)
- More brown/dead grass mixed in
- Some bare ground showing through
- Moss suggested with fine green texture
**Zone 5: Near River (4-6mm, lush)**
- Longer grass (more moisture)
- Bright green (well-watered)
- Some wild grass tufts (tall individual fibers)
- Dense but not uniform
---
### The Application Process
**Session 1: Base Coverage**
Applied first layer of 2mm grass to main campsite area:
- PVA glue thinned slightly (easier to spread)
- Applied to Section 1 (immediate caravan area)
- Static applicator charged and ready
- First attempt: fibers everywhere (including my face)
- Second attempt: more controlled
- Result: Patchy but promising
**Lesson 1:** Work in small sections (50mm x 50mm maximum). Glue dries too fast for large areas.
**Session 2: Building Up Layers**
Added second layer in sparse areas:
- Identified thin spots after first layer dried
- Applied more glue to just those areas
- Added more grass (sometimes different length/color)
- Built up coverage gradually
- Result: More convincing depth
**Lesson 2:** Multiple thin layers beat one thick layer. Grass has depth in nature.
**Session 3: Color Variation**
Added different colored grass in strategic areas:
- Yellow-green grass in worn areas
- Brown grass patches (dead grass, realistic)
- Light green for spring growth effect
- Mixed colors in same area (nature doesn't do single colors)
- Result: Much more natural appearance
**Lesson 3:** Color variation is critical. Uniform color reads as fake.
**Session 4: Tall Grass Areas**
Applied 4mm and 6mm grass in wilder areas:
- Used away from main subjects (doesn't hide details)
- Created sense of depth (tall grass suggests distance)
- Some individual tall fibers (wild grass effect)
- Mixed with shorter grass (natural transition)
- Result: Convincing wild areas
**Lesson 4:** Vary heights for realistic landscapes. Nature has multiple grass lengths.
**Session 5: Final Details**
Added finishing touches:
- Individual grass blades (long fibers glued by hand)
- Clumps and tufts (small groups of fibers)
- Seed heads (tiny dried flower stems)
- Final color accents
- Result: Life-like grass coverage
**Total grass application time:** ~8 hours across 5 sessions
---
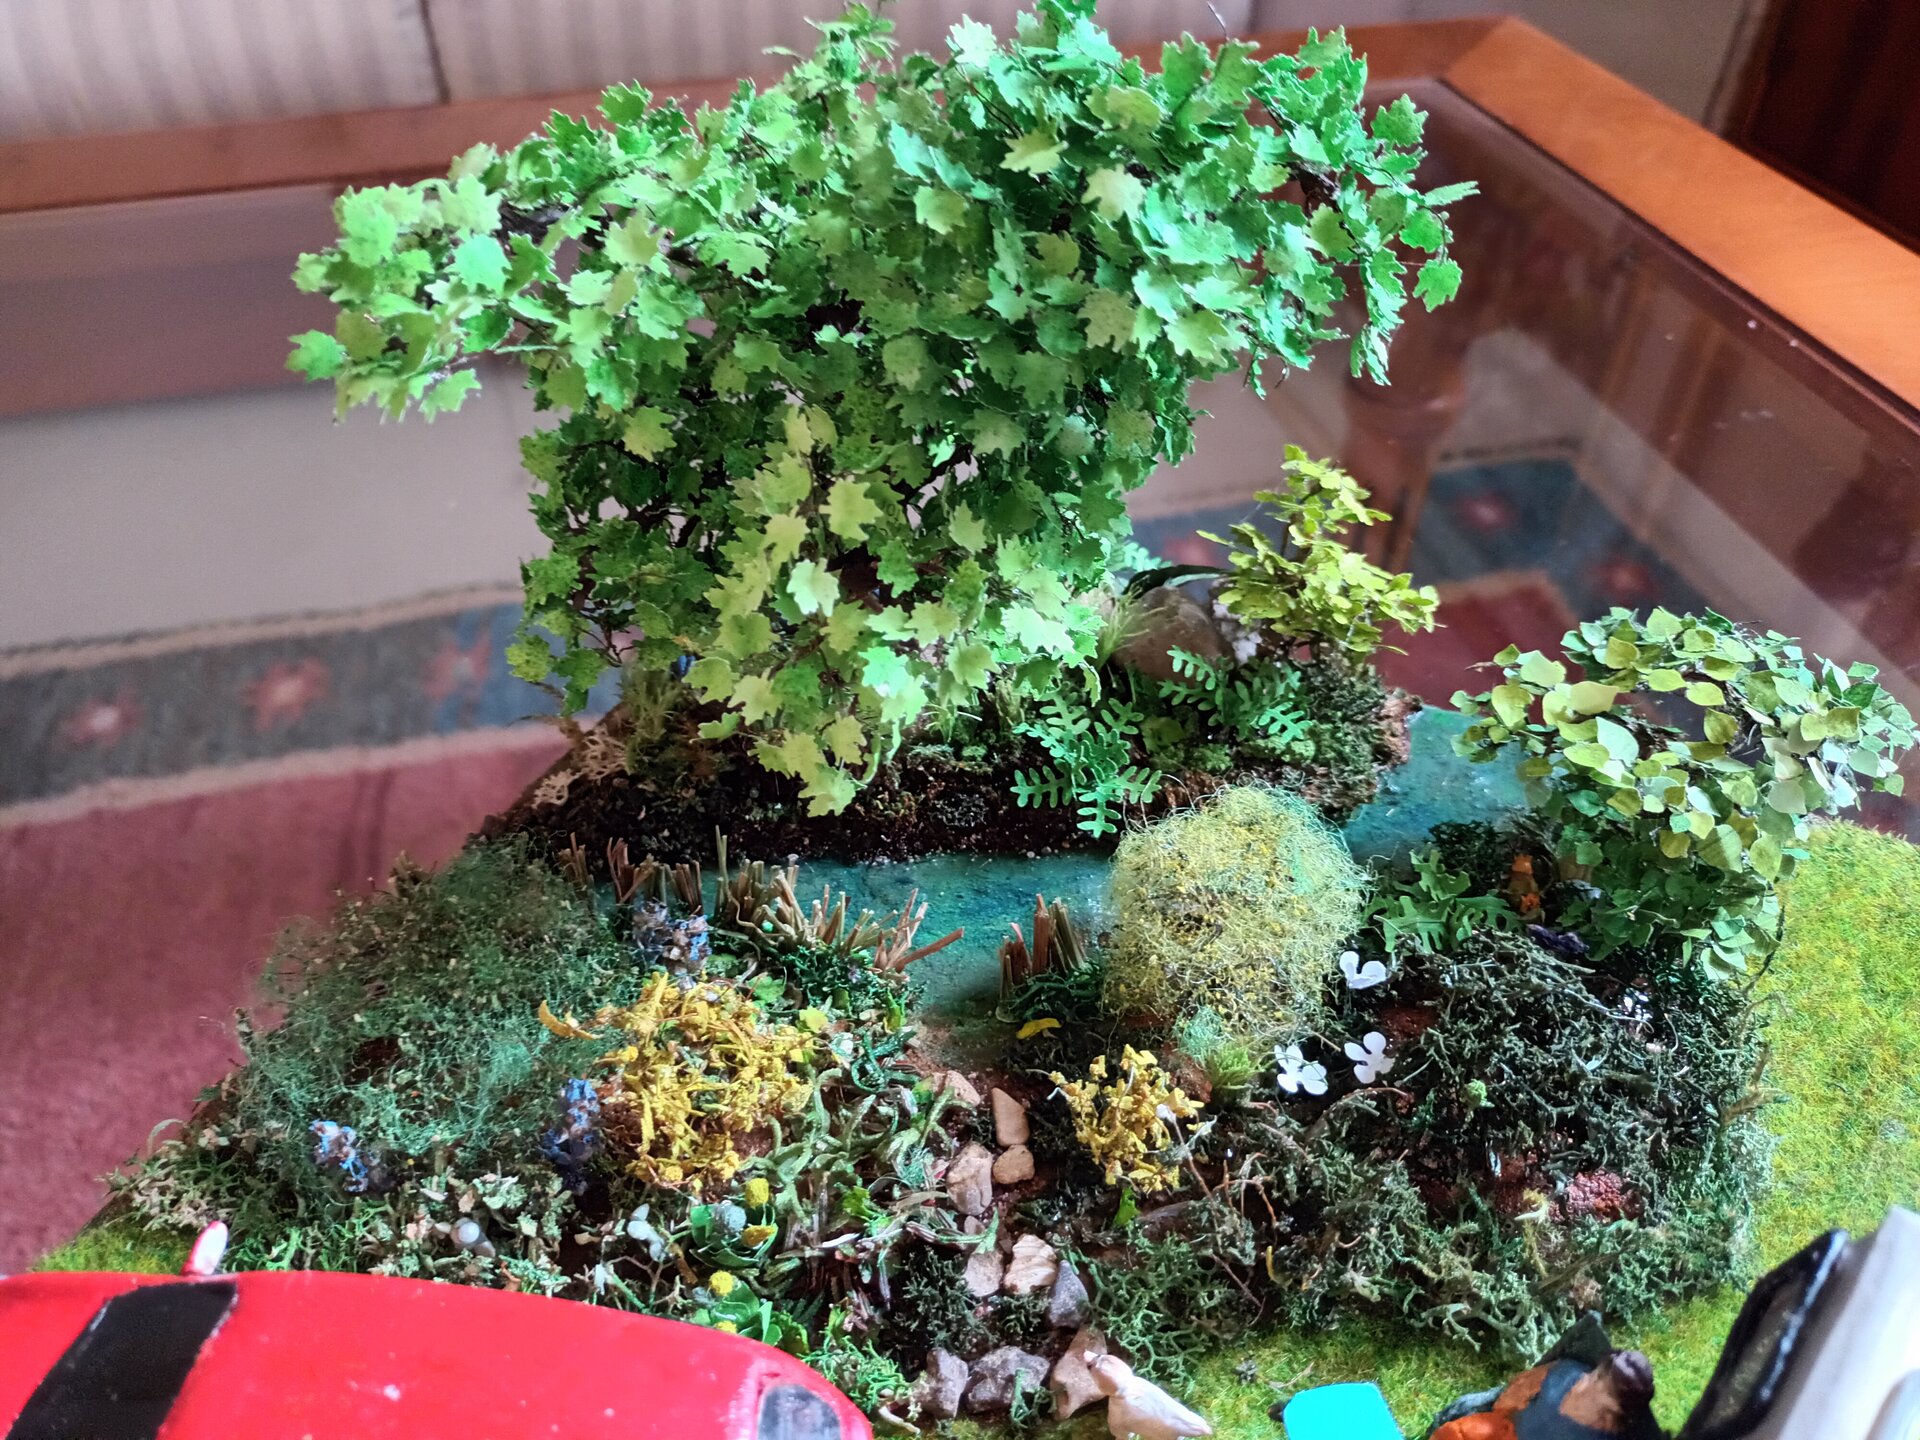
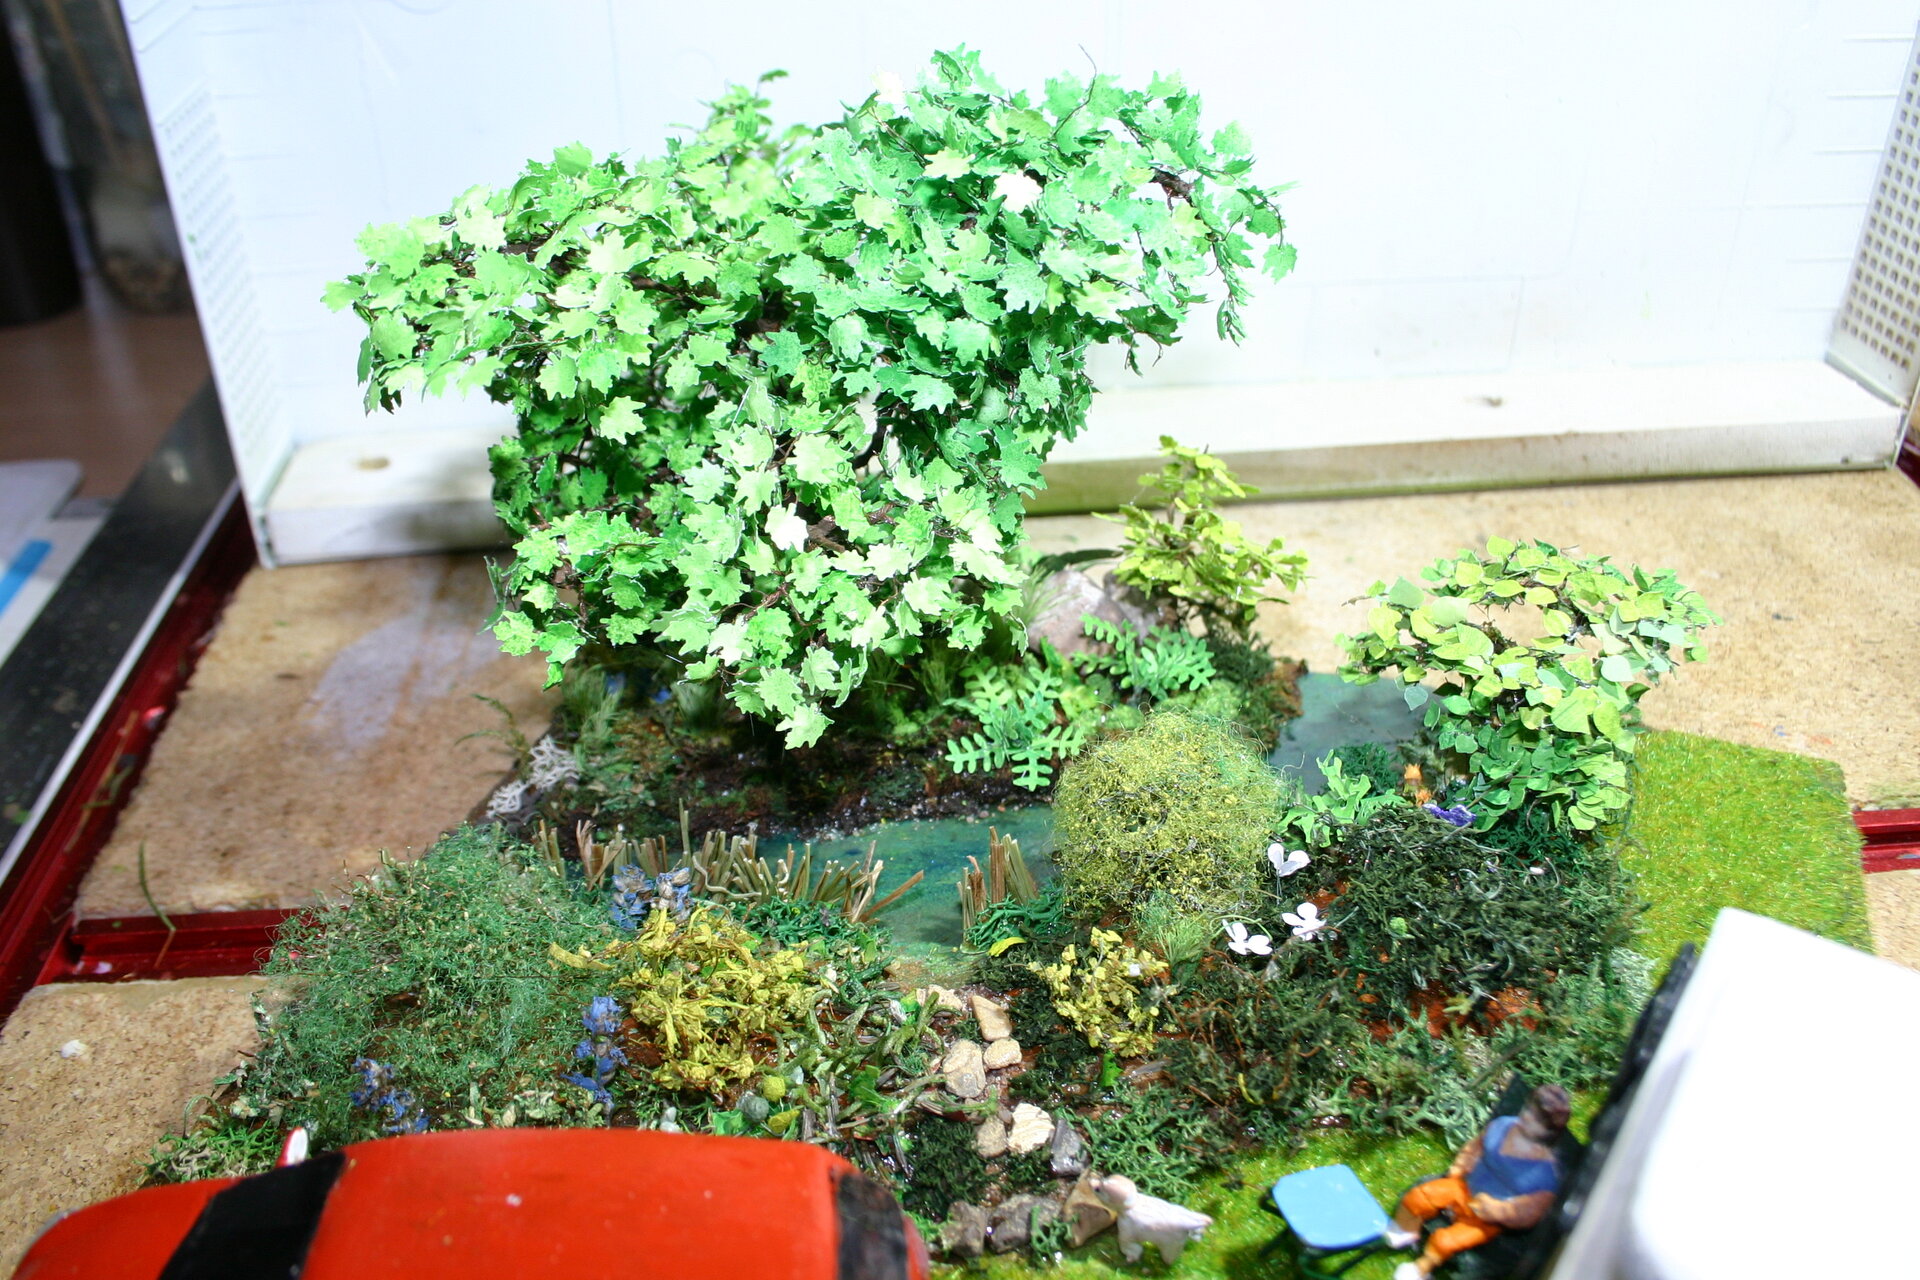
### The Static Grass Results
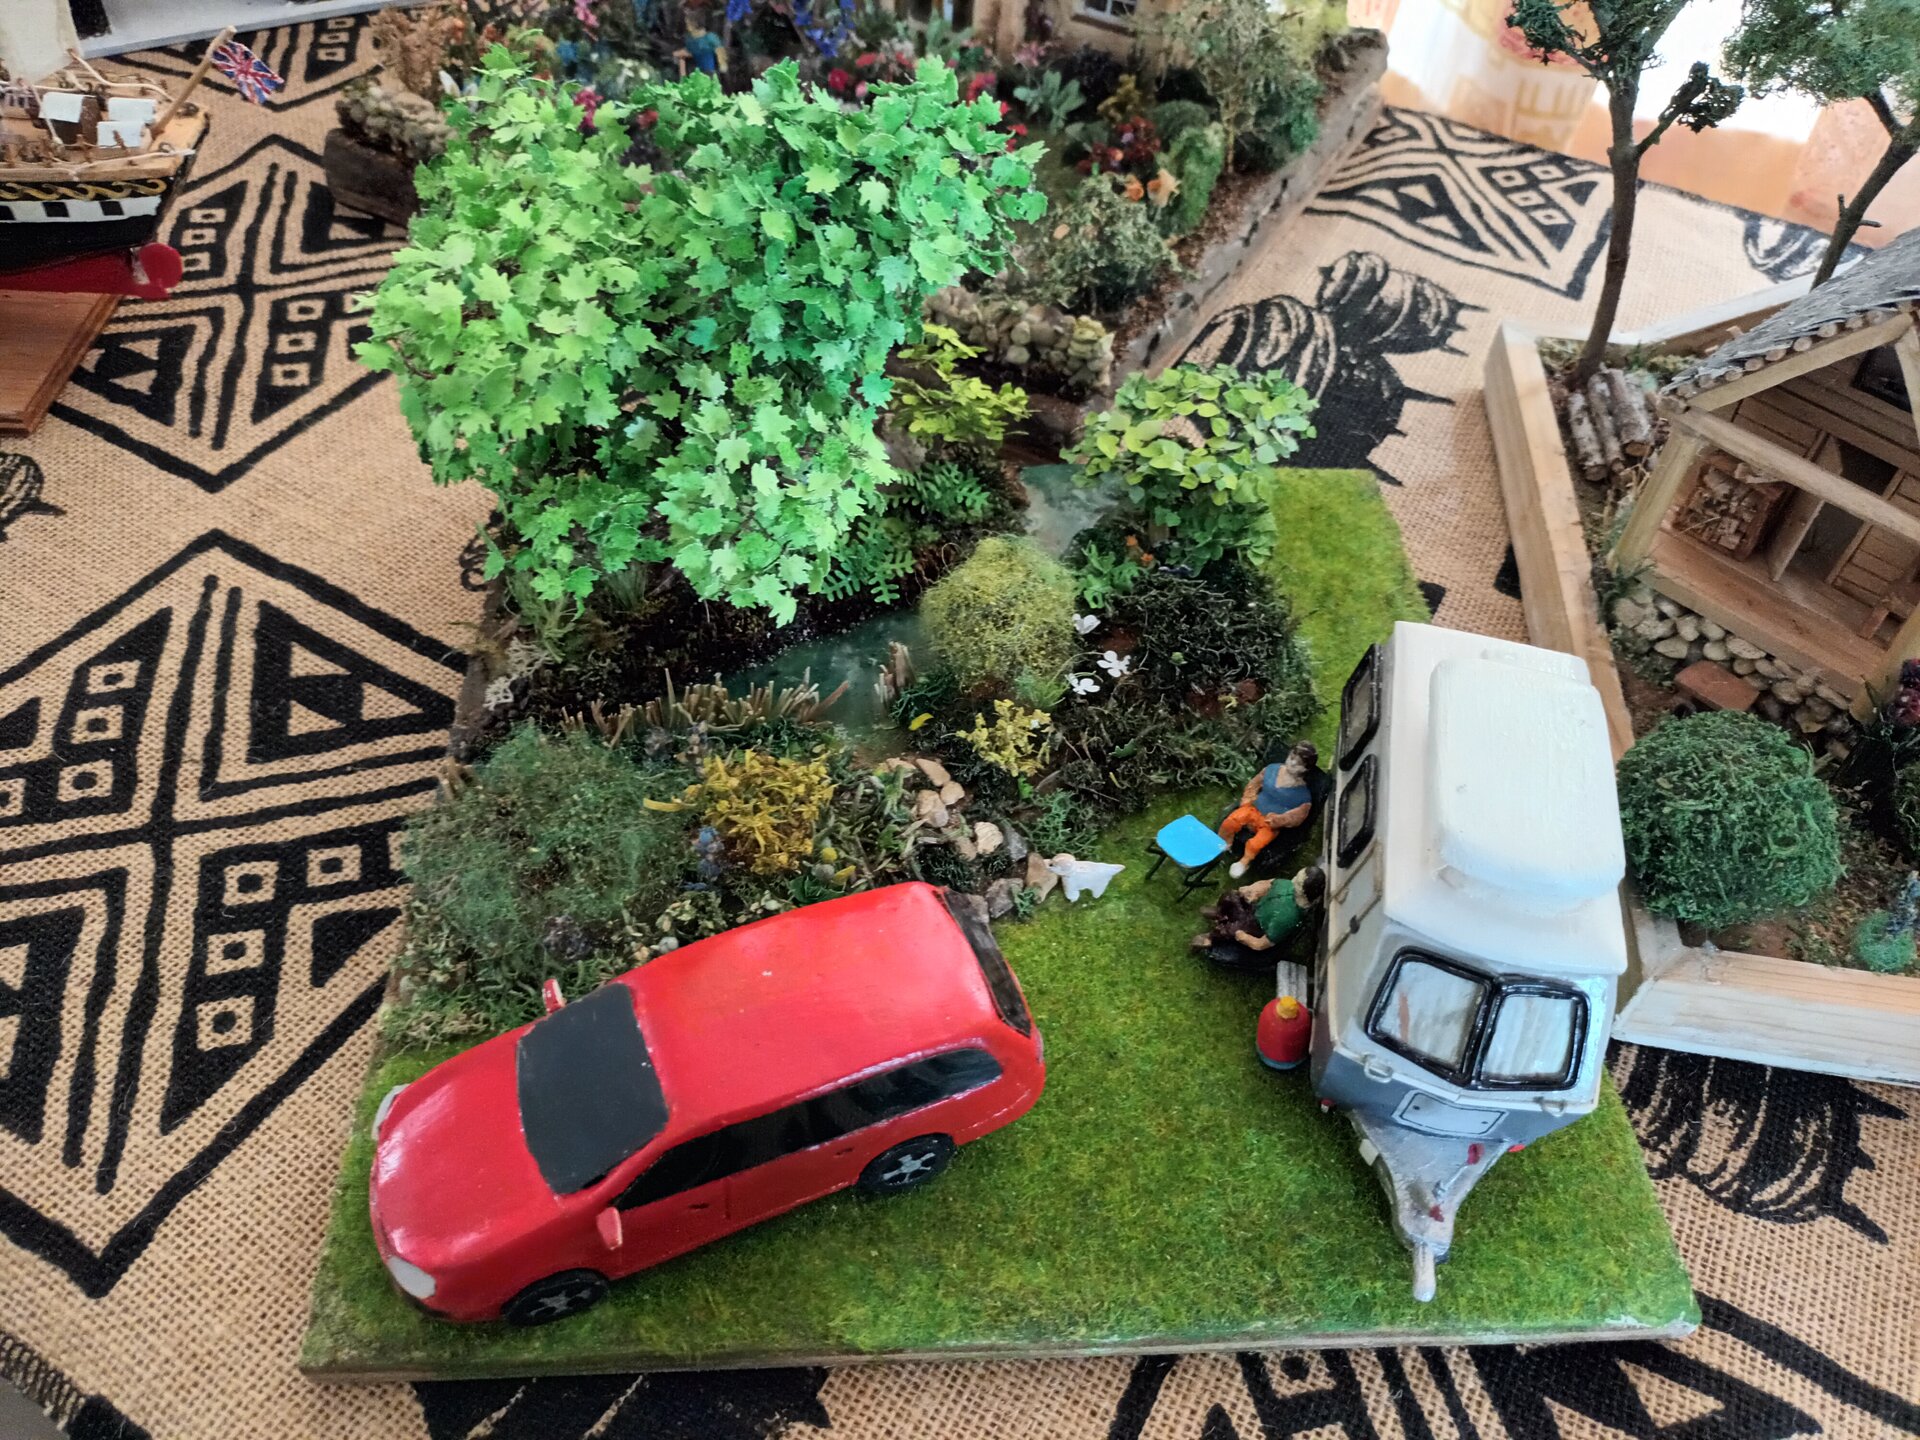
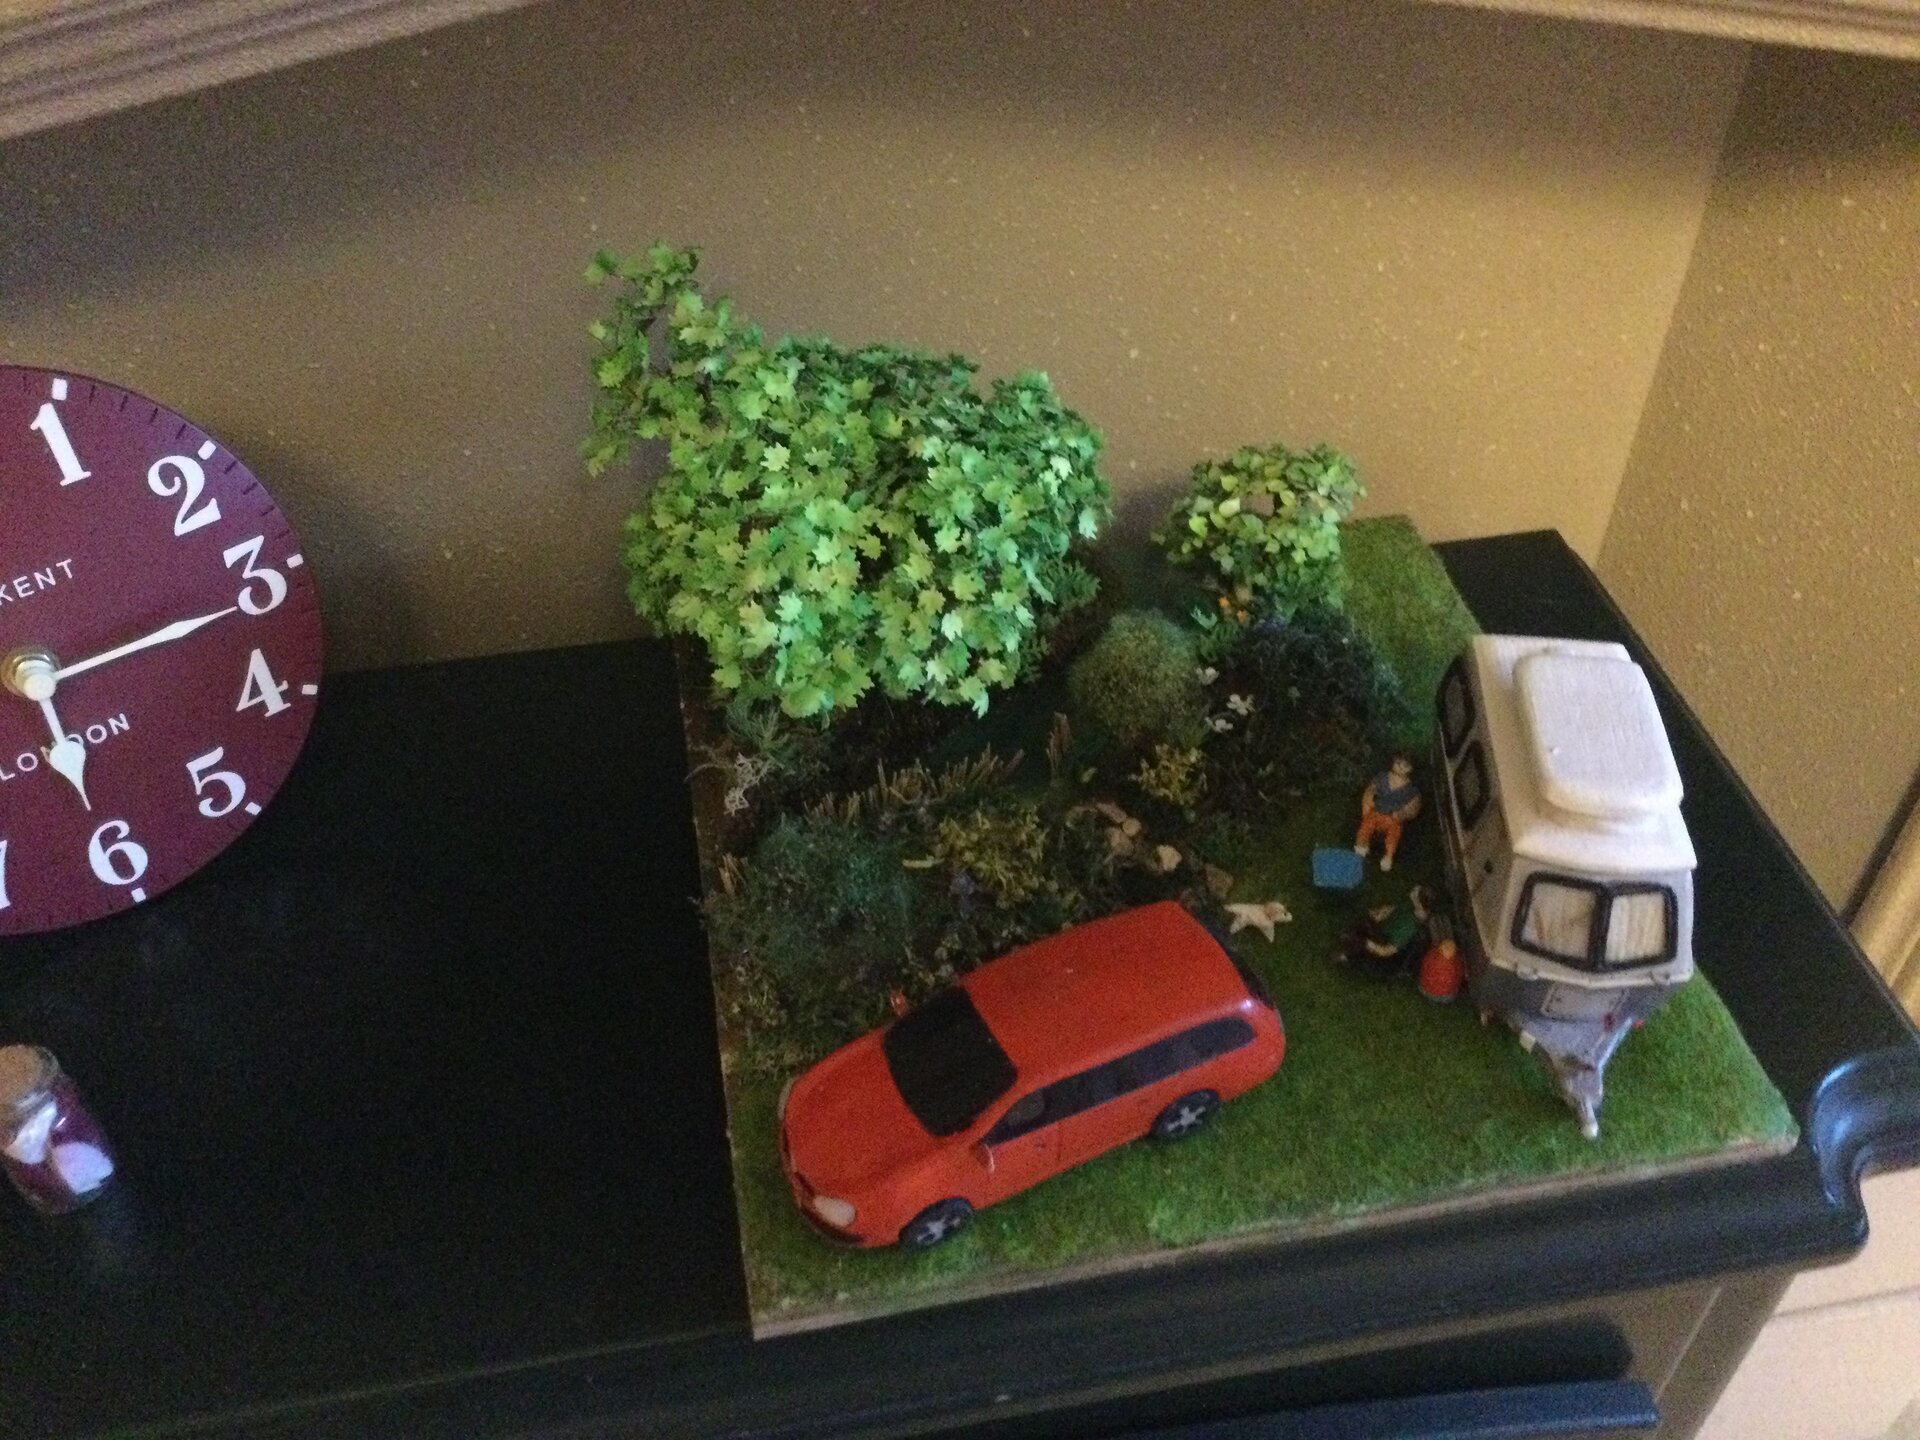
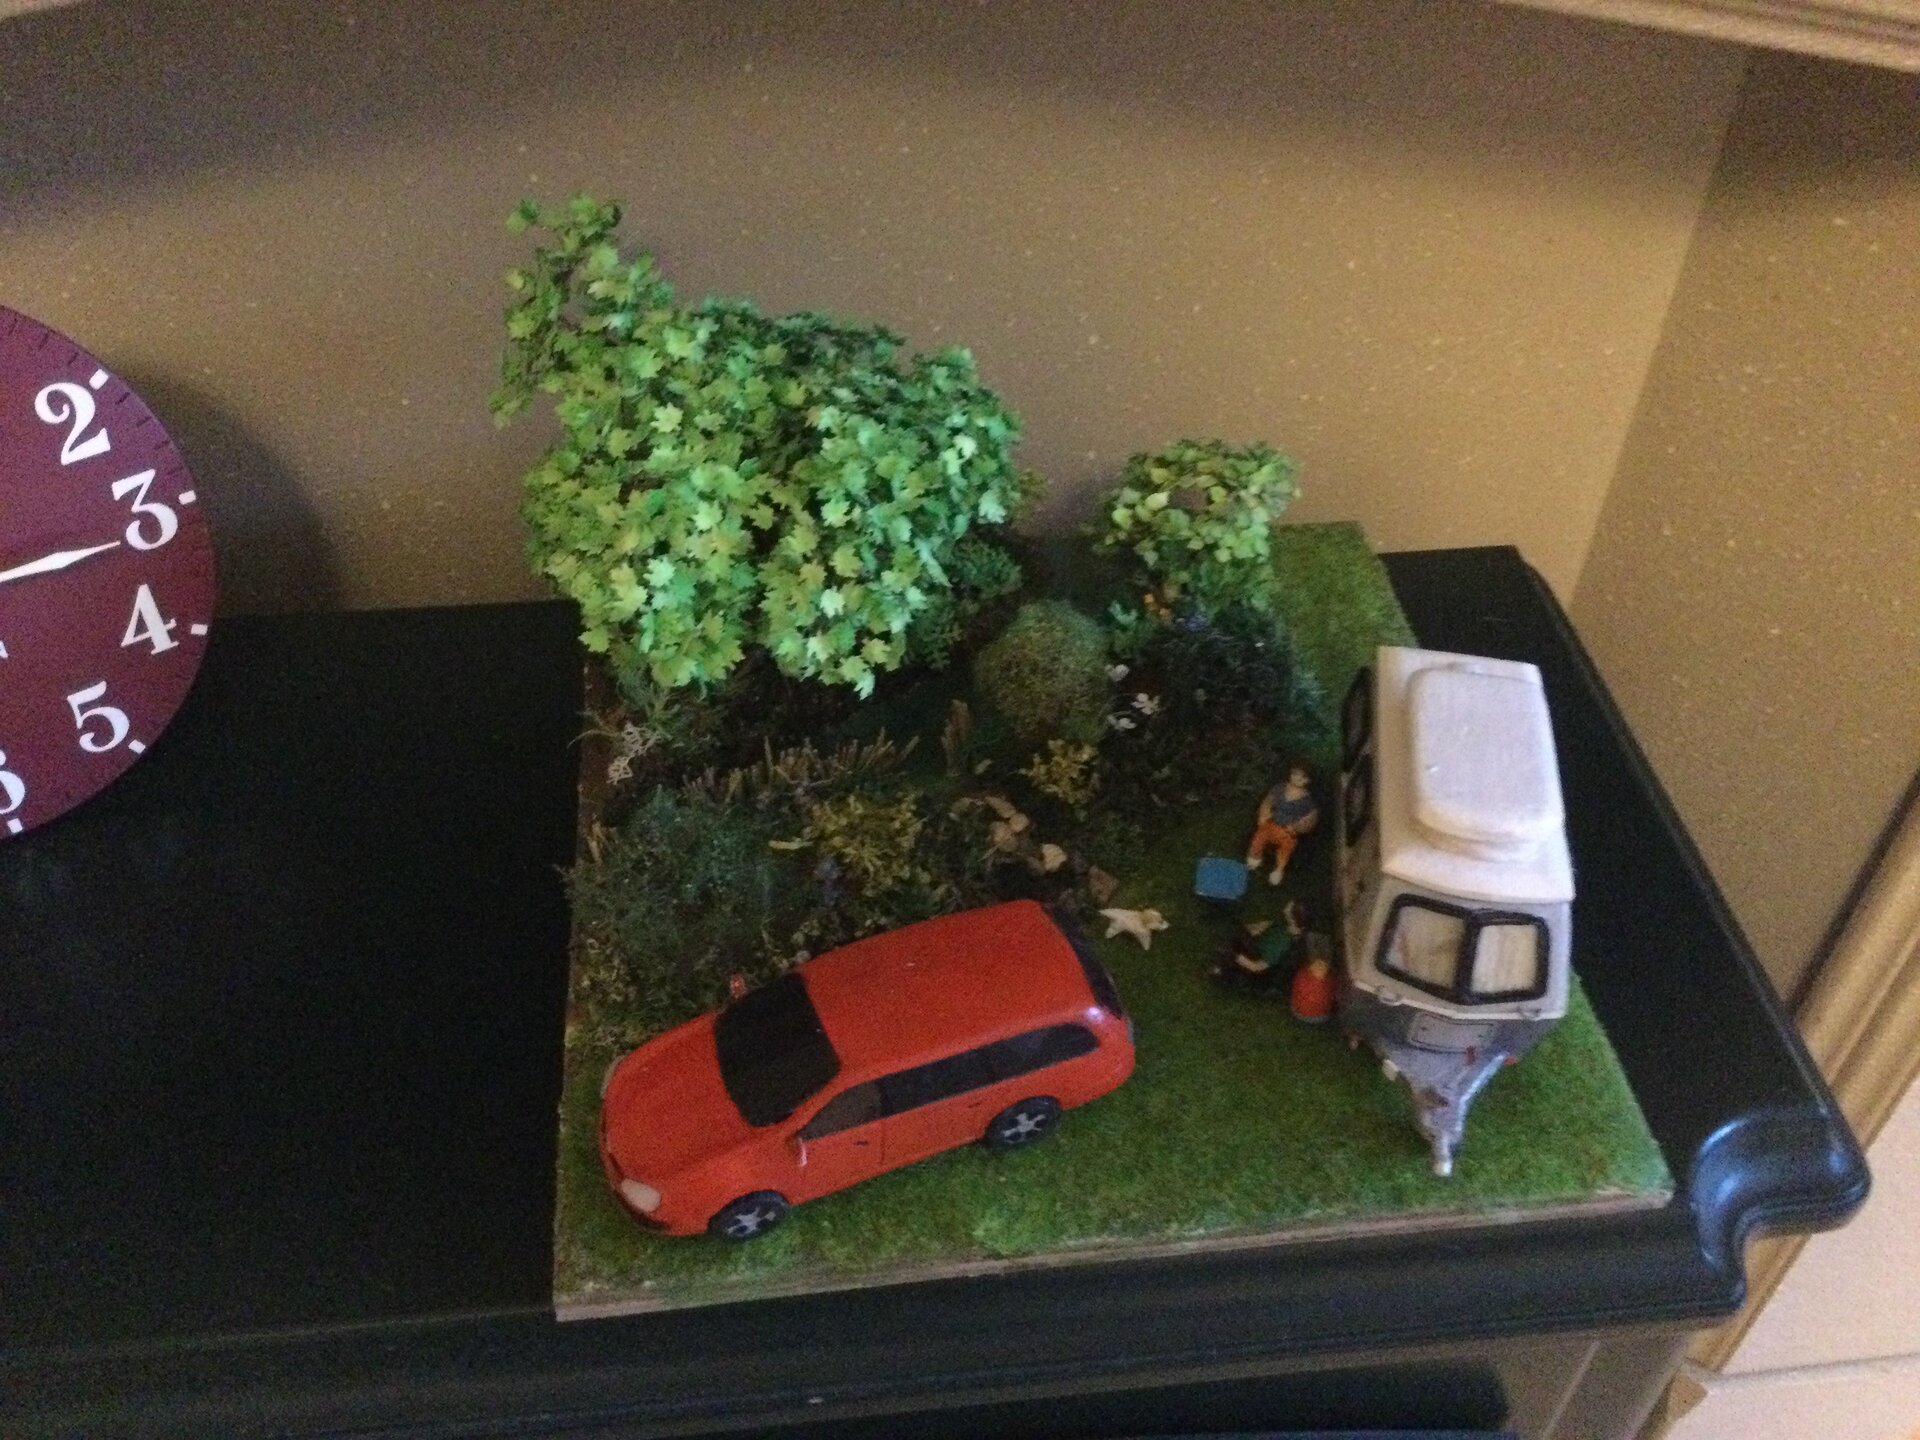
Completed grass work - varied heights, colors, and densities creating natural appearance
**What Worked:**
- Multiple lengths mixed together
- Color variation (5-6 different grass colors)
- Layered application (depth)
- Strategic placement (considering campsite wear patterns)
- Bare patches and thin areas (realistic)
**What Was Challenging:**
- DIY applicator unpredictable (but functional)
- Coverage control (too much or too little)
- Patience required (multiple sessions)
- Breathing on wet glue = grass everywhere
**The Result:** The ground transformed from "base with texture" to "grass you could imagine walking on." The campsite felt real.
---
### River Effects: Research and Planning
With grass complete, attention turned to the river - potentially the most dramatic element and the most likely to fail spectacularly.
**Research:**
I studied:
- Model railway water techniques
- Diorama water effects tutorials
- Real Welsh river photos (color, clarity, flow)
- Resin properties and working methods
**Water Effect Options:**
1. **Gloss Varnish** (multiple coats)
- ✅ Cheap
- ✅ Easy to apply
- ❌ Limited depth effect
- ❌ Can yellow over time
2. **Realistic Water** (acrylic water product)
- ✅ Designed for models
- ✅ Self-leveling
- ❌ Limited depth (multiple pours needed)
- ✅ Relatively safe
3. **Epoxy Resin**
- ✅ Deep pours possible
- ✅ Crystal clear
- ✅ Very realistic depth
- ❌ Toxic fumes
- ❌ Tricky working time
- ✅ Professional results
**Decision:** Epoxy resin. The river was a focal point - it needed to look genuinely wet and three-dimensional.
---
### River Bed Preparation
Preparing the river bed - rocks, color, texture, ready for water
**The river bed is critical** - you see through water to what's beneath. Mess this up and perfect water won't save it.
**River Bed Construction:**
1. **Base Shape:**
- Carved channel in foam base
- Deeper in center (natural flow)
- Shallower at edges
- Some rocks breaking surface (realistic)
2. **Rock Placement:**
- Larger rocks in river bed
- Smaller stones scattered
- Some partially buried
- Natural, random placement
3. **Color Layers:**
- Base: dark brown/grey (riverbed mud)
- Stones: varied greys and browns
- Washes: diluted black and green (algae, depth)
- Highlights: light grey on rock tops
4. **Texture:**
- Sand and fine gravel (river bed texture)
- PVA sealed (prevents floating in resin)
- Some green texture (algae on rocks)
- Matte finish (resin adds gloss)
5. **Vegetation:**
- Riverside plants trailing into water
- Grass growing at edge
- Some moss on rocks
- Looks like it grows there naturally
**Test:** Poured small amount of water on river bed to check appearance. Water revealed all the details - looked convincing. Ready for resin.
---
### The Resin Pour: Anxiety Incarnate
Mixing epoxy resin - precise ratios, careful mixing, mounting anxietyFirst pour in progress - no going back now!
**Pre-Pour Checklist:**
- ✅ Base sealed (no leaks)
- ✅ River bed ready
- ✅ Temperature appropriate (20-25°C)
- ✅ Resin measured precisely
- ✅ Mixing containers ready
- ✅ Stirring sticks prepared
- ✅ Level work surface confirmed
- ✅ Ventilation adequate
- ✅ No interruptions planned
- ✅ Heart rate elevated (nervous excitement)
**Mixing the Resin:**
Epoxy resin = Part A (resin) + Part B (hardener)
**Critical Steps:**
1. Measure Part A precisely (digital scale)
2. Measure Part B precisely (usually 1:1 or 2:1 ratio)
3. Combine in clean container
4. Stir slowly (bubbles are the enemy)
5. Stir for full recommended time (usually 3-5 minutes)
6. Scrape sides and bottom (unmixed resin won't cure)
7. Check: clear, no streaks, no unmixed areas
**The Pour:**
1. **First Pour - Thin Layer:**
- Pour slowly from edge
- Let flow naturally
- Cover river bed completely
- Work out any trapped air (toothpick)
- Just 2-3mm depth
- Purpose: Seal riverbed, prevent bubbles in deep pour
2. **Curing Wait:**
- 24 hours minimum
- Tackiness test (should be firm but slightly tacky)
- Ready for second pour when tacky (layers bond together)
3. **Second Pour - Main Depth:**
- Mix fresh resin
- Pour over first layer (tacky surface bonds layers)
- Deeper this time (5-7mm)
- Creates realistic water depth
- Let flow around rocks
- Cover to prevent dust settling
4. **Flow Effects:**
- While second pour still liquid (working time ~30 minutes)
- Heat gun (carefully!) to pop remaining bubbles
- Slight agitation with toothpick creates current lines
- Pull toward rocks (water flows around obstacles)
- Create subtle ripples
- Leave to cure undisturbed
**Curing Time:** 48-72 hours for full cure
**The Wait:** Torturous. Checking every few hours. Resisting urge to touch. Hoping it cures clear, level, and perfect.
---
### The Reveal: Did It Work?
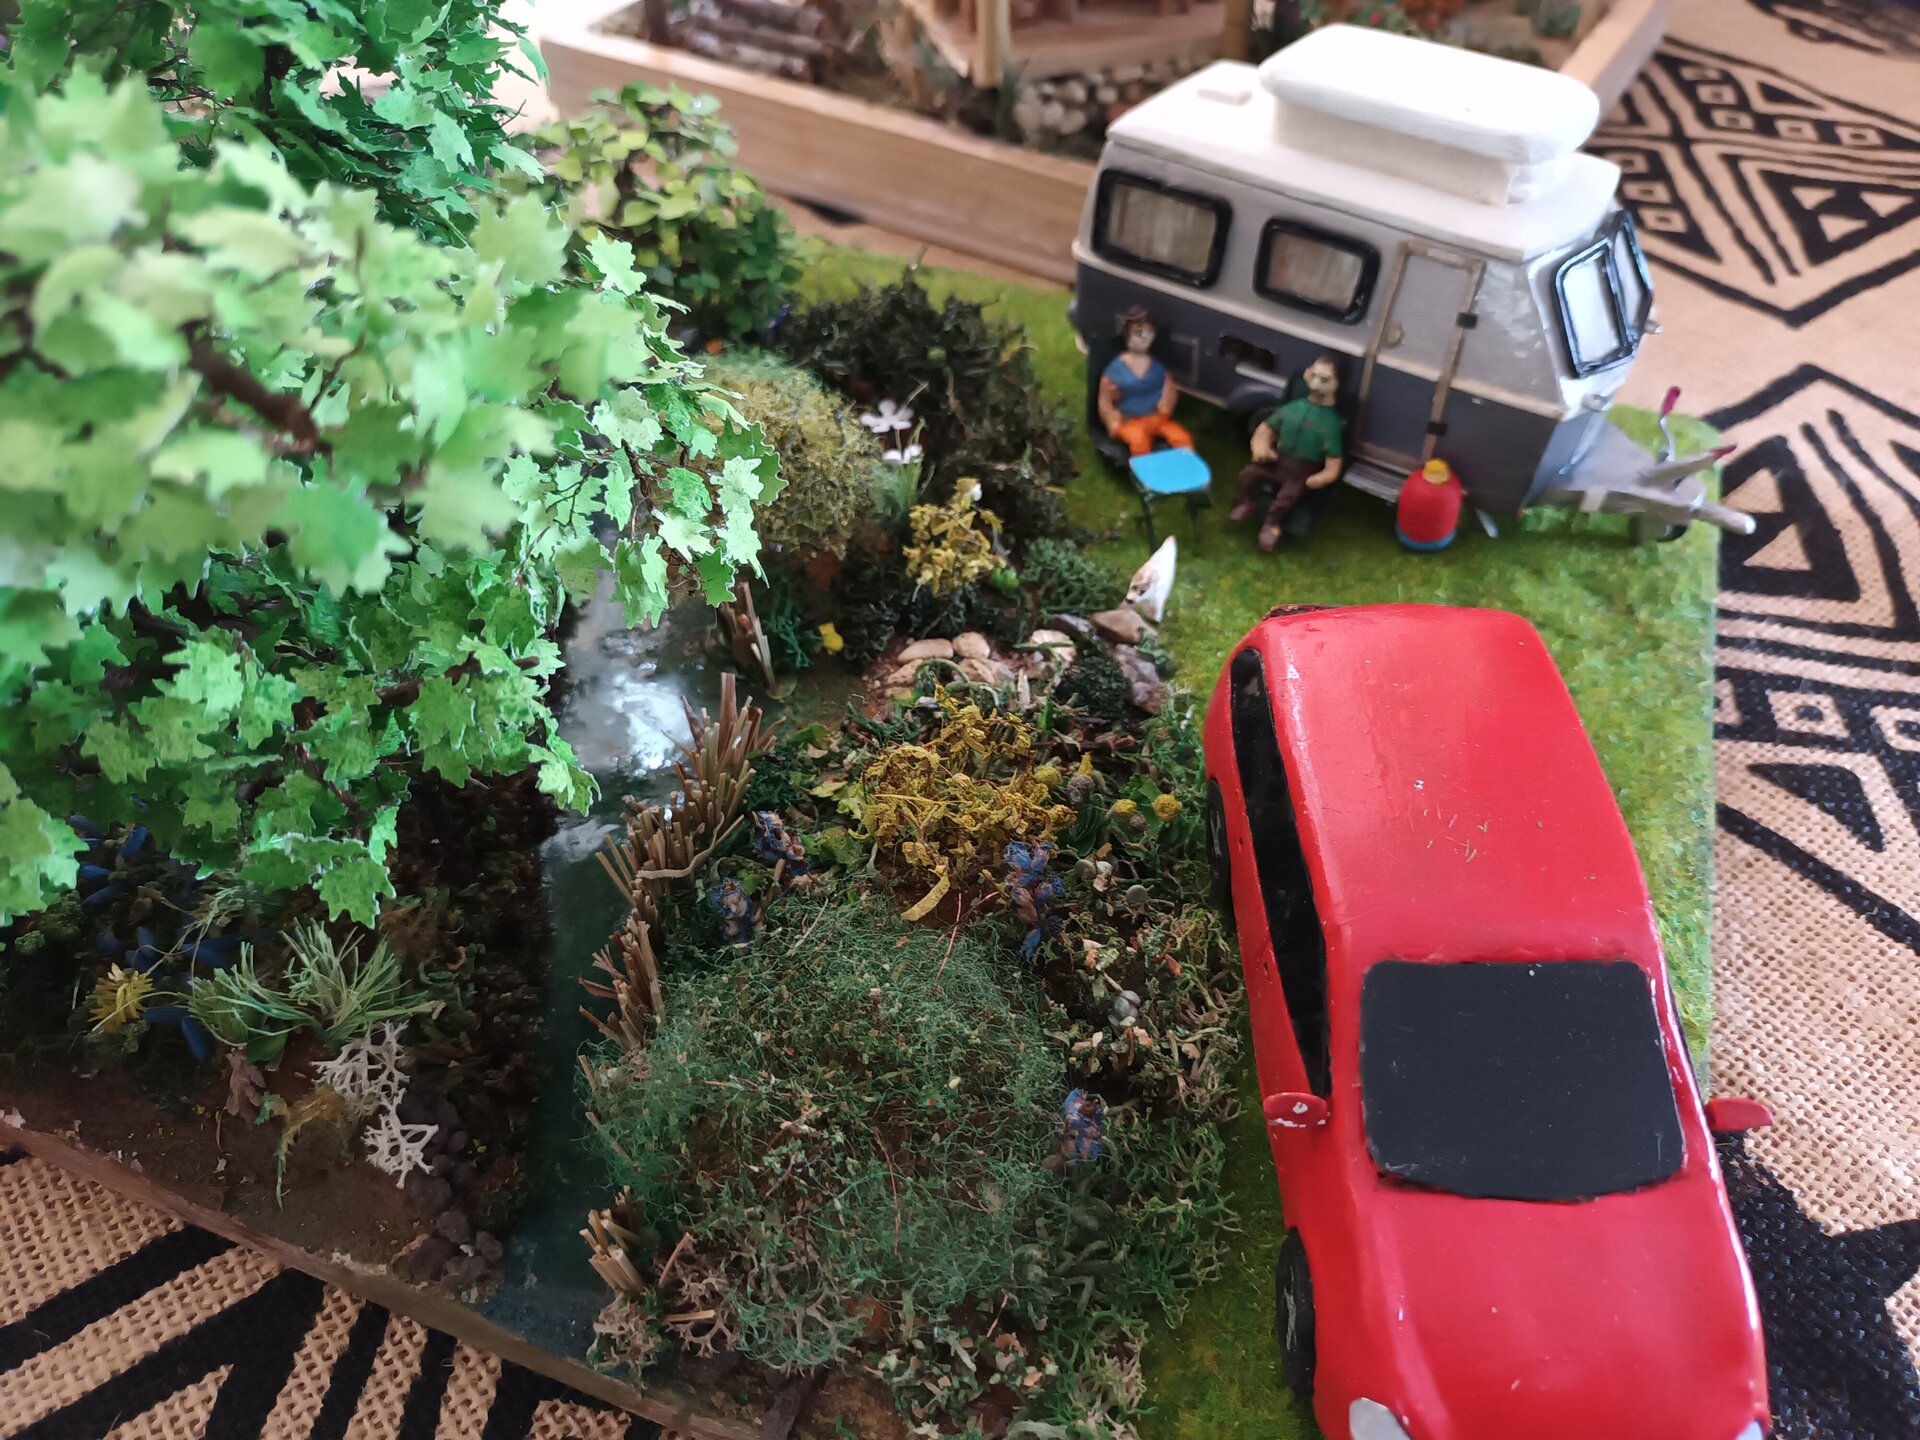
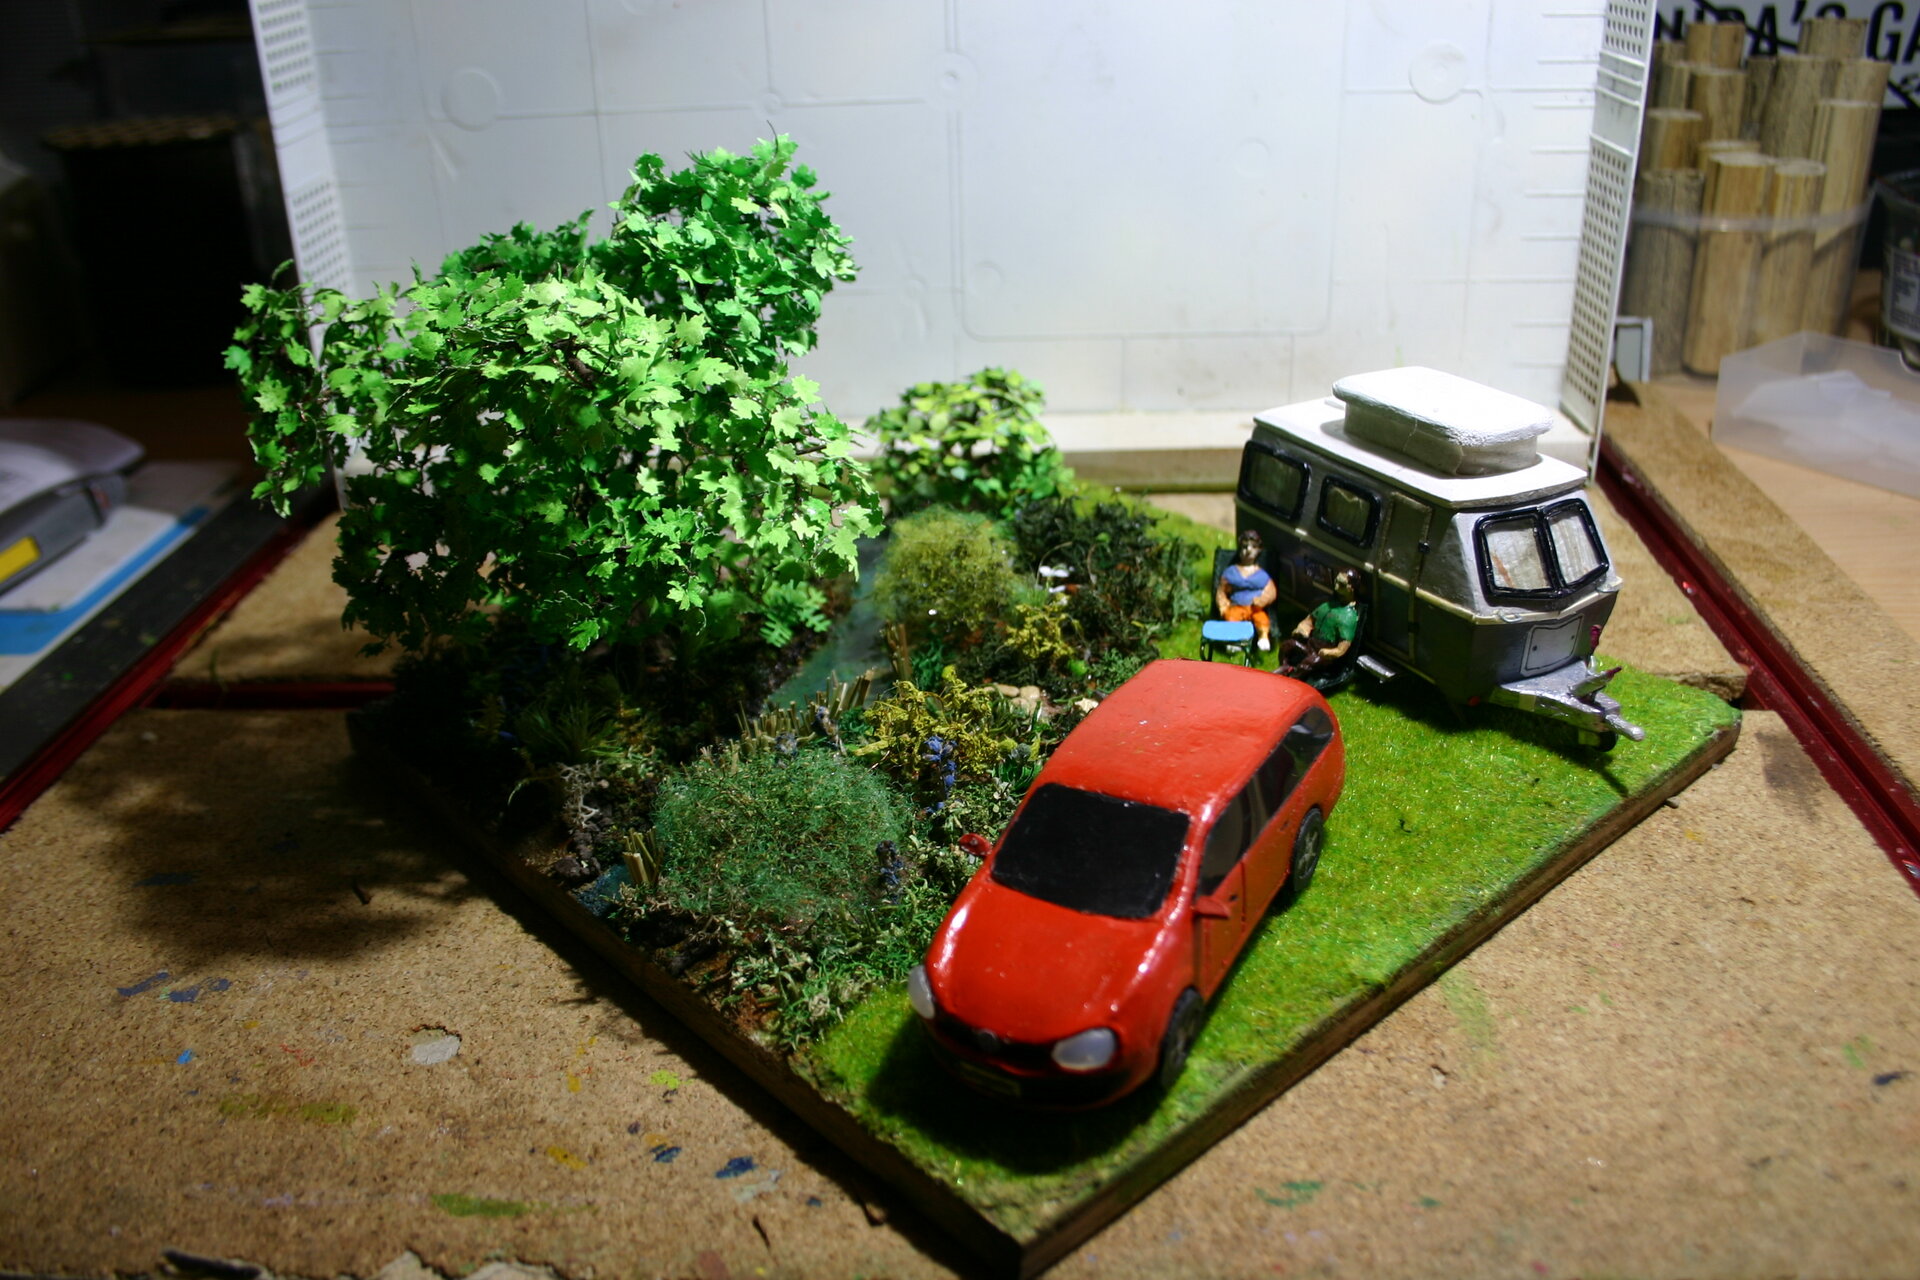
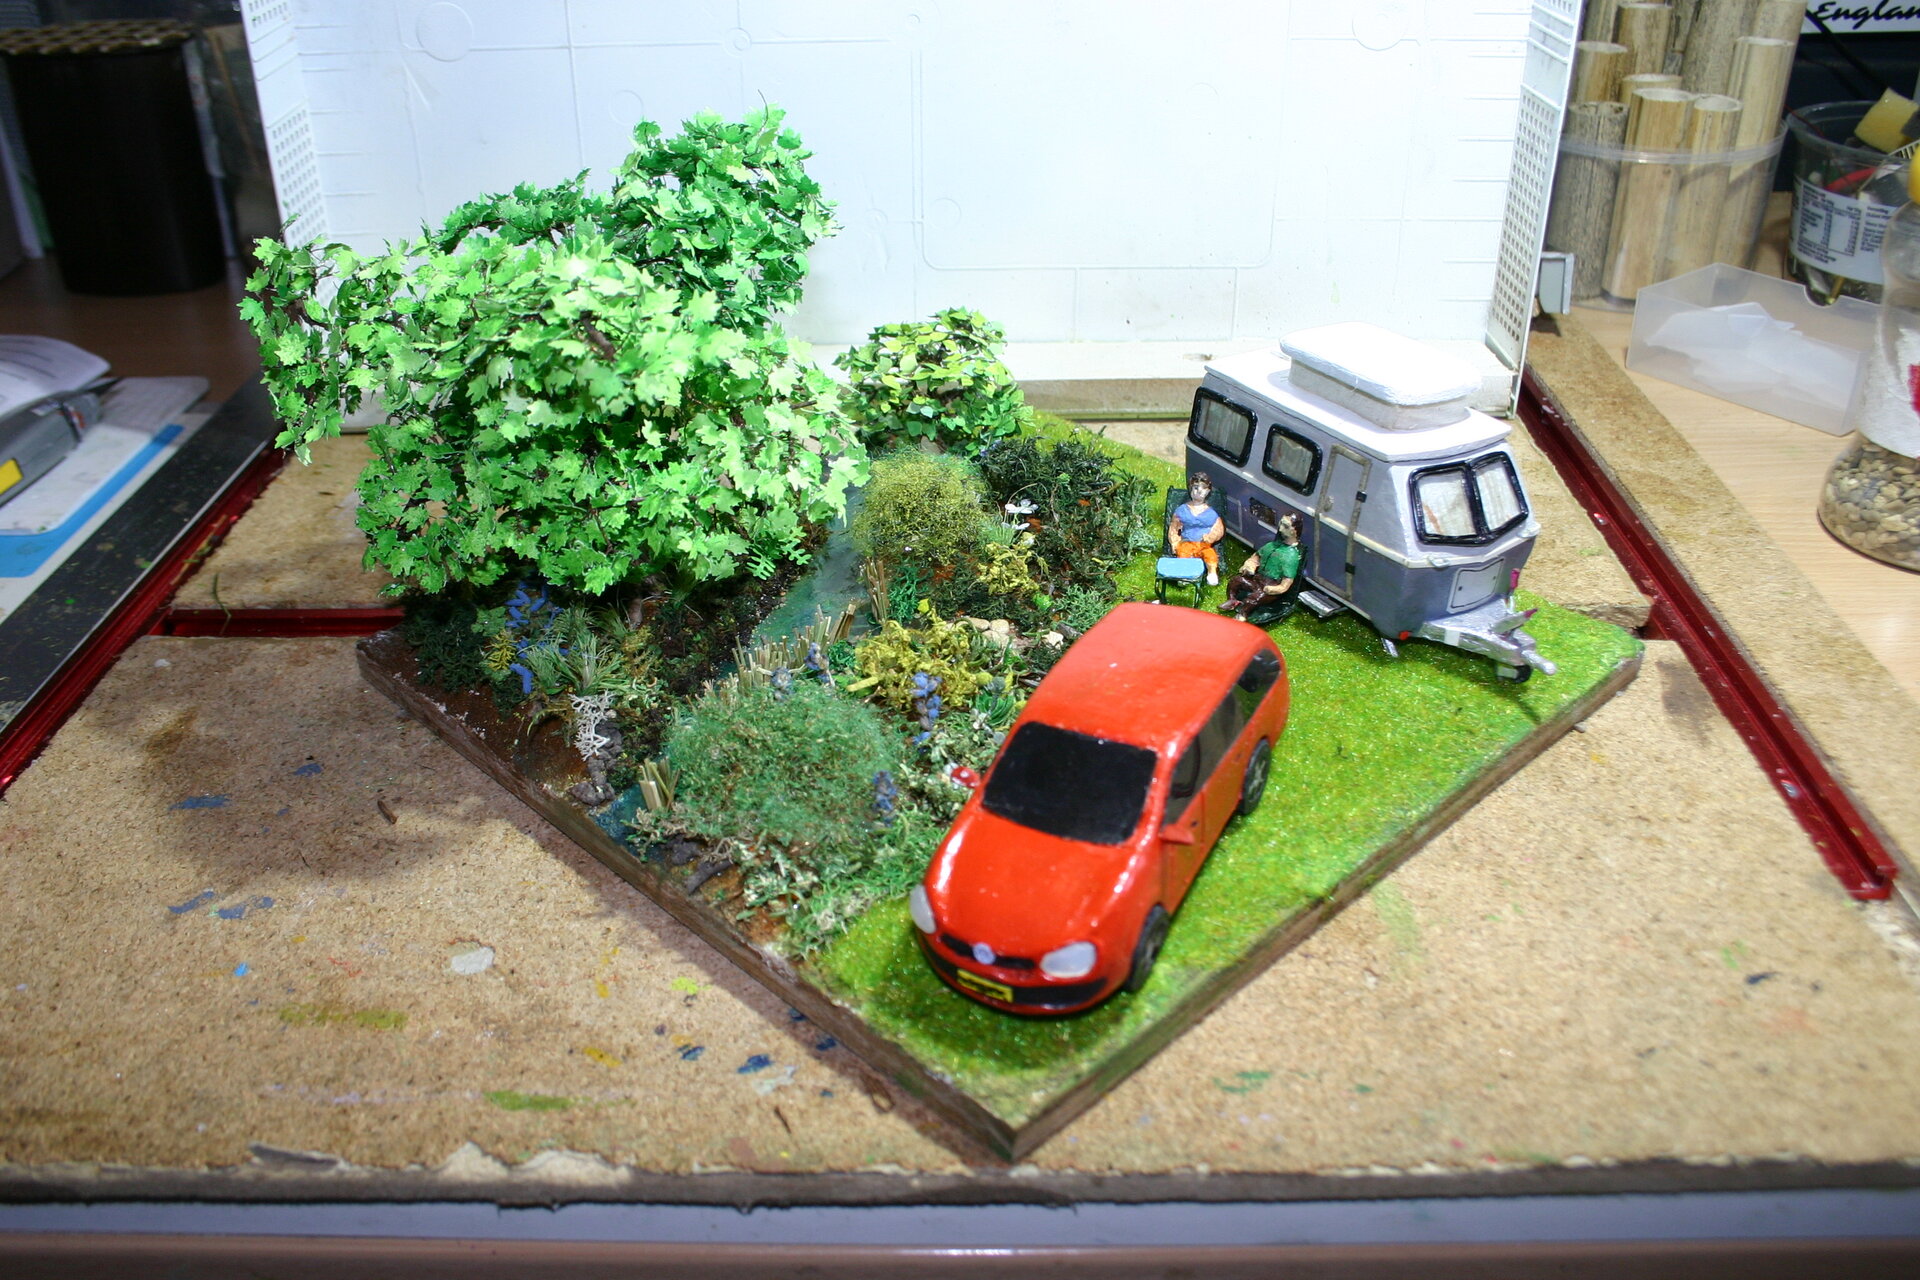
Cured resin water - it actually looks WET!
**72 Hours Later:**
Removing the dust cover was nerve-wracking. What if it didn't cure? What if there are bubbles? What if it's cloudy?
**The Result:**
- ✅ Crystal clear
- ✅ Level surface (thank goodness)
- ✅ Proper depth illusion
- ✅ Flow lines visible (subtle current)
- ✅ Rocks visible through water
- ✅ Reflective surface (looks wet!)
- ✅ Realistic appearance
- ✅ One small bubble (barely visible, adds realism)
**The relief:** Enormous. Resin water is an all-or-nothing technique. It worked.
---
### Final Water Details
Finishing the water edges - where water meets land
**Edge Treatment:**
The transition between water and land needed attention:
1. **Water Edge:**
- White glue with hint of white paint (water foam/disturbed water)
- Applied at rocks (water flowing around obstacles)
- At banks (slight wave action)
- Very thin, subtle effect
2. **Wet Rock Effect:**
- Rocks at water line painted darker (wet stone)
- Gloss varnish on submerged parts (wet appearance)
- Algae green on some underwater rocks
3. **Reflections:**
- Resin naturally reflects
- Sky color suggested by painting river bed with slight blue tint
- Works surprisingly well
4. **Ripples (Optional):**
- Could add with gloss gel medium
- Decided against (Welsh rivers often calm)
- Flat water looked more peaceful/realistic
---
### Skills Developed
**New Skills:**
- Static grass application (multiple colors, lengths, layers)
- DIY static grass applicator construction and use
- Epoxy resin mixing (precise measurements, proper mixing)
- Resin pouring technique (layers, flow, bubble removal)
- Water effect creation (depth, clarity, flow)
- River bed preparation (color, texture for underwater visibility)
**Improved Skills:**
- Patience (waiting for resin to cure)
- Observation of nature (campsite research)
- Color variation in natural elements
- Understanding how materials interact (resin on different surfaces)
**Important Lessons:**
- Research actual locations (campsite visit invaluable)
- Test techniques on scrap first (did resin tests)
- Multiple thin layers beat one thick layer (grass and water)
- Nature is varied and imperfect (don't aim for uniformity)
---
### Materials Used
**Static Grass:**
- 2mm grass (light green, dark green, yellow-green) - ~15g
- 4mm grass (mixed greens, brown) - ~10g
- 6mm grass (dark green, yellow) - ~5g
- PVA glue (diluted) - ~100ml
- Static applicator (DIY - tea strainer, wire, 9V battery)
**River/Water:**
- Epoxy resin - ~200ml total
- Hardener - ~200ml total
- River bed rocks (small stones, cork bark)
- Paint (browns, greys, greens for river bed)
- PVA glue (sealing river bed)
- White glue (water foam effects)
**Time Investment:**
- Static grass: ~8 hours
- River bed prep: ~3 hours
- Resin work: ~2 hours (plus 72 hours curing)
- Details and finishing: ~3 hours
- Total: ~16 hours active work
---
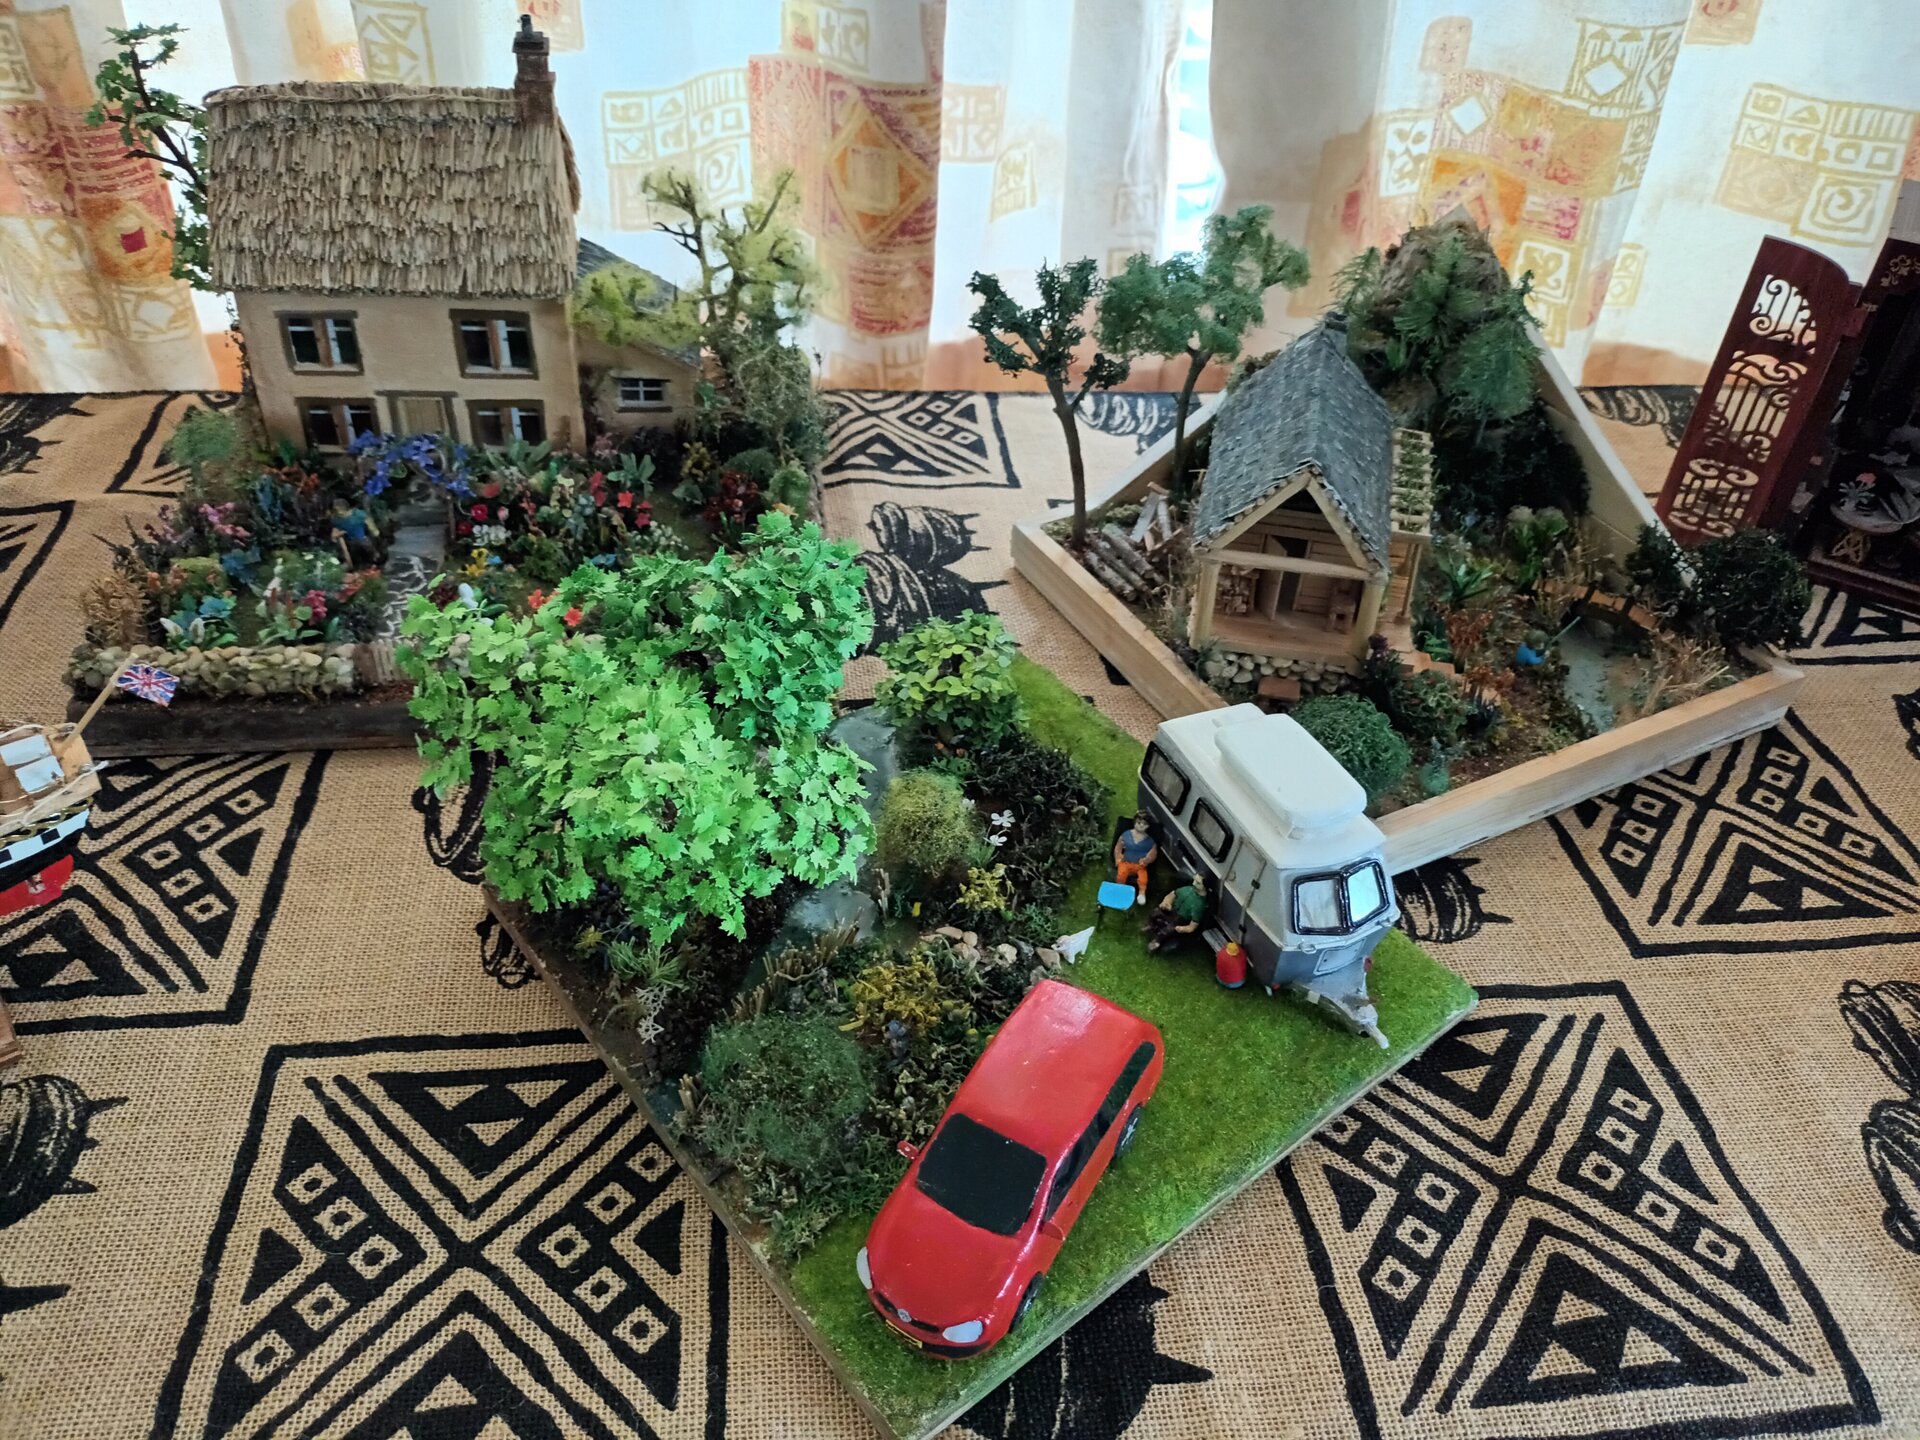
### The Transformation
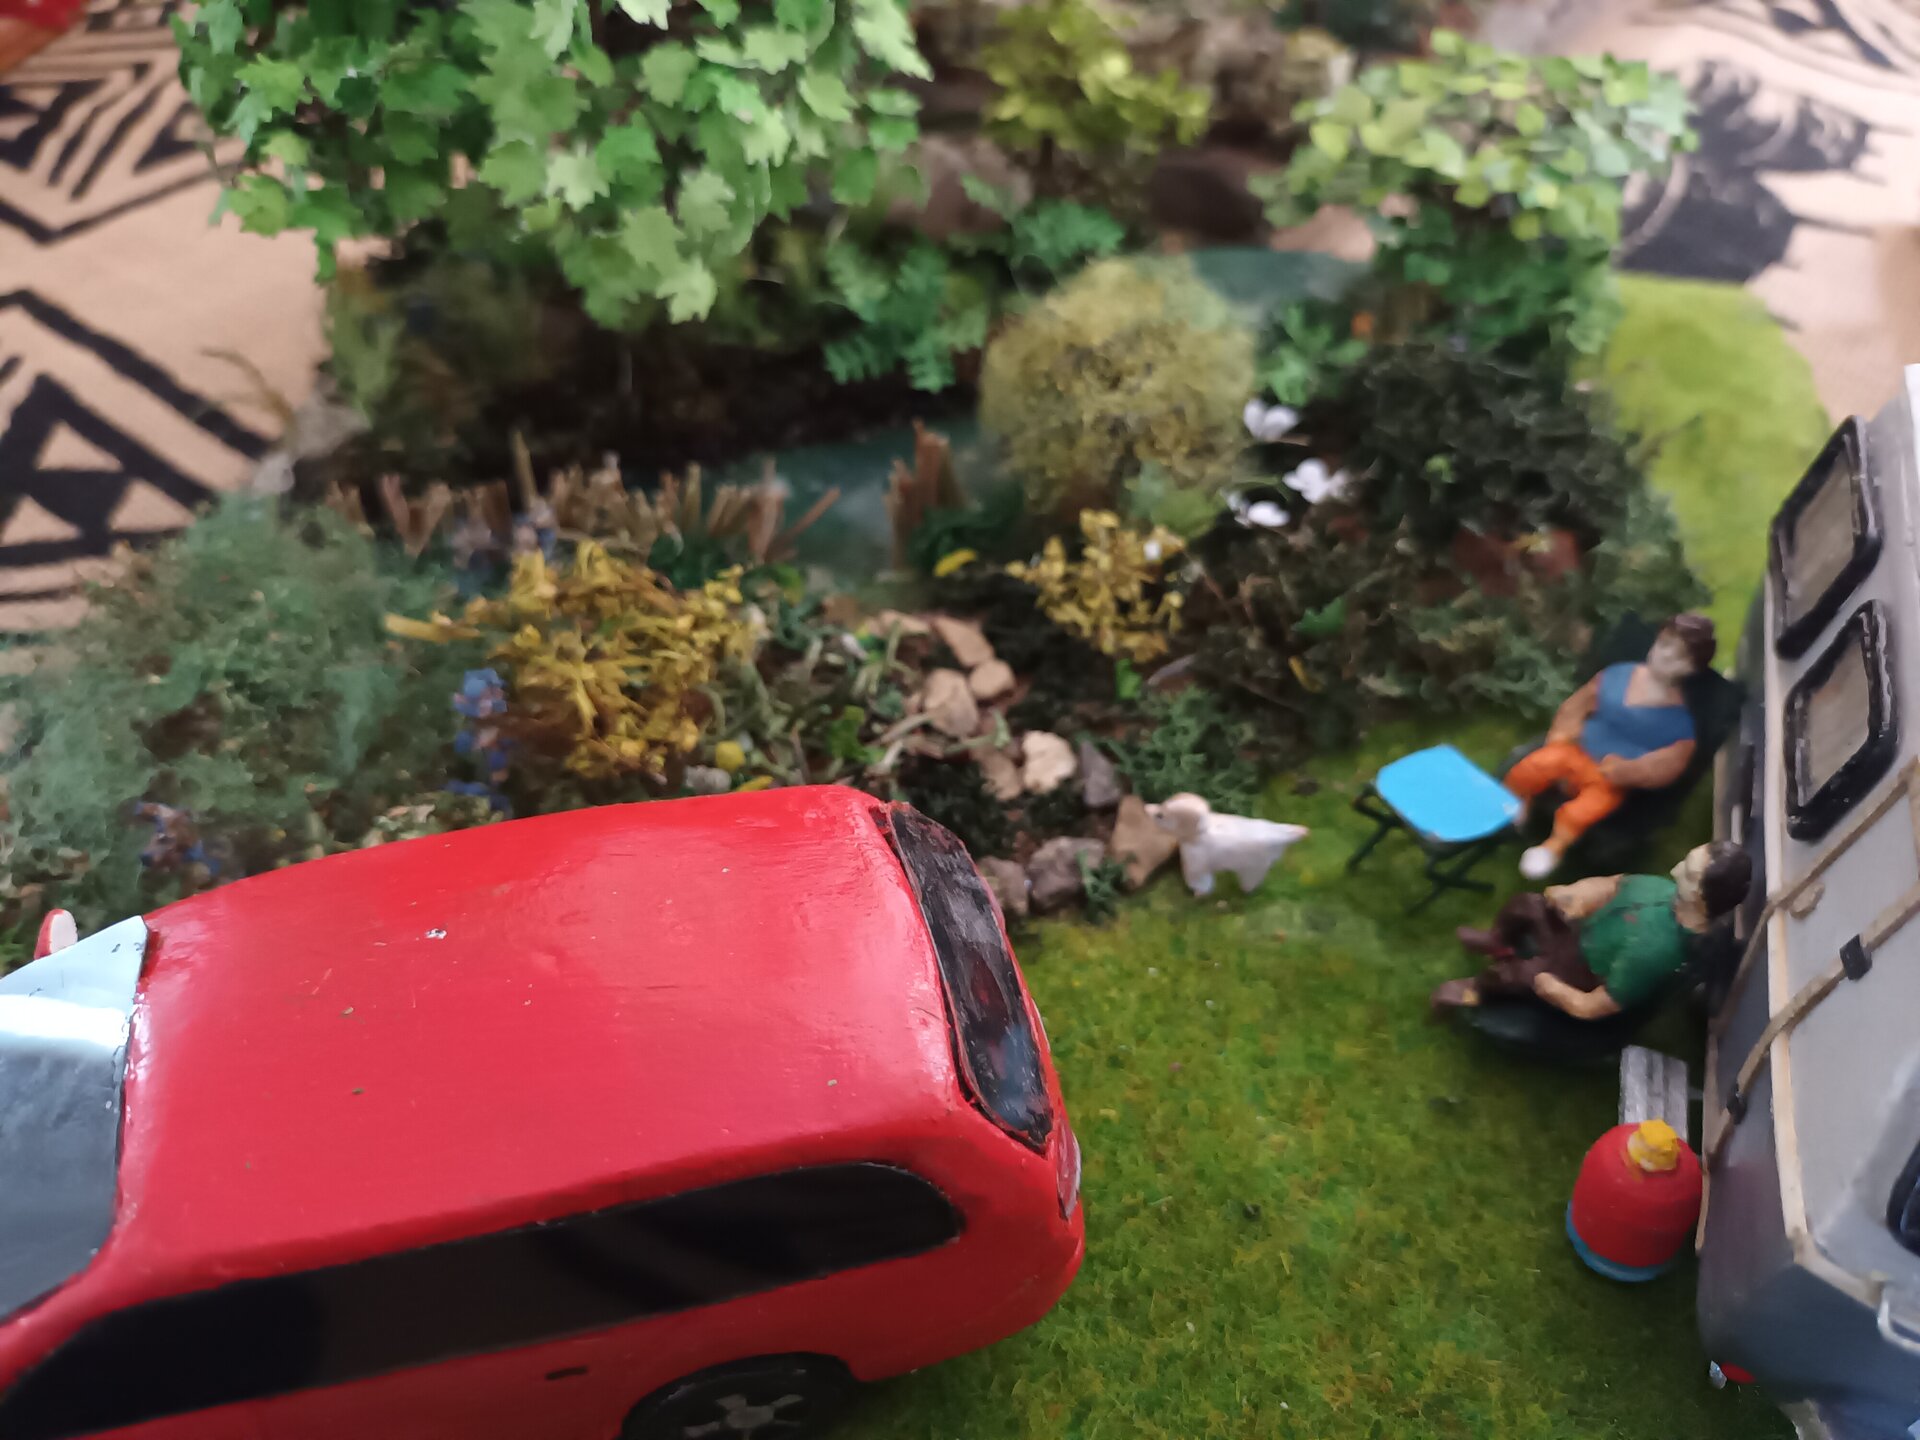
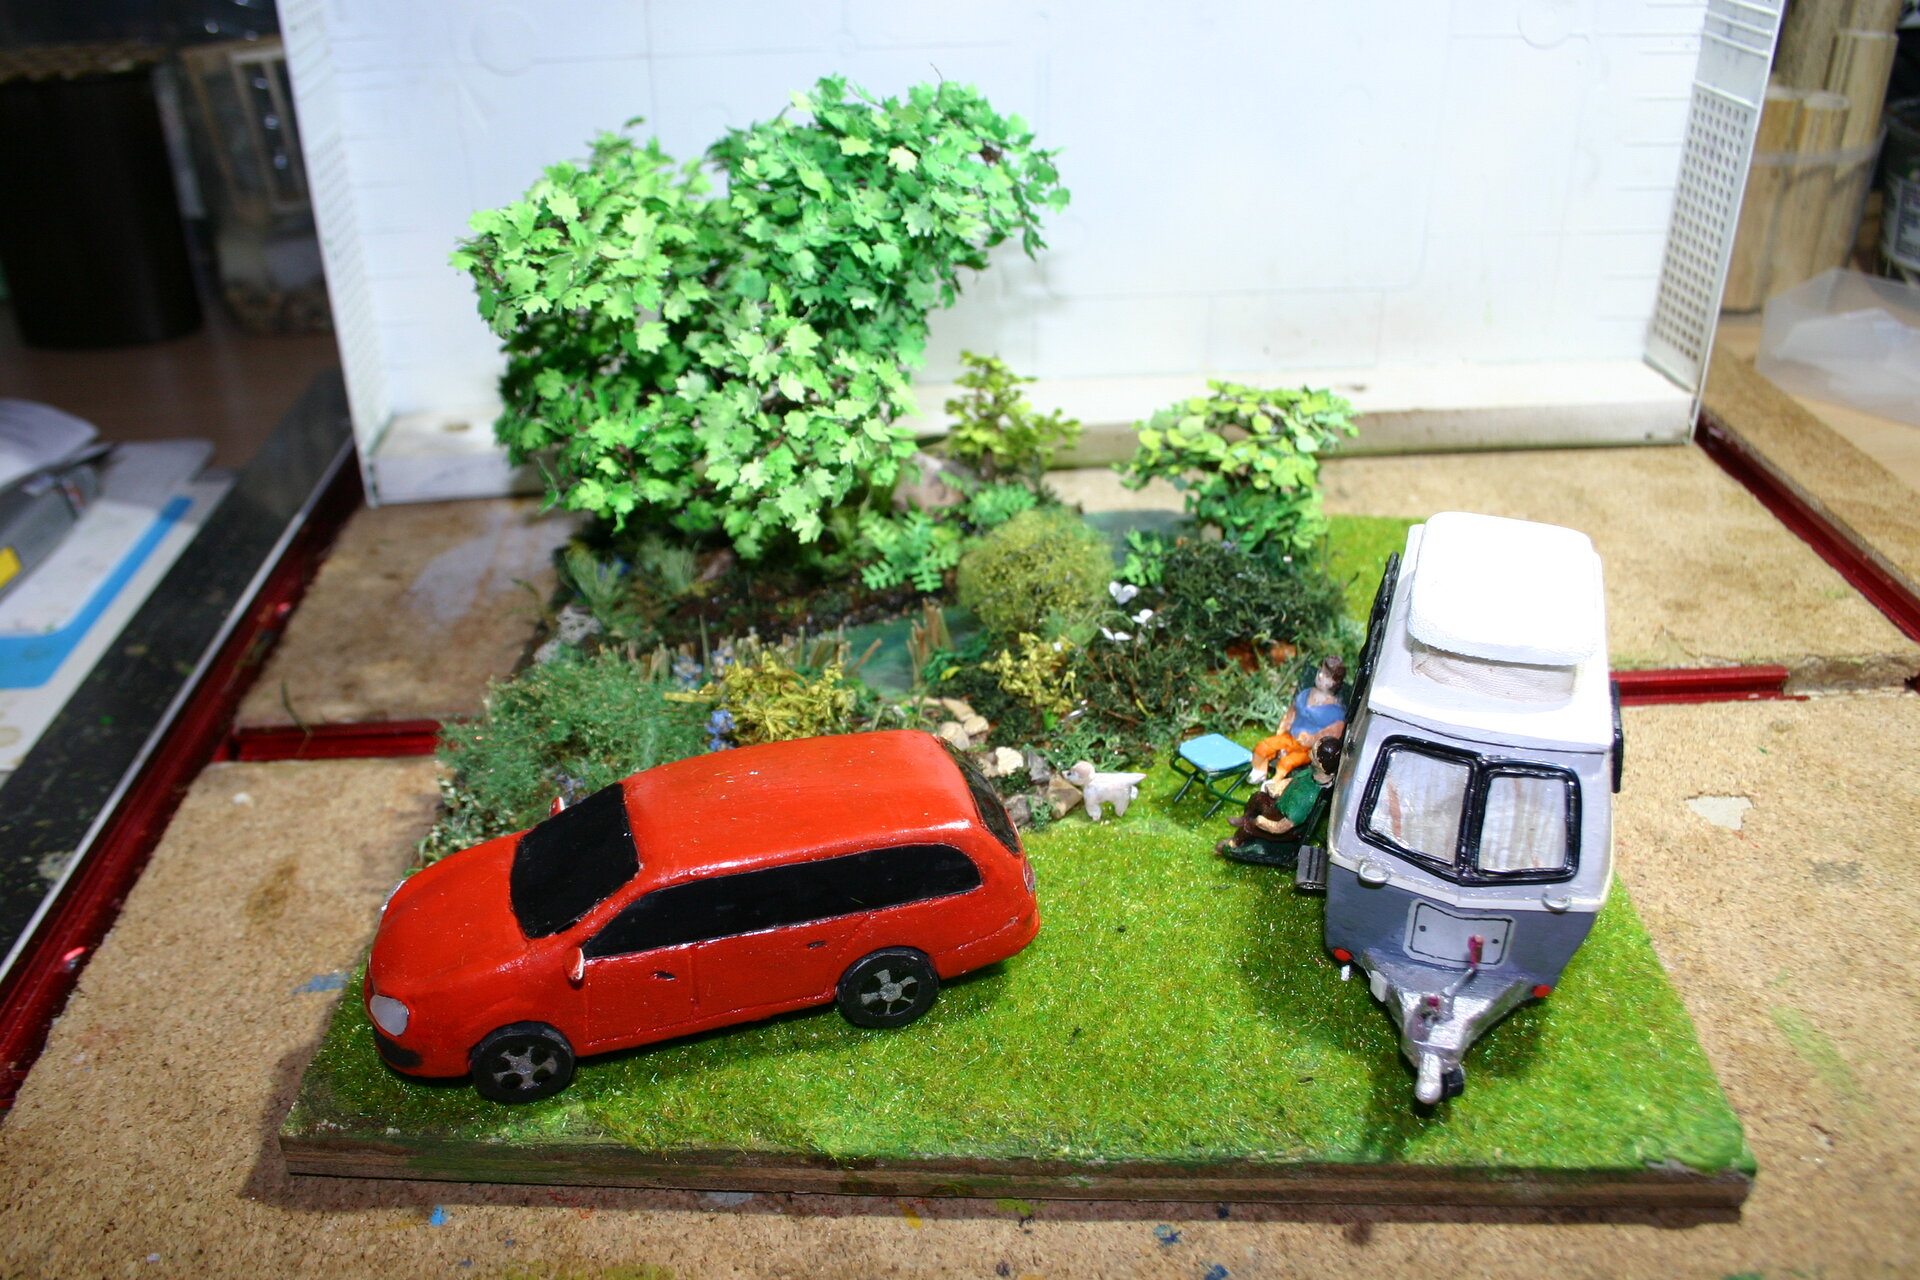
Before: base with components. After: a place that feels real
The combination of realistic grass coverage and actual "wet" looking water transformed the diorama completely.
**What Changed:**
- Scene has depth and texture
- Grass suggests a real campsite
- Water adds life and motion (even though it's static)
- Everything feels more real
- Composition more balanced
- Story more complete
**Client Preview Response:**
"Oh wow, that actually looks like water! And the grass - you can tell where we'd be sitting!"
This phase completed the environment. Now for final assembly and integration.
---
### Reflections
**What Worked:**
- Campsite research (made grass placement authentic)
- Multiple grass colors and heights (natural variation)
- Resin water technique (dramatic, realistic)
- Layered approach (grass and water both multi-layer)
- Patience with curing times
**What Was Challenging:**
- Static applicator unpredictability (worked but frustrating)
- Resin anxiety (so much could go wrong)
- Waiting for resin to cure (longest 72 hours ever)
- Getting grass coverage even (nature is uneven, but controlled uneven is tricky)
**What I'd Do Differently:**
- Buy commercial static applicator (DIY worked but annoying)
- Do more resin tests (got lucky with main pour)
- Take more process photos (focused on doing, forgot documenting)
- Plan grass zones more carefully before starting
**Key Insight:** The final 20% of a project (details like grass and water) create 80% of the impact. These "finishing touches" are what make something look professional vs. amateur.
---
### Next Steps
With environment complete, final assembly remained:
- Permanently mounting all components
- Final integration and adjustment
- Last weathering and details
- Quality check
- Delivery preparation
The home stretch - bringing everything together into the final, completed piece.
**Coming in Build Log 007:** *Final Assembly and Delivery - Integrating all elements, final touches, and handoff to the client.*
---
**Materials Cost This Phase:** ~£45
**Time Spent:** 16 hours (plus 72 hours curing time)
**Static Grass Used:** ~30g across multiple colors and lengths
**Resin Volume:** ~400ml total
**Anxiety Level During Resin Pour:** Maximum
**Result:** Water that actually looks like water
**Previous:** [005 - Scenery and Layout](005-scenery-and-layout)
**Next:** [007 - Final Assembly and Delivery](007-final-assembly)