Caravan Construction - The Make or Break Component
Build Log 002: Building the Eriba Triton Caravan
Date: December 22, 2024 - January 15, 2025
Phase: Caravan Construction
Time Spent: ~25 hours
Status: Completed (after multiple rework cycles)
The Moment of Truth
With planning complete and materials assembled, it was time to tackle the caravan - the centerpiece of this commission and the component I’d never attempted anything like before.
My reasoning for starting here:
If I couldn’t successfully build a recognizable miniature caravan, there was no point continuing with the rest of the project. Better to fail fast on the hardest component than invest 50+ hours only to discover I couldn’t deliver what was promised.
This wasn’t just any caravan - this was their caravan. The Eriba Triton. It needed to be recognizable.
Phase 1: Body Construction - Balsa Layers
Construction Method:
- Base Layers: Cut three layers of balsa wood for the body shell
- Height Spacing: Added balsa spacers between layers to achieve:
- Floor to center line height
- Center line to roof height
- Initial Assembly: Glued layers with spacers to create hollow shell
Why this approach?
- Balsa is light and easy to carve
- Hollow construction saves weight
- Provides structure for epoxy putty application
- Creates internal space (even though not visible)
The characteristic “egg” shape of the Eriba couldn’t be achieved with flat balsa alone - the compound curves required a different approach.
Phase 2: Shaping with Milliput Epoxy Putty
The Challenge: Creating smooth, compound curves
Milliput two-part epoxy putty becomes the solution - and the challenge:
Advantages:
- Can be shaped and carved when fresh
- Hardens to a solid, stable surface
- Can be sanded smooth when fully cured
- Accepts paint well
Disadvantages:
- Limited working time (~60-90 minutes)
- Difficult to achieve perfectly smooth application
- Requires experience to work effectively
- Each layer needs full cure before next application
My Process:
- Mixed small batches - working within the time window
- Applied in sections - front, sides, rear, top separately
- Rough shaped while still workable with wet tools
- Allowed 24 hours cure between sessions
- Sanded extensively with progressively finer grits
- Repeated - multiple layers to build up smooth curves
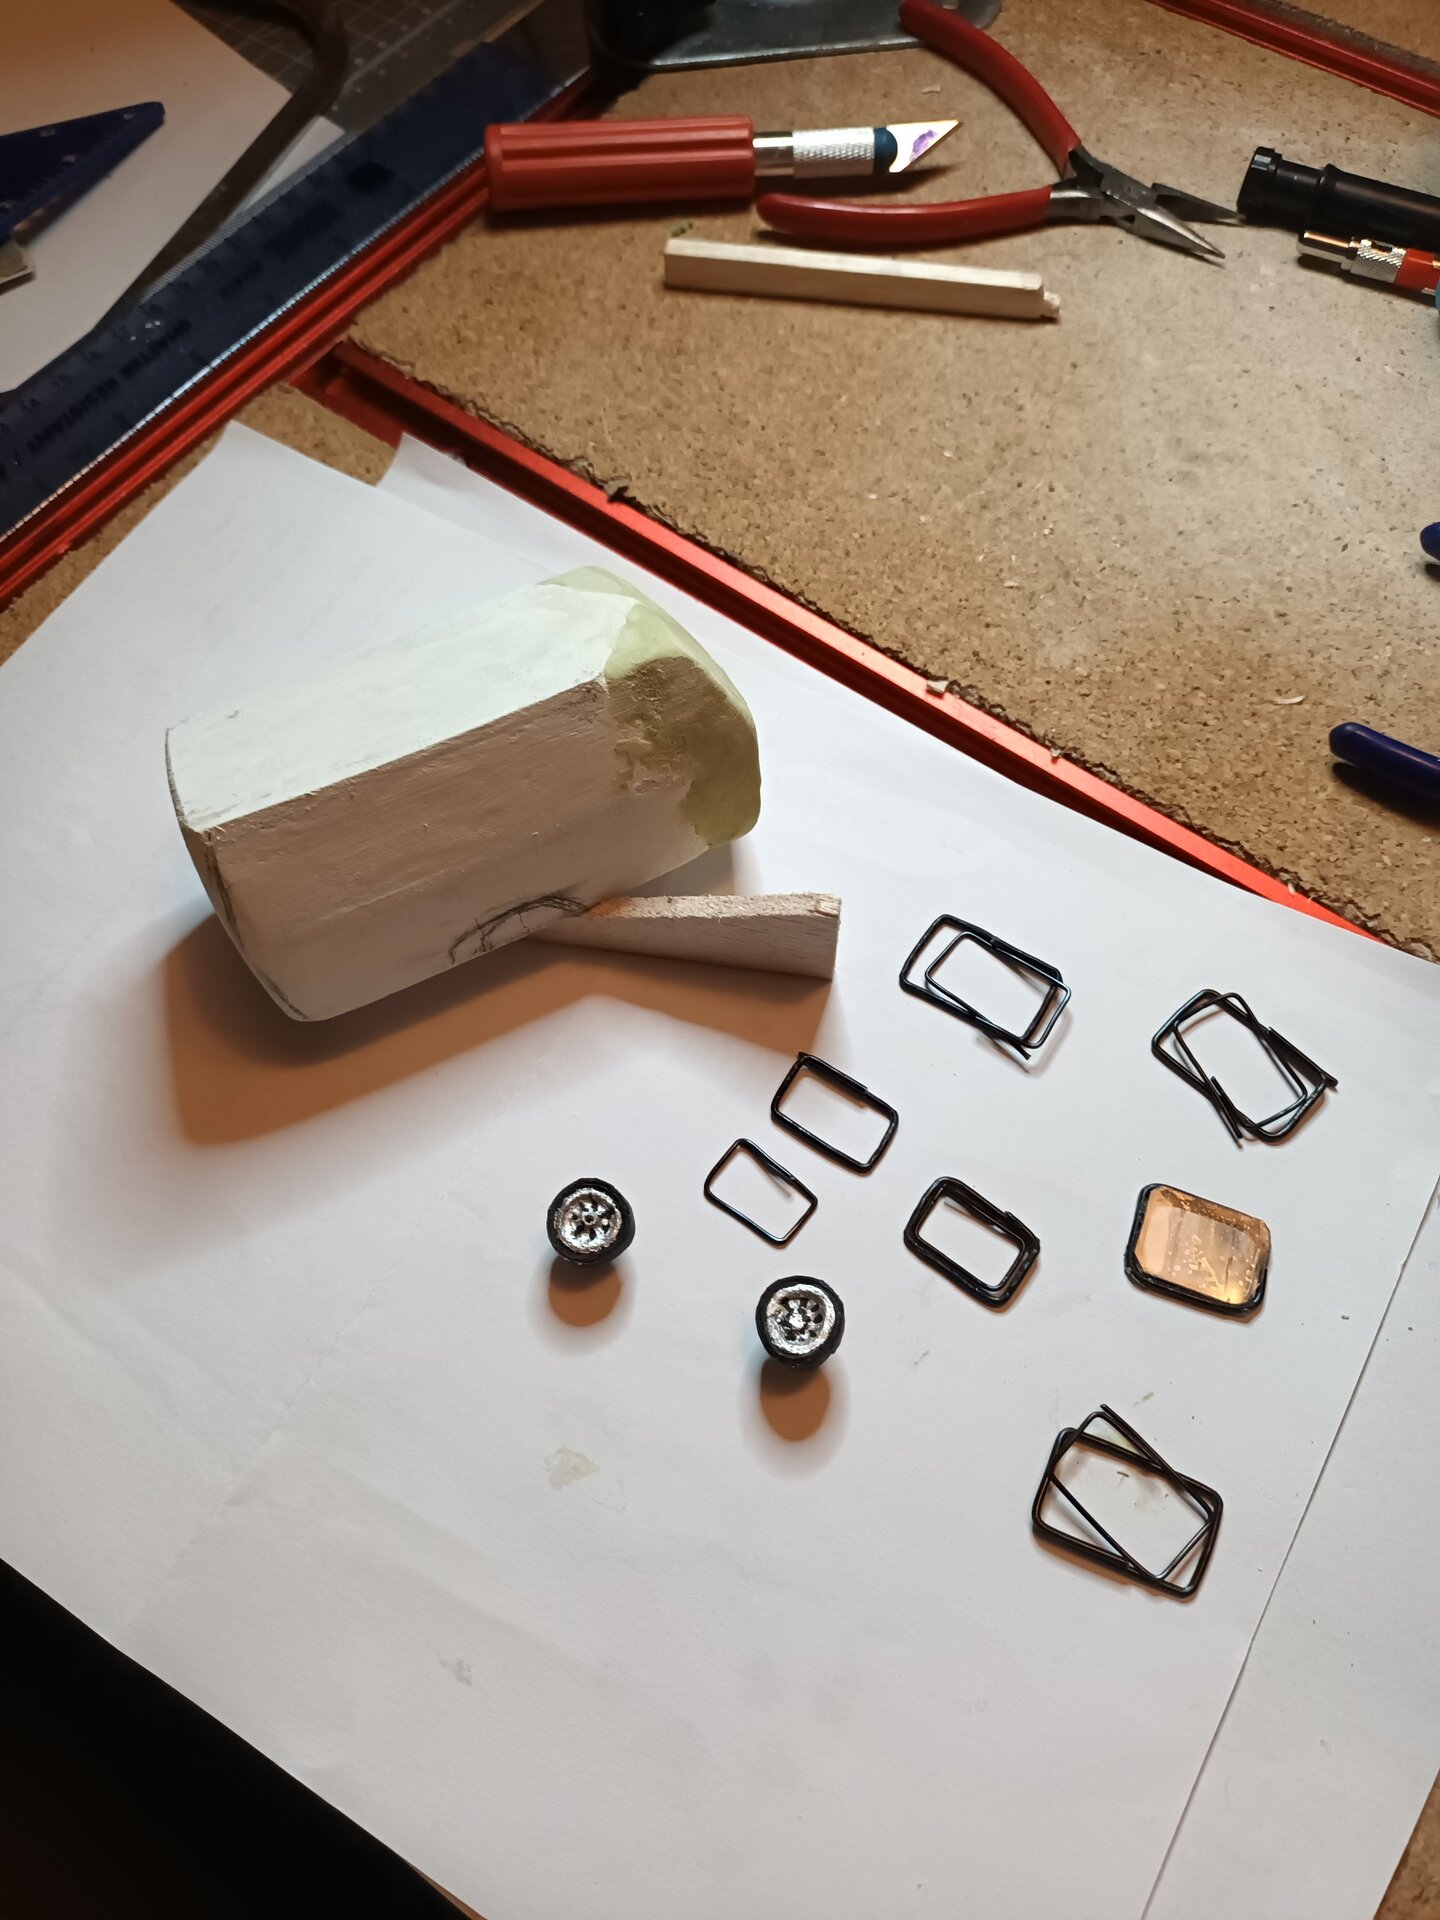
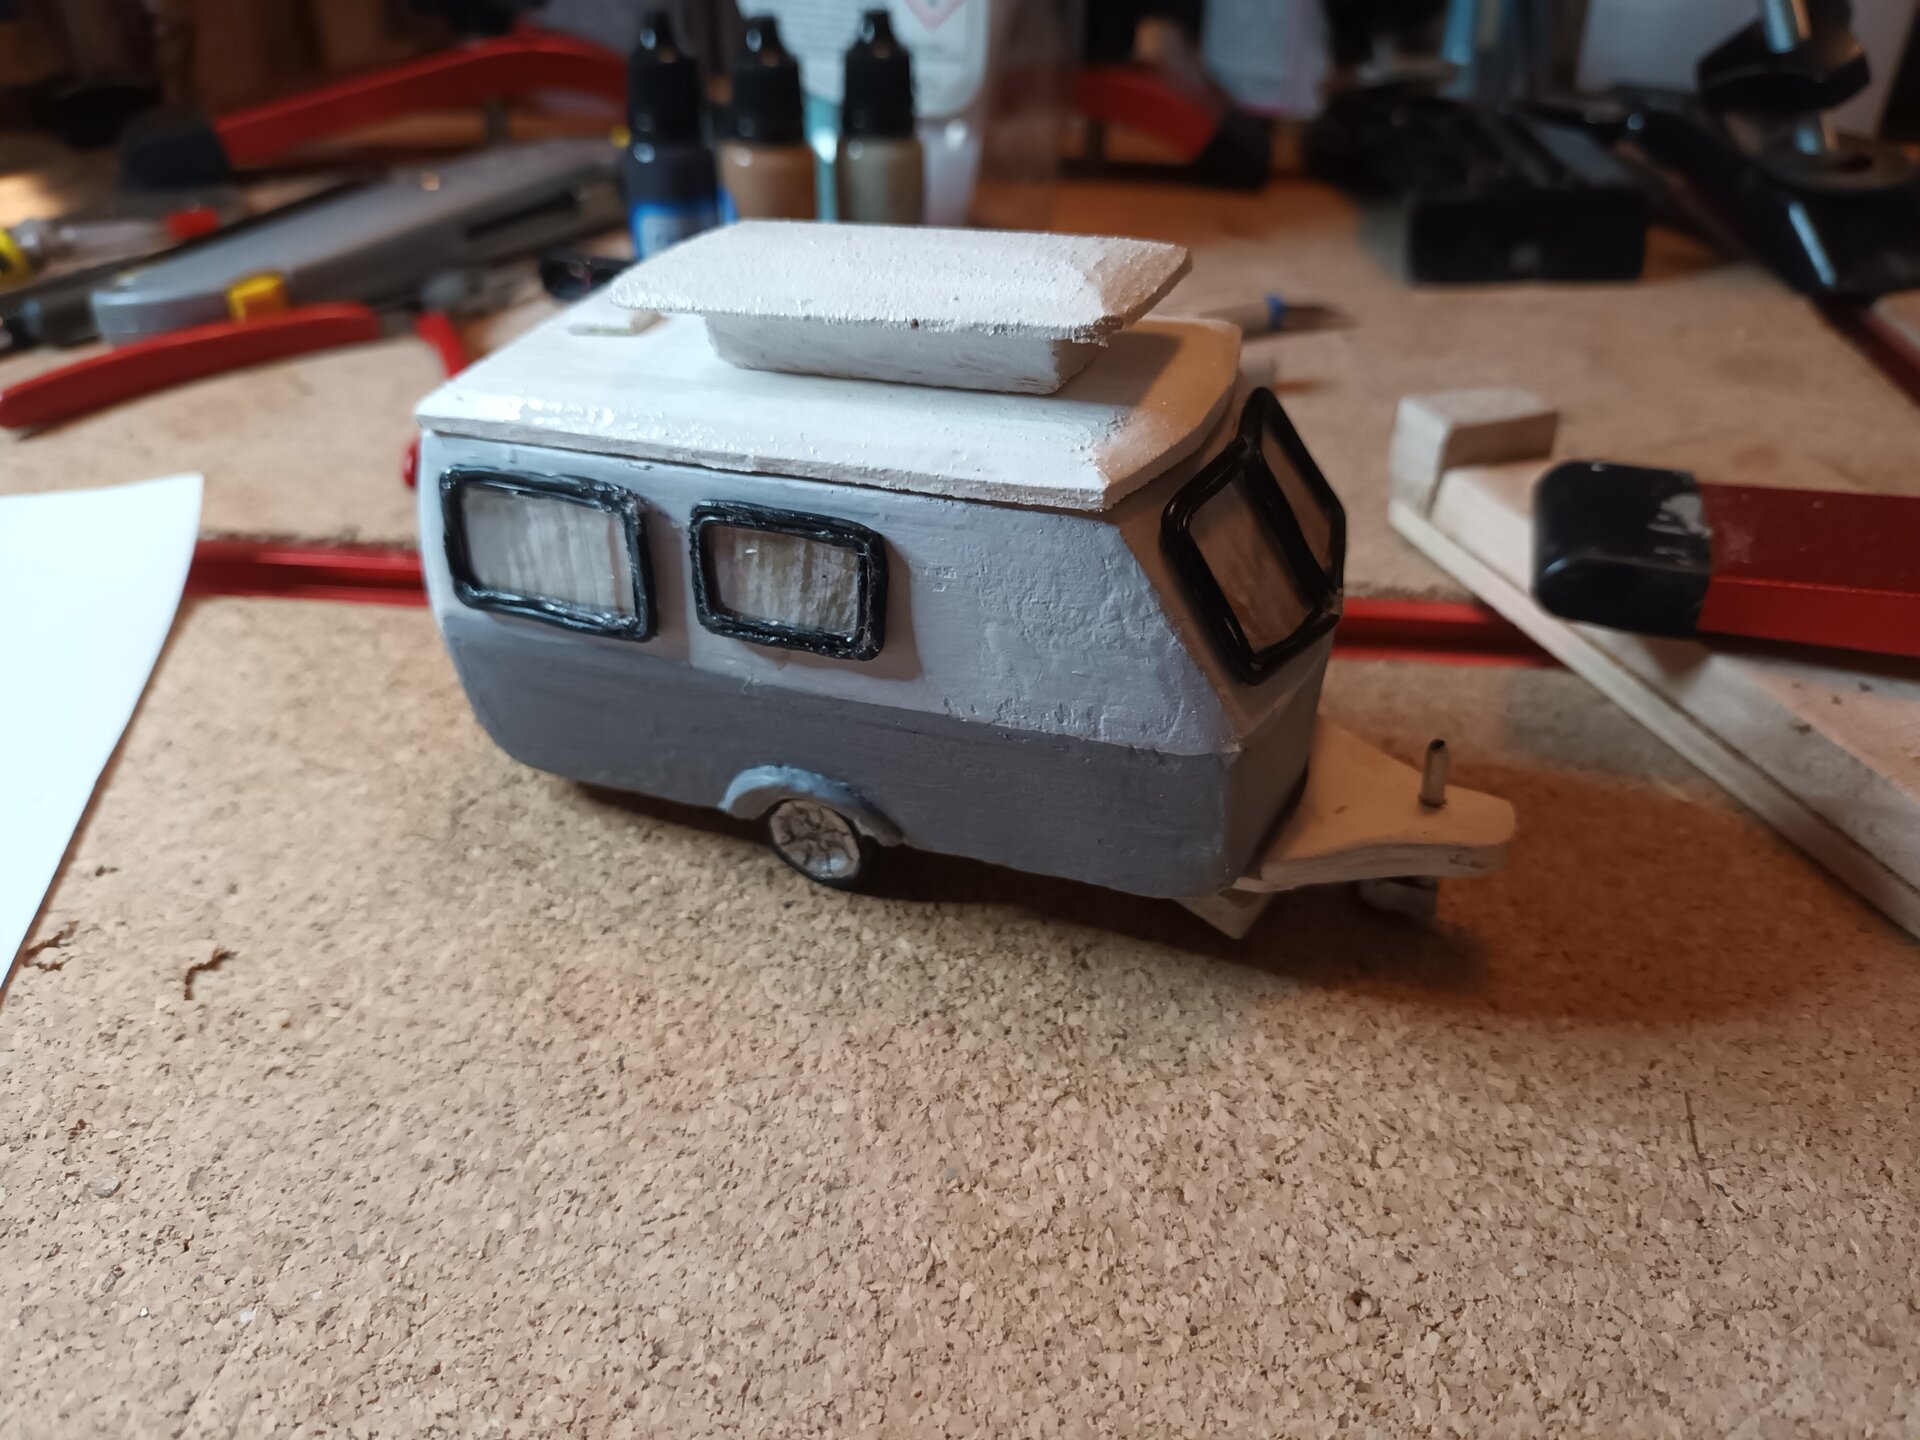
As visible in the photo, I had to make several adjustments to get the angles representative of the real Eriba. The characteristic curve from floor to roof, the distinctive front nose, the gentle taper toward the rear - each required careful observation and patient refinement.
Lesson Learned: Automotive curves in miniature are HARD. What looks like a simple curve is actually a compound curve changing in multiple directions. I gained immense respect for model car kit designers.
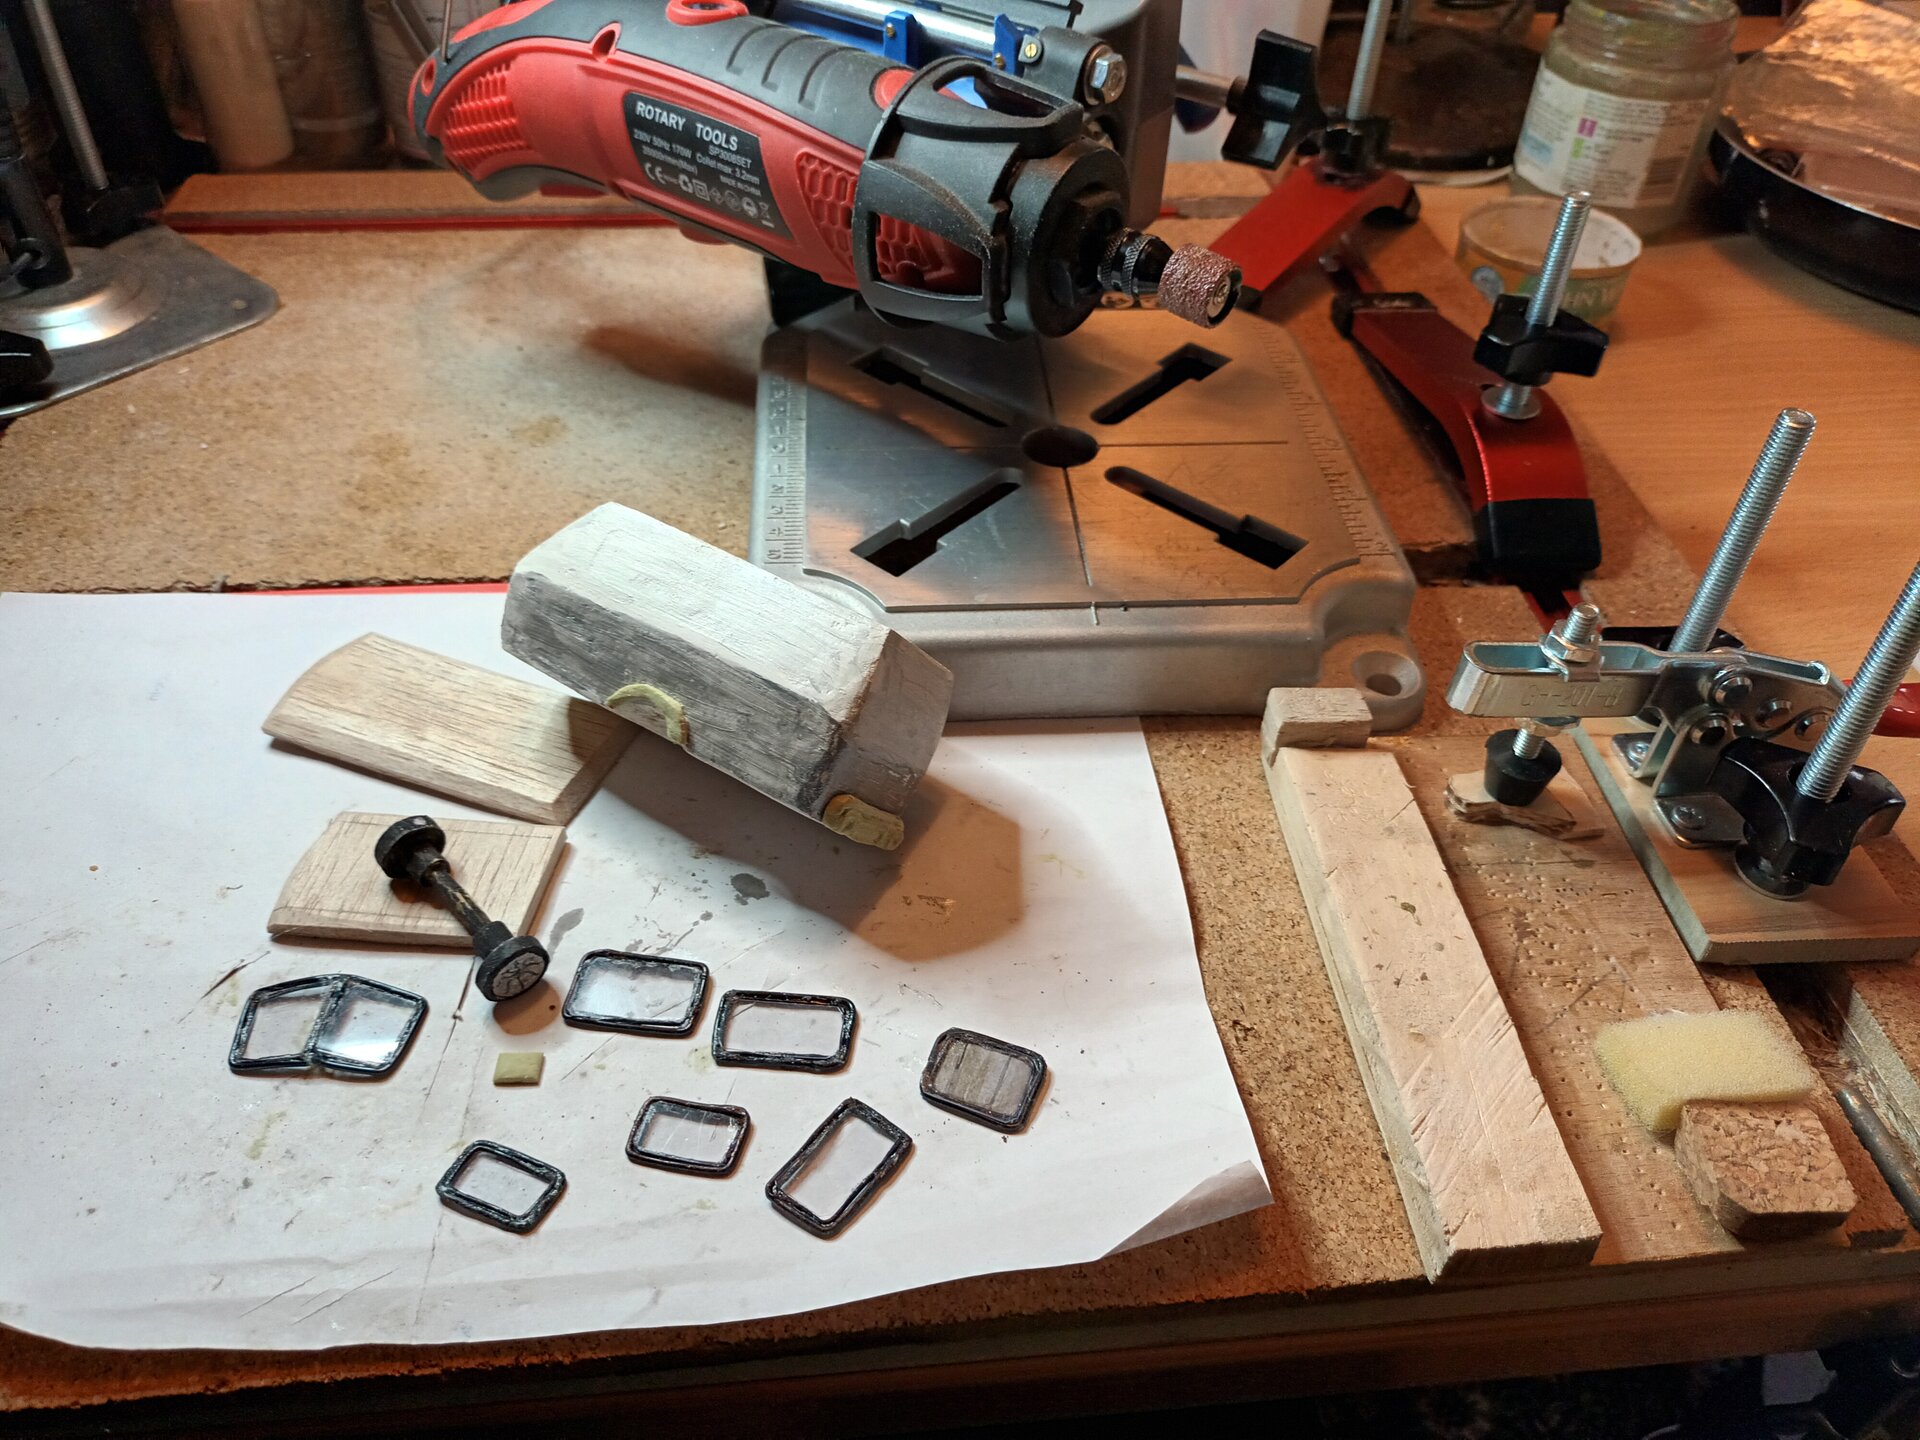
Phase 3: Windows - The Fiddly Details
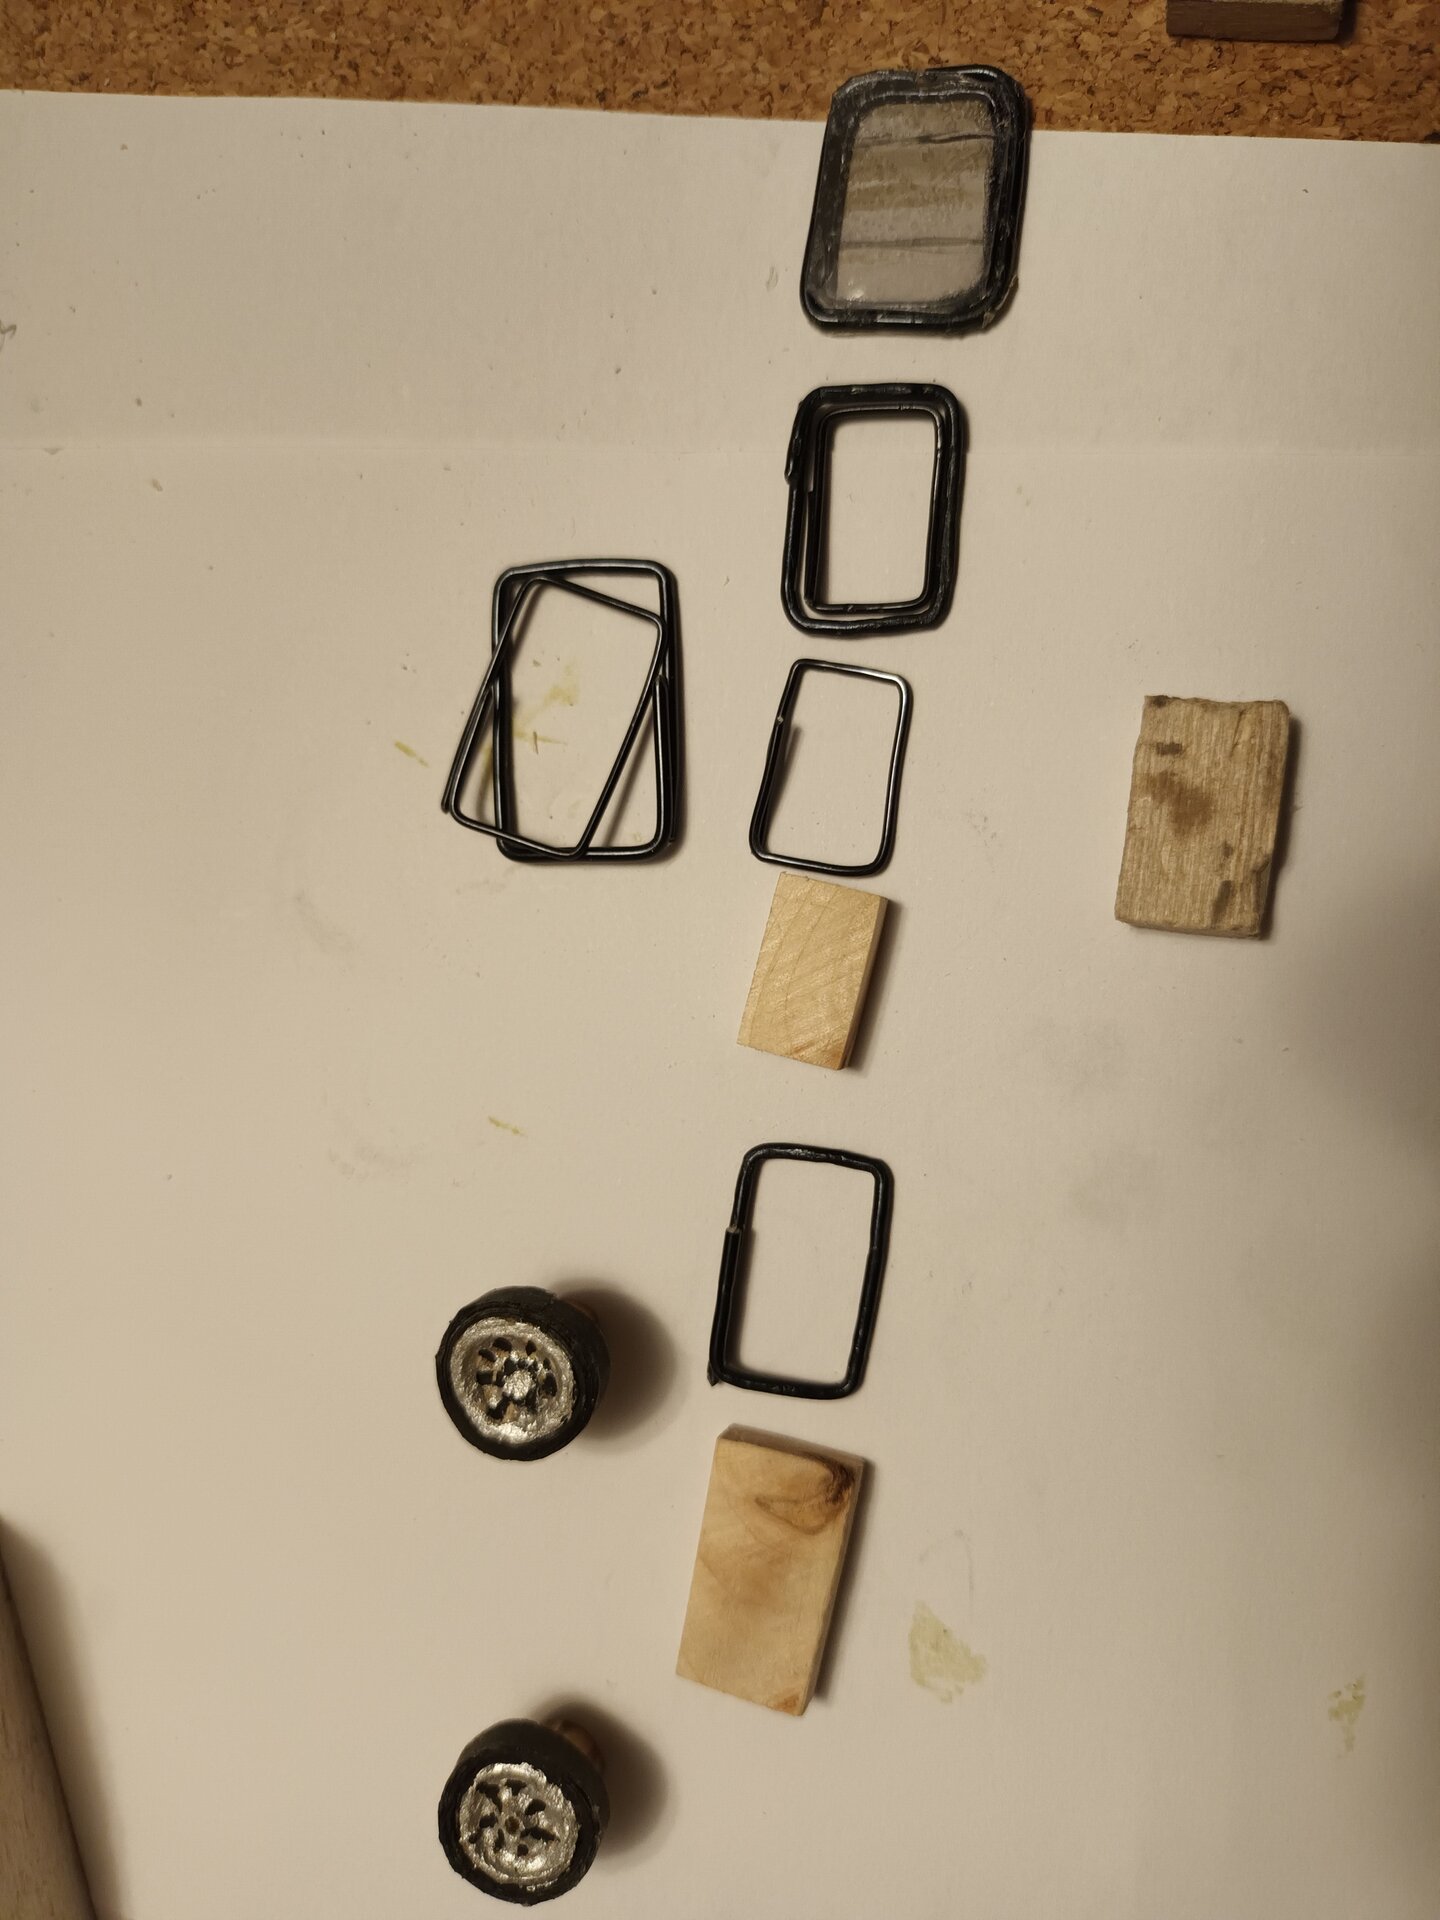
Window Construction Process:
1. Templates (Hardwood):
- Cut window shapes from thin hardwood
- Used for visual checking against reference photos
- Served as bending forms for wire frames
- Allowed testing positioning before commitment
2. Outer Frames (1.5mm aluminum wire):
- Black-coated wire bent to match template shapes
- Corners carefully formed to match Eriba’s rounded window corners
- Each window required multiple attempts to get curves right
- Wire wants to spring back - needed to overbend slightly
3. Inner Frames (0.5mm aluminum wire):
- Added inside outer frames for detail
- Represents the actual window frame dividers
- Glued carefully to maintain alignment
- Extremely fiddly at this scale
4. Glazing (Transparent Plastic):
- Cut from clear packaging material
- Slightly oversize, then trimmed after gluing
- Attached to inside of wire frames
- CA glue applied carefully to avoid clouding plastic
5. Curtains (Painted Tissue Paper):
- Tissue paper for proper drape appearance
- Painted before cutting (easier than painting after)
- Mixed colors for different rooms
- Glued behind glazing to show through windows
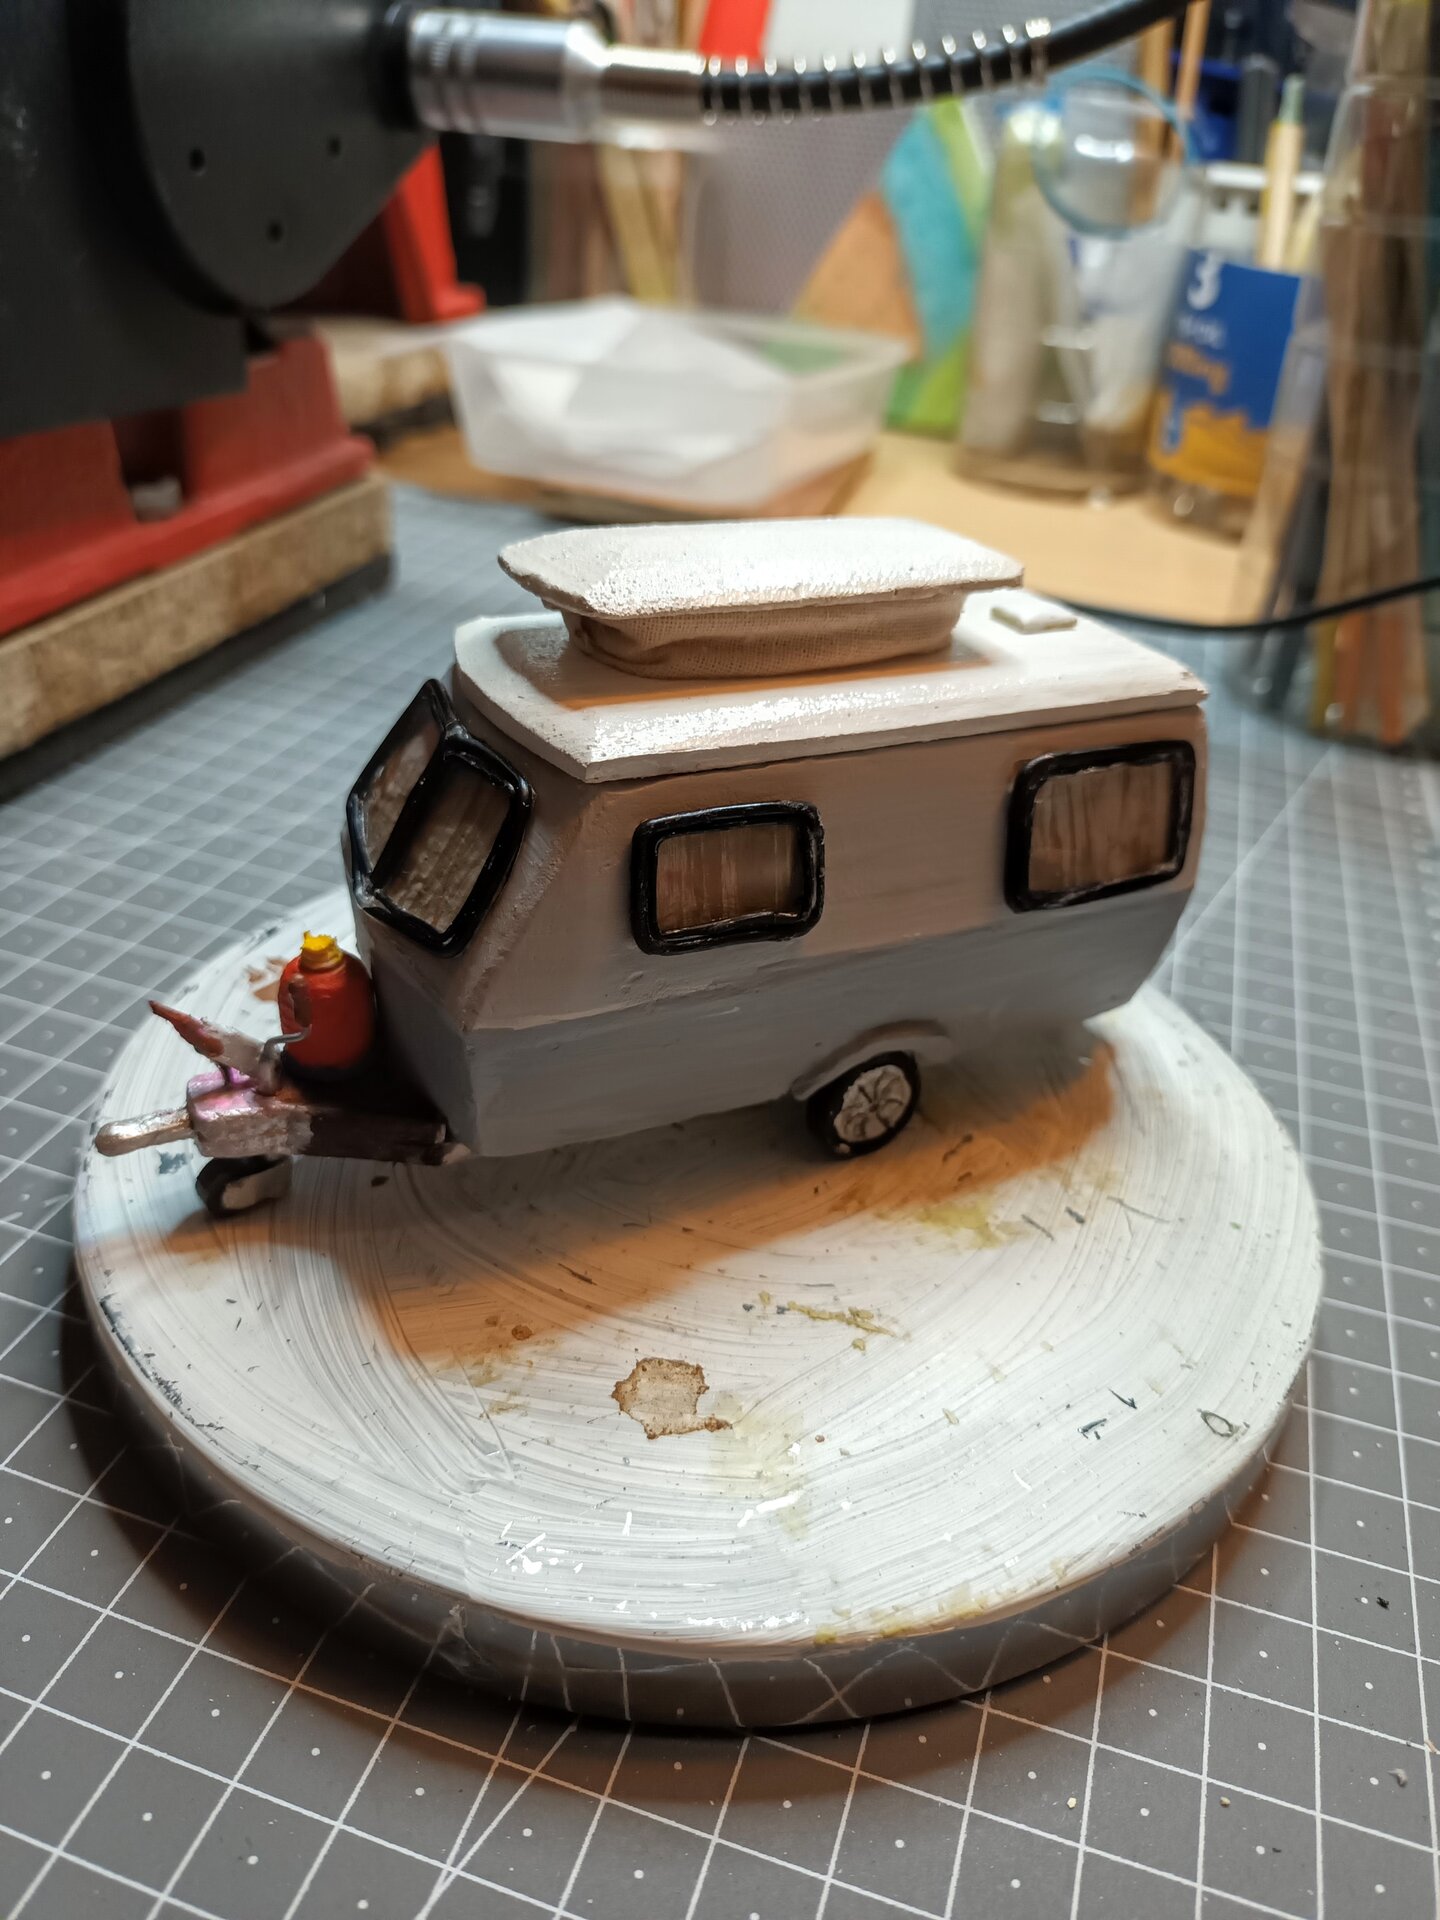
The Nose Windows: The front curved nose windows were particularly challenging. The compound curve of the Eriba’s nose means the windows aren’t just curved - they’re curved in two directions. Getting wire to hold this shape while maintaining the glazing attachment was frustrating. I rebuilt these windows three times before achieving acceptable results.
Phase 4: Wheels and Running Gear
Still visible in the same photo - the wheel construction:
Wheel Building Method:
- Hub: Small bamboo disc (center)
- Rim: Larger bamboo ring (outer)
- Spoke Effect: Middle layer with wedges cut out
- Assembly: Three layers glued concentrically
- Tires: Black paper strip wrapped around rim
- Axle: Wire rod connecting both wheels
Why bamboo?
- Strong for its weight
- Easy to cut cleanly with sharp blade
- Natural grain adds subtle texture
- Readily available (skewers and placemats)
The wheels needed to look correct for an Eriba - not too sporty, not too industrial. The real caravan has distinctive alloy wheels with a simple spoke pattern. My bamboo construction captured this reasonably well.
Phase 5: Additional Details
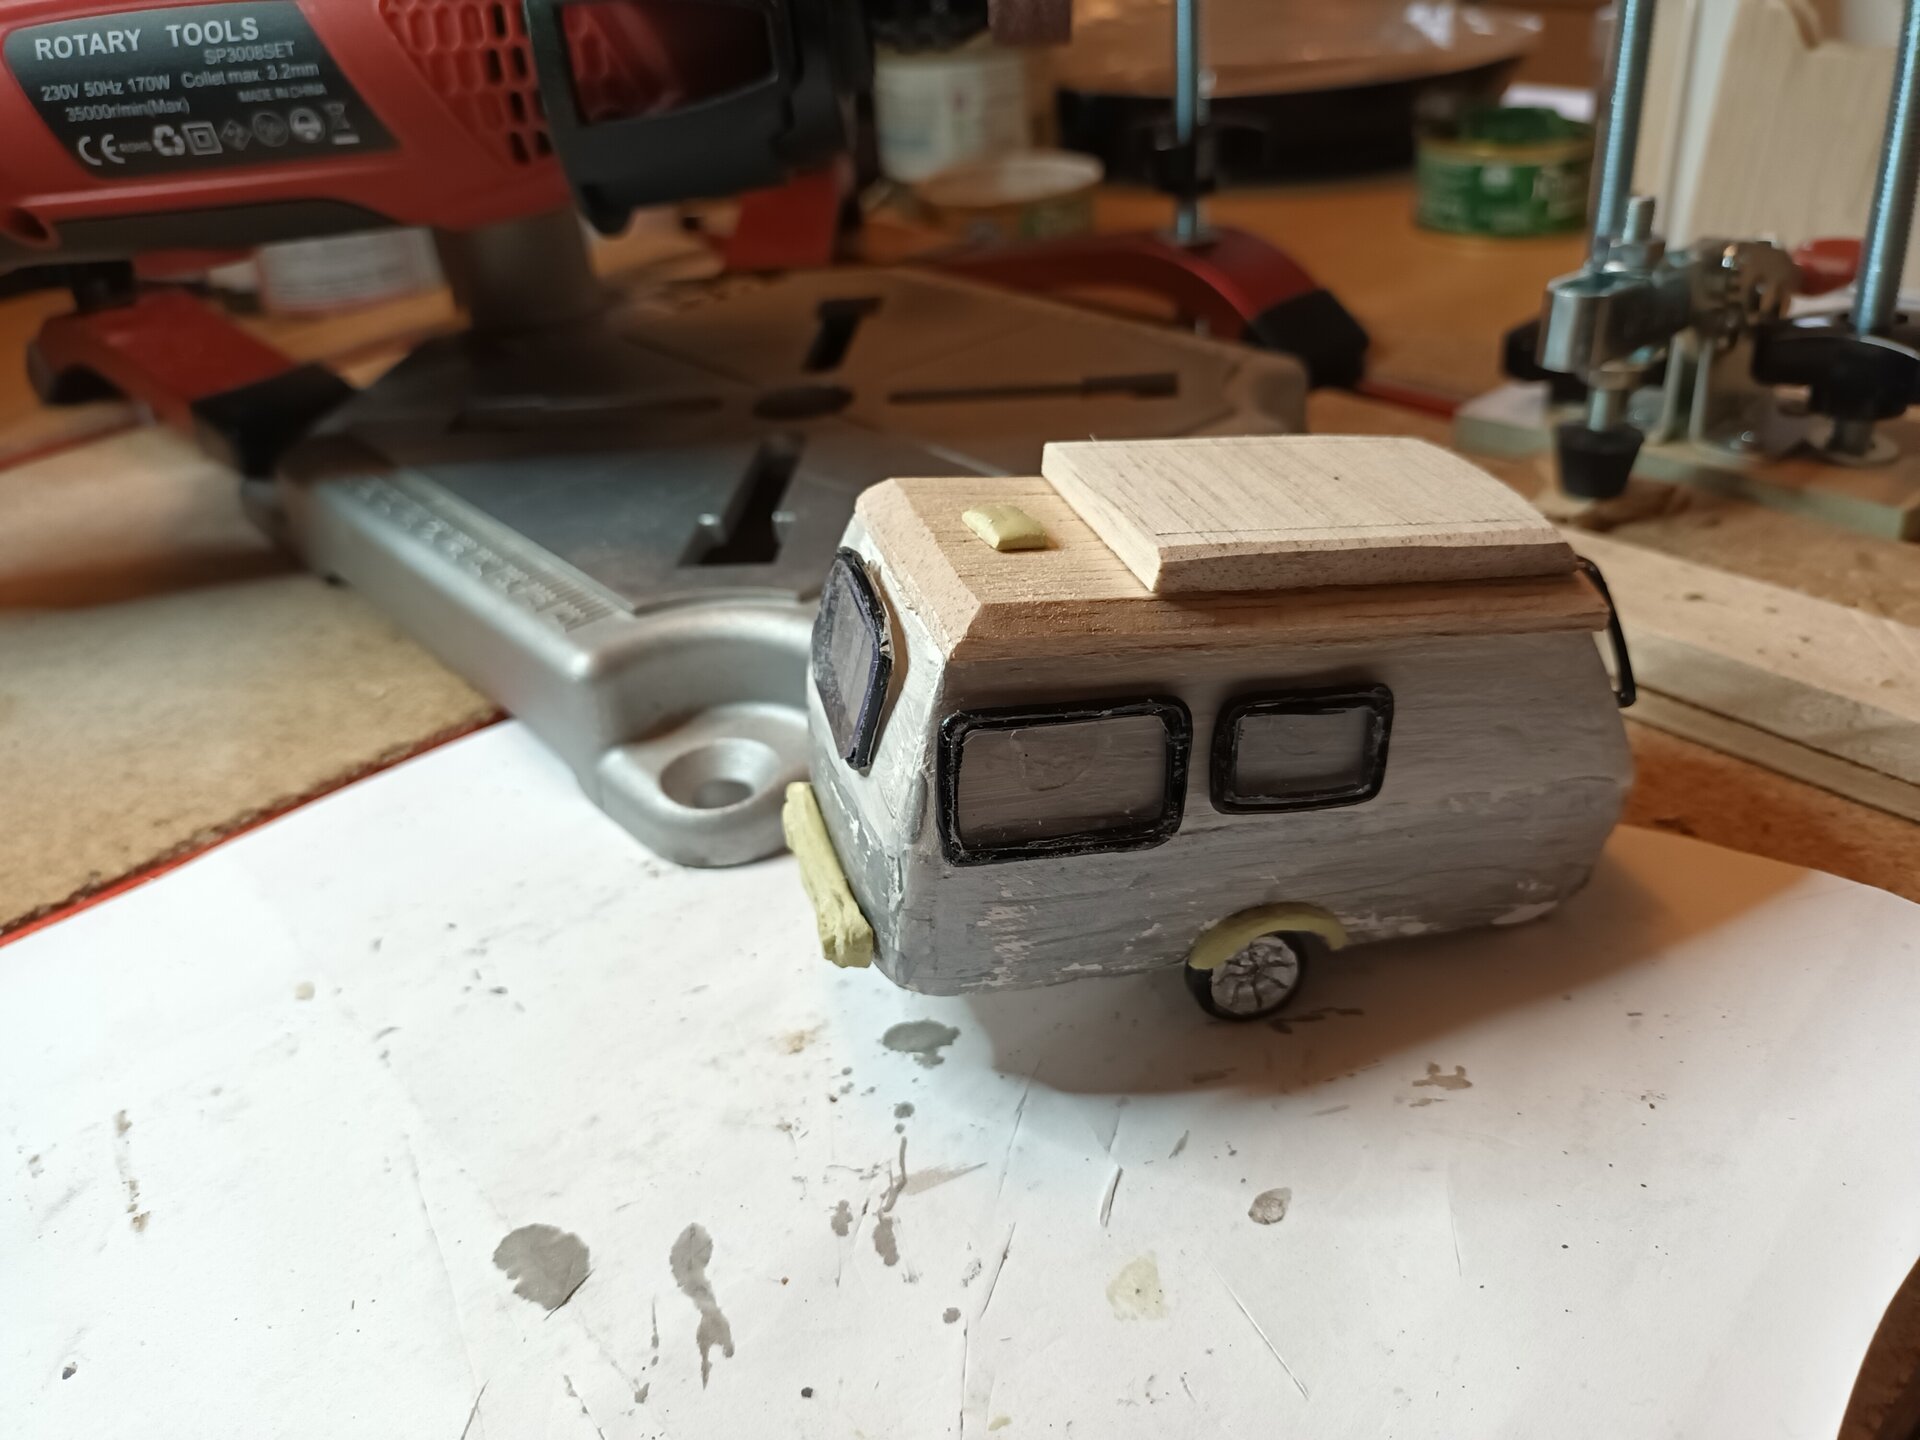
Components Added:
Mudguards (Wheel Covers):
- Formed from epoxy putty
- Shaped to follow wheel curve
- Sanded smooth
- Painted to match body
Rear Bumper:
- Epoxy putty shaped to Eriba profile
- Includes mounting points detail
- Chrome-painted highlights
Rear Lights:
- Tiny epoxy putty shapes
- Red and amber paint
- Clear gloss coat for lens effect
Roof:
- Cut from balsa sheet
- Sanded to achieve gentle curve
- Edge detail added
- Painted separately before attachment
At this stage, with all windows installed and major components fitted, the caravan was starting to look recognizable. But the paint finish wasn’t right…
The Painting Disaster
What Went Wrong:
After several attempts to paint and smooth the body, I could see it wasn’t good enough:
- Paint showing epoxy putty application lines
- Uneven surface texture visible in certain light
- Orange peel effect from rushed painting
- Imperfections I could see would bother me forever
The Difficult Decision:
This was a commissioned piece. It needed to be right. “Good enough” wasn’t good enough.
I made the call: rip off all the windows and start the finishing process again.
The Rework Process:
- Carefully removed all windows - tried to save them (partially successful)
- Sanded the entire body down to near-base level
- Applied thin layer of epoxy putty to fill remaining imperfections
- Extensive sanding with 240, 400, 600, 800 grit progression
- Primer coat to check for remaining issues
- More sanding where needed
- Final primer coat
- Patient base coat application - thin layers, drying between
- Color coats - multiple thin layers
- Clear coat for protection
Time invested in paint rework: About 8 hours spread over multiple days
Emotional cost: Significant. Questioning abilities. Wondering if I should have just accepted the first attempt.
Was it worth it? Absolutely. The final finish was smooth and even - looked much better.
Lesson: In commissioned work, your standards matter more than your timeline. The client is trusting you with their memories.
Phase 6: Final Assembly
Final Components:
Jockey Wheel (Front Support):
- Wire frame construction
- Tiny wheel that actually rotates
- Mounting bracket detail
- Simulated adjustment mechanism
Brake Assembly:
- Small box on A-frame
- Represents handbrake unit
- Cable detail to chassis
- Painted industrial grey
Tow Hitch:
- Ball hitch socket
- Mounting points
- Safety chain attachments
- Breakaway cable detail
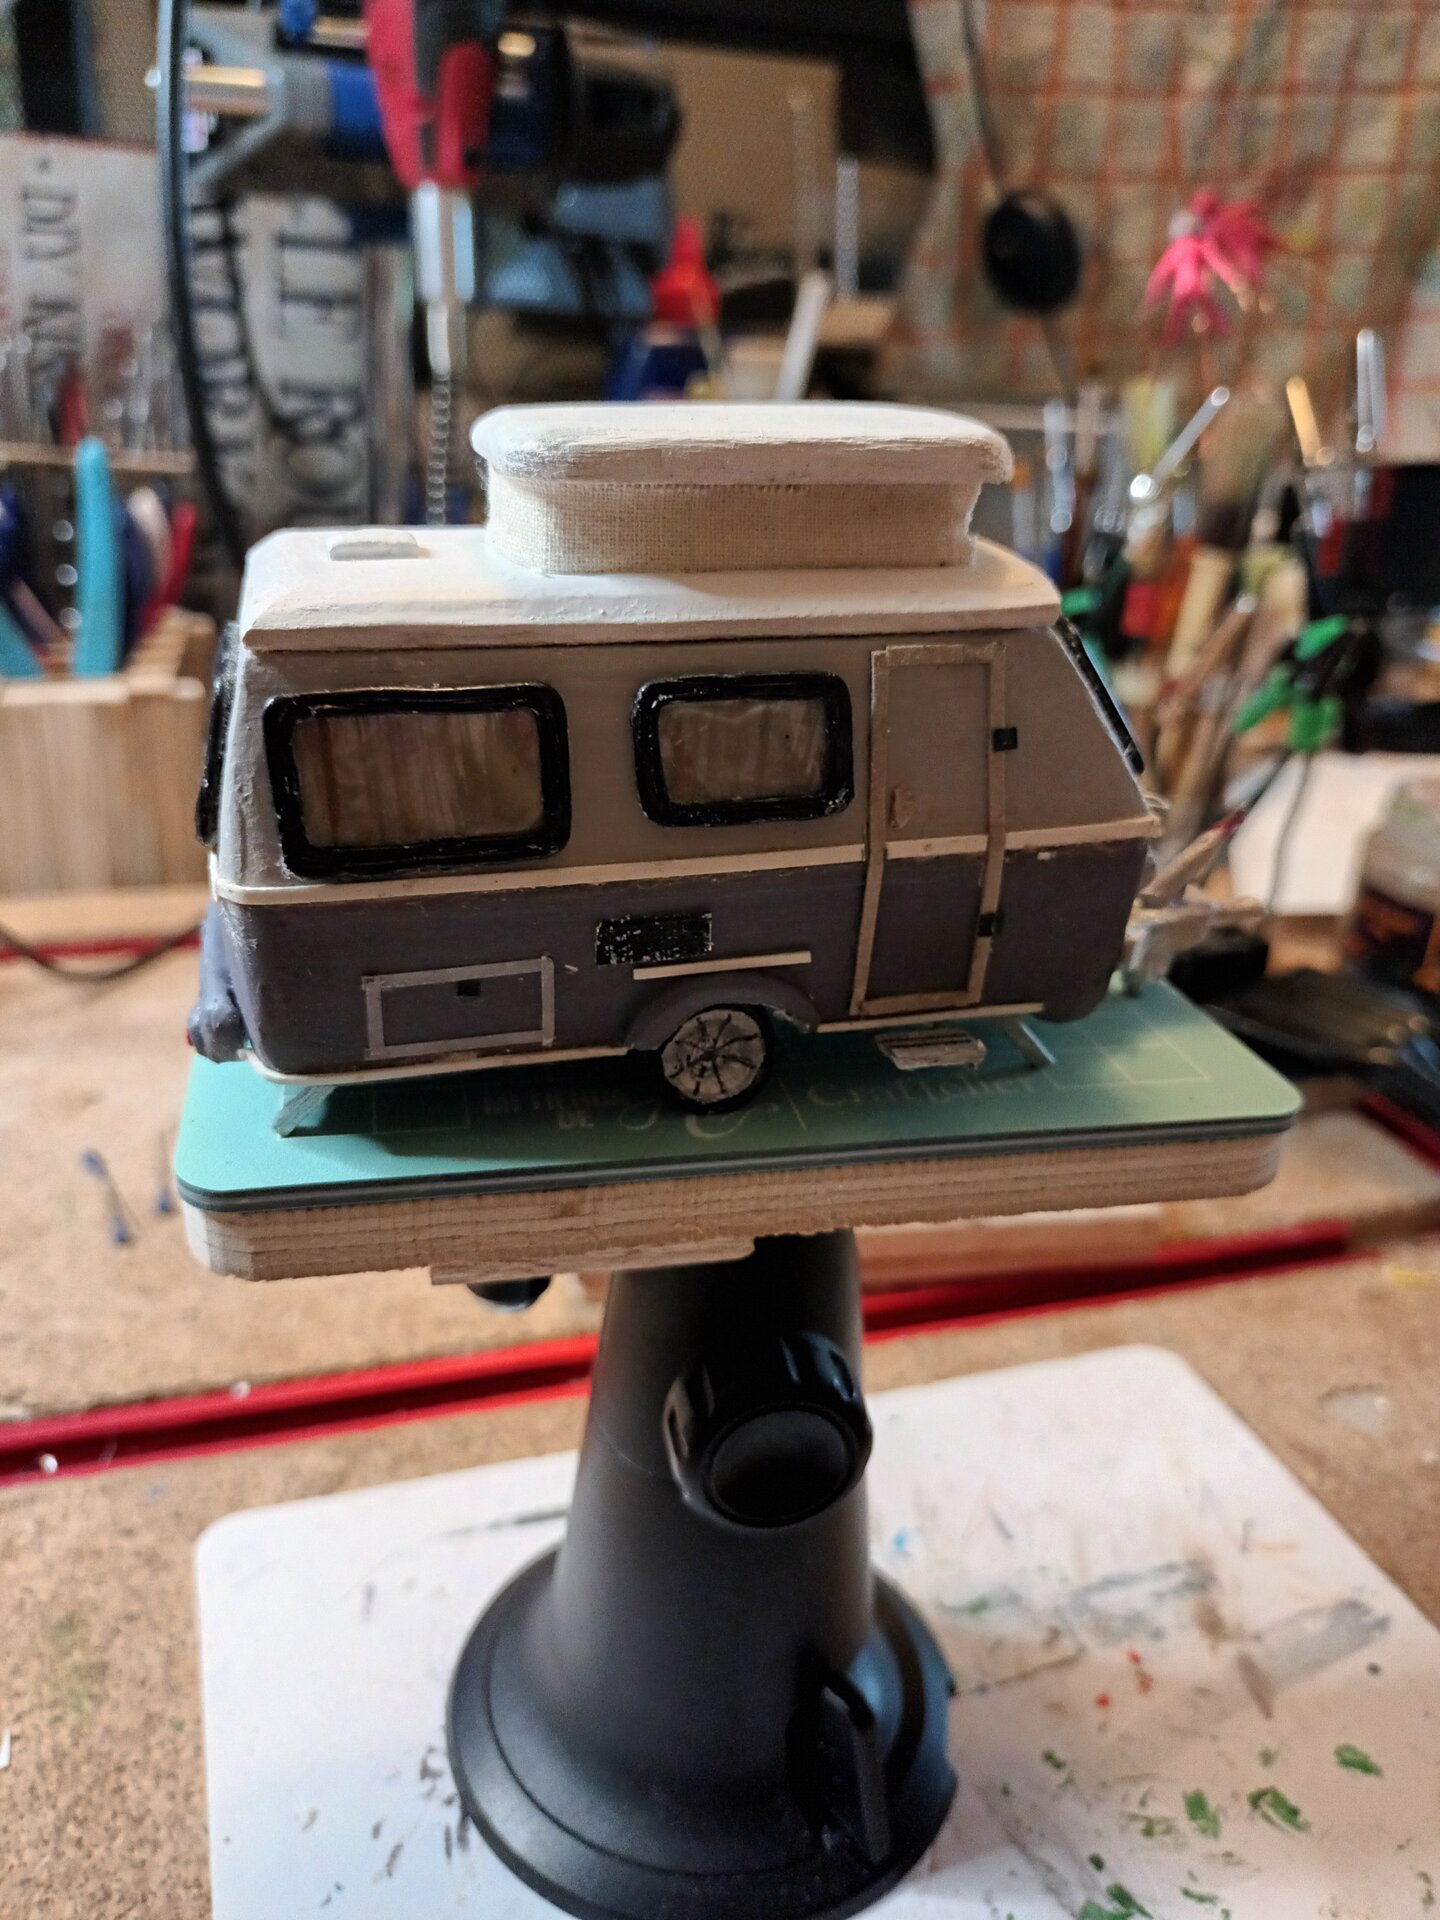
The Moment: Stepping back and seeing the completed caravan was a triumph. All the frustration, the rework, the failed attempts - worth it. This actually looked like an Eriba Triton. Not perfect, but recognizable, well-proportioned, and convincingly detailed.
Proof of Concept: If I could build this caravan, I could build the car. The commission was feasible.
Skills Developed
New Skills:
- Miniature vehicle construction from scratch
- Working with Milliput epoxy putty for compound curves
- Creating miniature windows with wire frames
- Achieving smooth automotive finishes
- Wheel construction techniques
- Accepting the necessity of major rework
Improved Skills:
- Patience (drastically improved)
- Surface preparation and sanding
- Paint application for smooth finishes
- Detail addition to vehicles
- Working to client-driven quality standards
Tools Acquired:
- Finer sanding implements (600-2000 grit)
- Smaller files for detail work
- Better wire-bending tools
- Paint mixing station
- Magnifying work lamp
Materials Used
Structural:
- Balsa wood sheets (3mm, 1mm)
- Milliput epoxy putty (2 packs used)
- CA glue (superglue)
- PVA white glue
Windows:
- 1.5mm aluminum wire (black-coated)
- 0.5mm aluminum wire
- Clear plastic sheet
- Tissue paper
- Acrylic paint (for curtains)
Wheels:
- Bamboo skewers
- Bamboo placemat material
- Black paper
- Wire (axle)
Paint:
- Primer (grey, spray can)
- White base coat (spray)
- Cream body color (hand-painted)
- Chrome silver (bumper, details)
- Red (lights)
- Amber (lights)
- Clear gloss coat
Time Investment:
~25 hours total (including 8 hours of paint rework)
Reflections
What Worked Well:
- Balsa/epoxy putty combination for body
- Window construction method
- Bamboo wheels
- Decision to rework rather than accept flawed finish
What Was Challenging:
- Achieving smooth compound curves
- Front nose window curves
- Paint application without texture
- Managing epoxy putty working time
- Accepting time cost of doing it right
What I’d Do Differently:
- Apply thinner layers of epoxy putty initially (easier to sand)
- Build more cure time into schedule (less rushing)
- Practice paint technique on scrap before final piece
- Create more detailed window templates first
The Validation: When I showed my son the completed caravan, his immediate response: “That’s our caravan!” Mission accomplished. The hours of work, the frustration, the rework - all justified by that recognition.
Next Steps
With the caravan successfully completed, confidence was high. Time to tackle the next major challenge: the VW Golf R Estate.
The lessons learned here - particularly about accepting rework and the importance of patient finishing - would prove crucial for the car build.
Coming in Build Log 003: VW Golf Estate Construction - Discovering air-dry clay, paper prototypes, and the challenge of automotive curves (again).
Materials Cost This Phase: ~£25
Time Spent: 25 hours
Rework Cycles: 1 major (paint), several minor (windows)
Coffee Consumed: Considerable
Satisfaction Level: High
Client Reaction: “That’s our caravan!”
Previous: 001 - Planning & Commission
Next: 003 - VW Golf Estate Build
Have questions or feedback about this project? I'd love to hear from you.