English Country Garden - Cottage Construction
Cottage Construction Begins
The cottage construction started early with the creation of a paper model to size the footprint and location. With the plants all available for installation, attention moved to the construction of the cottage itself.
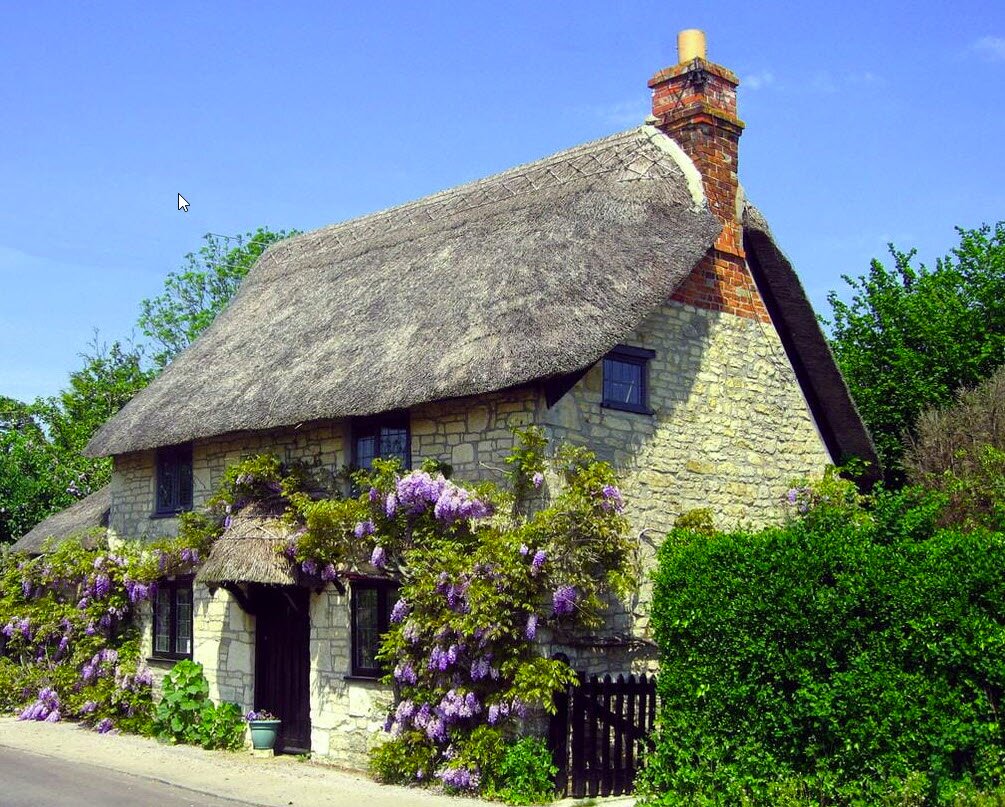
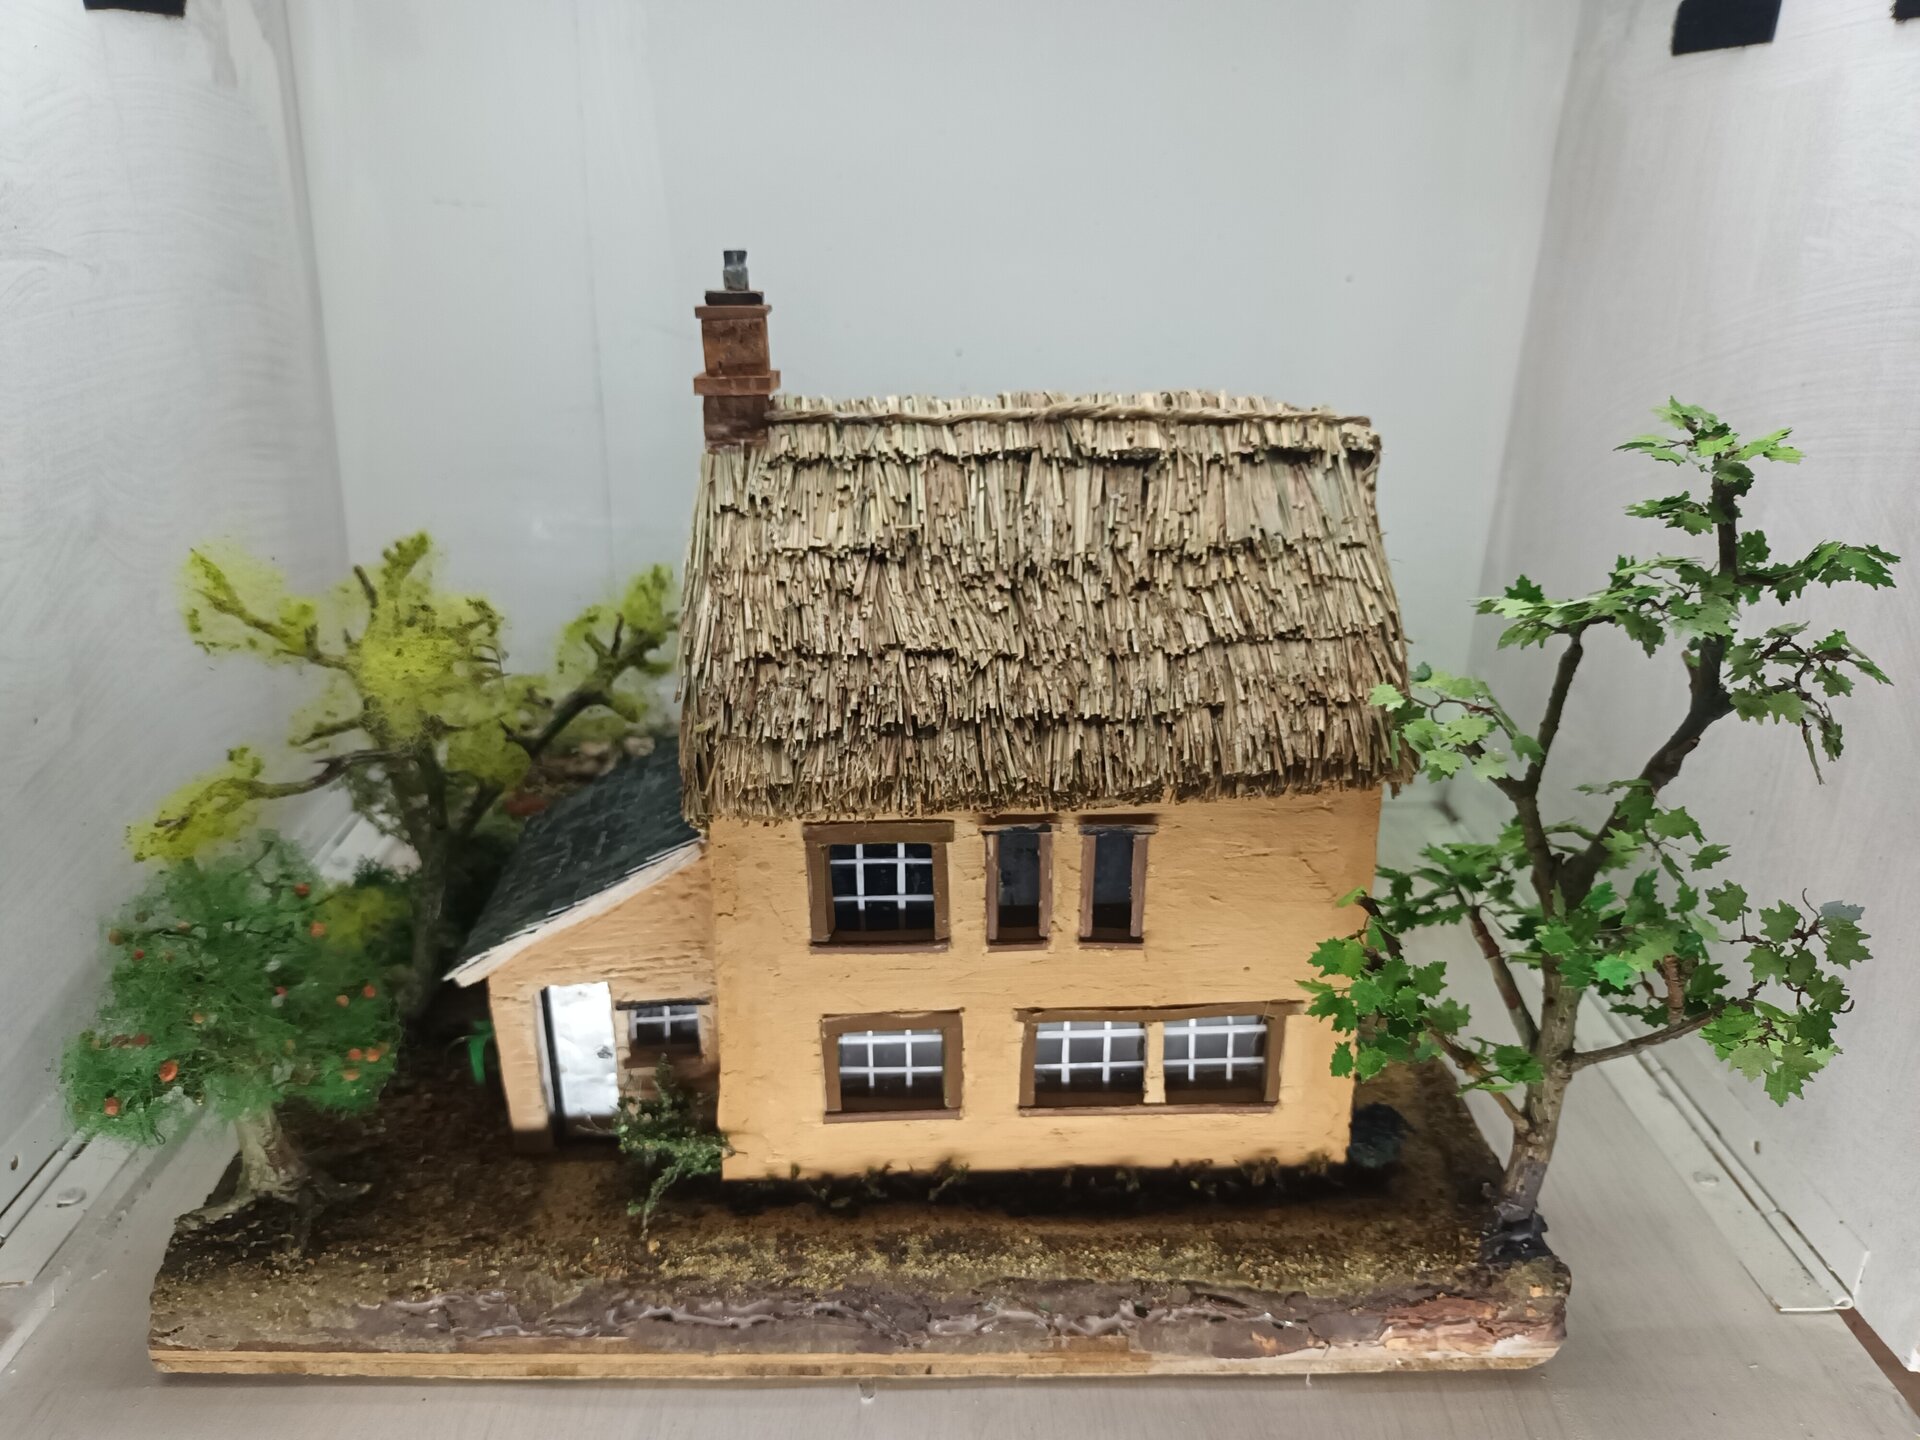
This cottage would be the centerpiece of the entire garden - a historic Victorian structure with authentic thatched roof, approximately 16cm height, 11cm width, and 19cm length (roof height 9.5m at scale).
Building the Structure
Wall Construction
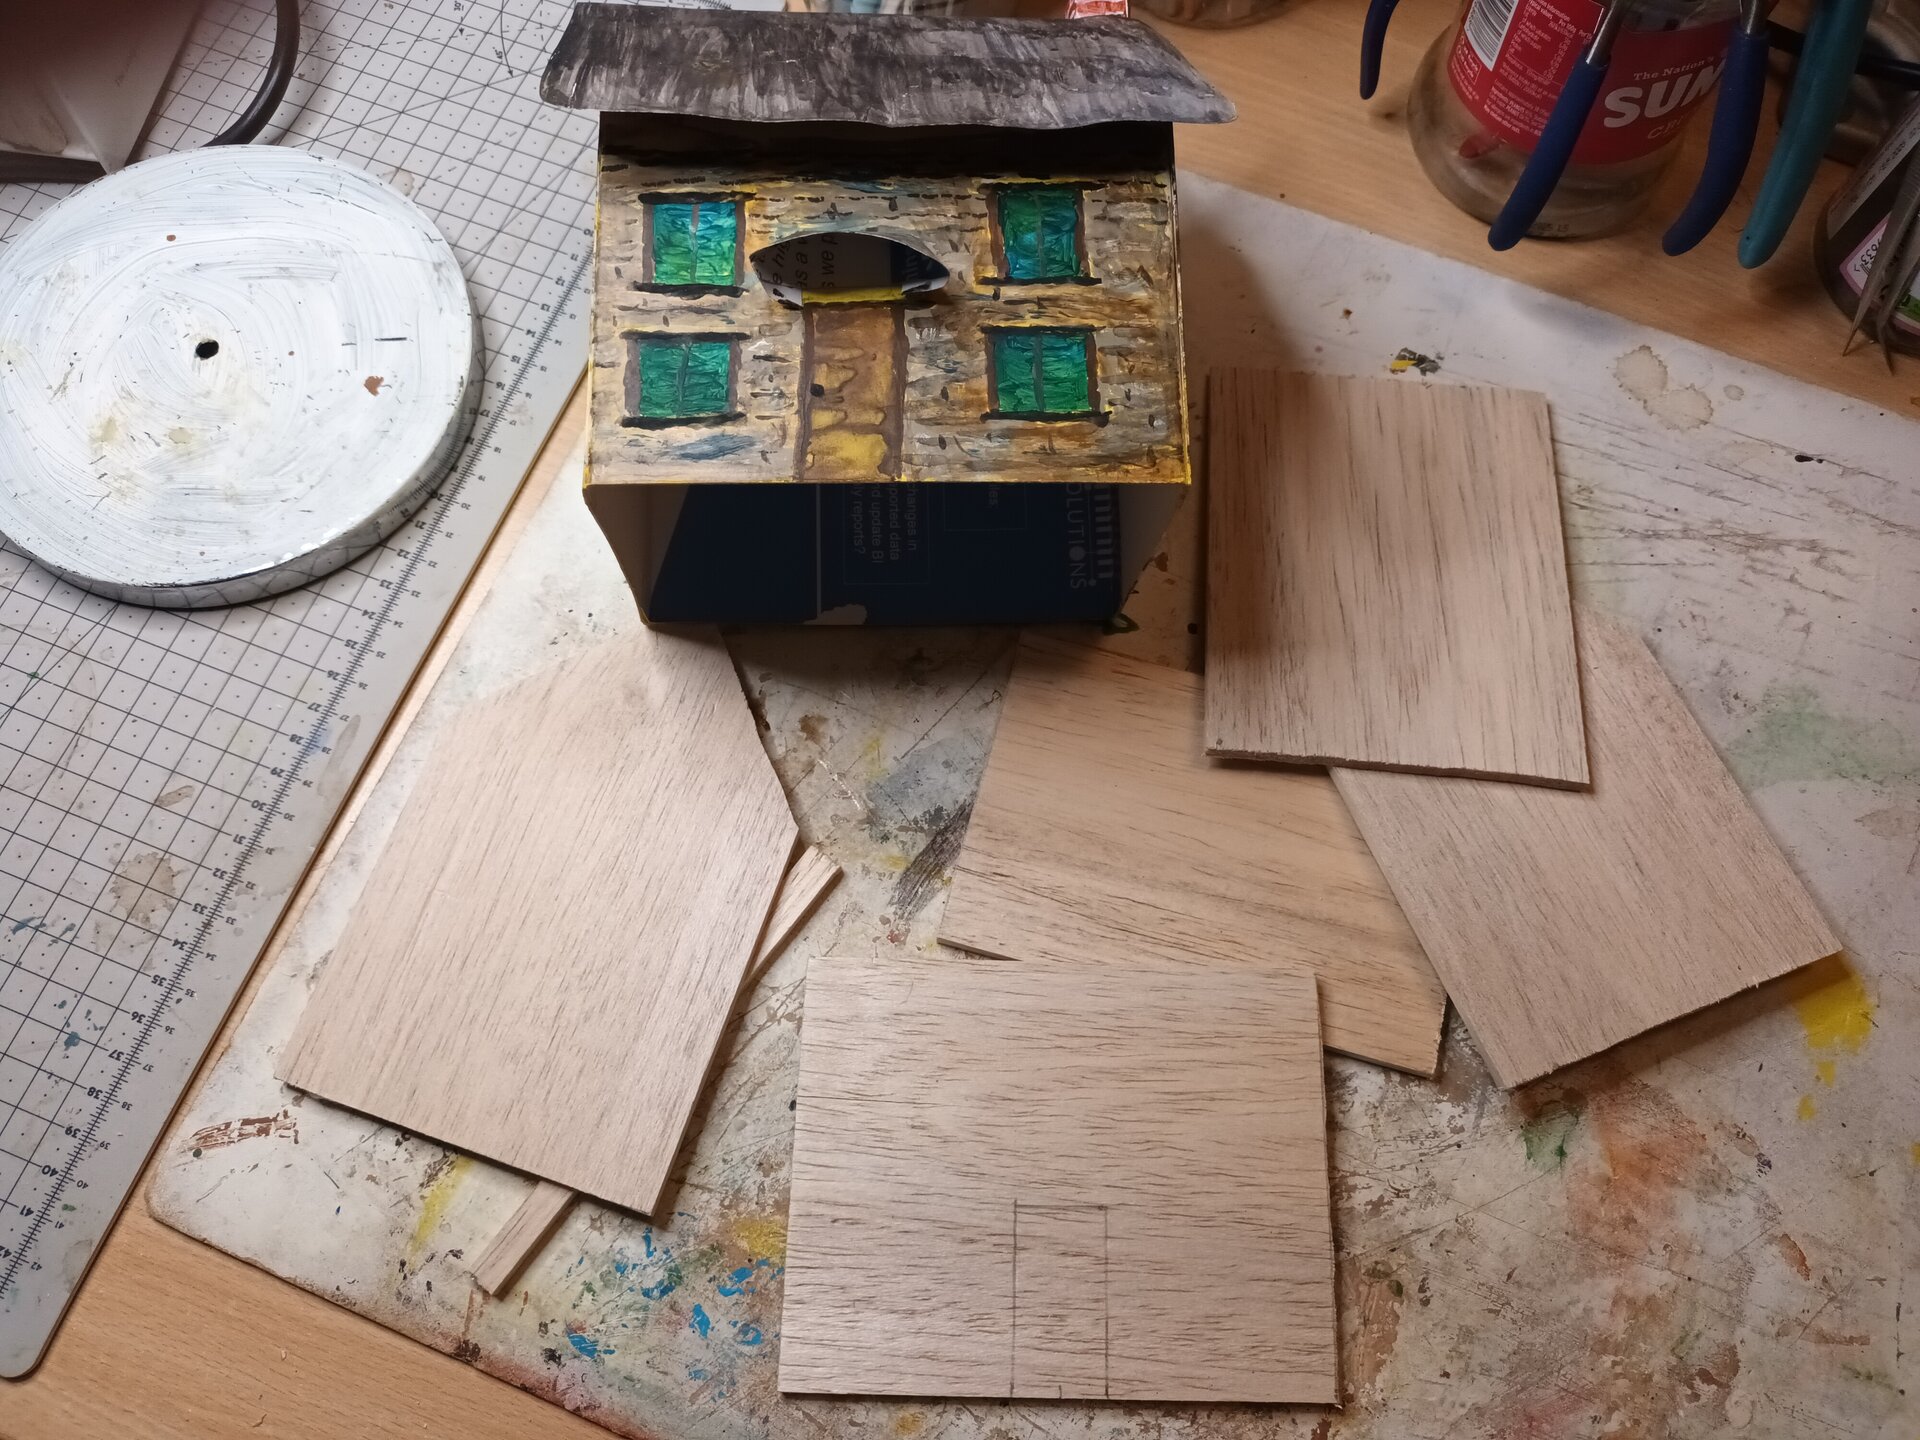
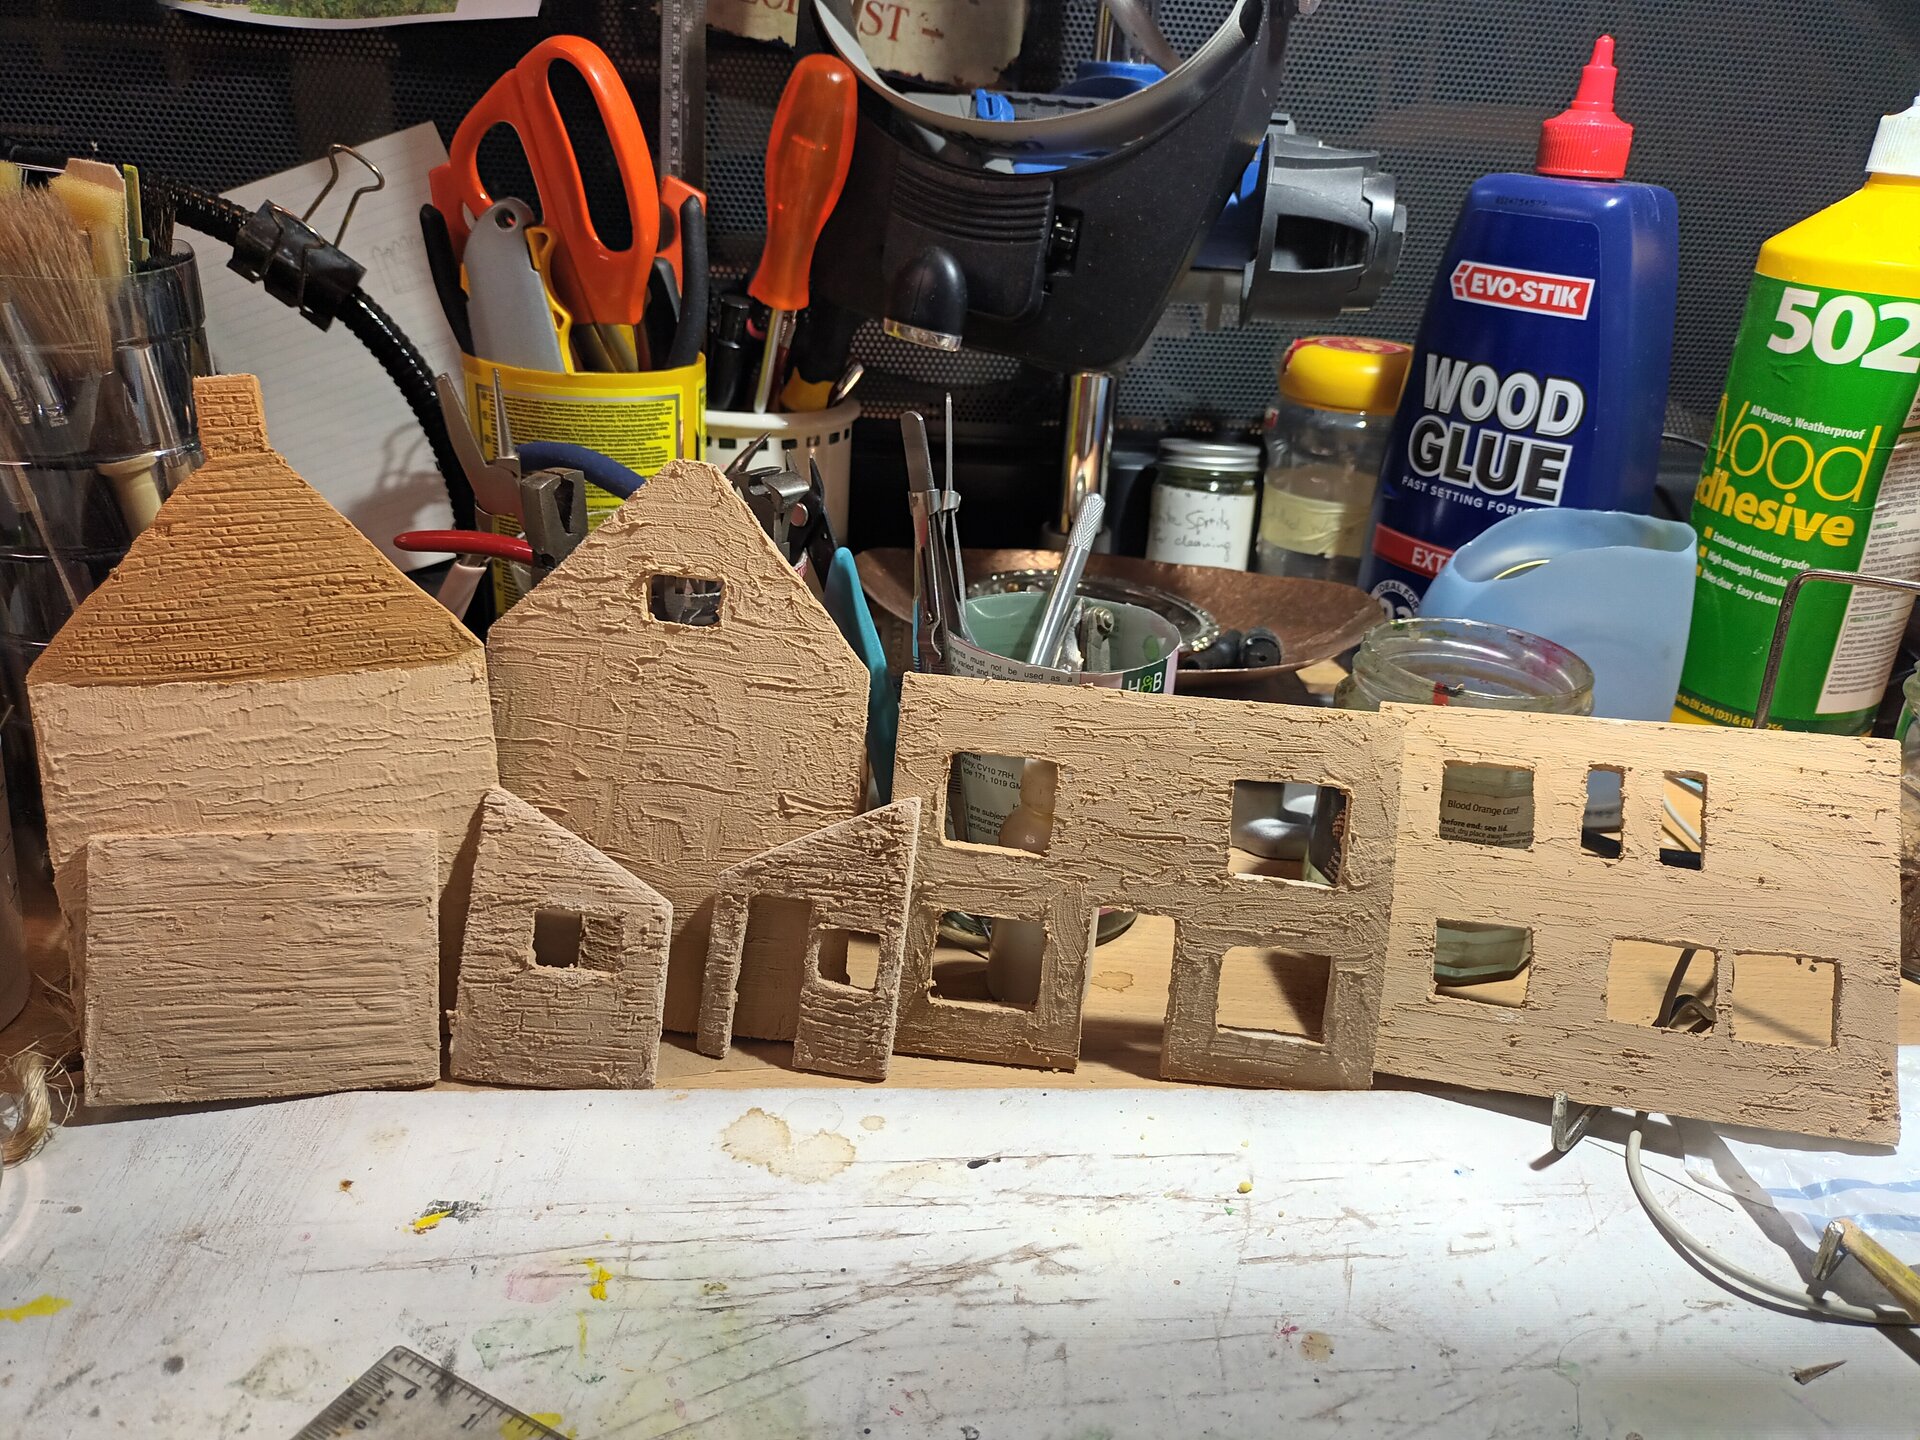
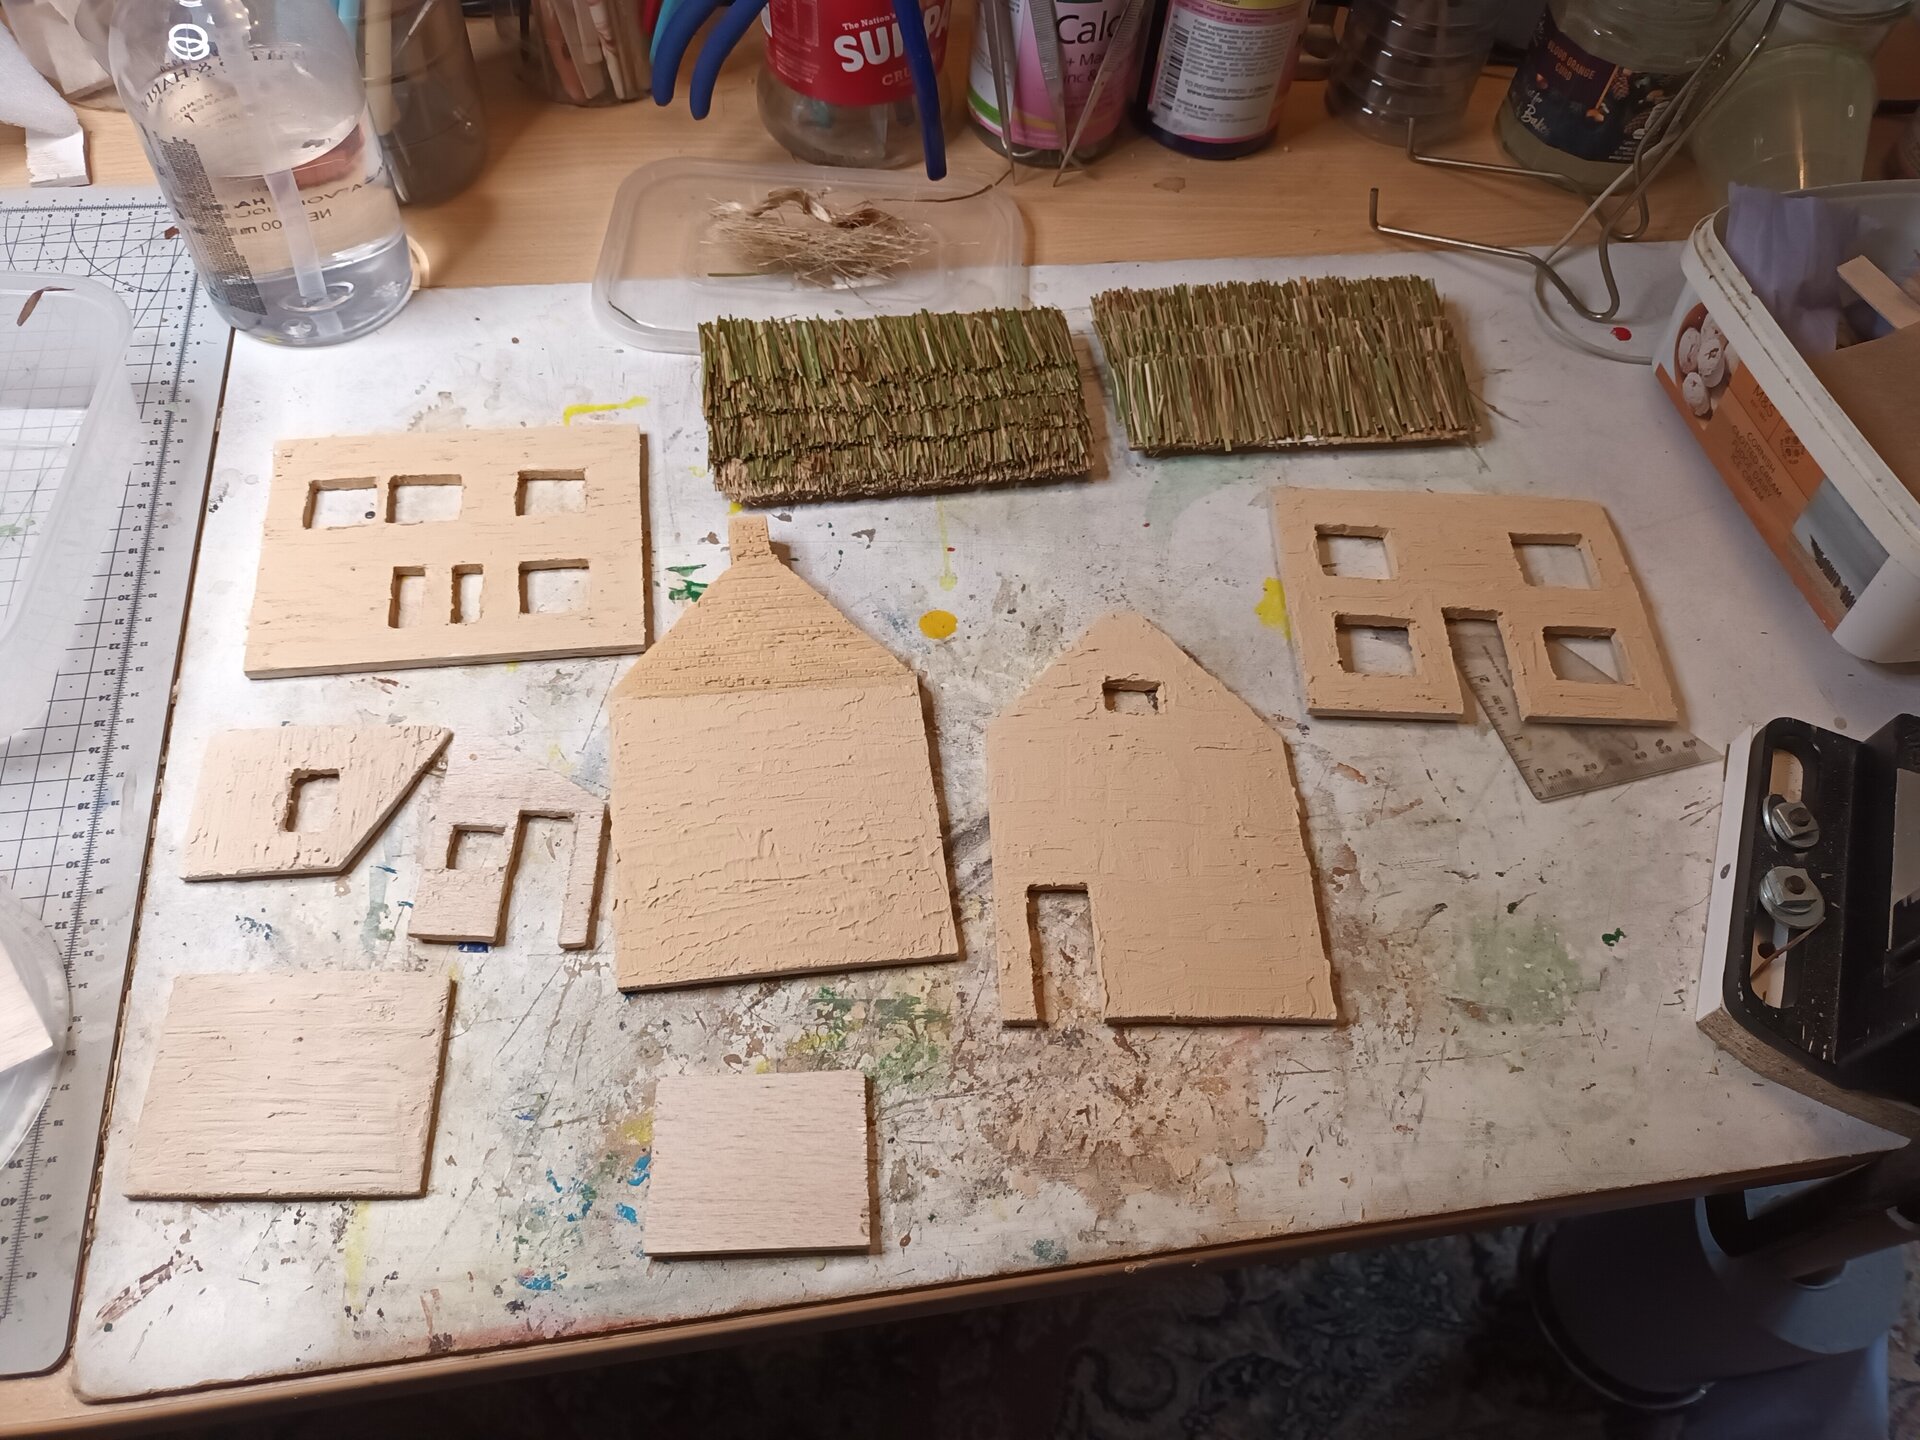
The walls were all cut out of balsa wood and covered with a layer of filler to prepare the wall texture. The walls were all largely completed and textured before assembly - a lesson learned from previous projects to ensure even finishing.
Dry Fitting and Layout
The walls were all pinned together to confirm measurements and alignment. Windows and doors were marked up on the panels to verify positioning before cutting.
This dry-fitting stage was crucial to catch any measurement errors before committing to cutting openings or permanent assembly.
[NOTE: Did you create any technical drawings or just work from measurements and references? Any dimensional challenges at 1:50 scale?]
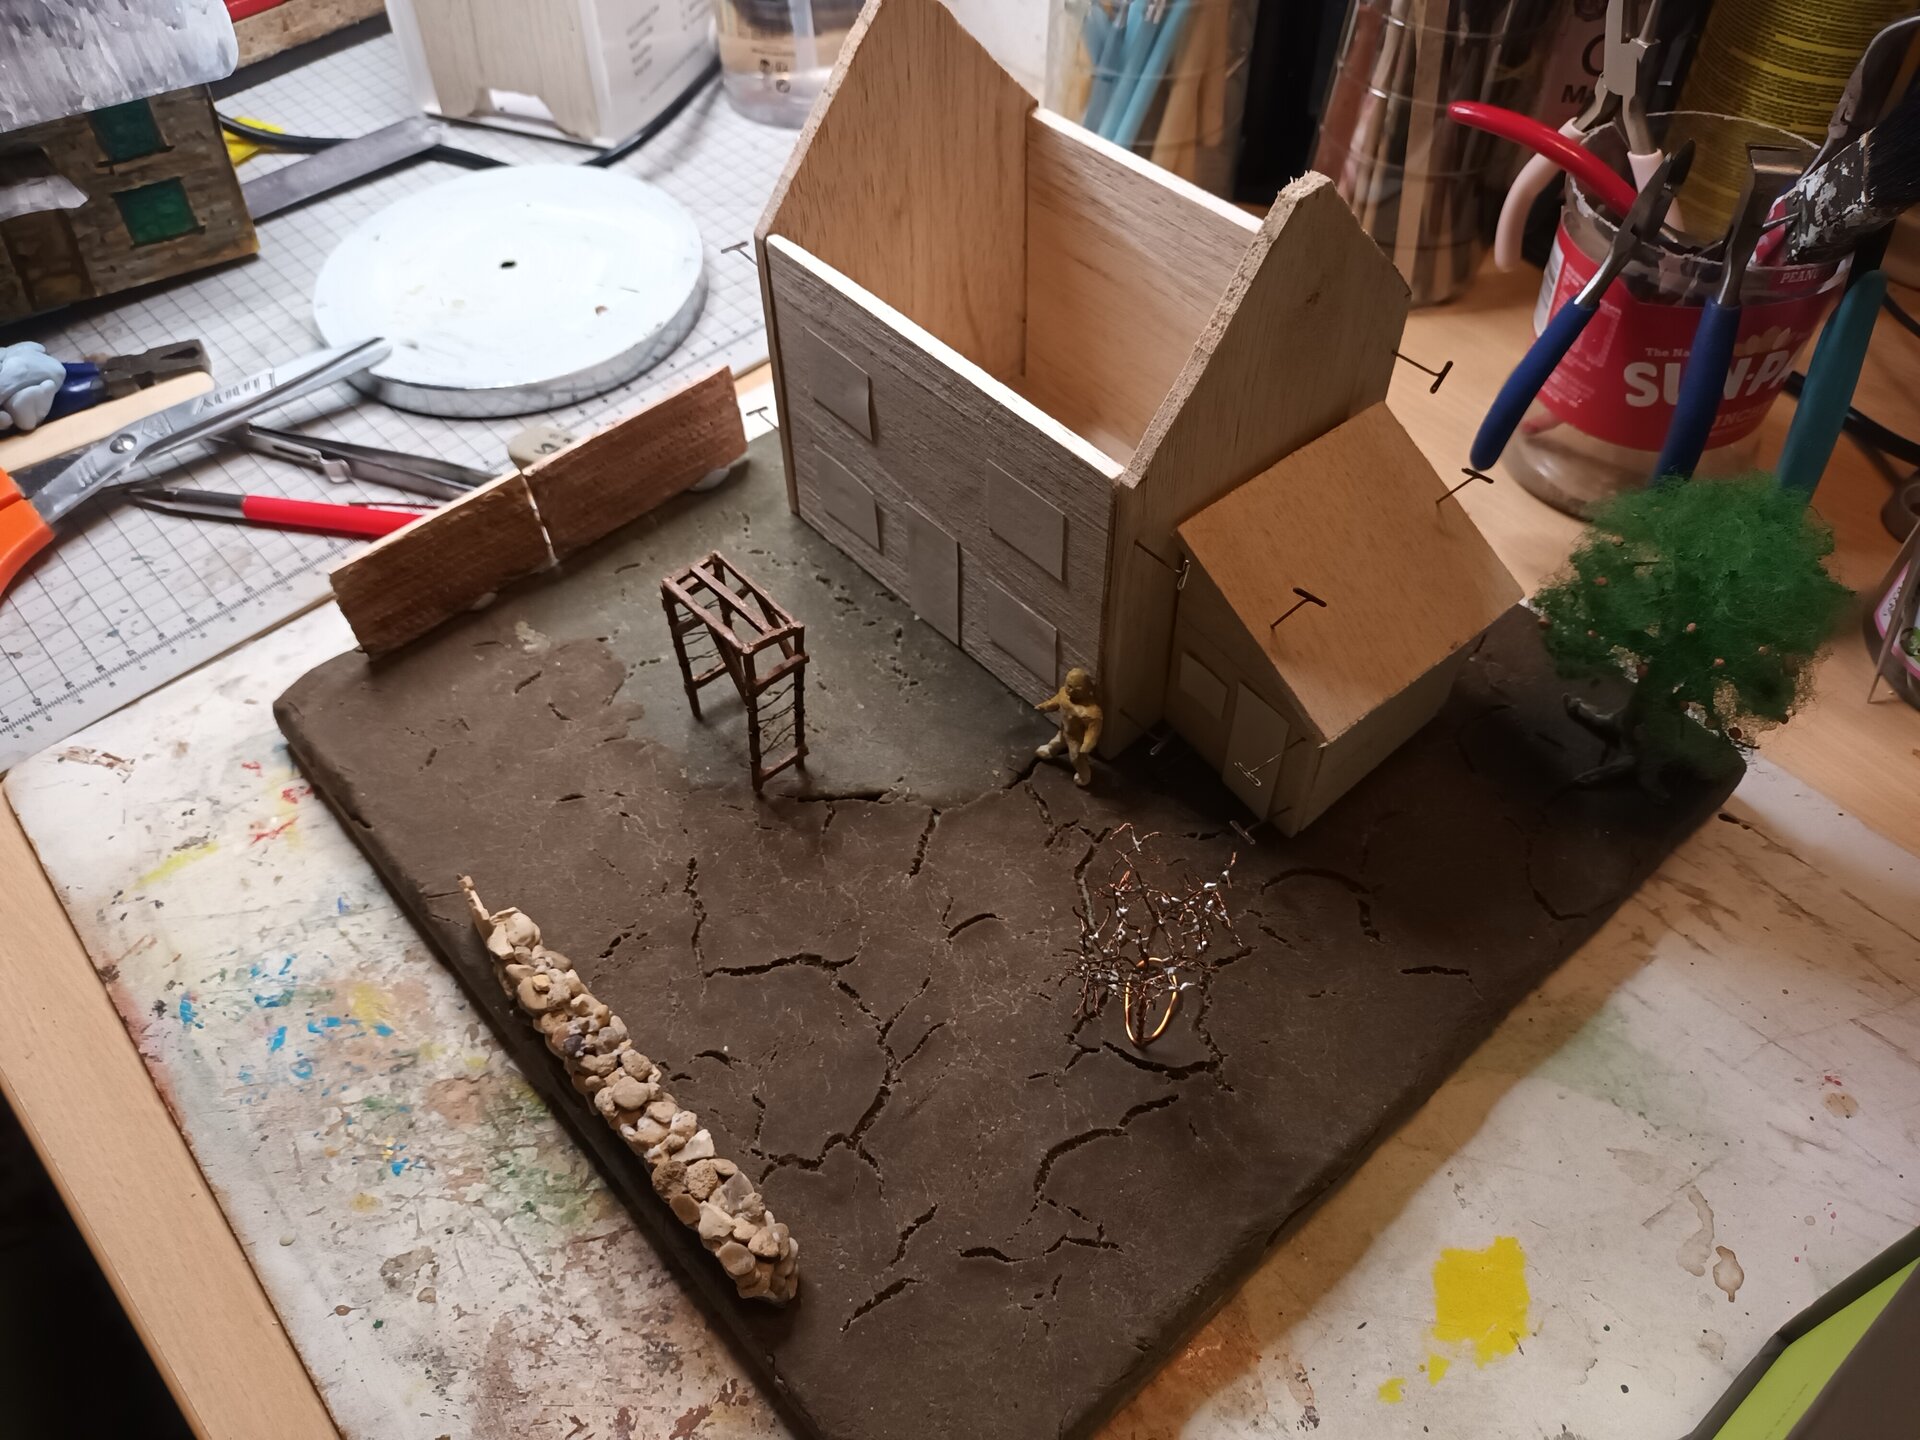
Chimney Construction
The chimney construction was incorporated into the wall structure. The wall texture was modified to have a brick effect, and the chimney itself was made from balsa wood covered in filler to allow for the brick effect of the chimney.
The chimney was then glued to the inside of the wall and incorporated into the roof structure. This integrated approach ensured the chimney would be structurally sound and properly positioned relative to the roof peak.
Windows and Doors
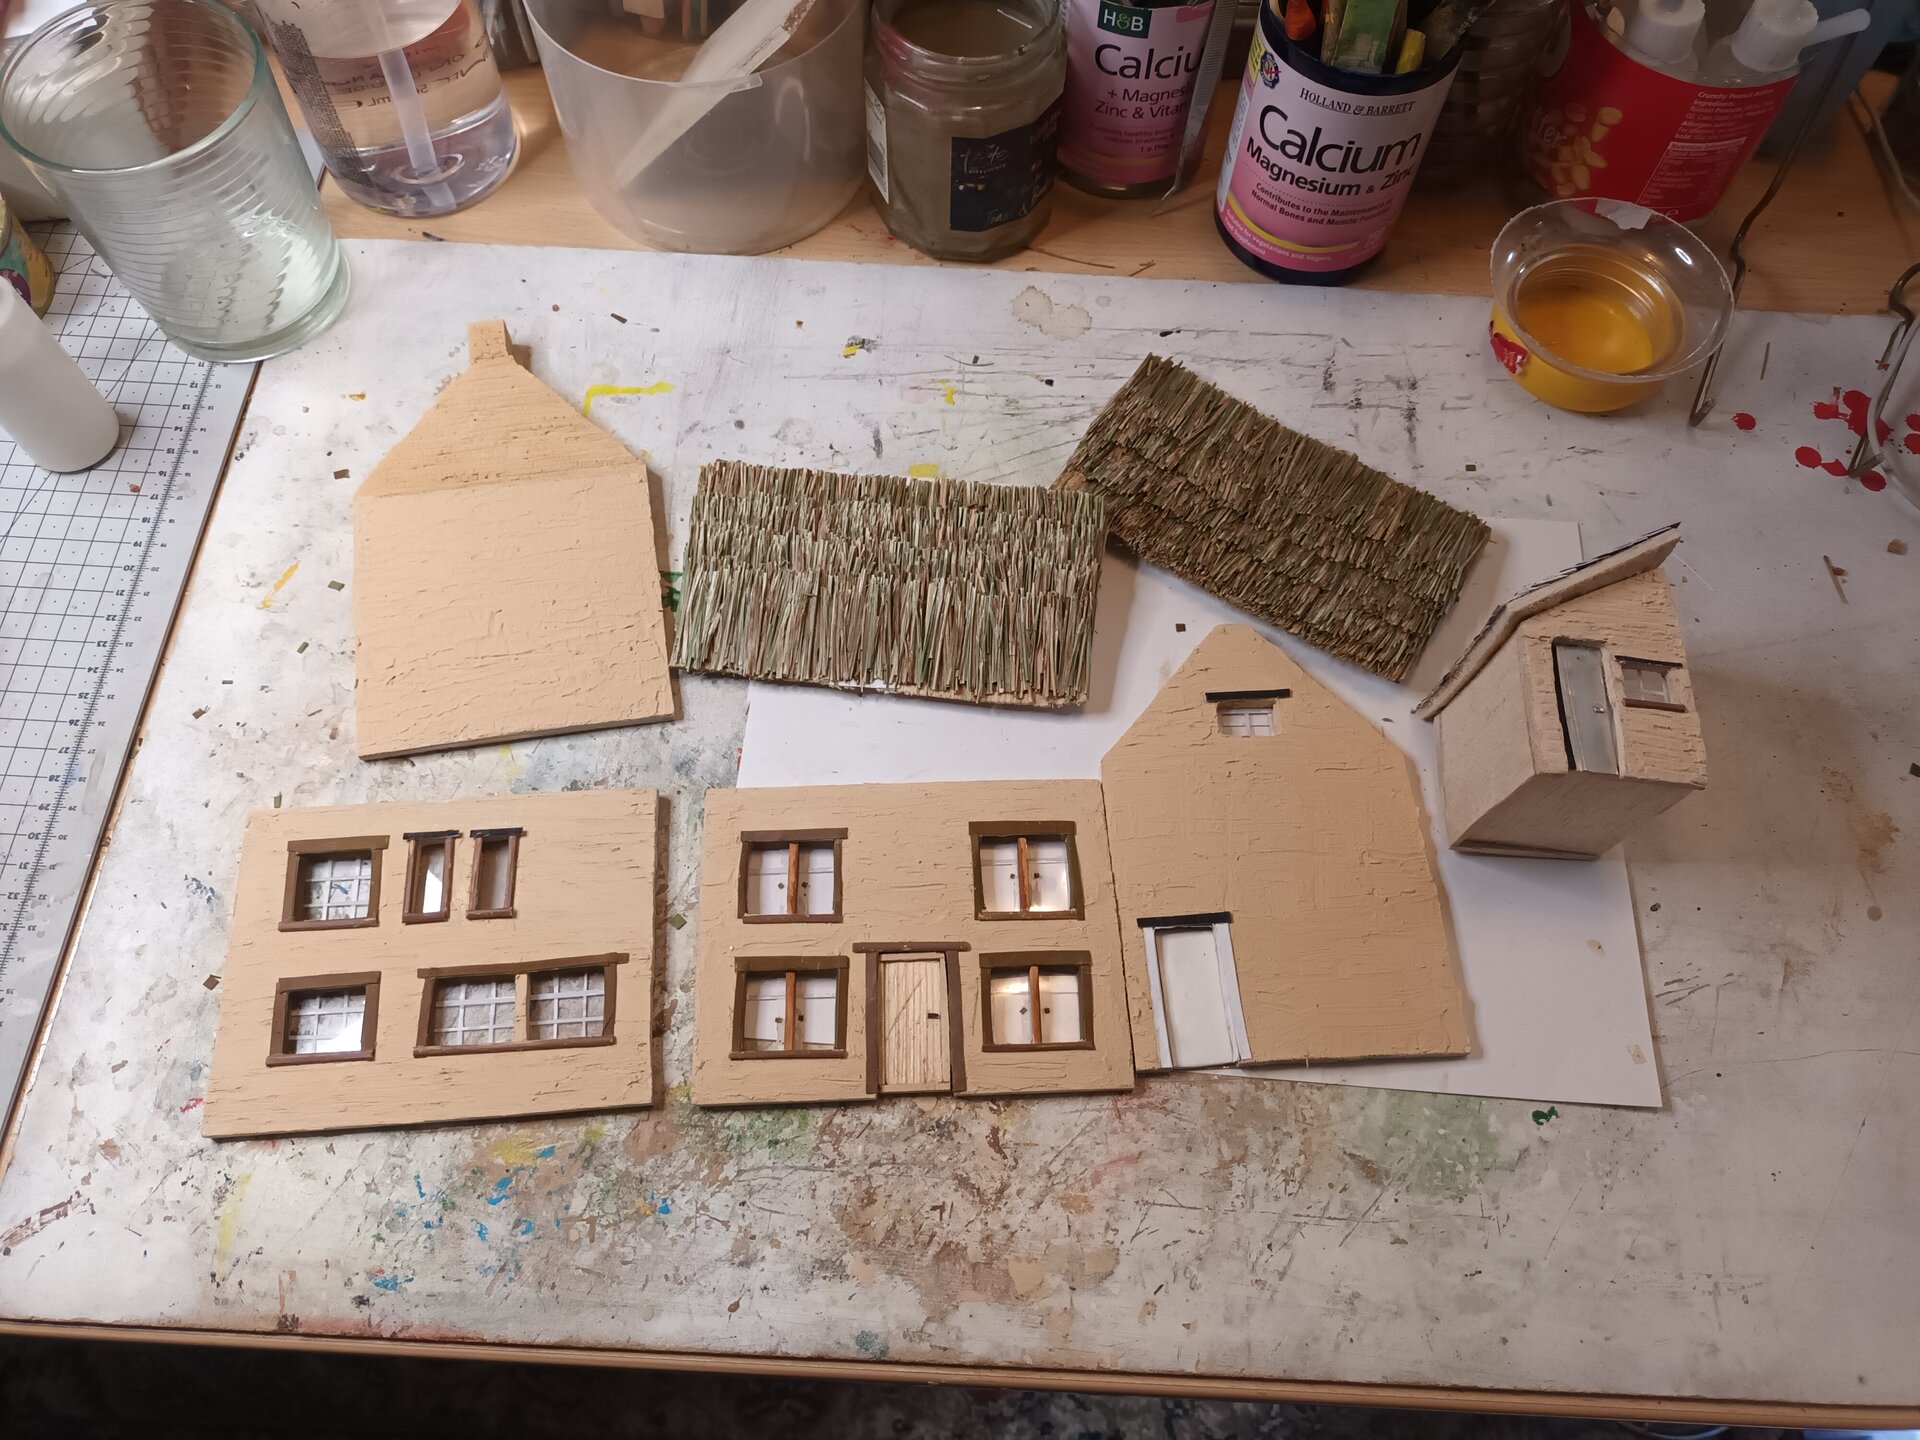
After confirming the wall design, the windows and doors were cut out and the wall texture applied and painted.
Windows and door frames were added by cutting thin strips of wood-colored and white paper to frame them. The white paper strips were glued inside thin plastic to resemble the window panes and sash windows, creating the multi-pane cottage window effect.
[NOTE: How many panes per window? Did you create opening windows or all fixed? Any interior details visible through windows?]
The Thatched Roof
Next was the construction of the thatched roof - the feature that distinguished this cottage and required learning entirely new techniques.
Research and YouTube Learning
Several YouTube videos were very informative. I borrowed some ideas from them, but ultimately chose to use real grass:
These tutorials showed various approaches, but I wanted to use natural materials to achieve the most realistic effect at this scale.
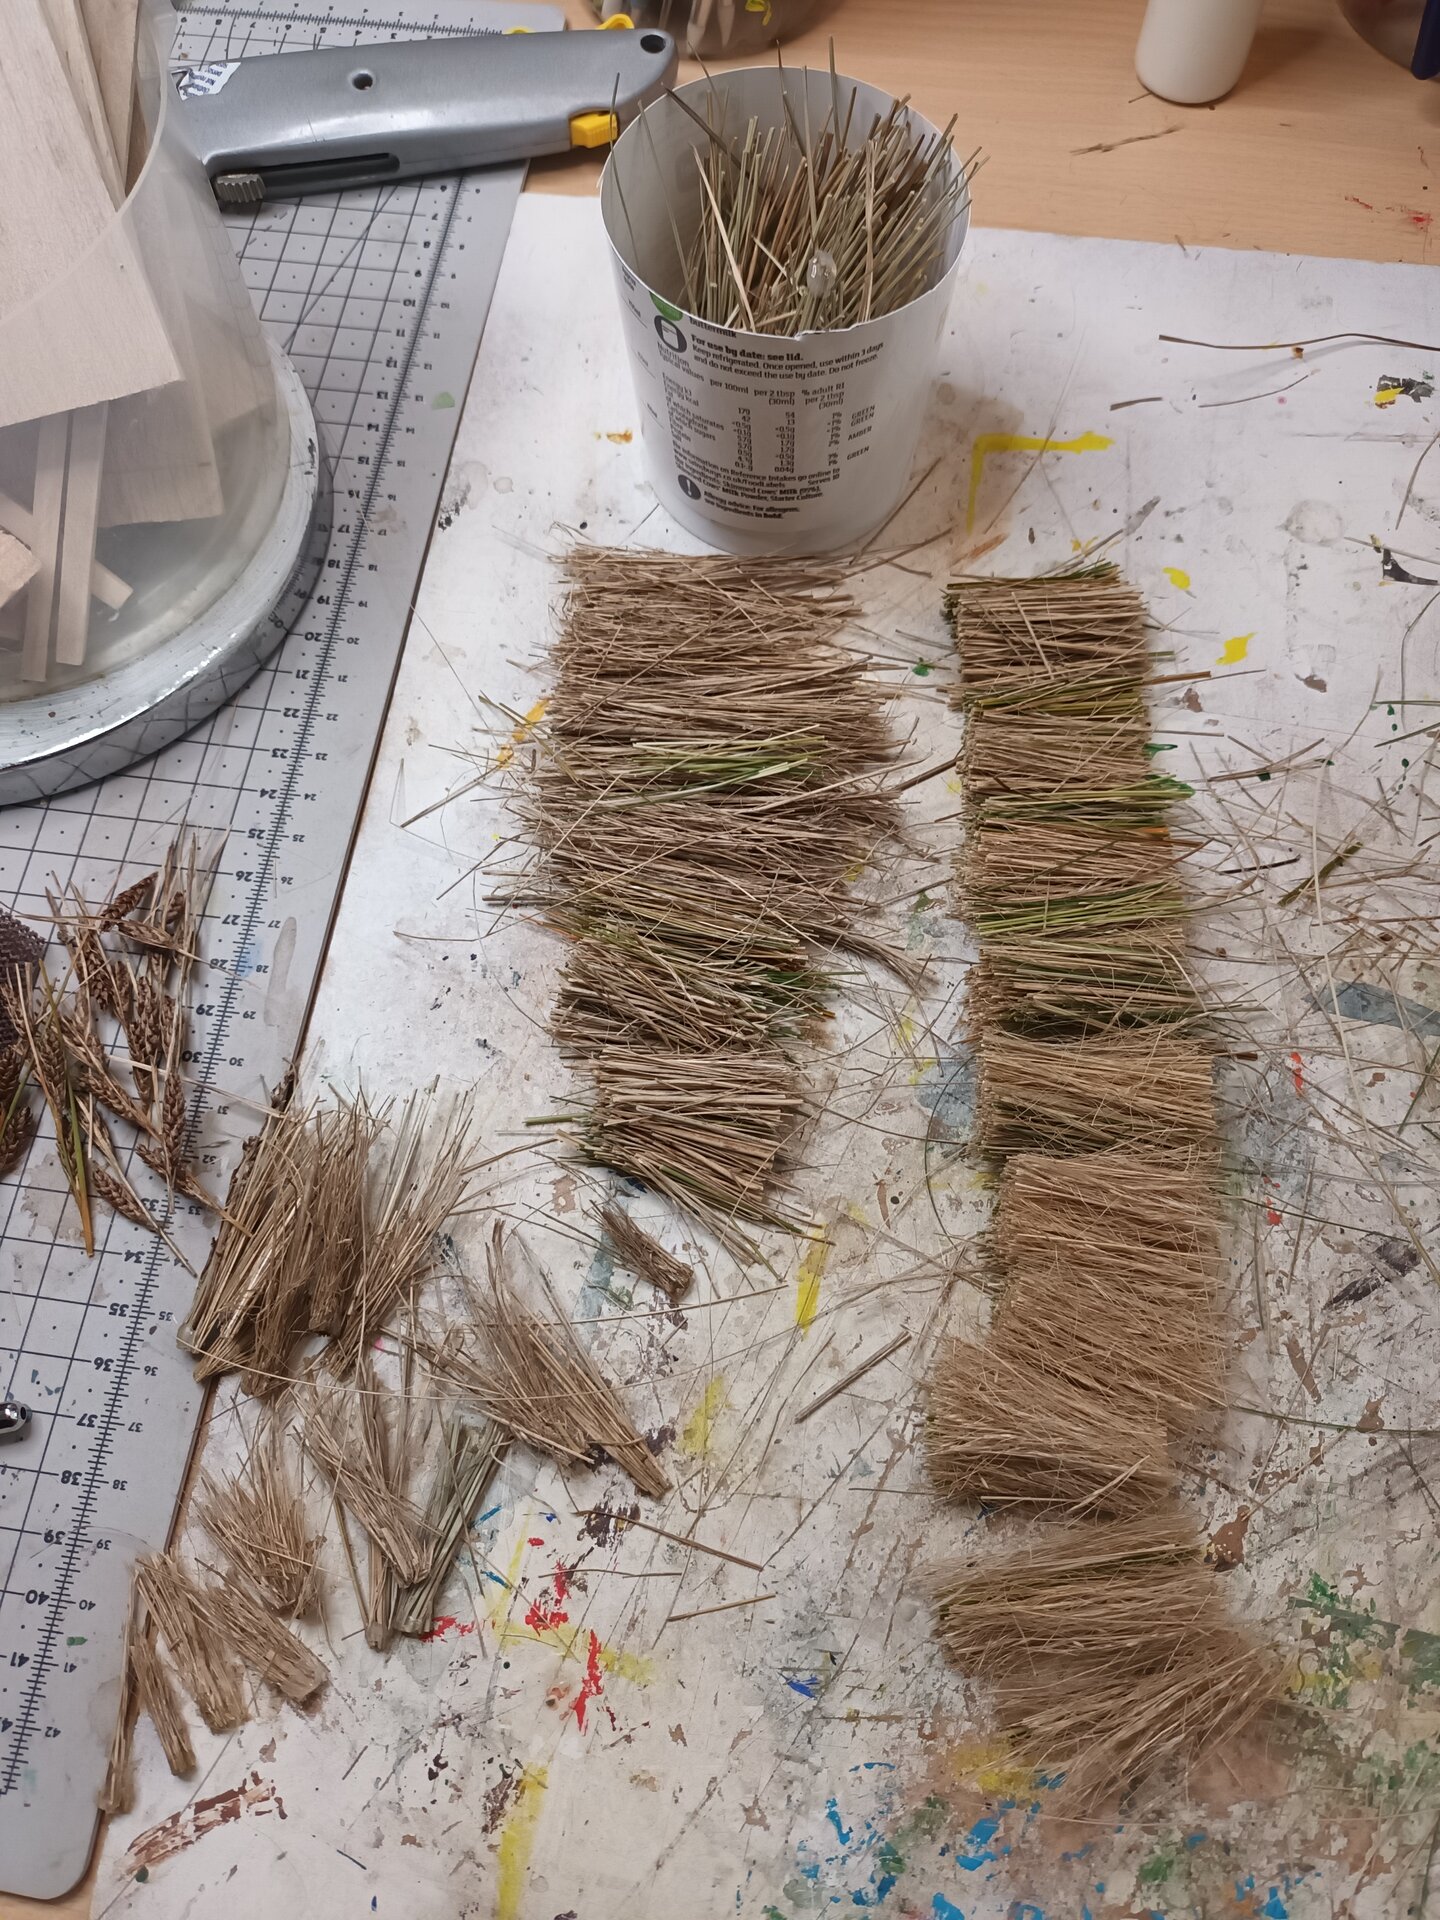
Grass Collection and Preparation
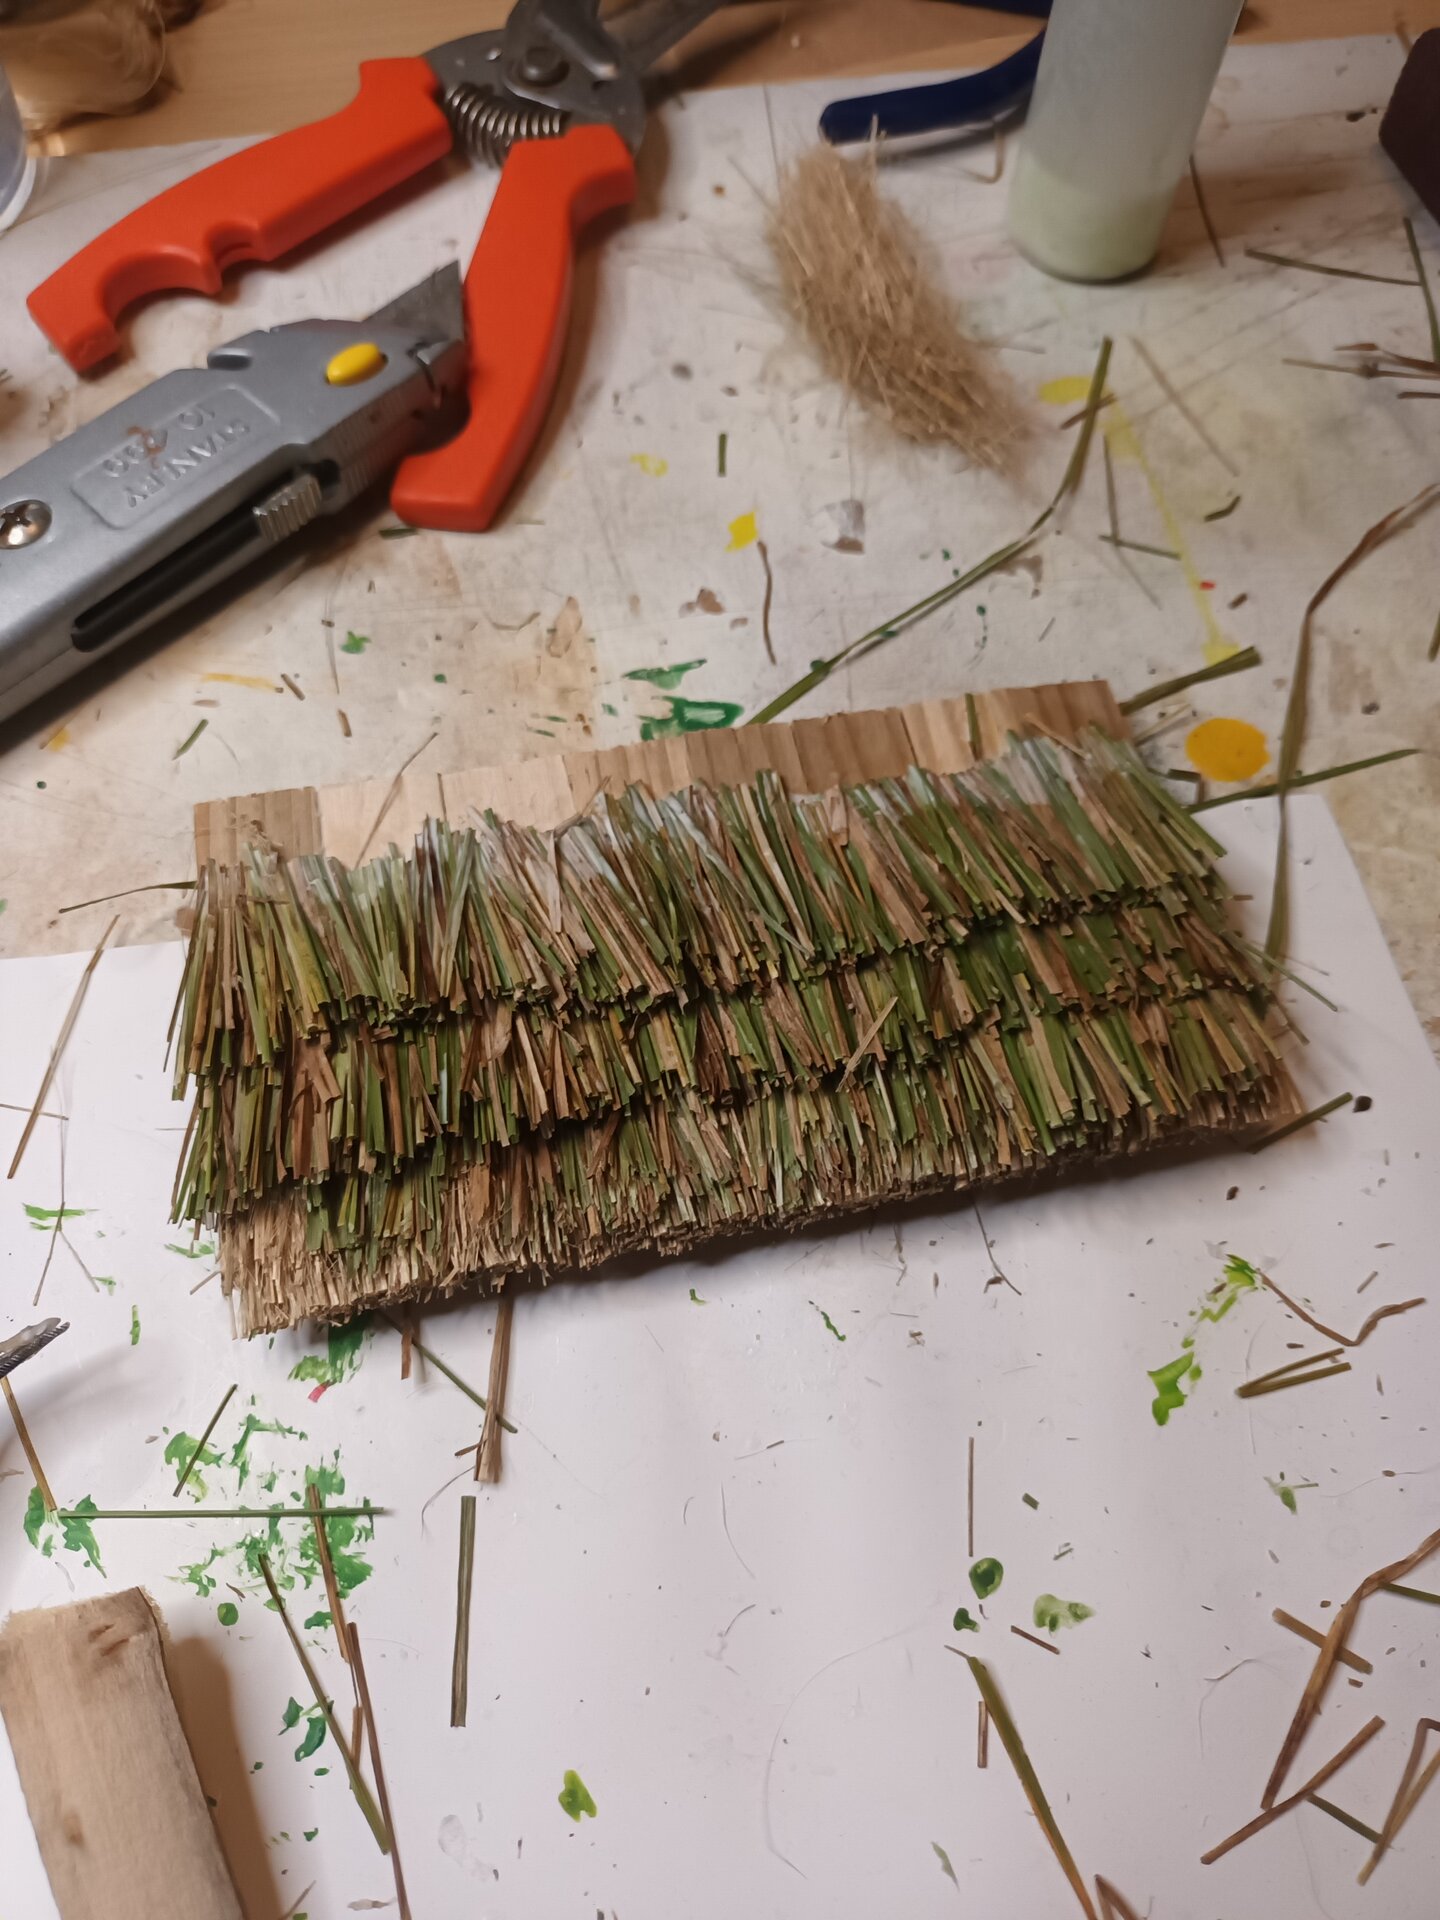
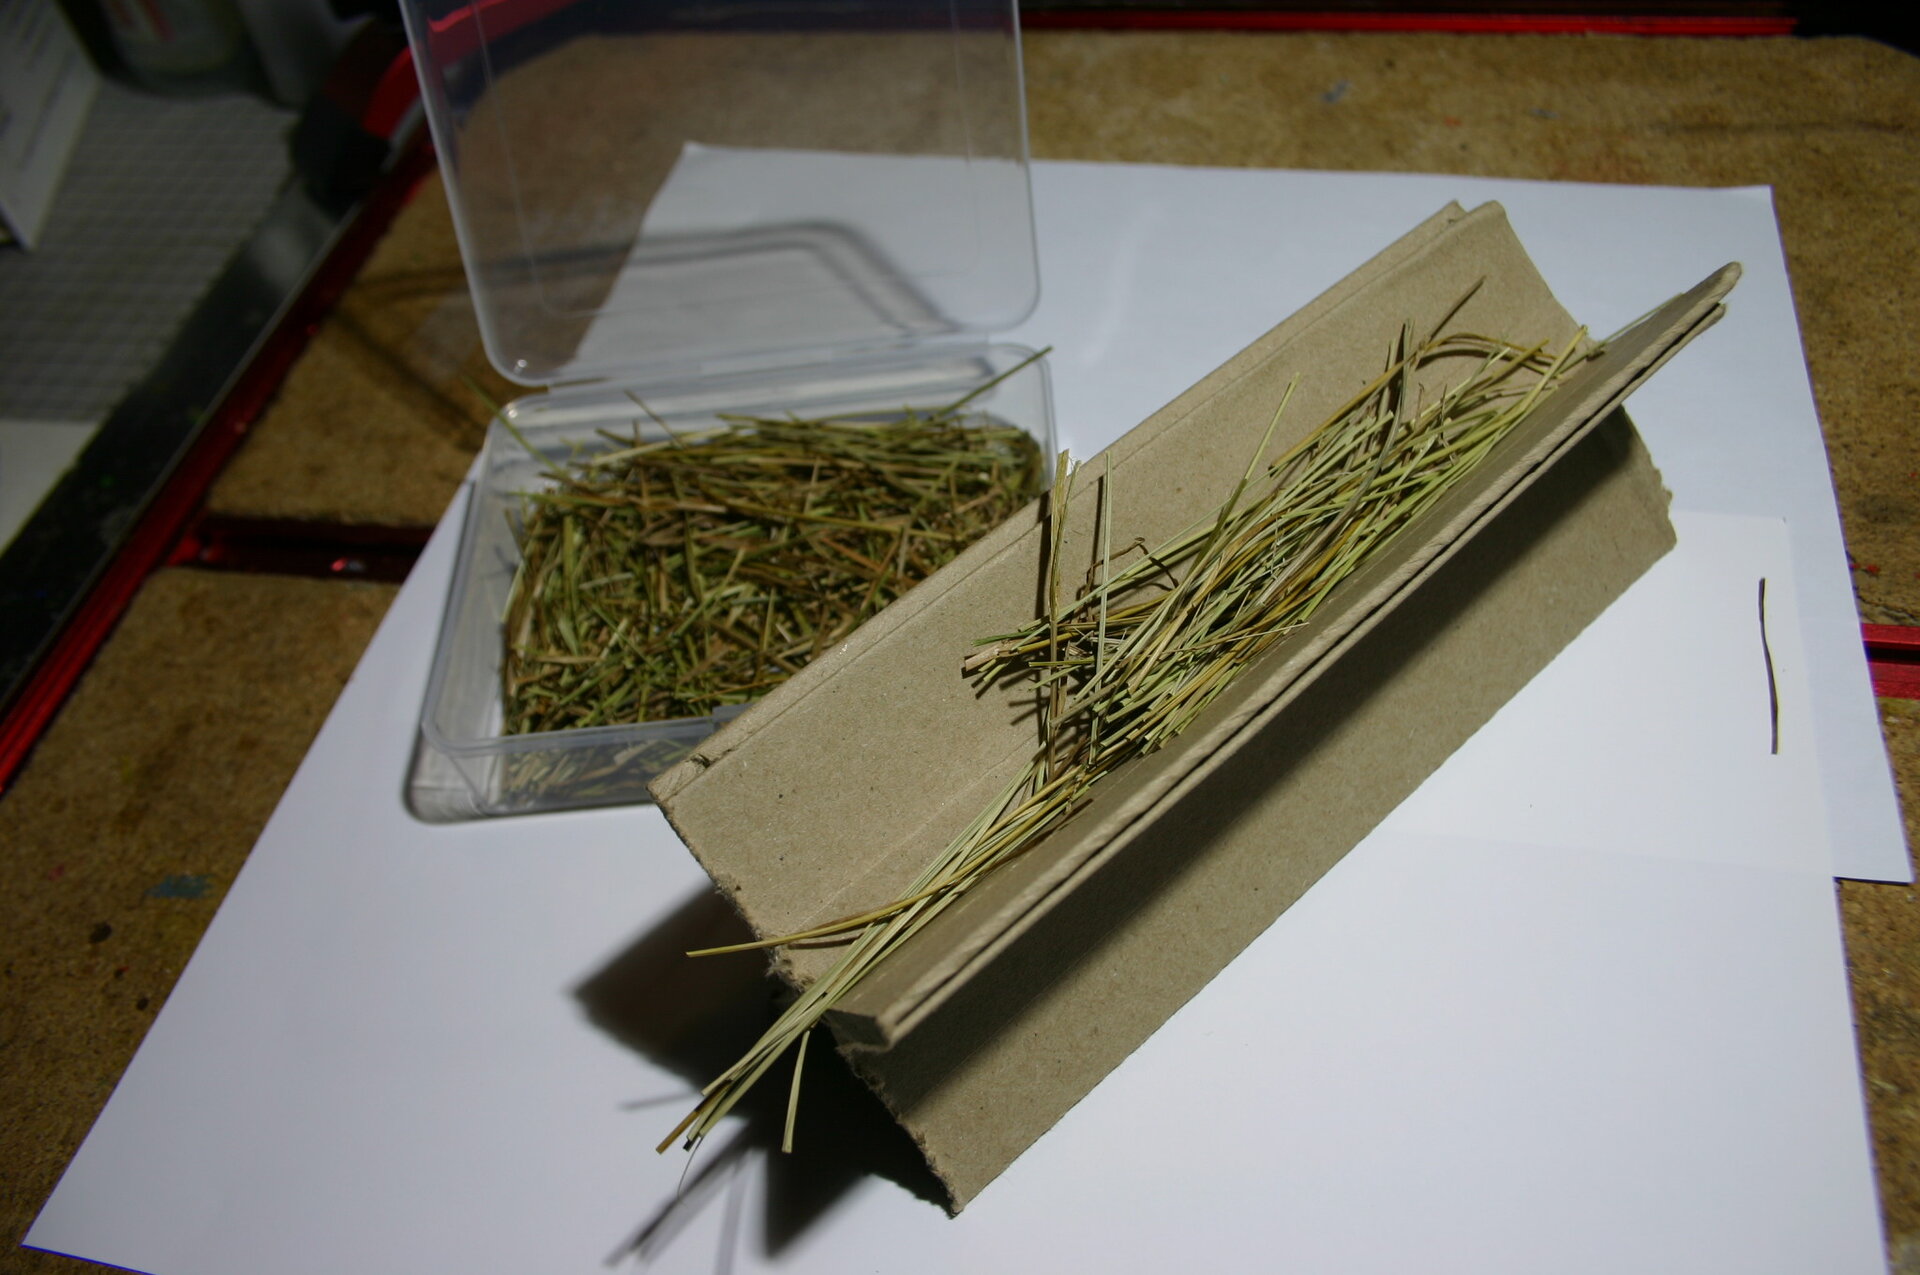
Grass from the garden was collected, sorted, and cut into small bundles. One of the key challenges encountered was sorting and bundling the grass. After struggling for some time, I engineered a V-shaped caddy to feed the grass on one side, sort out the bits not required, and then pick a bundle with all the grass pointing in the same direction.
[NOTE: Can you describe the V-shaped caddy design in more detail? Dimensions, materials? This tool innovation could be useful to document.]
Roof Base Construction
The base of the roof was prepared with strips of wood, creating the structural framework for the thatch application.
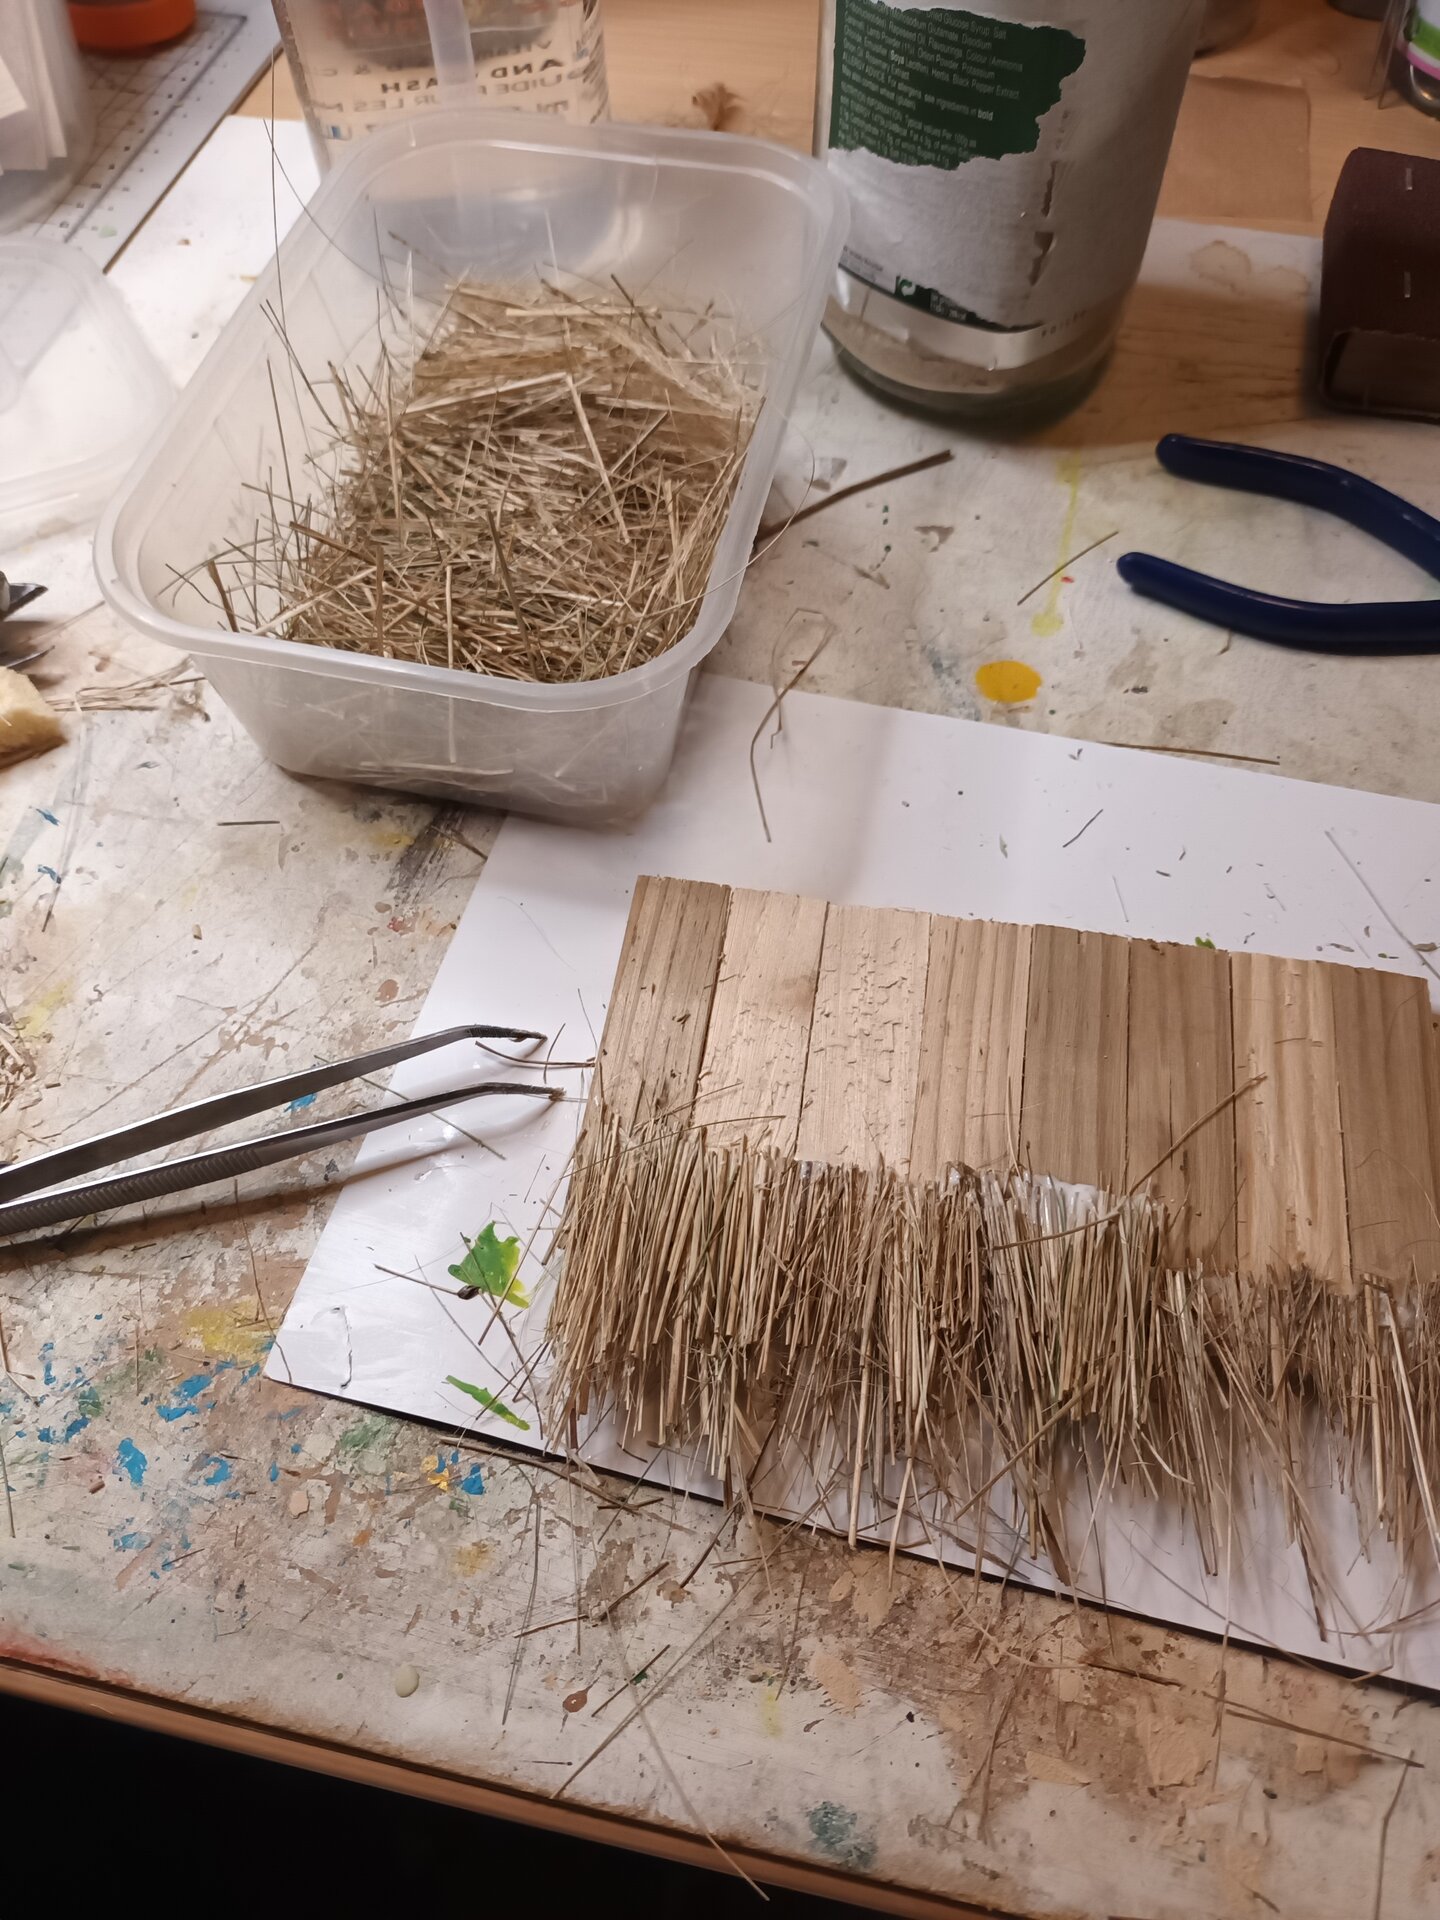
Applying the Thatch
Grass bundles were glued starting from the bottom, working upward in overlapping layers to create the characteristic thatched appearance. This method mimics real thatching technique where each layer overlaps the one below.
The process was painstaking - each bundle had to be:
- Selected from the sorted grass stock
- Trimmed to appropriate length
- Positioned to overlap correctly
- Glued securely
- Trimmed again for even appearance
Getting the grass smooth and cut exactly as a life-size roof would be was a significant challenge. The custom V-shaped sorting caddy helped enormously with this process.
[NOTE: How did you finish the roof ridge? Any special technique for the chimney penetration through thatch?]
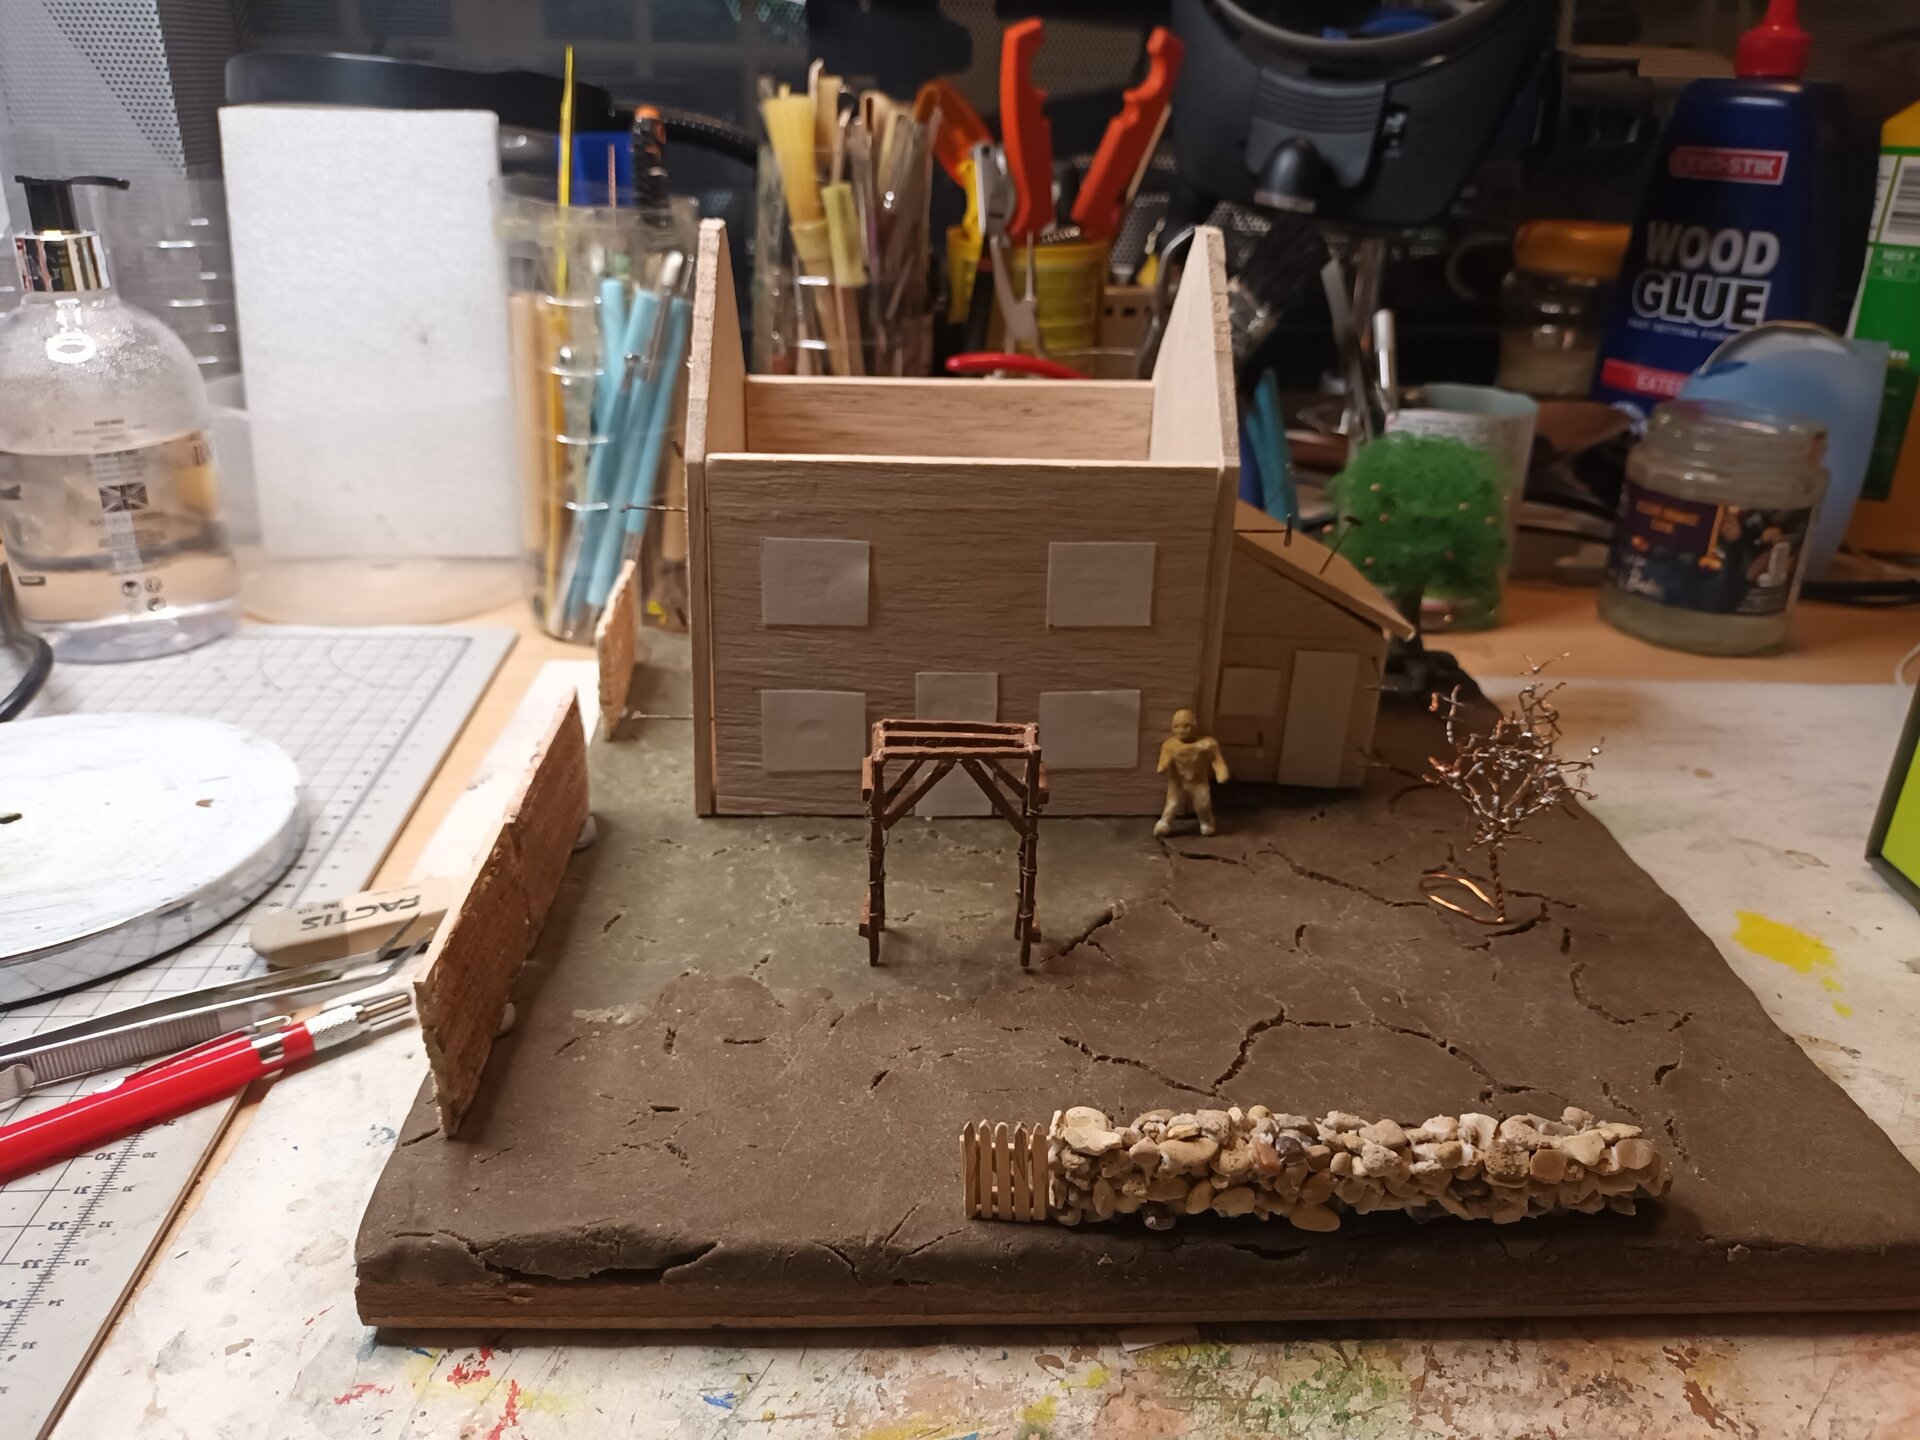
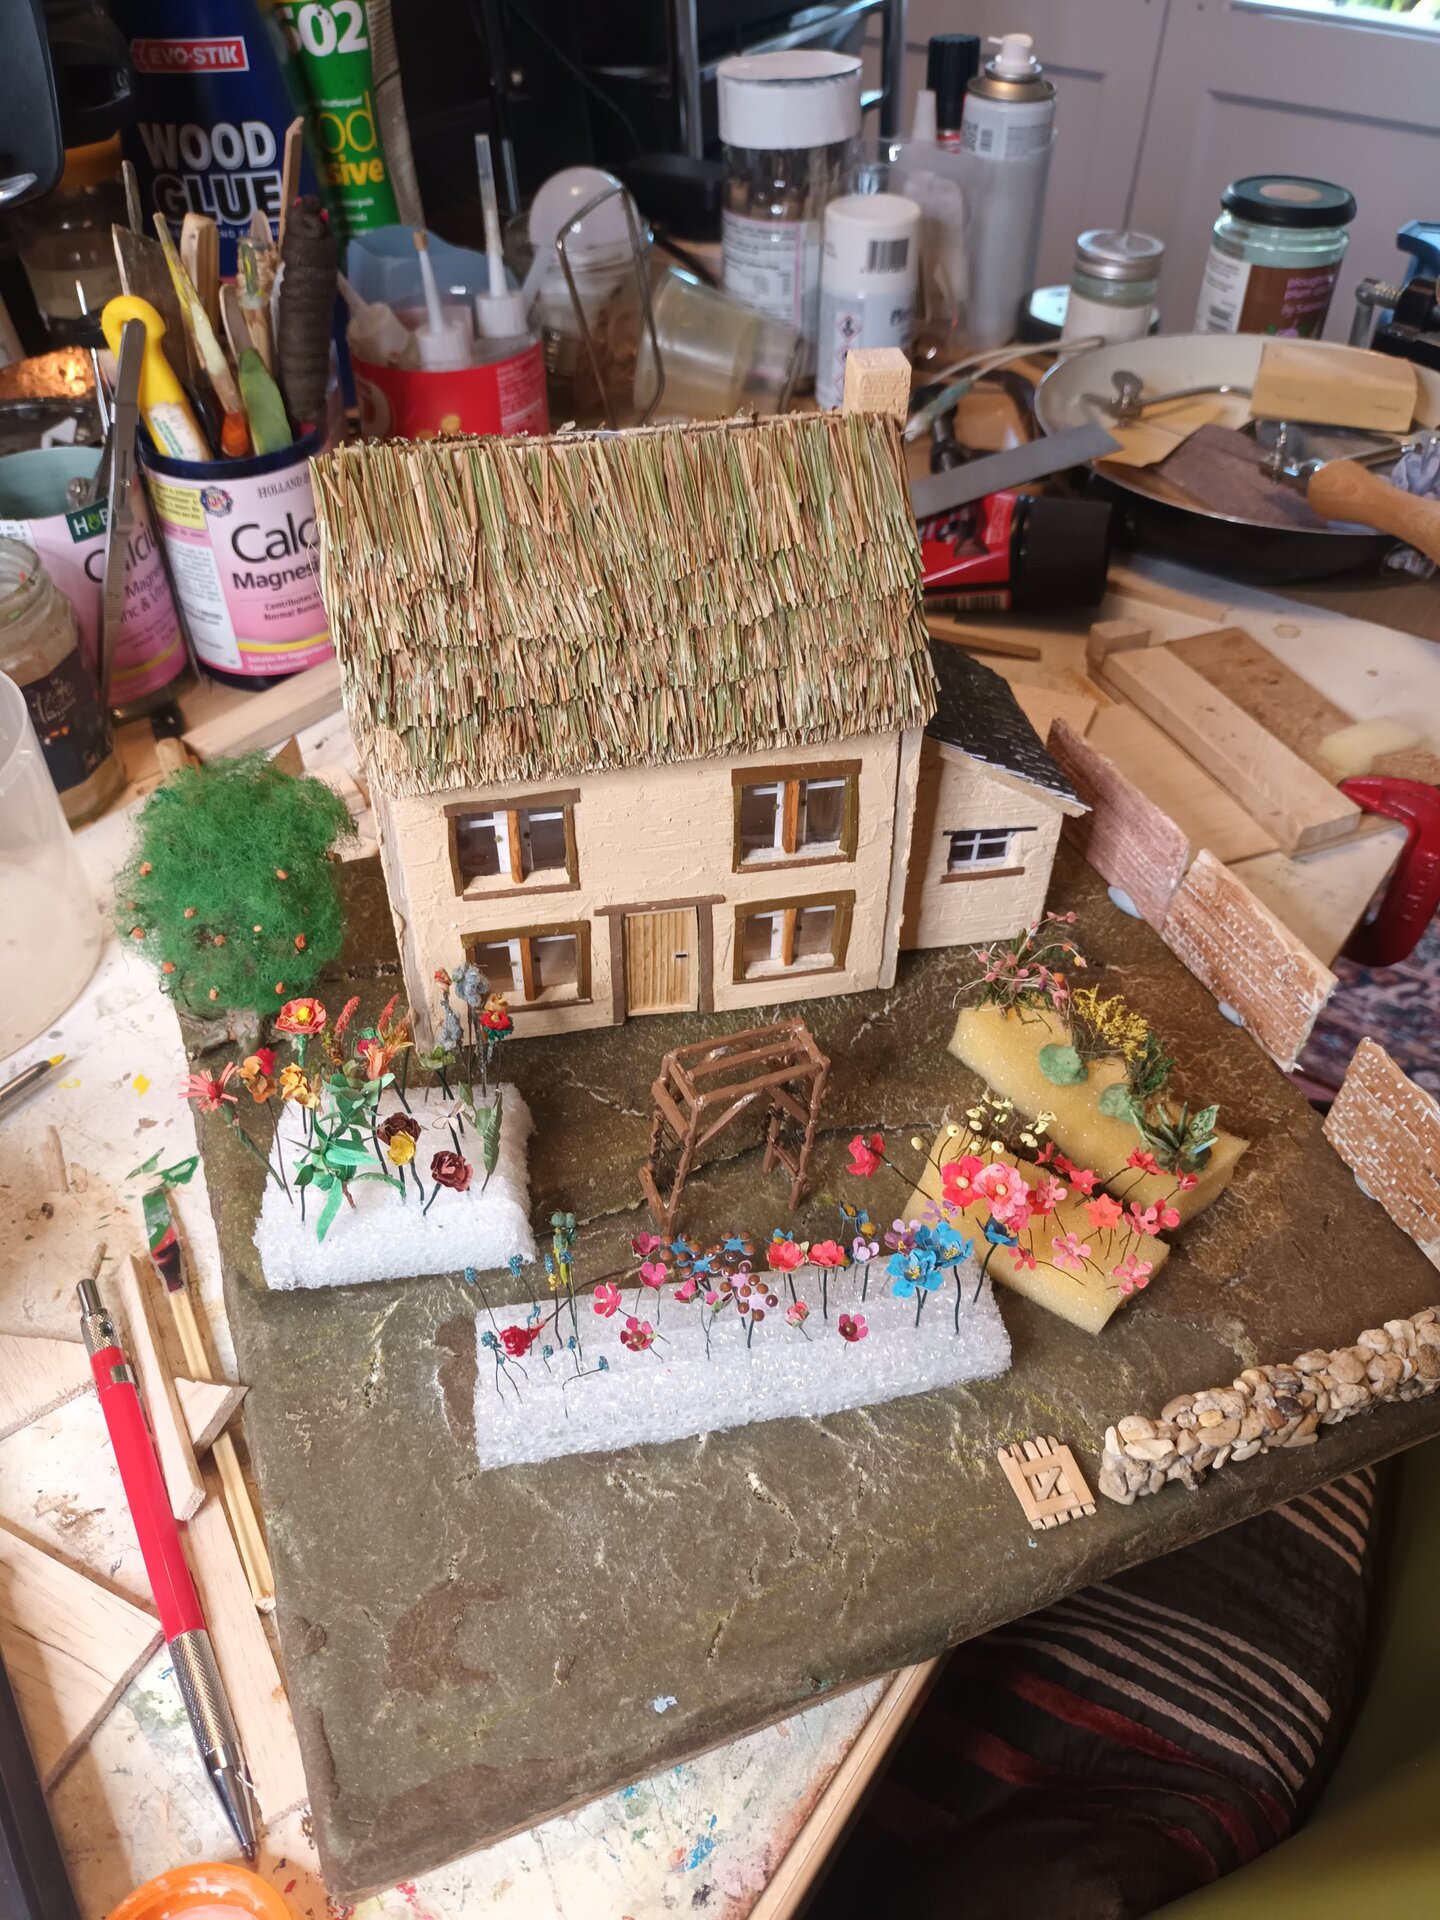
Cottage Assembly
With all the components of the cottage ready, assembly could start using wood glue.
The assembly sequence was critical:
- Join wall panels with chimney integrated
- Ensure square and proper alignment
- Attach roof structure
- Install window and door trim details
- Final touch-ups and weathering
Completed Cottage
With the cottage finished, the installation of the landscape could commence.
Cottage Construction Challenges
Thatched Roof Technique: The most significant challenge was achieving a realistic thatch appearance at miniature scale. Real grass provided authenticity but required the development of custom tools (V-shaped sorting caddy) to manage.
Wall Texture Balance: Getting the right amount of filler to create texture without obscuring balsa wood grain or adding too much weight required experimentation.
Window Scale: Creating convincing multi-pane sash windows at 1:50 scale with paper and plastic was delicate work requiring steady hands and precision cutting.
Chimney Integration: Ensuring the chimney was structurally sound while appearing to emerge naturally from the roof peak required planning during wall construction phase.
Material Consistency: Balancing weight, strength, and appearance across all cottage components while maintaining structural integrity.
Weathering Approach
As noted in the project approach, weathering was woven into construction and coloring rather than being a separate phase. During painting and assembly:
- Wall colors included variations and subtle discoloration
- Window frames showed slight wear
- Thatch received varied tones suggesting age and weather exposure
- Brick chimney included mortar variations and slight staining
This integrated approach to weathering created a naturally aged appearance rather than adding effects after completion.
Skills Developed
- Balsa wood construction techniques
- Filler application for texture
- Brick effect creation on balsa core
- Multi-pane window construction at miniature scale
- Paper and plastic window glazing
- Natural grass thatching technique
- Custom tool engineering (V-shaped grass sorting caddy)
- Structural integration (chimney and roof)
- Period architecture research and replication
- Integrated weathering during construction
Cottage Complete
The Victorian cottage, centerpiece of the entire project, was now complete. At approximately 16cm tall with its distinctive thatched roof and brick chimney, it provided the perfect anchor for the English cottage garden that would surround it.
The combination of scratch-built construction, authentic thatching with real grass, and period-appropriate details created a structure worthy of the over 100 handcrafted plants that would soon fill the garden around it.
Next Build Log: #005 - Garden Planting & Finishing - Installing plants, final composition, and project completion
Project Status: Cottage complete and ready for installation; all plants prepared; ready for final garden planting phase
The centerpiece structure that would anchor the entire cottage garden scene was now ready to take its place on the elevated rear section of the base.
Have questions or feedback about this project? I'd love to hear from you.