The Figure-Making Journey

Session Overview
This build session tackled one of the most challenging aspects of miniature modeling: creating believable human figures at 1:56 scale. This wasn’t my first attempt at figure-making, and previous efforts had been frustrating, particularly with facial features and proportions.
This session became a journey of experimentation, problem-solving, and incremental improvement—sometimes succeeding, sometimes failing, but always learning.
The Head Problem
Previously, I’d had real trouble making heads for figures. The proportions always seemed off, facial features were indistinct, and the overall results were disappointing. My first approach was to make the head separately and then attach it to a body—a technique that showed some improvement but still wasn’t quite right.
The fundamental issue was working without proper structural support, which made it difficult to achieve consistent proportions and maintain shape during the sculpting and drying process.
Discovery: Wire Armatures
The breakthrough came when I decided to create a wire armature first and then layer air-dry clay onto this frame. This technique provided:
- Internal structure that maintained proportions
- Support during handling without distorting the clay
- Predictable drying with less warping or cracking
- Working framework for achieving correct anatomy
The wire armature became the skeleton of the figure, establishing pose, proportions, and basic body structure before any clay was applied. This was a significant step forward from my previous attempts.
Problem-Solving: The Figure Holder
One immediate challenge emerged: how do you hold a delicate clay figure while working on it without squashing the clay you’ve just sculpted?
The solution was a custom tool—a small holder that supported the wire armature without touching the clay work. This simple but effective tool made an enormous difference:
- Allowed detailed work without damaging fragile areas
- Provided stable support during fine sculpting
- Eliminated the need to constantly reposition grip
- Made the overall process less stressful and more precise
Creating custom tools to solve specific challenges proved to be a valuable lesson in itself.
Experimentation with Materials
This project involved testing multiple materials and techniques:
Store-Bought Reference Figure
I purchased a plastic figure and painted it to serve as a proportional reference. Having this physical example at the correct scale was invaluable for understanding how body parts relate at 1:56 scale—something that’s difficult to judge from photos or diagrams alone.
Air-Dry Clay
My main material for this build was air-dry clay. The advantages:
- No kiln or specialized equipment needed
- Extended working time before hardening
- Easy to blend and smooth while wet
- Relatively forgiving of mistakes
The challenges:
- Paint application caused flaking on the dried surface
- Required careful drying to prevent cracking
- Less fine detail potential than other materials
Epoxy Putty
Earlier experiments with epoxy putty produced several generations of figures, but the results were consistently problematic. The proportions and facial details just weren’t working. While epoxy putty offers advantages (doesn’t dry until mixed, holds fine detail), the working time is limited and errors are harder to correct.
The comparison photo tells the story: the plastic reference on the left shows correct proportions, the air-dry clay figure in the center represents progress, and the epoxy putty attempts on the right reveal the ongoing struggle with proportions and faces.
The Girl Figure
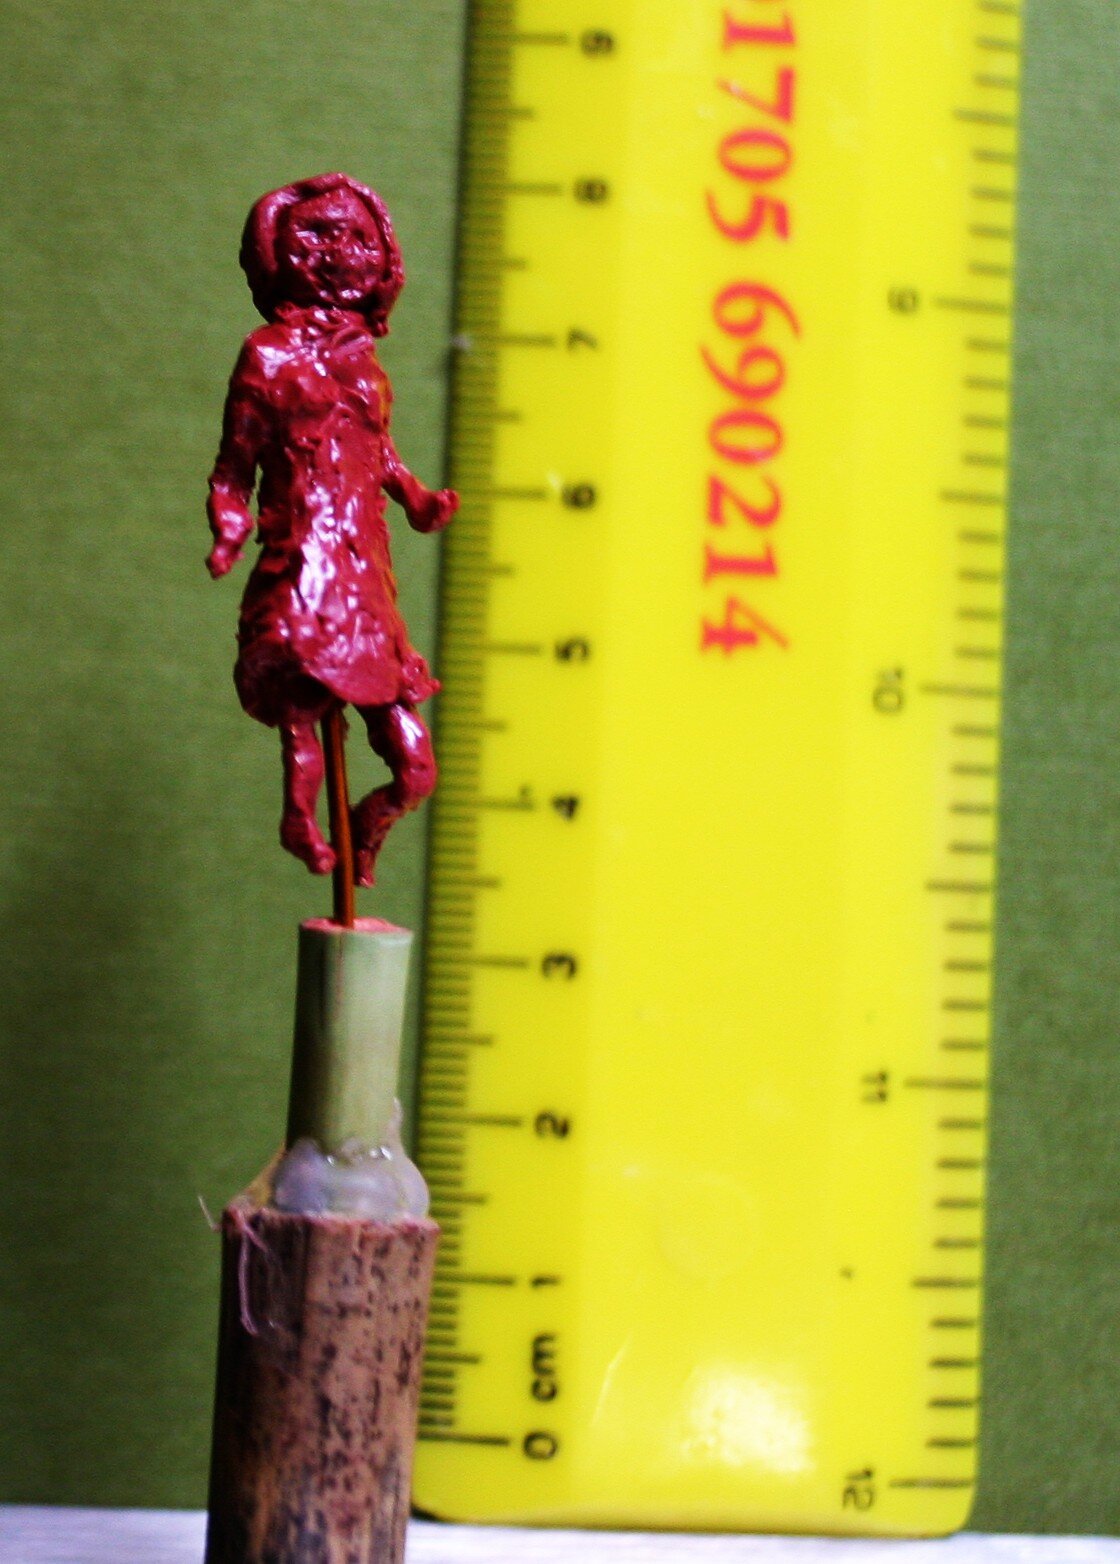
The main figure for this diorama—a girl fishing by the river—gradually came together through the wire armature and air-dry clay technique. The body proportions were reasonably successful, capturing the pose and basic anatomy at this challenging scale.
However, facial details remained problematic. At 1:56 scale, a face is only a few millimeters across, and achieving recognizable features requires precision that I haven’t yet mastered. The eyes, nose, and mouth need to be suggested rather than detailed, finding that balance between too much and too little detail.
Drying and Undercoating
Eventually, accepting that further refinement wasn’t producing better results (and possibly making things worse through overworking), I made the decision to move forward. The figures went into the oven to dry and cure.
Important lesson learned: The hot glue I’d used to attach figures to the holder didn’t survive the oven temperature. The figures came loose, requiring careful repositioning. Next time, a different mounting method would be necessary for figures that need oven curing.
After drying, I gave the figures undercoats, preparing them for final painting.
Painting and Assessment
After painting, the results were mixed but encouraging:
The honest assessment: The figures “did not come out completely rubbish”—which is actually progress! While far from perfect, they were functional for the diorama and represented significant improvement over previous attempts.
What worked:
- Wire armature technique provided proper structure
- Basic proportions were reasonably correct
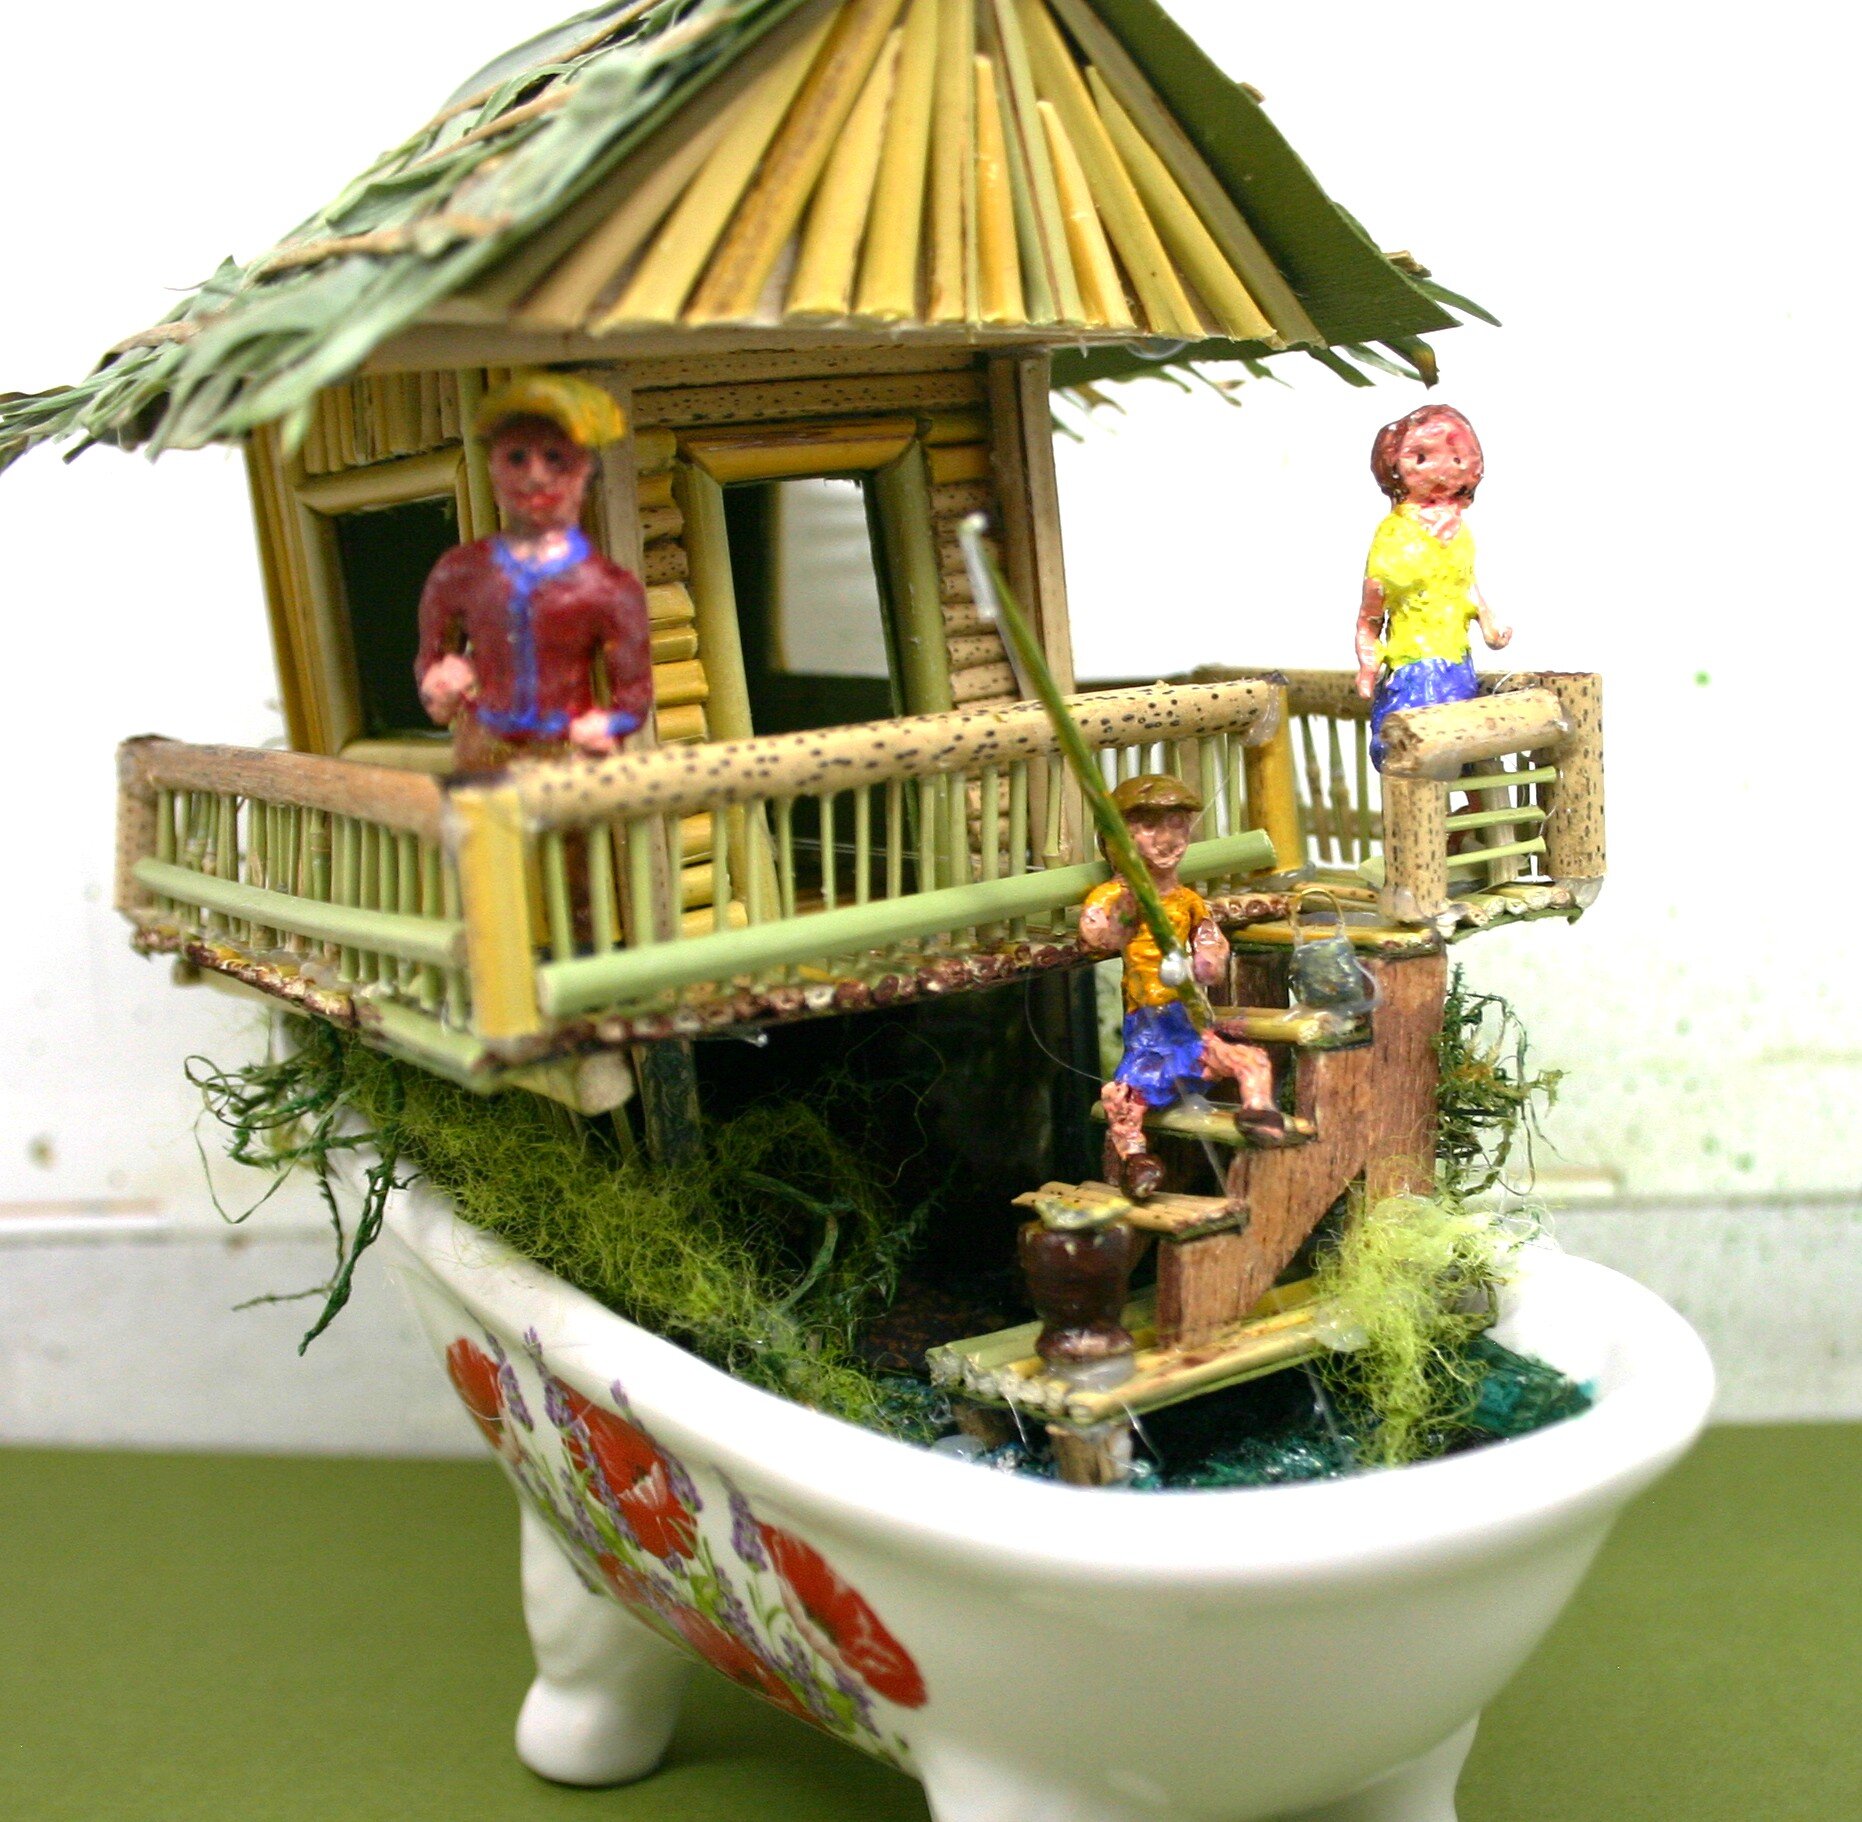
- Poses were natural and appropriate for the scene
- The figures had presence and purpose in the diorama
What needs improvement:
- Facial features remain a significant challenge
- Paint application technique needs refinement (flaking issues)
- Fine detail work requires more practice and possibly different tools
- Overall finish quality could be better
Lessons for Future Figures
This session provided invaluable insights for future figure-making attempts:
Technique Insights
- Wire armatures are essential for consistent proportions and structural support
- Custom tools can solve specific handling challenges
- Reference figures at the correct scale are invaluable for proportion checking
- Material selection matters for achieving desired results
Process Improvements Needed
- More patience with sculpting—don’t rush the process
- Better technique with fine detail work
- Right materials for specific applications (research paint that bonds better to air-dry clay)
- Don’t give up too early on refinement—but also know when overworking becomes counterproductive
The Positive Side: Improvisation and Ideas
Despite the challenges, this session demonstrated abilities that are equally important:
- Improvisation when faced with unexpected problems
- Creative problem-solving (like the figure holder)
- Willingness to experiment with different techniques and materials
- Great ideas to guide the learning process
The comparison between different attempts shows clear progression, even if the destination hasn’t been reached yet.
The Long Road Ahead
This build illustrated an important truth: I still have a long way to go in mastering figure-making. It’s a specialized skill that requires:
- Patience to work slowly and carefully at tiny scales
- Technique developed through practice and study
- Right materials for the specific application
- Persistence to keep trying after setbacks
But the progress is visible, the learning is happening, and each attempt builds skills that will benefit future projects.
| *Time: 12-15 hours | Materials: Wire armature, air-dry clay, epoxy putty, acrylic paints, custom holder tool | Challenge Level: Advanced* |
Have questions or feedback about this project? I'd love to hear from you.